low beam Peugeot 308 2018 Owner's Manual
[x] Cancel search | Manufacturer: PEUGEOT, Model Year: 2018, Model line: 308, Model: Peugeot 308 2018Pages: 324, PDF Size: 10.72 MB
Page 42 of 324
40
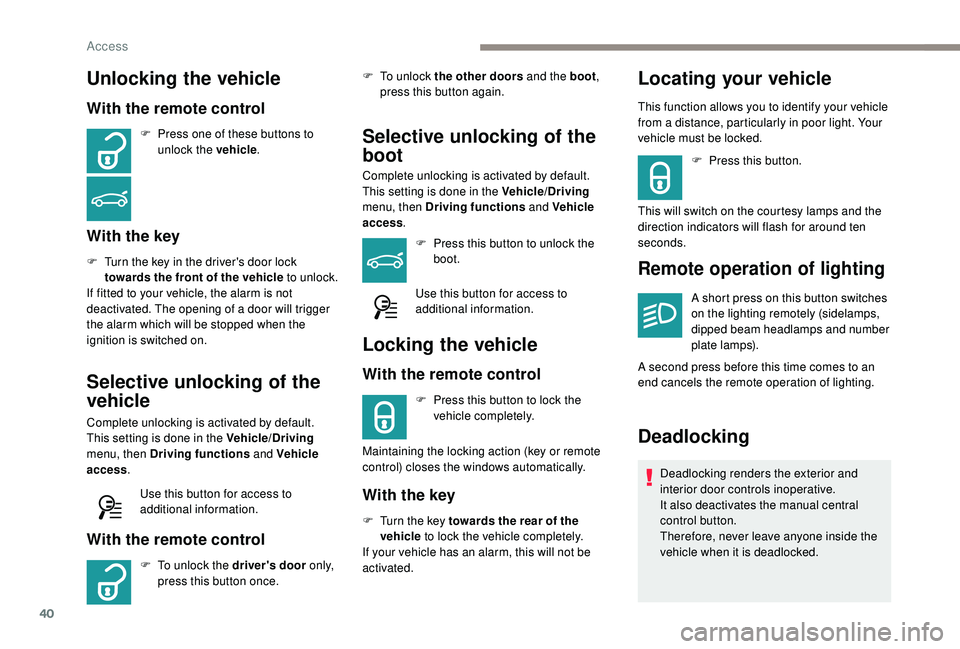
Unlocking the vehicle
With the remote control
F Press one of these buttons to unlock the vehicle .
With the key
F Turn the key in the driver's door lock
towards the front of the vehicle to unlock.
If fitted to your vehicle, the alarm is not
deactivated. The opening of a door will trigger
the alarm which will be stopped when the
ignition is switched on.
Selective unlocking of the
vehicle
Complete unlocking is activated by default.
This setting is done in the Vehicle/Driving
menu, then Driving functions and Vehicle
access .
Use this button for access to
additional information.
With the remote control
F To unlock the driver's door o n l y,
press this button once. F
T
o unlock the other doors and the boot
,
press this button again.
Selective unlocking of the
boot
Complete unlocking is activated by default.
This setting is done in the Vehicle/Driving
menu, then Driving functions and Vehicle
access .
F
P
ress this button to unlock the
boot.
Use this button for access to
additional information.
Locking the vehicle
With the remote control
F Press this button to lock the vehicle completely.
Maintaining the locking action (key or remote
control) closes the windows automatically.
With the key
F Turn the key towards the rear of the vehicle to lock the vehicle completely.
If your vehicle has an alarm, this will not be
activated.
Locating your vehicle
This function allows you to identify your vehicle
from a distance, particularly in poor light. Your
vehicle must be locked.
F
P
ress this button.
This will switch on the courtesy lamps and the
direction indicators will flash for around ten
seconds.
Remote operation of lighting
A short press on this button switches
on the lighting remotely (sidelamps,
dipped beam headlamps and number
plate lamps).
A second press before this time comes to an
end cancels the remote operation of lighting.
Deadlocking
Deadlocking renders the exterior and
interior door controls inoperative.
It also deactivates the manual central
control button.
Therefore, never leave anyone inside the
vehicle when it is deadlocked.
Access
Page 77 of 324
75
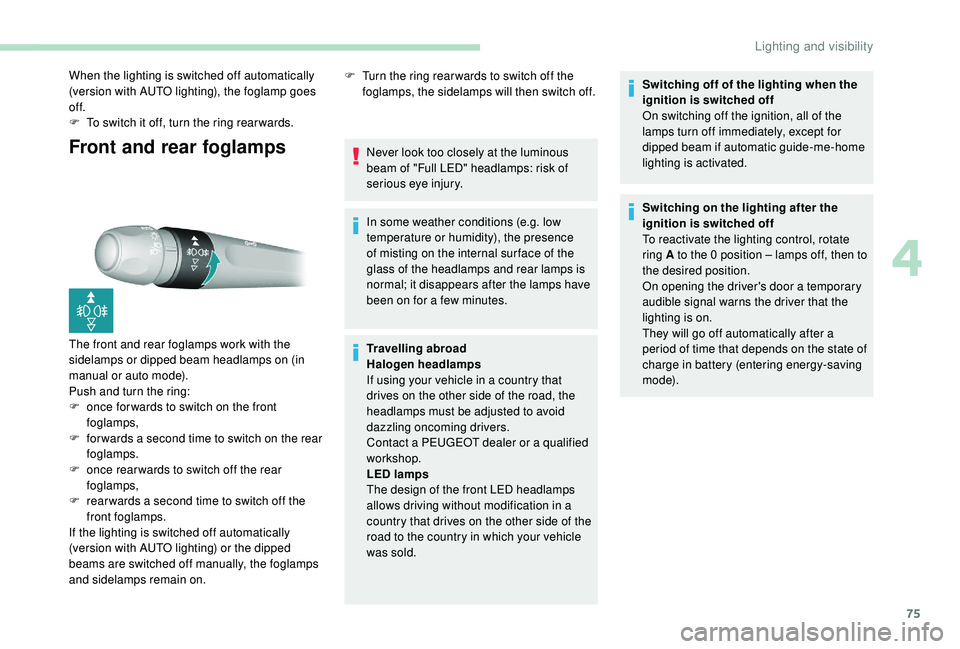
Front and rear foglamps
When the lighting is switched off automatically
(version with AUTO lighting), the foglamp goes
of f.
F
T
o switch it off, turn the ring rear wards.
The front and rear foglamps work with the
sidelamps or dipped beam headlamps on (in
manual or auto mode).
Push and turn the ring:
F
o
nce for wards to switch on the front
foglamps,
F
f
or wards a second time to switch on the rear
foglamps.
F
o
nce rear wards to switch off the rear
foglamps,
F
r
ear wards a second time to switch off the
front foglamps.
If the lighting is switched off automatically
(version with AUTO lighting) or the dipped
beams are switched off manually, the foglamps
and sidelamps remain on. F
T urn the ring rear wards to switch off the
foglamps, the sidelamps will then switch off.
Never look too closely at the luminous
beam of "Full LED" headlamps: risk of
serious eye injury.
In some weather conditions (e.g. low
temperature or humidity), the presence
of misting on the internal sur face of the
glass of the headlamps and rear lamps is
normal; it disappears after the lamps have
been on for a few minutes.
Travelling abroad
Halogen headlamps
If using your vehicle in a country that
drives on the other side of the road, the
headlamps must be adjusted to avoid
dazzling oncoming drivers.
Contact a PEUGEOT dealer or a qualified
workshop.
LED lamps
The design of the front LED headlamps
allows driving without modification in a
country that drives on the other side of the
road to the country in which your vehicle
was sold. Switching off of the lighting when the
ignition is switched off
On switching off the ignition, all of the
lamps turn off immediately, except for
dipped beam if automatic guide-me-home
lighting is activated.
Switching on the lighting after the
ignition is switched off
To reactivate the lighting control, rotate
ring A to the 0 position – lamps off, then to
the desired position.
On opening the driver's door a temporary
audible signal warns the driver that the
lighting is on.
They will go off automatically after a
period of time that depends on the state of
charge in battery (entering energy-saving
m o d e).
4
Lighting and visibility
Page 78 of 324
76
Daytime running lamps/
Sidelamps
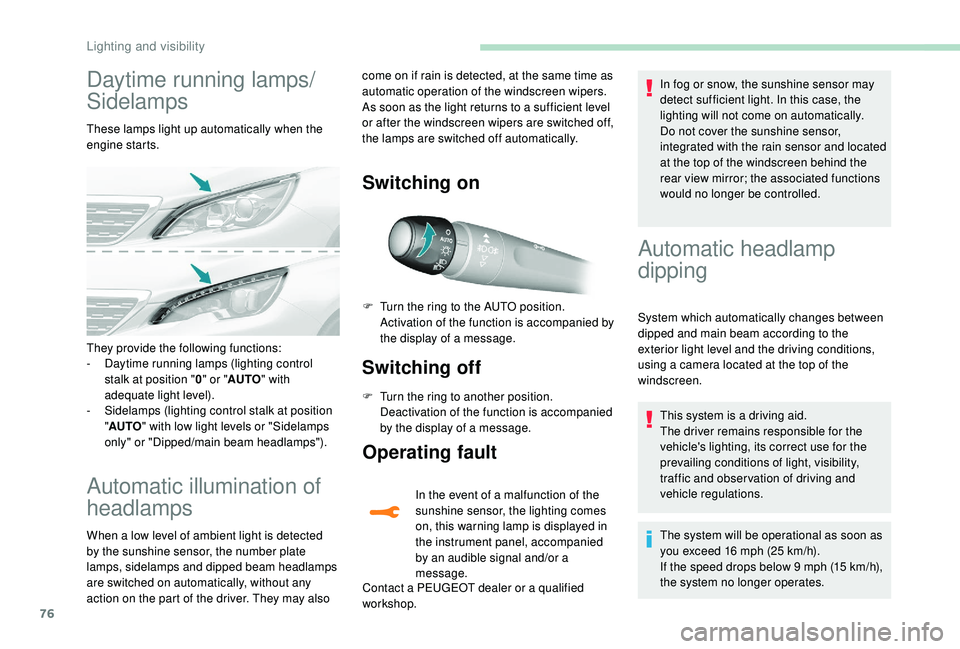
These lamps light up automatically when the
engine starts.
Automatic illumination of
headlamps
When a low level of ambient light is detected
by the sunshine sensor, the number plate
lamps,
sidelamps and dipped beam headlamps
are switched on automatically, without any
action on the part of the driver. They may also
Switching on
Switching off
F Turn the ring to another position. Deactivation of the function is accompanied
by the display of a message.
Operating fault
In the event of a malfunction of the
sunshine sensor, the lighting comes
on, this warning lamp is displayed in
the instrument panel, accompanied
by an audible signal and/or a
message.
Contact a PEUGEOT dealer or a qualified
workshop. In fog or snow, the sunshine sensor may
detect sufficient light. In this case, the
lighting will not come on automatically.
Do not cover the sunshine sensor,
integrated with the rain sensor and located
at the top of the windscreen behind the
rear view mirror; the associated functions
would no longer be controlled.
They provide the following functions:
-
D
aytime running lamps (lighting control
stalk at position " 0" or " AUTO " with
adequate light level).
-
S
idelamps (lighting control stalk at position
" AUTO " with low light levels or "Sidelamps
only" or "Dipped/main beam headlamps"). F
T
urn the ring to the AUTO position.
Activation of the function is accompanied by
the display of a message.
Automatic headlamp
dipping
System which automatically changes between
dipped and main beam according to the
exterior light level and the driving conditions,
using a camera located at the top of the
windscreen.
This system is a driving aid.
The driver remains responsible for the
vehicle's lighting, its correct use for the
prevailing conditions of light, visibility,
traffic and obser vation of driving and
vehicle regulations.
The system will be operational as soon as
you exceed 16
mph (25 km/h).
If the speed drops below 9
mph (15 km/h),
the system no longer operates.
come on if rain is detected, at the same time as
automatic operation of the windscreen wipers.
As soon as the light returns to a sufficient level
or after the windscreen wipers are switched off,
the lamps are switched off automatically.
Lighting and visibility
Page 79 of 324
77
Activation/Deactivation
F Turn the lighting control stalk ring to the "AUTO " position.
F
I
n the Vehicle/Driving menu,
select the " Driving functions "
tab, then " Automatic headlamp
dip ".
The status of the system remains in memory
when the ignition is switched off.
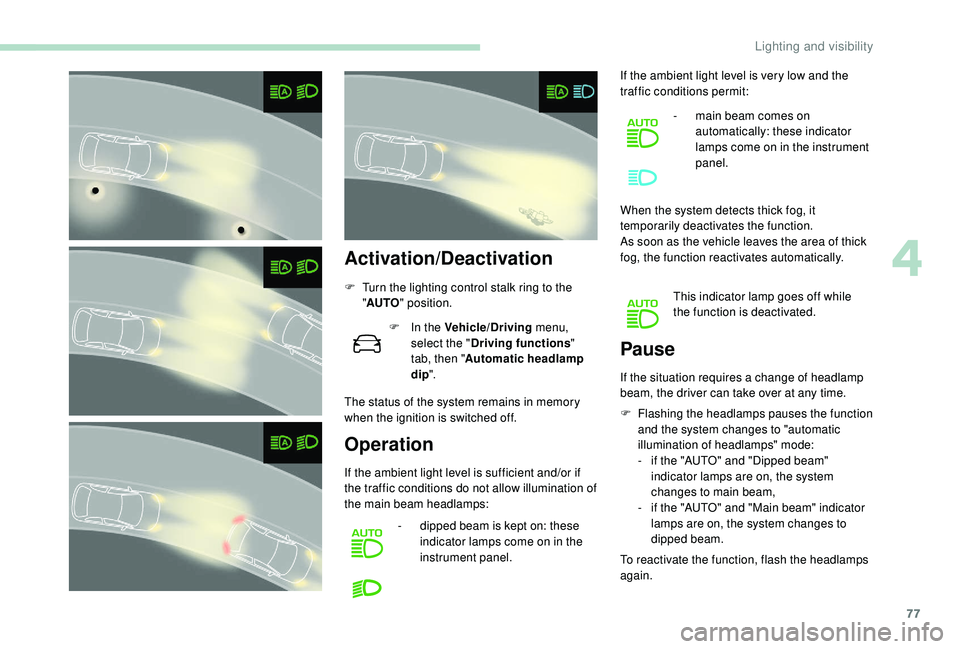
Operation
If the ambient light level is sufficient and/or if
the traffic conditions do not allow illumination of
the main beam headlamps: -
d
ipped beam is kept on: these
indicator lamps come on in the
instrument panel. If the ambient light level is very low and the
traffic conditions permit:
-
m
ain beam comes on
automatically: these indicator
lamps come on in the instrument
panel.
When the system detects thick fog, it
temporarily deactivates the function.
As soon as the vehicle leaves the area of thick
fog, the function reactivates automatically. This indicator lamp goes off while
the function is deactivated.
F
F
lashing the headlamps pauses the function
and the system changes to "automatic
illumination of headlamps" mode:
- i f the "AUTO" and "Dipped beam"
indicator lamps are on, the system
changes to main beam,
-
i
f the "AUTO" and "Main beam" indicator
lamps are on, the system changes to
dipped beam.
To reactivate the function, flash the headlamps
again.
Pause
If the situation requires a change of headlamp
beam, the driver can take over at any time.
4
Lighting and visibility
Page 80 of 324
78
The system may suffer inter ference or not
work correctly:
-
u
nder poor visibility conditions (snow,
heavy rain, etc.),
-
i
f the windscreen is dirty, misted or
obscured (by a sticker, etc.) in front of
the camera,
-
i
f the vehicle is facing highly reflective
signs.
When the system detects thick fog, it
temporarily deactivates the function.
The system is not able to detect:
-
r
oad users that do not have their own
lighting, such as pedestrians,
-
v
ehicles whose lighting is obscured
(for example: vehicles running behind a
safety barrier on a motor way),
-
v
ehicles at the top or bottom of a
steep slope, on winding roads, on
crossroads. Clean the windscreen regularly,
particularly the area in front of the camera.
The internal sur face of the windscreen can
also become misted around the camera.
In humid and cold weather, demist the
windscreen regularly.
Do not allow snow to accumulate on the
bonnet or roof of the vehicle as this could
conceal the detection camera.
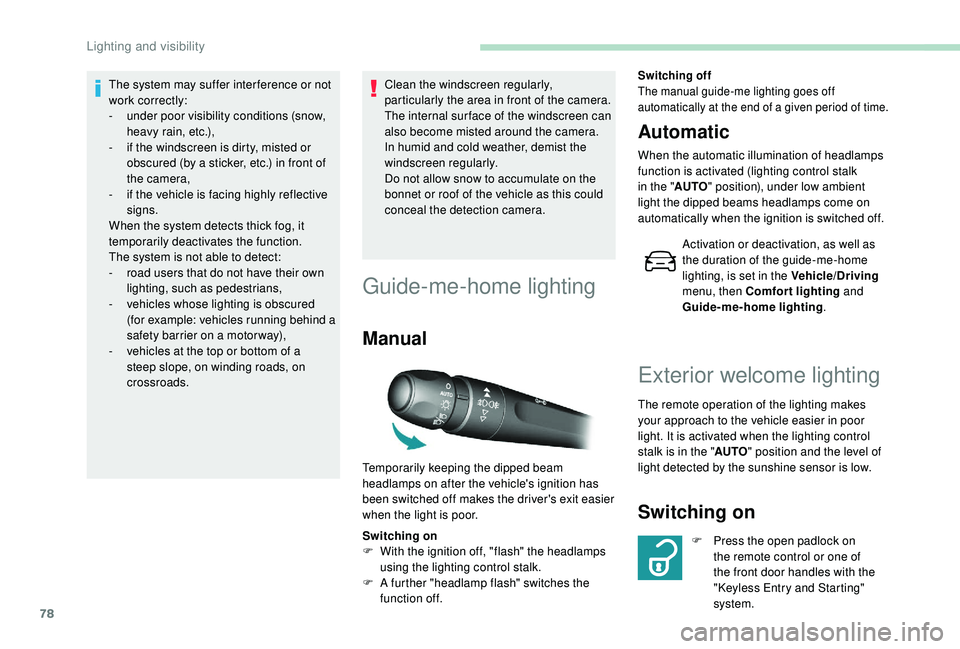
Guide-me-home lighting
Manual
Switching on
F
W ith the ignition off, "flash" the headlamps
using the lighting control stalk.
F
A f
urther "headlamp flash" switches the
function off.
Switching off
The manual guide-me lighting goes off
automatically at the end of a given period of time.
Automatic
When the automatic illumination of headlamps
function is activated (lighting control stalk
in the " AUTO" position), under low ambient
light the dipped beams headlamps come on
automatically when the ignition is switched off.
Activation or deactivation, as well as
the duration of the guide-me-home
lighting, is set in the Vehicle/Driving
menu, then Comfort lighting and
Guide-me-home lighting .
Temporarily keeping the dipped beam
headlamps on after the vehicle's ignition has
been switched off makes the driver's exit easier
when the light is poor.
Exterior welcome lighting
The remote operation of the lighting makes
your approach to the vehicle easier in poor
light. It is activated when the lighting control
stalk is in the " AUTO" position and the level of
light detected by the sunshine sensor is low.
Switching on
F Press the open padlock on the remote control or one of
the front door handles with the
"Keyless Entry and Starting"
system.
Lighting and visibility
Page 81 of 324
79
Switching off
The exterior welcome lighting switches off
automatically after a set time, when the ignition
is switched on or on locking the vehicle.
Programming
The activation, deactivation and
choice of welcome lighting duration
are done in the Vehicle/Driving menu,
then Guide-me-home lighting and
Welcome lighting .
The dipped beam headlamps and the
sidelamps come on; your vehicle is also
unlocked.
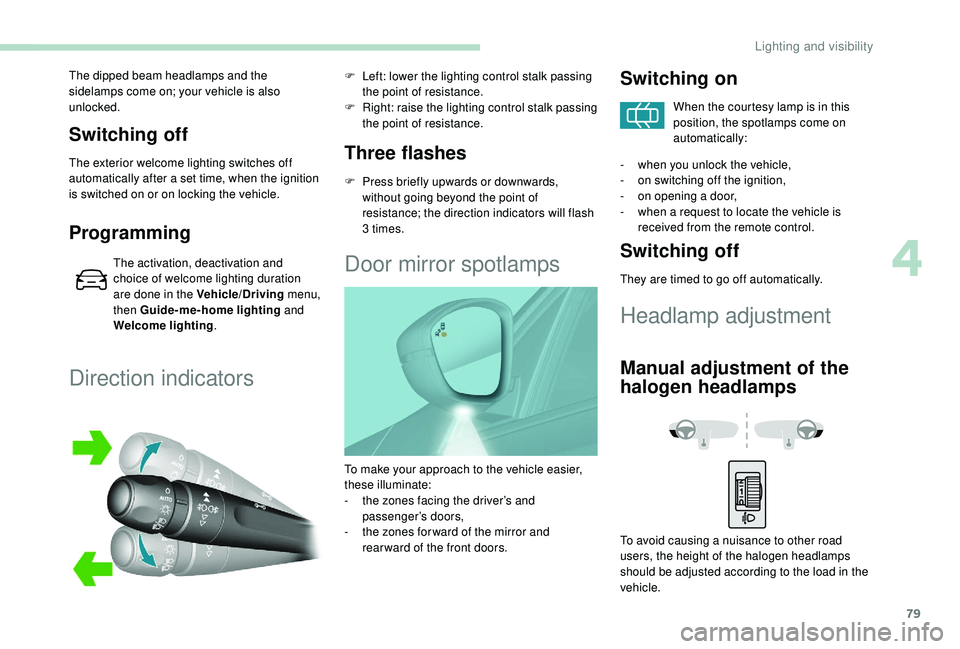
Direction indicators
Three flashes
F Press briefly upwards or downwards,
without going beyond the point of
resistance; the direction indicators will flash
3 times.
F
L
eft: lower the lighting control stalk passing
the point of resistance.
F
R
ight: raise the lighting control stalk passing
the point of resistance.
Door mirror spotlamps
Switching on
When the courtesy lamp is in this
position, the spotlamps come on
automatically:
-
w
hen you unlock the vehicle,
-
o
n switching off the ignition,
-
o
n opening a door,
-
w
hen a request to locate the vehicle is
received from the remote control.
Switching off
They are timed to go off automatically.
Headlamp adjustment
Manual adjustment of the
halogen headlamps
To avoid causing a nuisance to other road
users, the height of the halogen headlamps
should be adjusted according to the load in the
vehicle.
To make your approach to the vehicle easier,
these illuminate:
-
t
he zones facing the driver’s and
passenger’s doors,
-
t
he zones for ward of the mirror and
rear ward of the front doors.
4
Lighting and visibility
Page 82 of 324
80
Automatic adjustment of
"Full LED" technology
headlamps
This system automatically adjusts the height
of the beams from this type of headlamp,
according to the load in the vehicle, to avoid
causing a nuisance to other road users.If a fault occurs, this warning lamp
comes on in the instrument panel,
accompanied by a message and an
audible signal.
Do not touch the "Full LED" technology
headlamps. Risk of electrocution!
The system then places the headlamp beams
in the lowest position.
Have the system checked by a PEUGEOT
dealer or a qualified workshop.
Wiper control stalk
Programming
Your vehicle may also include some functions
that can be configured:
-
a
utomatic windscreen wipers,
-
r
ear wiping on engaging reverse gear.
In wintry conditions, remove snow, ice or
frost present on the windscreen, around
the wiper arms and blades and the
windscreen seal, before operating the
wipers.
Do not operate the wipers on a dry
windscreen. Under extremely hot or cold
conditions, ensure that the wiper blades
are not stuck to the windscreen before
operating the wipers.
Manual controls
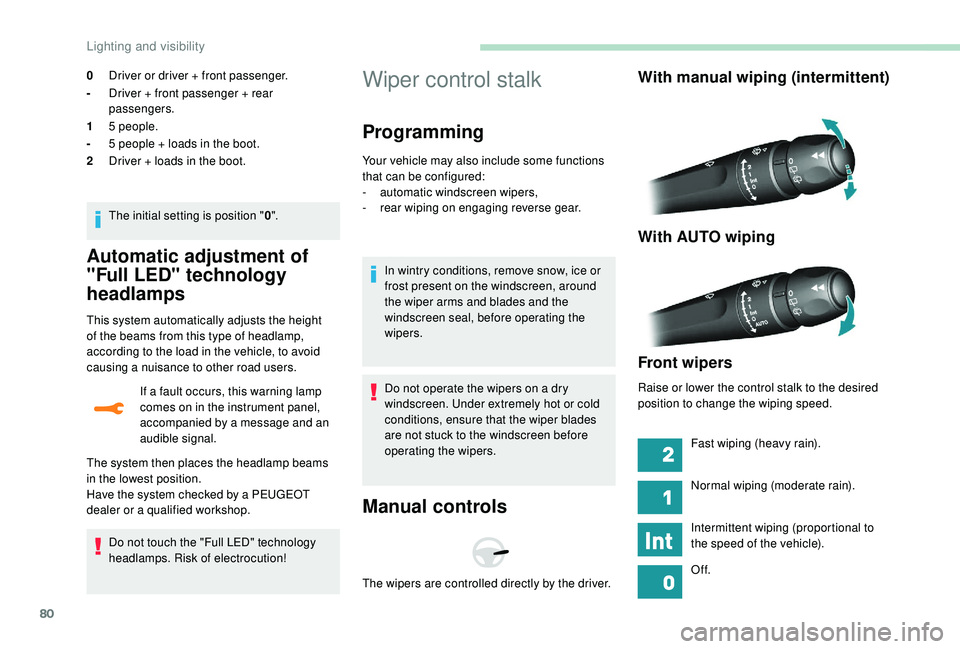
With manual wiping (intermittent)
With AUTO wiping
Front wipers
Raise or lower the control stalk to the desired
position to change the wiping speed.
The wipers are controlled directly by the driver. Fast wiping (heavy rain).
Normal wiping (moderate rain).
Intermittent wiping (proportional to
the speed of the vehicle).
Of f.
0
Driver or driver + front passenger.
- Driver + front passenger + rear
passengers.
1 5 people.
- 5 people + loads in the boot.
2 Driver + loads in the boot.
The initial setting is position " 0".
Lighting and visibility
Page 177 of 324
175
During use
Never release the device with a trailer or
load carrier on the towball.
Never exceed the maximum authorised
weight for the vehicle – the Gross Train
Weight or GTW.
It is essential that the maximum
authorised load be complied with on the
towing device: if it is exceeded, this device
may detach from the vehicle, which is a
serious accident risk.
Check that the trailer lamps work
c o r r e c t l y.
Before setting off, check the adjustment of
the headlamp beam height.
For more information on Headlamp
adjustment, refer to the corresponding
section.
Following use
When travelling without a trailer or load
carrier, the towball must be removed and
the blanking plug inserted in the carrier.
This measure applies particularly where
the towball might obscure visibility of the
number plate or its lighting.Blanking plug
In the event of towing, it is essential to remove
the blanking plug if your vehicle has one.
To do this, contact a PEUGEOT dealer or a
qualified workshop.
The blanking plug is located behind the
lower air intake grille.
Towing device with
quickly detachable towball
(hatchback)
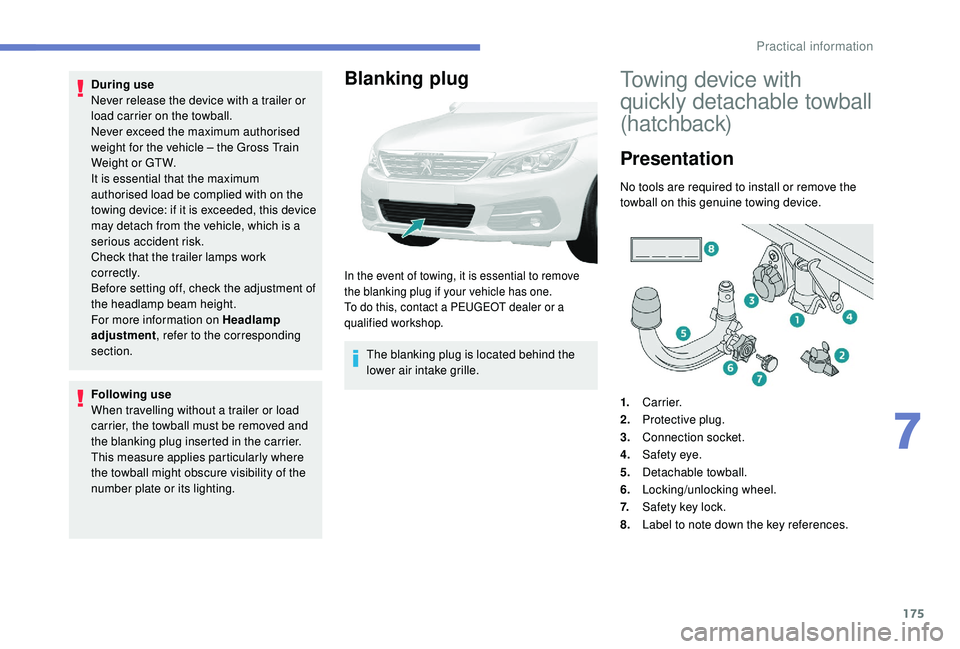
Presentation
No tools are required to install or remove the
towball on this genuine towing device.
1. Carrier.
2. Protective plug.
3. Connection socket.
4. Safety eye.
5. Detachable towball.
6. Locking/unlocking wheel.
7. Safety key lock.
8. Label to note down the key references.
7
Practical information
Page 183 of 324
181
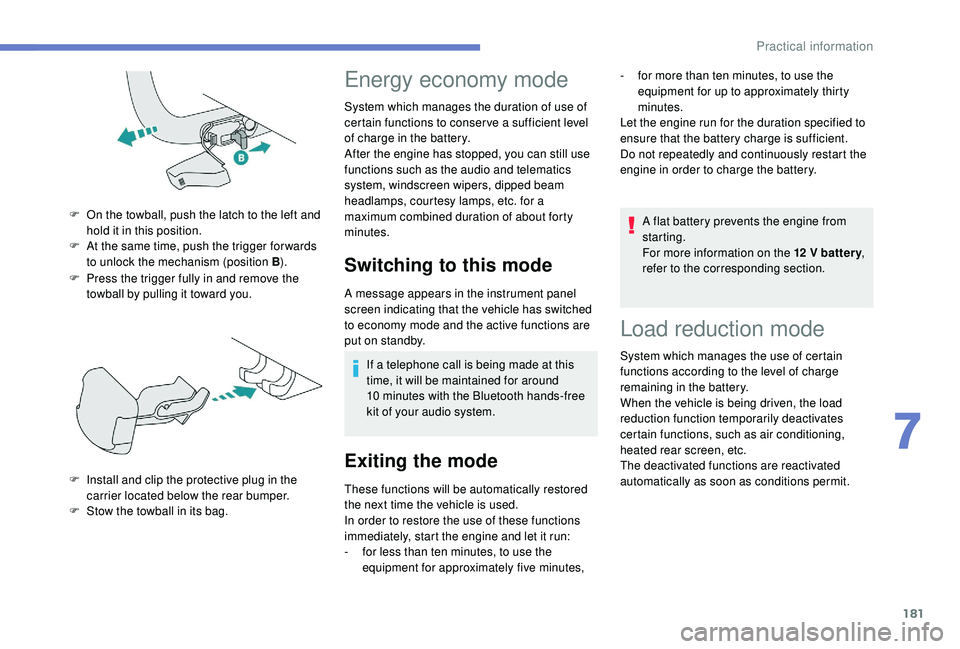
F Press the trigger fully in and remove the towball by pulling it toward you.
F
O
n the towball, push the latch to the left and
hold it in this position.
F
A
t the same time, push the trigger for wards
to unlock the mechanism (position B ).
F
I
nstall and clip the protective plug in the
carrier located below the rear bumper.
F
S
tow the towball in its bag.
Energy economy mode
System which manages the duration of use of
certain functions to conser ve a sufficient level
of charge in the battery.
After the engine has stopped, you can still use
functions such as the audio and telematics
system, windscreen wipers, dipped beam
headlamps,
courtesy lamps, etc. for a
maximum combined duration of about forty
minutes.
Switching to this mode
A message appears in the instrument panel
screen indicating that the vehicle has switched
to economy mode and the active functions are
put on standby.
If a telephone call is being made at this
time, it will be maintained for around
10
minutes with the Bluetooth hands-free
kit of your audio system.
Exiting the mode
These functions will be automatically restored
the next time the vehicle is used.
In order to restore the use of these functions
immediately, start the engine and let it run:
-
f
or less than ten minutes, to use the
equipment for approximately five minutes, A flat battery prevents the engine from
starting.
For more information on the 12
V batter y
,
refer to the corresponding section.
Load reduction mode
System which manages the use of certain
functions according to the level of charge
remaining in the battery.
When the vehicle is being driven, the load
reduction function temporarily deactivates
certain functions, such as air conditioning,
heated rear screen, etc.
The deactivated functions are reactivated
automatically as soon as conditions permit. -
f
or more than ten minutes, to use the
equipment for up to approximately thirty
minutes.
Let the engine run for the duration specified to
ensure that the battery charge is sufficient.
Do not repeatedly and continuously restart the
engine in order to charge the battery.
7
Practical information