audio Peugeot 308 2021 Owner's Manual
[x] Cancel search | Manufacturer: PEUGEOT, Model Year: 2021, Model line: 308, Model: Peugeot 308 2021Pages: 244, PDF Size: 8.21 MB
Page 5 of 244
3
Contents
bit.ly/helpPSA
Active Blind Spot Monitoring System 120
Parking sensors 121
Visiopark 1 122
Park Assist 124
7Practical information
Compatibility of fuels 131
Refuelling 131
Diesel misfuel prevention 132
Snow chains 133
Very cold climate screen 133
Towing device 134
Towing device with quickly detachable
towball
135
Energy economy mode 139
Fitting roof bars 140
Bonnet 141
Engine compartment 141
Checking levels 142
Checks 144
AdBlue® (BlueHDi) 146
Free-wheeling 148
Advice on care and maintenance 148
8In the event of a breakdown
Tool kit 150
Temporary puncture repair kit 151
Spare wheel 157
Changing a bulb
160
Changing a fuse 166
12
V battery 169
Towing the vehicle 173
Running out of fuel (Diesel) 174
9Technical data
Engine technical data and towed loads 176
Petrol engines 177
Diesel engines 179
Dimensions 181
Identification markings 183
10PEUGEOT Connect Radio
First steps 184
Steering mounted controls 185
Menus 186
Applications 187
Radio 187
DAB (Digital Audio Broadcasting) radio 189
Media 189
Telephone 191
Settings 194
Frequently asked questions 196
11PEUGEOT Connect Nav
First steps 198
Steering mounted controls 199
Menus 199
Voice commands 201
Navigation 204
Connected navigation 207
Applications
209
Radio 2 11
DAB (Digital Audio Broadcasting) radio 213
Media 213
Telephone 214
Settings 217
Frequently asked questions 219
■
Alphabetical index
Access to additional videos
Page 7 of 244
5
Overview
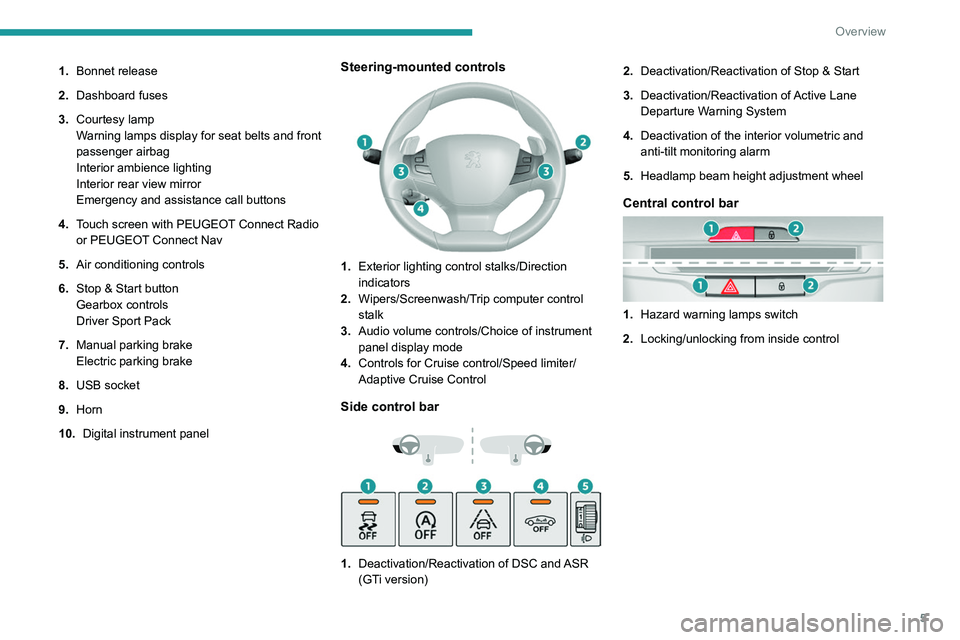
1.Bonnet release
2. Dashboard fuses
3. Courtesy lamp
Warning lamps display for seat belts and front
passenger airbag
Interior ambience lighting
Interior rear view mirror
Emergency and assistance call buttons
4. Touch screen with PEUGEOT Connect Radio
or PEUGEOT Connect Nav
5. Air conditioning controls
6. Stop & Start button
Gearbox controls
Driver Sport Pack
7. Manual parking brake
Electric parking brake
8. USB socket
9. Horn
10. Digital instrument panelSteering-mounted controls
1.Exterior lighting control stalks/Direction
indicators
2. Wipers/Screenwash/Trip computer control
stalk
3. Audio volume controls/Choice of instrument
panel display mode
4. Controls for Cruise control/Speed limiter/
Adaptive Cruise Control
Side control bar
1.Deactivation/Reactivation of DSC and ASR
(GTi version) 2.
Deactivation/Reactivation of Stop & Start
3. Deactivation/Reactivation of Active Lane
Departure Warning System
4. Deactivation of the interior volumetric and
anti-tilt monitoring alarm
5. Headlamp beam height adjustment wheel
Central control bar
1.Hazard warning lamps switch
2. Locking/unlocking from inside control
Page 41 of 244
39
Ease of use and comfort
3Opening
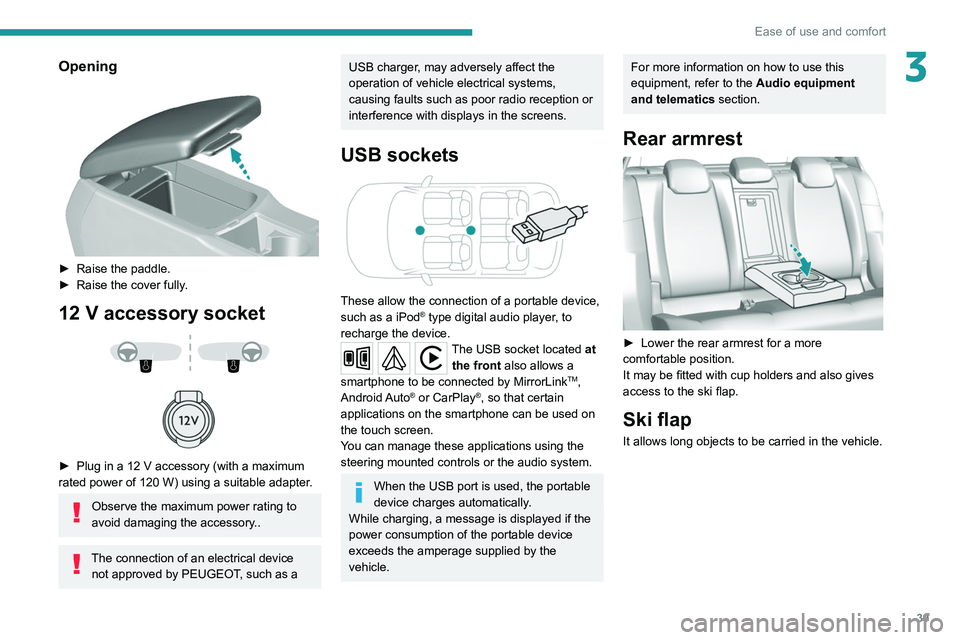
► Raise the paddle.
► Raise the cover fully .
12 V accessory socket
► Plug in a 12 V accessory (with a maximum
rated power of 120 W) using a suitable adapter.
Observe the maximum power rating to
avoid damaging the accessory..
The connection of an electrical device not approved by PEUGEOT, such as a
USB charger, may adversely affect the
operation of vehicle electrical systems,
causing faults such as poor radio reception or
interference with displays in the screens.
USB sockets
These allow the connection of a portable device,
such as a iPod® type digital audio player, to
recharge the device.
The USB socket located at the front also allows a
smartphone to be connected by MirrorLink
TM,
Android Auto® or CarPlay®, so that certain
applications on the smartphone can be used on
the touch screen.
You can manage these applications using the
steering mounted controls or the audio system.
When the USB port is used, the portable
device charges automatically.
While charging, a message is displayed if the
power consumption of the portable device
exceeds the amperage supplied by the
vehicle.
For more information on how to use this
equipment, refer to the Audio equipment
and telematics section.
Rear armrest
► Lower the rear armrest for a more
comfortable position.
It may be fitted with cup holders and also gives
access to the ski flap.
Ski flap
It allows long objects to be carried in the vehicle.
Page 141 of 244
139
Practical information
7► Lift the protective cover on the connection
socket and connect the trailer's electric plug.
Removing the towball
► Disconnect the trailer's electric plug from the
connection socket on the carrier .
►
Detach the trailer safety cable from the safety
eye on the carrier
.
►
Unhitch the trailer from the towball.
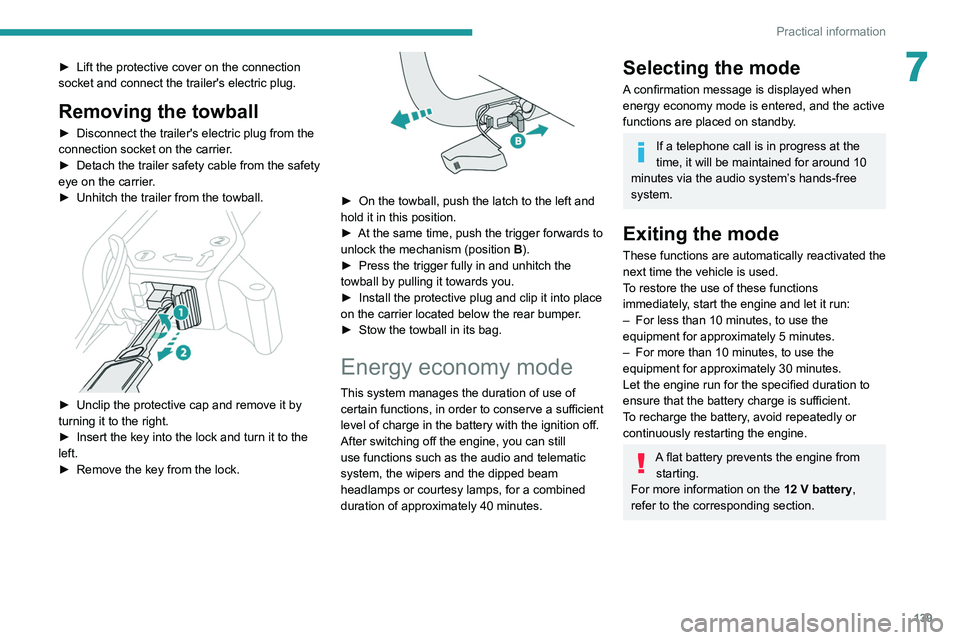
► Unclip the protective cap and remove it by
turning it to the right.
►
Insert the key into the lock and turn it to the
left.
►
Remove the key from the lock.
► On the towball, push the latch to the left and
hold it in this position.
►
At the same time, push the trigger forwards to
unlock the mechanism (position B
).
►
Press the trigger fully in and unhitch the
towball by pulling it towards you.
►
Install the protective plug and clip it into place
on the carrier
located below the rear bumper.
►
Stow the towball in its bag.
Energy economy mode
This system manages the duration of use of
certain functions, in order to conserve a sufficient
level of charge in the battery with the ignition off.
After switching off the engine, you can still
use functions such as the audio and telematic
system, the wipers and the dipped beam
headlamps or courtesy lamps, for a combined
duration of approximately 40 minutes.
Selecting the mode
A confirmation message is displayed when
energy economy mode is entered, and the active
functions are placed on standby.
If a telephone call is in progress at the
time, it will be maintained for around 10
minutes via the audio system’s hands-free
system.
Exiting the mode
These functions are automatically reactivated the
next time the vehicle is used.
To restore the use of these functions
immediately, start the engine and let it run:
–
For less than 10 minutes, to use the
equipment for approximately 5 minutes.
–
For more than 10 minutes, to use the
equipment for approximately 30 minutes.
Let the engine run for the specified duration to
ensure that the battery charge is sufficient.
T
o recharge the battery, avoid repeatedly or
continuously restarting the engine.
A flat battery prevents the engine from starting.
For more information on the 12
V battery,
refer to the corresponding section.
Page 170 of 244
168
In the event of a breakdown
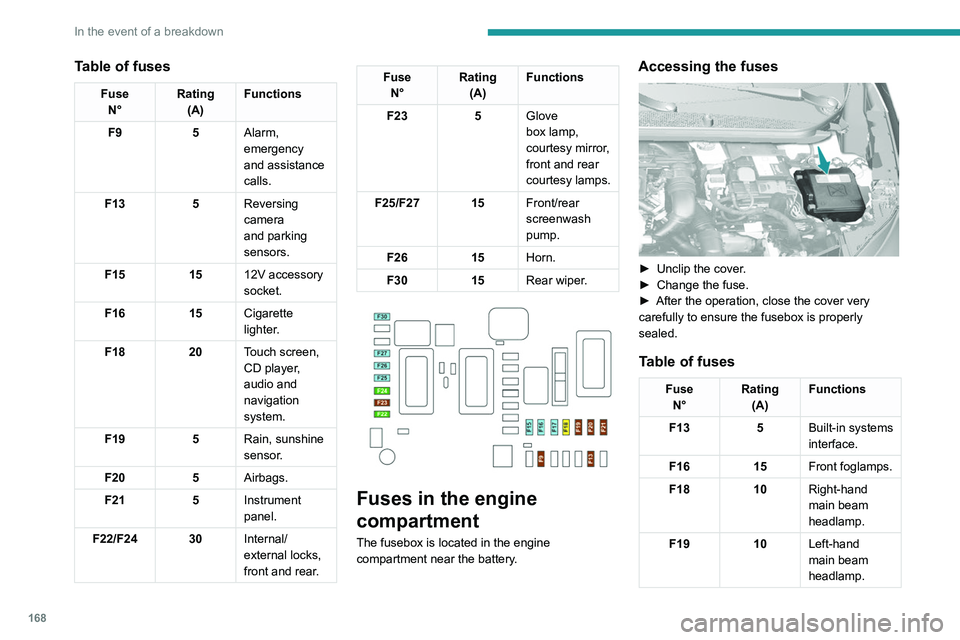
Table of fuses
FuseN° Rating
(A) Functions
F9 5Alarm,
emergency
and assistance
calls.
F13 5Reversing
camera
and parking
sensors.
F15 1512V accessory
socket.
F16 15Cigarette
lighter.
F18 20Touch screen,
CD player,
audio and
navigation
system.
F19 5Rain, sunshine
sensor.
F20 5Airbags.
F21 5Instrument
panel.
F22/F24 30 Internal/
external locks,
front and rear.
Fuse
N° Rating
(A) Functions
F23 5Glove
box lamp,
courtesy
mirror,
front and rear
courtesy lamps.
F25/F27 15 Front/rear
screenwash
pump.
F26 15Horn.
F30 15Rear wiper.
Fuses in the engine
compartment
The fusebox is located in the engine
compartment near the battery.
Accessing the fuses
► Unclip the cover .
► Change the fuse.
►
After the operation, close the cover very
carefully to ensure the fusebox is properly
sealed.
Table of fuses
Fuse N° Rating
(A) Functions
F13 5Built-in systems
interface.
F16 15Front foglamps.
F18 10Right-hand
main beam
headlamp.
F19 10Left-hand
main beam
headlamp.
Page 172 of 244
170
In the event of a breakdown
► Secure the bonnet stay.
► Remove the plastic cover on the (+) terminal.
The battery (-) terminal is not accessible.
A
remote earth point is located on the engine.
Starting using another
battery
If your vehicle's battery is flat, the engine can be
started using a backup battery (either external or
from another vehicle) and jump leads or using a
battery booster.
Never start the engine by connecting a
battery charger.
Never use a 24
V or higher battery booster.
Check beforehand that the backup battery
has a nominal voltage of 12
V and a capacity
at least equal to that of the discharged
battery.
The two vehicles must not be in contact with
each other.
Switch off all electricity-consuming equipment
on both vehicles (audio system, wipers,
lighting, etc.).
Make sure that the jump leads are well away
from the engine’s moving parts (fan, belt,
etc.).
Do not disconnect the (+) terminal while the
engine is running.
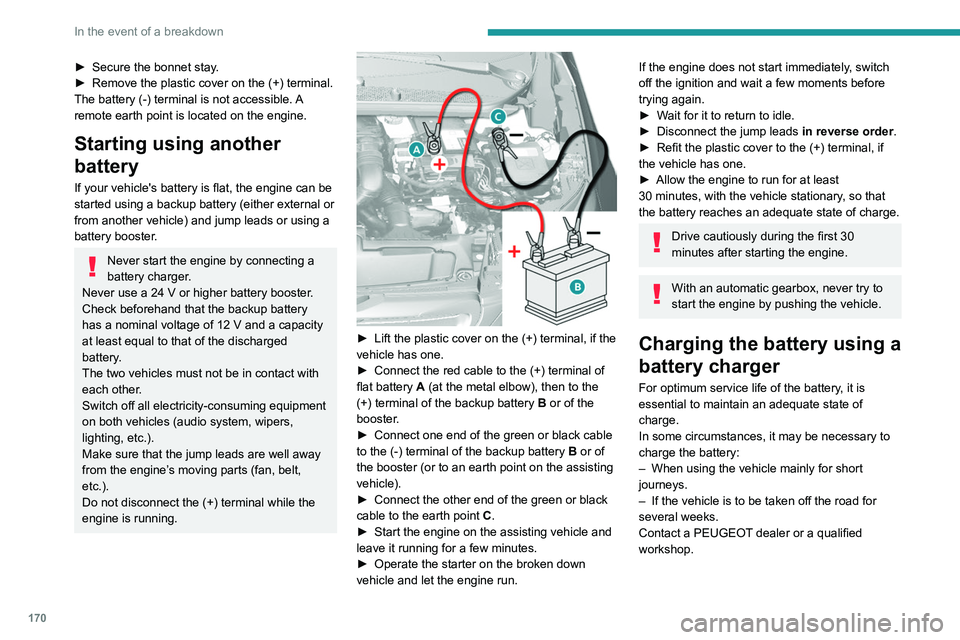
► Lift the plastic cover on the (+) terminal, if the
vehicle has one.
►
Connect the red cable to the (+) terminal of
flat battery
A (at the metal elbow), then to the
(+) terminal of the backup battery
B or of the
booster.
►
Connect one end of the green or black cable
to the (-) terminal of the backup battery
B or of
the booster (or to an earth point on the assisting
vehicle).
►
Connect the other end of the green or black
cable to the earth point
C
.
►
Start the engine on the assisting vehicle and
leave it running for a few minutes.
►
Operate the starter on the broken down
vehicle and let the engine run.
If the engine does not start immediately, switch
off the ignition and wait a few moments before
trying again.
►
W
ait for it to return to idle.
►
Disconnect the jump leads in reverse order.
►
Refit the plastic cover to the (+) terminal, if
the vehicle has one.
►
Allow the engine to run for at least
30
minutes, with the vehicle stationary, so that
the battery reaches an adequate state of charge.
Drive cautiously during the first 30
minutes after starting the engine.
With an automatic gearbox, never try to
start the engine by pushing the vehicle.
Charging the battery using a
battery charger
For optimum service life of the battery, it is
essential to maintain an adequate state of
charge.
In some circumstances, it may be necessary to
charge the battery:
–
When using the vehicle mainly for short
journeys.
–
If the vehicle is to be taken off the road for
several weeks.
Contact a PEUGEOT
dealer or a qualified
workshop.
Page 173 of 244
171
In the event of a breakdown
8Follow the instructions provided by the
manufacturer of the charger.
Never reverse polarities.
It is not necessary to disconnect the
battery.
►
Switch the ignition off.
►
Switch off all electrical consumers (audio
system, lighting, wipers, etc.).
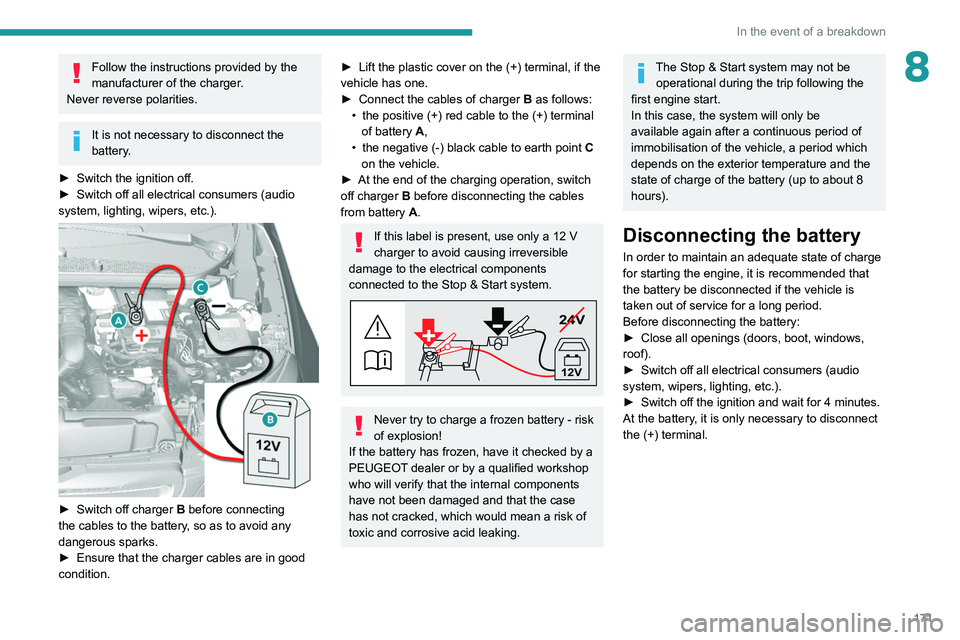
► Switch off charger B before connecting
the cables to the battery, so as to avoid any
dangerous sparks.
►
Ensure that the charger cables are in good
condition.
► Lift the plastic cover on the (+) terminal, if the
vehicle has one.
►
Connect the cables of charger B
as follows:
•
the positive (+) red cable to the (+) terminal
of battery
A,
•
the negative (-) black cable to earth point C
on the vehicle.
►
At the end of the charging operation, switch
off charger B
before disconnecting the cables
from battery A.
If this label is present, use only a 12 V
charger to avoid causing irreversible
damage to the electrical components
connected to the Stop & Start system.
24V
12V
Never try to charge a frozen battery - risk
of explosion!
If the battery has frozen, have it checked by a
PEUGEOT dealer or by a qualified workshop
who will verify that the internal components
have not been damaged and that the case
has not cracked, which would mean a risk of
toxic and corrosive acid leaking.
The Stop & Start system may not be operational during the trip following the
first engine start.
In this case, the system will only be
available again after a continuous period of
immobilisation of the vehicle, a period which
depends on the exterior temperature and the
state of charge of the battery (up to about 8
hours).
Disconnecting the battery
In order to maintain an adequate state of charge
for starting the engine, it is recommended that
the battery be disconnected if the vehicle is
taken out of service for a long period.
Before disconnecting the battery:
►
Close all openings (doors, boot, windows,
roof).
►
Switch off all electrical consumers (audio
system, wipers, lighting, etc.).
►
Switch off the ignition and wait for 4
minutes.
At the battery, it is only necessary to disconnect
the (+) terminal.
Page 186 of 244
184
PEUGEOT Connect Radio
PEUGEOT Connect
Radio
Multimedia audio system -
Applications - Bluetooth
®
telephone
The functions and settings described
vary according to the vehicle version and
configuration.
For safety reasons and because they
require sustained attention by the driver,
the following operations must be carried out
with the vehicle stationary and the ignition
on:
–
Pairing the smartphone with the system in
Bluetooth mode.
–
Using the smartphone.
–
Connection to the CarPlay®, MirrorLinkTM
or Android Auto applications (certain
applications interrupt their display while the
vehicle is moving).
–
Changing the system settings and
configuration.
The system is protected in such a way that it will only operate in the vehicle.
The Energy Economy Mode message is
displayed when the system is about to enter
the corresponding mode.
The system’s Open Source Software (OSS) source codes are available at the
following addresses:
https://www.groupe-psa.com/fr/oss/
https://www.groupe-psa.com/en/oss/
First steps
With the engine running, a press mutes
the sound.
With the ignition off, a press turns the system on.
Increase or decrease the volume using
the wheel or the "plus" or "minus" buttons
(depending on the equipment).
Use the buttons on either side of or below the
touch screen for access to the menus, then
press the virtual buttons in the touch screen.
Depending on the model, use the "Source" or
"Menu" buttons on the left of the touch screen
for access to the menus, then press the virtual
buttons in the touch screen.
At all times it is possible to display the rolling
menus by pressing the screen briefly with three
fingers.
All of the touch areas of the screen are white.
For pages with multiple tabs at the bottom of the
screen, it is possible to switch between pages
either by tapping the tab for the desired page, or
by using a finger, sliding the pages to the left or
to the right.
Press in the grey zone to go back up a level or
to confirm.
Press the back arrow to go back a level or
confirm.
The touch screen is of the "capacitive" type.
To clean the screen, use a soft, non-abrasive
cloth (e.g. spectacles cloth) with no additional
product.
Do not use sharp objects on the screen.
Do not touch the screen with wet hands.
Certain information is displayed permanently in
the upper bar of the touch screen:
–
Air conditioning status information (depending
on version), and direct access to the
corresponding menu.
–
Radio Media and
Telephone menu status
information.
–
Privacy status information.
–
Access to the touch screen and digital
instrument panel settings.
Audio source selection (depending on
equipment):
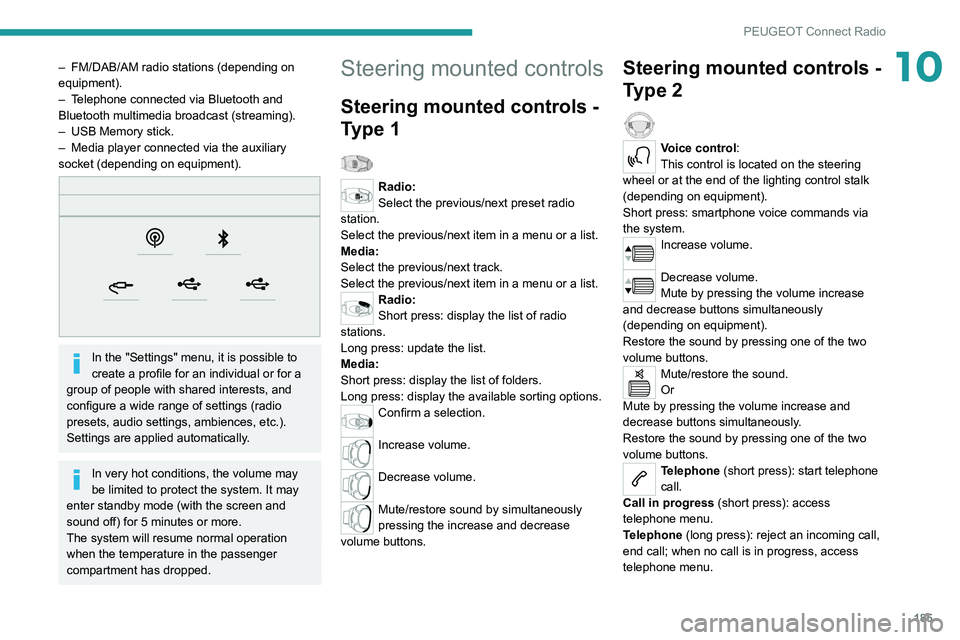
Page 187 of 244
185
PEUGEOT Connect Radio
10– FM/DAB/AM radio stations (depending on
equipment).
–
T
elephone connected via Bluetooth and
Bluetooth multimedia broadcast (streaming).
–
USB Memory stick.
–
Media player connected via the auxiliary
socket (depending on equipment).
In the "Settings" menu, it is possible to
create a profile for an individual or for a
group of people with shared interests, and
configure a wide range of settings (radio
presets, audio settings, ambiences, etc.).
Settings are applied automatically.
In very hot conditions, the volume may
be limited to protect the system. It may
enter standby mode (with the screen and
sound off) for 5 minutes or more.
The system will resume normal operation
when the temperature in the passenger
compartment has dropped.
Steering mounted controls
Steering mounted controls -
Type 1
Radio:
Select the previous/next preset radio
station.
Select the previous/next item in a menu or a list.
Media:
Select the previous/next track.
Select the previous/next item in a menu or a list.
Radio:
Short press: display the list of radio
stations.
Long press: update the list.
Media:
Short press: display the list of folders.
Long press: display the available sorting options.
Confirm a selection.
Increase volume.
Decrease volume.
Mute/restore sound by simultaneously
pressing the increase and decrease
volume buttons.
Steering mounted controls -
Type 2
Voice control:
This control is located on the steering
wheel or at the end of the lighting control stalk
(depending on equipment).
Short press: smartphone voice commands via
the system.
Increase volume.
Decrease volume.
Mute by pressing the volume increase
and decrease buttons simultaneously
(depending on equipment).
Restore the sound by pressing one of the two
volume buttons.
Mute/restore the sound.
Or
Mute by pressing the volume increase and
decrease buttons simultaneously.
Restore the sound by pressing one of the two
volume buttons.
Telephone (short press): start telephone
call.
Call in progress (short press): access
telephone menu.
Telephone (long press): reject an incoming call,
end call; when no call is in progress, access
telephone menu.
Page 188 of 244
186
PEUGEOT Connect Radio
Radio (rotate): automatic search for the
previous/next station.
Media (rotate): previous/next track, move
through a list.
Short press: confirm a selection; if nothing
selected, access presets.
Radio: display the list of stations.
Media: display the list of tracks.
Radio (press and hold): update the list of
detected stations.
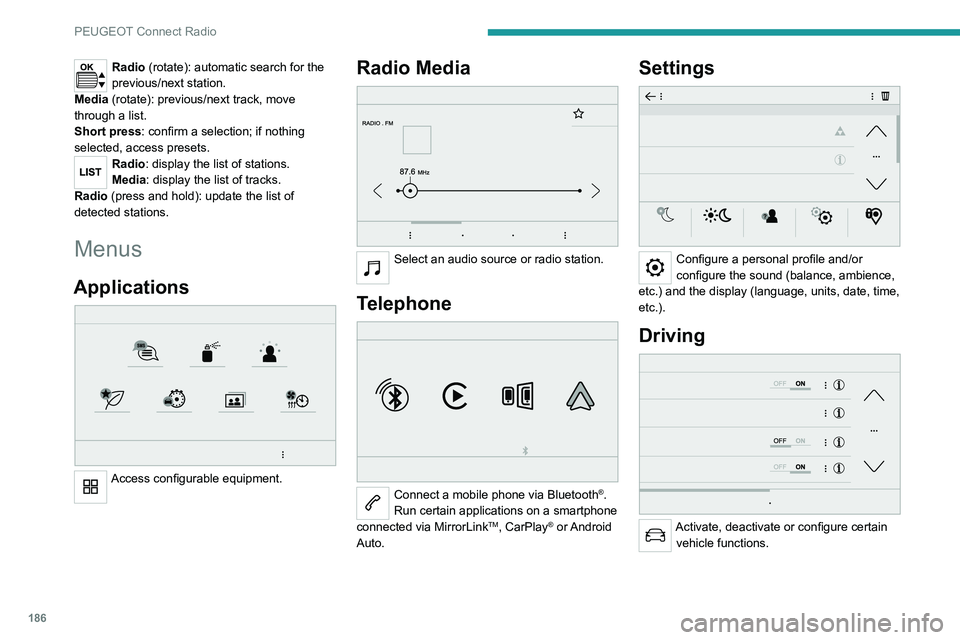
Menus
Applications
Access configurable equipment.
Radio Media
Select an audio source or radio station.
Telephone
Connect a mobile phone via Bluetooth®.
Run certain applications on a smartphone
connected via MirrorLink
TM, CarPlay® or Android
Auto.
Settings
Configure a personal profile and/or
configure the sound (balance, ambience,
etc.) and the display (language, units, date, time,
etc.).
Driving
Activate, deactivate or configure certain vehicle functions.
Navigation
Configure the navigation and select your
destination via MirrorLinkTM, CarPlay® or
Android Auto.
Air conditioning
21,518,5
Manage various temperature and air flow
settings.