turn signal Peugeot 308 2021 Owner's Manual
[x] Cancel search | Manufacturer: PEUGEOT, Model Year: 2021, Model line: 308, Model: Peugeot 308 2021Pages: 244, PDF Size: 8.21 MB
Page 13 of 244
11
Instruments
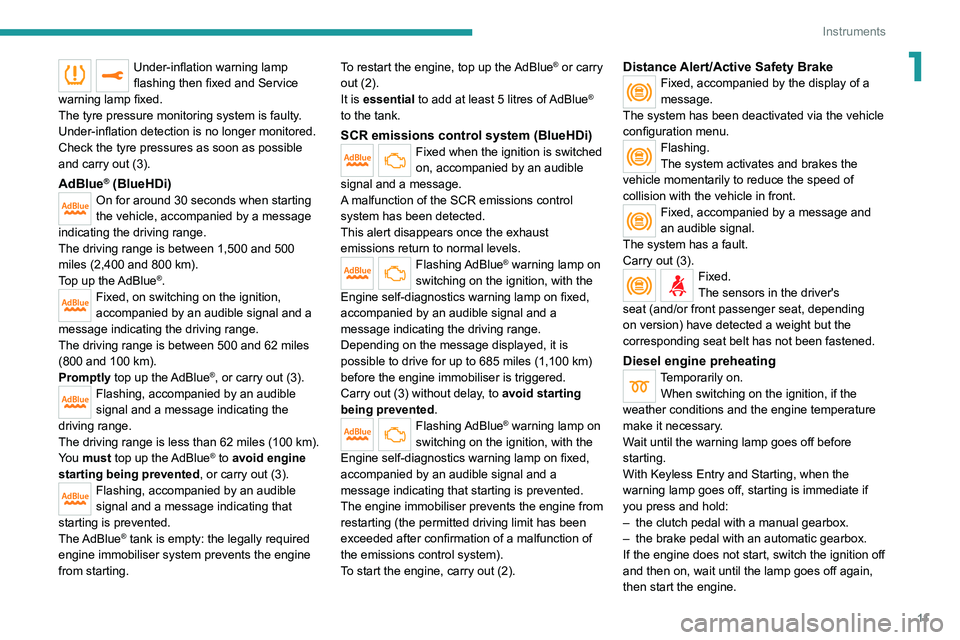
1Under-inflation warning lamp
flashing then fixed and Service
warning lamp fixed.
The tyre pressure monitoring system is faulty.
Under-inflation detection is no longer monitored.
Check the tyre pressures as soon as possible
and carry out (3).
AdBlue® (BlueHDi)On for around 30 seconds when starting
the vehicle, accompanied by a message
indicating the driving range.
The driving range is between 1,500 and 500
miles (2,400 and 800
km).
Top up the AdBlue
®.Fixed, on switching on the ignition,
accompanied by an audible signal and a
message indicating the driving range.
The driving range is between 500 and 62 miles
(800 and 100
km).
Promptly top up the AdBlue
®, or carry out (3).Flashing, accompanied by an audible
signal and a message indicating the
driving range.
The driving range is less than 62 miles (100
km).
You must top up the AdBlue
® to avoid engine
starting being prevented , or carry out
(3).
Flashing, accompanied by an audible
signal and a message indicating that
starting is prevented.
The AdBlue
® tank is empty: the legally required
engine immobiliser system prevents the engine
from starting. To restart the engine, top up the AdBlue
® or carry
out (2).
It is essential to add at least 5 litres of AdBlue
®
to the tank.
SCR emissions control system (BlueHDi)Fixed when the ignition is switched
on, accompanied by an audible
signal and a message.
A malfunction of the SCR emissions control
system has been detected.
This alert disappears once the exhaust
emissions return to normal levels.
Flashing AdBlue® warning lamp on
switching on the ignition, with the
Engine self-diagnostics warning lamp on fixed,
accompanied by an audible signal and a
message indicating the driving range.
Depending on the message displayed, it is
possible to drive for up to 685 miles (1,100
km)
before the engine immobiliser is triggered.
Carry out (3) without delay, to avoid starting
being prevented.
Flashing AdBlue® warning lamp on
switching on the ignition, with the
Engine self-diagnostics warning lamp on fixed,
accompanied by an audible signal and a
message indicating that starting is prevented.
The engine immobiliser prevents the engine from
restarting (the permitted driving limit has been
exceeded after confirmation of a malfunction of
the emissions control system).
To start the engine, carry out (2).
Distance Alert/Active Safety BrakeFixed, accompanied by the display of a
message.
The system has been deactivated via the vehicle
configuration menu.
Flashing.
The system activates and brakes the
vehicle momentarily to reduce the speed of
collision with the vehicle in front.
Fixed, accompanied by a message and
an audible signal.
The system has a fault.
Carry out (3).
Fixed.
The sensors in the driver's
seat (and/or front passenger seat, depending
on version) have detected a weight but the
corresponding seat belt has not been fastened.
Diesel engine preheatingTemporarily on. When switching on the ignition, if the
weather conditions and the engine temperature
make it necessary.
Wait until the warning lamp goes off before
starting.
With
Keyless Entry and Starting, when the
warning lamp goes off, starting is immediate if
you press and hold:
–
the clutch pedal with a manual gearbox.
–
the brake pedal with an automatic gearbox.
If the engine does not start, switch the ignition off
and then on, wait until the lamp goes off again,
then start the engine.
Page 26 of 244
24
Access
With Keyless Entry and Starting
Following disconnection of the vehicle battery,
replacement of the remote control battery or in
the event of a remote control malfunction, you
can no longer unlock, lock or locate your vehicle.
► Place the mechanical key (integral with the
remote control) in the lock to unlock your vehicle.
► Remove the carpet underneath the 12 V
socket.
► Place the electronic key in the house
provided for this purpose.
► Switch on the ignition by pressing "START/
STOP".
The electronic key is now fully operational again.
If the problem persists, contact a PEUGEOT
dealer or a qualified workshop as soon as
possible.
If your vehicle is fitted with an alarm, it
will not be activated/deactivated when
the vehicle is locked/unlocked.
Opening a door will trigger the alarm, which
can be stopped by switching the ignition on.
Other doors
► For the other doors, check that the child lock
is not activated.
►
Insert the built-in key into the lock located on
the edge of the door and turn it an eighth of a
turn to the right for the right-hand side door
, and
to the left for the left-hand side door.
►
Close the doors and check from the outside
that the vehicle is locked.
Changing the battery
If the battery is flat, you are informed by
lighting of this warning lamp in the
instrument panel, an audible signal and a
message in the screen.
Without Keyless Entry and Starting
Battery ref.: CR1620 / 3 volts.
With Keyless Entry and Starting
Battery ref.: CR2032 / 3 volts.
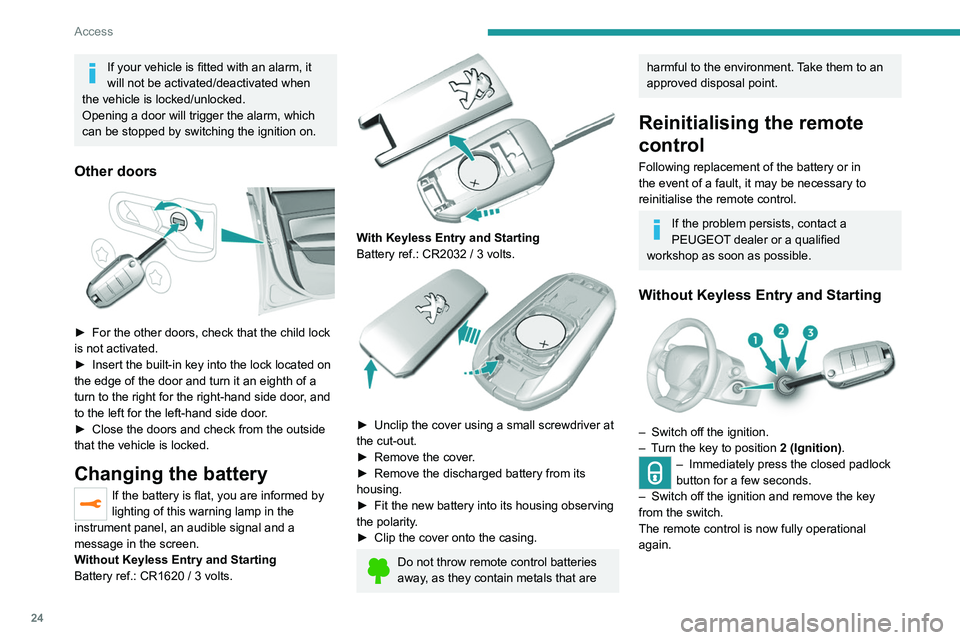
► Unclip the cover using a small screwdriver at
the cut-out.
►
Remove the cover
.
►
Remove the discharged battery from its
housing.
►
Fit the new battery into its housing observing
the polarity
.
►
Clip the cover onto the casing.
Do not throw remote control batteries
away, as they contain metals that are
harmful to the environment. Take them to an
approved disposal point.
Reinitialising the remote
control
Following replacement of the battery or in
the event of a fault, it may be necessary to
reinitialise the remote control.
If the problem persists, contact a
PEUGEOT dealer or a qualified
workshop as soon as possible.
Without Keyless Entry and Starting
– Switch off the ignition.
– T urn the key to position 2 (Ignition) .
– Immediately press the closed padlock
button for a few seconds.
–
Switch off the ignition and remove the key
from the switch.
The remote control is now fully operational
again.
Page 34 of 244
32
Ease of use and comfort
Memorising driving
positions
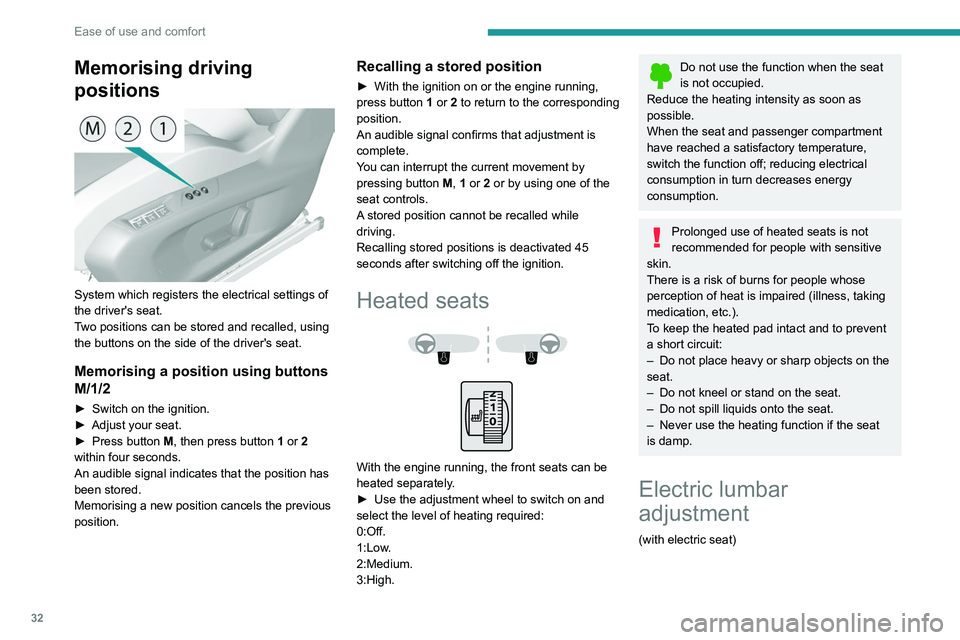
System which registers the electrical settings of
the driver's seat.
Two positions can be stored and recalled, using
the buttons on the side of the driver's seat.
Memorising a position using buttons
M/1/2
► Switch on the ignition.
► Adjust your seat.
►
Press button
M, then press button 1 or 2
within four seconds.
An audible signal indicates that the position has
been stored.
Memorising a new position cancels the previous
position.
Recalling a stored position
► With the ignition on or the engine running,
press button 1 or 2 to return to the corresponding
position.
An audible signal confirms that adjustment is
complete.
You can interrupt the current movement by
pressing button M, 1 or 2 or by using one of the
seat controls.
A stored position cannot be recalled while
driving.
Recalling stored positions is deactivated 45
seconds after switching off the ignition.
Heated seats
With the engine running, the front seats can be
heated separately.
►
Use the adjustment wheel to switch on and
select the level of heating required:
0:Off.
1:Low
.
2:Medium.
3:High.
Do not use the function when the seat
is not occupied.
Reduce the heating intensity as soon as
possible.
When the seat and passenger compartment
have reached a satisfactory temperature,
switch the function off; reducing electrical
consumption in turn decreases energy
consumption.
Prolonged use of heated seats is not
recommended for people with sensitive
skin.
There is a risk of burns for people whose
perception of heat is impaired (illness, taking
medication, etc.).
To keep the heated pad intact and to prevent
a short circuit:
–
Do not place heavy or sharp objects on the
seat.
–
Do not kneel or stand on the seat.
–
Do not spill liquids onto the seat.
–
Never use the heating function if the seat
is damp.
Electric lumbar
adjustment
(with electric seat)
Page 53 of 244
51
Lighting and visibility
4In some weather conditions (e.g. low
temperature or humidity), the presence
of misting on the internal surface of the glass
of the headlamps and rear lamps is normal; it
disappears after the lamps have been on for a
few minutes.
Travelling abroad
Halogen headlamps
If using your vehicle in a country that drives
on the other side of the road to the one in
which your vehicle was sold, the headlamps
must be adjusted to avoid dazzling oncoming
drivers.
Contact a PEUGEOT dealer or a qualified
workshop.
LED lamps
The design of the front LED headlamps
allows driving without modification in a
country that drives on the other side of the
road to the country in which your vehicle was
sold.
Switching off the lights when the
ignition is switched off
On switching off the ignition, all of the lights
turn off immediately, except for dipped
beam if automatic guide-me-home lighting is
activated.
Switching on the lighting after the
ignition is switched off
To reactivate the lighting control, rotate ring
A to the 0 position - lamps off, then to the
desired position.
On opening the driver's door a temporary
audible signal warns the driver that the
lighting is on.
They will go off automatically after a period of
time that depends on the state of charge in
battery (entering energy-saving mode).
Daytime running lamps/
Sidelamps
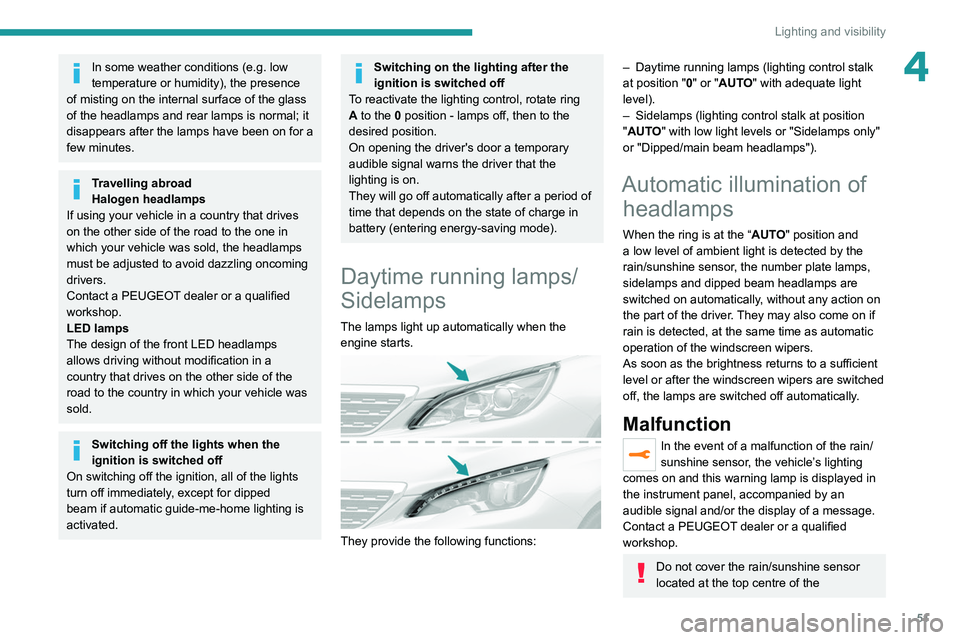
The lamps light up automatically when the
engine starts.
They provide the following functions:
– Daytime running lamps (lighting control stalk
at position " 0" or "AUTO" with adequate light
level).
–
Sidelamps (lighting control stalk at position
"
AUTO" with low light levels or "Sidelamps only"
or "Dipped/main beam headlamps").
Automatic illumination of headlamps
When the ring is at the “AUTO" position and
a low level of ambient light is detected by the
rain/sunshine sensor, the number plate lamps,
sidelamps and dipped beam headlamps are
switched on automatically, without any action on
the part of the driver. They may also come on if
rain is detected, at the same time as automatic
operation of the windscreen wipers.
As soon as the brightness returns to a sufficient
level or after the windscreen wipers are switched
off, the lamps are switched off automatically.
Malfunction
In the event of a malfunction of the rain/
sunshine sensor, the vehicle’s lighting
comes on and this warning lamp is displayed in
the instrument panel, accompanied by an
audible signal and/or the display of a message.
Contact a PEUGEOT dealer or a qualified
workshop.
Do not cover the rain/sunshine sensor
located at the top centre of the
Page 64 of 244
62
Safety
► Press the central part of the steering wheel.
Electronic stability control
(ESC)
The electronic stability control programme includes the following systems:
–
Anti-lock braking system (ABS) and Electronic
brake force distribution (EBFD).
–
Emergency braking assistance (EBA).
–
Anti-slip regulation (ASR).
–
Dynamic stability control (DSC).
–
T
railer stability assist (TSA).
Anti-lock braking system (ABS) and Electronic brake
force distribution (EBFD)
These systems enhance the vehicle’s stability
and handling during braking, and enable greater
control while cornering, particularly on poor or
slippery road surfaces.
ABS prevents wheel locking in the event of
emergency braking.
EBFD manages the braking pressure wheel by
wheel.
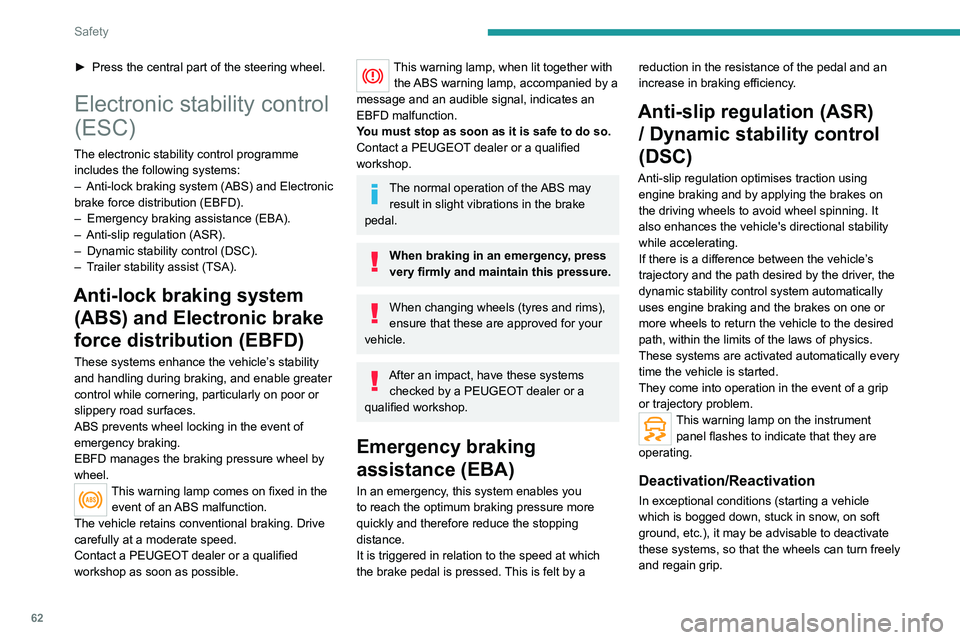
This warning lamp comes on fixed in the
event of an ABS malfunction.
The vehicle retains conventional braking. Drive
carefully at a moderate speed.
Contact a PEUGEOT dealer or a qualified
workshop as soon as possible.
This warning lamp, when lit together with the ABS warning lamp, accompanied by a
message and an audible signal, indicates an
EBFD malfunction.
You must stop as soon as it is safe to do so.
Contact a PEUGEOT dealer or a qualified
workshop.
The normal operation of the ABS may result in slight vibrations in the brake
pedal.
When braking in an emergency, press
very firmly and maintain this pressure.
When changing wheels (tyres and rims),
ensure that these are approved for your
vehicle.
After an impact, have these systems checked by a PEUGEOT dealer or a
qualified workshop.
Emergency braking
assistance (EBA)
In an emergency, this system enables you
to reach the optimum braking pressure more
quickly and therefore reduce the stopping
distance.
It is triggered in relation to the speed at which
the brake pedal is pressed. This is felt by a reduction in the resistance of the pedal and an
increase in braking efficiency.
Anti-slip regulation (ASR)
/ Dynamic stability control
(DSC)
Anti-slip regulation optimises traction using
engine braking and by applying the brakes on
the driving wheels to avoid wheel spinning. It
also enhances the vehicle's directional stability
while accelerating.
If there is a difference between the vehicle’s
trajectory and the path desired by the driver, the
dynamic stability control system automatically
uses engine braking and the brakes on one or
more wheels to return the vehicle to the desired
path, within the limits of the laws of physics.
These systems are activated automatically every
time the vehicle is started.
They come into operation in the event of a grip
or trajectory problem.
This warning lamp on the instrument panel flashes to indicate that they are
operating.
Deactivation/Reactivation
In exceptional conditions (starting a vehicle
which is bogged down, stuck in snow, on soft
ground, etc.), it may be advisable to deactivate
these systems, so that the wheels can turn freely
and regain grip.
Page 72 of 244
70
Safety
Child seat at the front
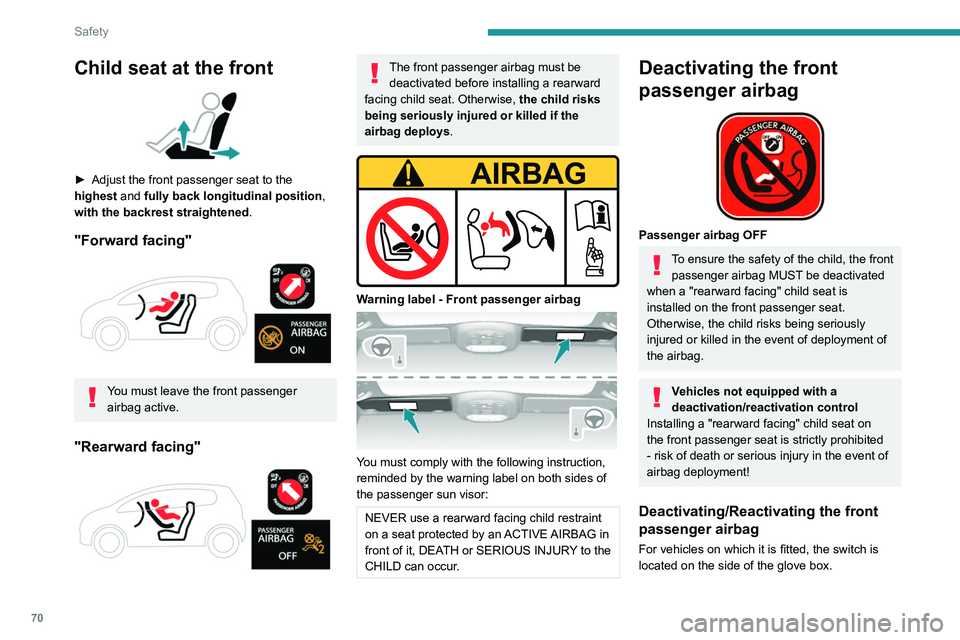
► Adjust the front passenger seat to the
highest and fully back longitudinal position ,
with the backrest straightened.
"Forward facing"
You must leave the front passenger airbag active.
"Rearward facing"
The front passenger airbag must be deactivated before installing a rearward
facing child seat. Otherwise, the child risks
being seriously injured or killed if the
airbag deploys.
Warning label - Front passenger airbag
You must comply with the following instruction,
reminded by the warning label on both sides of
the passenger sun visor:
NEVER use a rearward facing child restraint
on a seat protected by an ACTIVE AIRBAG in
front of it, DEATH or SERIOUS INJURY to the
CHILD can occur.
Deactivating the front
passenger airbag
Passenger airbag OFF
To ensure the safety of the child, the front passenger airbag MUST be deactivated
when a "rearward facing" child seat is
installed on the front passenger seat.
Otherwise, the child risks being seriously
injured or killed in the event of deployment of
the
airbag.
Vehicles not equipped with a
deactivation/reactivation control
Installing a "rearward
facing" child seat on
the front passenger seat is strictly prohibited
- risk of death or serious injury in the event of
airbag deployment!
Deactivating/Reactivating the front
passenger airbag
For vehicles on which it is fitted, the switch is
located on the side of the glove box.
With the ignition off:
► To deactivate the airbag, turn the key in the
switch to the "OFF " position.
► To reactivate it, turn the key to the "ON"
position.
When the ignition is switched on:
This warning lamp comes on and remains lit to signal deactivation.
Or
This warning lamp comes on for about 1 minute to signal activation.
Recommended child seats
Approved range of recommended child seats
secured using a three-point seat belt.
Page 73 of 244
71
Safety
5
With the ignition off:
► T o deactivate the airbag, turn the key in the
switch to the "OFF " position.
►
T
o reactivate it, turn the key to the "ON"
position.
When the ignition is switched on:
This warning lamp comes on and remains lit to signal deactivation.
Or
This warning lamp comes on for about 1 minute to signal activation.
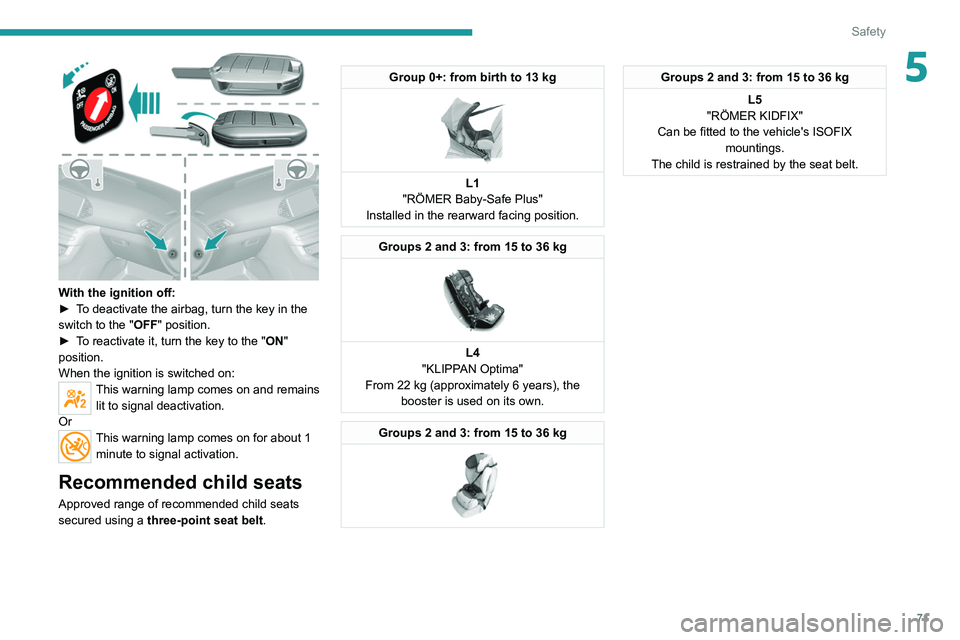
Recommended child seats
Approved range of recommended child seats
secured using a three-point seat belt.
Group 0+: from birth to 13 kg
L1
"RÖMER Baby-Safe Plus"
Installed in the rearward facing position.
Groups 2 and 3: from 15 to 36 kg
L4
"KLIPPAN Optima"
From 22 kg (approximately 6 years), the booster is used on its own.
Groups 2 and 3: from 15 to 36 kg
Groups 2 and 3: from 15 to 36 kg
L5
"RÖMER KIDFIX"
Can be fitted to the vehicle's ISOFIX mountings.
The child is restrained by the seat belt.
Page 84 of 244
82
Driving
Starting with the key
The parking brake must be applied.
► With a manual gearbox in neutral, fully
depress the clutch pedal.
► With an automatic gearbox in mode P or N,
fully depress the brake pedal.
► Insert the key into the ignition switch.
– The system recognises the starting code.
► Unlock the steering column by simultaneously
turning the steering wheel and the key.
In some cases, you may have to apply
some force to turn the wheels (if the
wheels are turned against a kerb, for
example).
► With a petrol engine, operate the starter
motor by turning the key to position 3 without
pressing the accelerator pedal, until the engine
starts. As soon as the engine starts, release the
key.
► With a Diesel engine, turn the key to position
2, ignition on, to operate the engine preheating
system.
► Wait until this warning lamp goes off in
the instrument panel, then turn the key to
position 3 without pressing the accelerator pedal,
to operate the starter motor until the engine
starts. As soon as the engine starts, release the
key.
If the outside temperature is high, let the
engine idle for 1 to 2 minutes after the
vehicle comes to a stop, to help it to cool.
Before setting off
Nose weight
► Distribute the load in the trailer so that the
heaviest items are as close as possible to the
axle and the nose weight (at the point where it
joins your vehicle) approaches the maximum
permitted without exceeding it.
Tyres
► Check the tyre pressures of the towing
vehicle and of the trailer , observing the
recommended pressures.
Lighting
► Check the electrical signalling on the trailer
and the headlamp beam height of your vehicle.
If a genuine PEUGEOT towing device is
used, the rear parking sensors will be
deactivated automatically to avoid the audible
signal.
When driving
Cooling
Towing a trailer uphill causes the coolant
temperature to increase. The maximum towable
load depends on the gradient and the exterior temperature. The fan’s cooling capacity does not
increase with engine speed.
►
Reduce speed and lower the engine speed to
limit the amount of heating produced.
In all cases, pay attention to the coolant
temperature.
If this warning lamp and the STOP
warning lamp come on, stop the
vehicle and switch off the engine as soon as
possible.
Brakes
Braking distances are increased when towing a
trailer. To avoid overheating the brakes, the use
of engine braking is recommended.
Side wind
Bear in mind that the vehicle will be more
susceptible to wind when towing.
Anti-theft protection
Electronic immobiliser
The key contains an electronic chip which has a
special code. When the ignition is switched on,
this code must be recognised in order for starting
to be possible.
This electronic engine immobiliser locks the
engine management system a few minutes after
the ignition is switched off, and prevents the
engine being started by anyone who does not
have the key.
In the event of a fault, you are informed
by illumination of this warning lamp, an
audible signal and a message in the screen.In
this case, your vehicle will not start; contact a
PEUGEOT dealer as soon as possible.
Keep safely, away from your vehicle, the
label attached to the keys given to you
when you purchased your vehicle.
Starting/Switching off the
engine, remote control
key
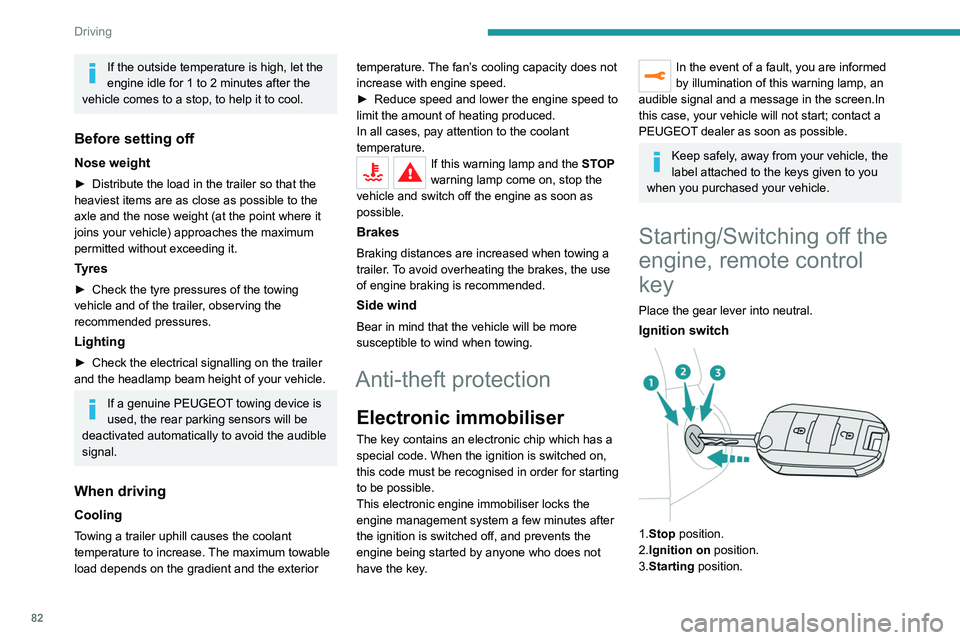
Place the gear lever into neutral.
Ignition switch
1.Stop position.
2.Ignition on position.
3.Starting position.
Page 88 of 244
86
Driving
Automatic application
With the vehicle stationary, the parking brake
is automatically applied when the ignition is
switched off.
Application of the parking brake is
confirmed by illumination of the
brake indicator lamp and the P indicator lamp in
the control lever, accompanied by the display of
a message.
With the engine stalled or in STOP mode
of Stop & Start, automatic application
does not take place.
With automatic operation, you can also
manually apply or release the parking
brake using the control lever.
Manual release
With the ignition on or the engine running, to
release the parking brake:
► press the brake pedal,
► briefly push the control lever.
The complete release of the parking brake is
confirmed by the brake indicator lamp and the
P indicator lamp in the control lever going off,
accompanied by the display of a message and
an audible signal until the doors are closed.
If you push the control lever without
pressing the brake pedal, the parking
the parking brake is still on or has not been fully
released.
When parking on a slope, direct your
wheels against the kerb, apply the
parking brake, engage a gear and switch off
the ignition.
Pressing the brake pedal facilitates the
application and release of the manual
parking brake.
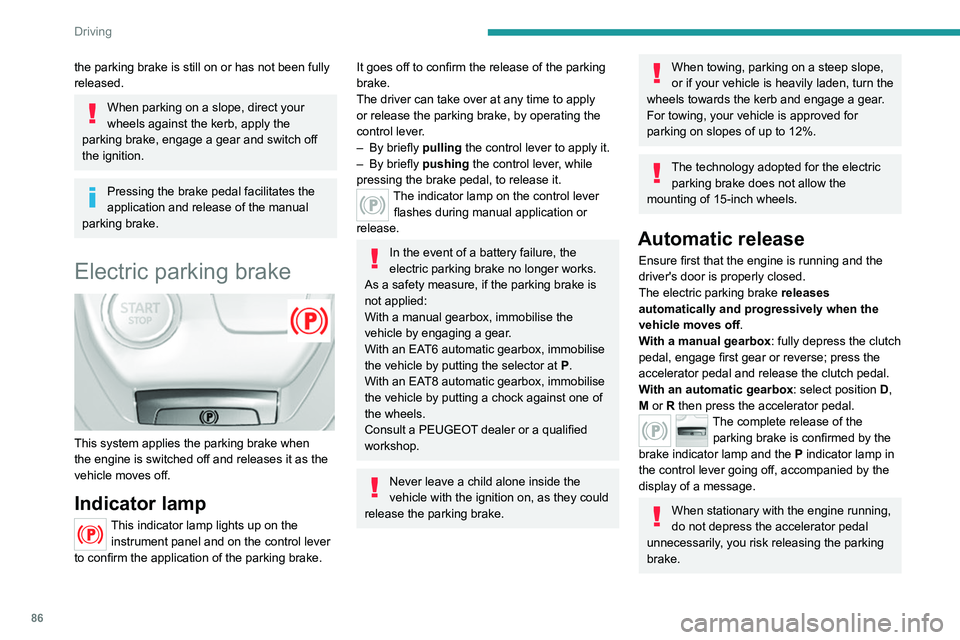
Electric parking brake
This system applies the parking brake when
the engine is switched off and releases it as the
vehicle moves off.
Indicator lamp
This indicator lamp lights up on the instrument panel and on the control lever
to confirm the application of the parking brake.
It goes off to confirm the release of the parking
brake.
The driver can take over at any time to apply
or release the parking brake, by operating the
control lever.
–
By briefly
pulling the control lever to apply it.
–
By briefly
pushing the control lever, while
pressing the brake pedal, to release it.
The indicator lamp on the control lever flashes during manual application or
release.
In the event of a battery failure, the
electric parking brake no longer works.
As a safety measure, if the parking brake is
not applied:
With a manual gearbox, immobilise the
vehicle by engaging a gear.
With an EAT6
automatic gearbox, immobilise
the vehicle by putting the selector at
P
.
With an EAT8 automatic gearbox, immobilise
the vehicle by putting a chock against one of
the wheels.
Consult a PEUGEOT dealer or a qualified
workshop.
Never leave a child alone inside the
vehicle with the ignition on, as they could
release the parking brake.
When towing, parking on a steep slope,
or if your vehicle is heavily laden, turn the
wheels towards the kerb and engage a gear.
For towing, your vehicle is approved for
parking on slopes of up to 12%.
The technology adopted for the electric parking brake does not allow the
mounting of 15-inch wheels.
Automatic release
Ensure first that the engine is running and the
driver's door is properly closed.
The electric parking brake releases
automatically and progressively when the
vehicle moves off.
With a manual gearbox: fully depress the clutch
pedal, engage first gear or reverse; press the
accelerator pedal and release the clutch pedal.
With an automatic gearbox: select position D,
M or R then press the accelerator pedal.
The complete release of the parking brake is confirmed by the
brake indicator lamp and the P indicator lamp in
the control lever going off, accompanied by the
display of a message.
When stationary with the engine running,
do not depress the accelerator pedal
unnecessarily, you risk releasing the parking
brake.
Page 93 of 244
91
Driving
6M. +/-Manual operation
►
T o shift up/down through the gears,
push the control backwards/forwards.
Steering mounted controls
(Only for vehicles equipped with the Driver
Sport Pack.)
Press behind the right control to increase the
gear.
Press behind the left control to decrease the
gear.
The steering controls do not allow neutral to be selected and reverse gear to be
engaged or disengaged.
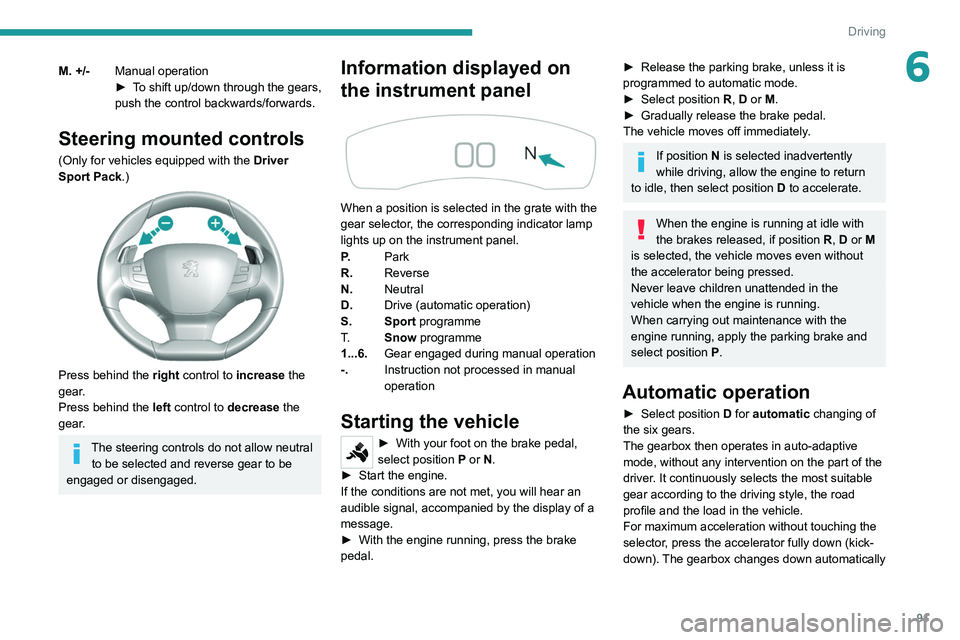
Information displayed on
the instrument panel
When a position is selected in the grate with the
gear selector, the corresponding indicator lamp
lights up on the instrument panel.
P. Park
R. Reverse
N. Neutral
D. Drive (automatic operation)
S. Sport programme
T. Snow programme
1...6. Gear engaged during manual operation
-. Instruction not processed in manual
operation
Starting the vehicle
► With your foot on the brake pedal,
select position P
or N.
►
Start the engine.
If the conditions are not met, you will hear an
audible signal, accompanied by the display of a
message.
►
With the engine running, press the brake
pedal.
► Release the parking brake, unless it is
programmed to automatic mode.
►
Select position R
, D or M.
►
Gradually release the brake pedal.
The vehicle moves off immediately
.
If position N is selected inadvertently
while driving, allow the engine to return
to idle, then select position D to accelerate.
When the engine is running at idle with
the brakes released, if position R, D or M
is selected, the vehicle moves even without
the accelerator being pressed.
Never leave children unattended in the
vehicle when the engine is running.
When carrying out maintenance with the
engine running, apply the parking brake and
select position P.
Automatic operation
► Select position D for automatic changing of
the six gears.
The gearbox then operates in auto-adaptive
mode, without any intervention on the part of the
driver. It continuously selects the most suitable
gear according to the driving style, the road
profile and the load in the vehicle.
For maximum acceleration without touching the
selector, press the accelerator fully down (kick-
down). The gearbox changes down automatically