seat adjustment PEUGEOT 308 2023 Owners Manual
[x] Cancel search | Manufacturer: PEUGEOT, Model Year: 2023, Model line: 308, Model: PEUGEOT 308 2023Pages: 260, PDF Size: 7.97 MB
Page 4 of 260
2
Contents
■
Overview
■
Eco-driving
1Dashboard instrumentsDriver information 10
Digital instrument panels 10
Warning and indicator lamps 11
Indicators 17
Manual test 20
Total distance recorder 21
Trip computer 21
10-inch touch screen 22
i-Toggles 24
Remotely operable additional functions
(Rechargeable hybrid)
24
2AccessElectronic key with remote control function
and built-in key 26
Proximity Keyless Entry and Start 28
Central locking 30
Back-up procedures 31
Doors 33
Boot 33
Motorised tailgate (SW) 33
Alarm 37
Electric windows 39
Sunroof 40
3Ease of use and comfortDriving position 42
Front seats 43
Steering wheel adjustment 47
Heated steering wheel 47
Mirrors 47
Rear bench seat 49
Heating and Ventilation 51
Dual-zone automatic air conditioning 52
Front demisting/defrosting 55
Rear screen demisting/defrosting 55
Heated windscreen 55
Temperature pre-conditioning
(Rechargeable hybrid)
55
Front fittings 56
Courtesy lamps 59
Interior ambient lighting 60
Rear fittings 60
Boot fittings 61
4Lighting and visibilityExterior lighting control stalk 65
Direction indicators 66
Headlamp beam height adjustment 66
Automatic illumination of headlamps 67
Guide-me-home and welcome lighting 67
Automatic lighting systems - General
recommendations
68
Automatic headlamp dipping 68
Peugeot Matrix LED Technology 2.0 69
Wiper control stalk 71
Intermittent wipers 73
Automatic wipers 73
Changing a wiper blade 74
5SafetyGeneral safety recommendations 76
Hazard warning lamps 76
Horn 77
Pedestrian horn (Rechargeable hybrid) 77
Emergency or assistance 77
Electronic stability control (ESC) 79
Seat belts 82
Airbags 84
Child seats 86
Deactivating the front passenger airbag 88
ISOFIX child seats 89
i-Size child seats 90
Installing child seats 91
Child lock 93
6DrivingDriving recommendations 94
Starting/switching off the engine 95
Starting rechargeable hybrid vehicles 96
Electric parking brake 98
Manual gearbox 100
Automatic gearbox 100
Driving modes 103
Hill start assist 104
Gear shift indicator 105
Stop & Start 105
Tyre under-inflation detection 107
Driving and manoeuvring aids -
General recommendations
108
Steering wheel with hands-on detection 11 0
Shortcuts for driving aids 11 0
Road signs recognition 111
Speed limiter 11 4
Cruise control - Specific recommendations 11 6 CarM an uals 2 .c o m
Page 25 of 260
23
Dashboard instruments
1► Depending on the pages displayed on the
screen, with or without the context menu, scroll
the text by swiping with your finger
, as with a
smartphone.
Show/Hide context menu
Return to the previous page
►
T
o change the status of a function, press the
description for the corresponding line (change
confirmed by the slider moving to the right/left:
function activated/deactivated).
Access additional information on the function
Access to function parameters
Adding/Removing shortcuts
Short press, ignition off: system on/off.
Short press, ignition on: mute/restore
sound.
Long press, ignition on: start standby mode
(mute sound, screens and clock display off).
Rotation: volume adjustment.
Applications
Press this button to access the
applications wall.
From any page, press the touch screen
with three fingers to display the
applications wall. To obtain information about the other
applications not listed here, refer to the sections
describing the audio and telematic systems.
ADAS
Activation/Deactivation and configuration
of the driving aid functions.
Climate
Settings for temperature, air flow, etc.
For more information on Dual-zone automatic
air conditioning , refer to the corresponding
section.
Activation/Deactivation of the heated steering
wheel.
For more information on the Heated steering
wheel, refer to the corresponding section.
Seats
Activation/Deactivation and configuration
of the seat comfort functions (heating and
massages).
For more information on the Heated seats
or on the Multi-point massages, refer to the
corresponding section.
Settings
Main settings for the audio system, touch
screen and digital instrument panel.
Activation/Deactivation and configuration of
the exterior lighting, vehicle access and safety
functions.
Energy
Access to the rechargeable hybrid system
features (energy flow, consumption statistics,
deferred charging, e
- SAVE function).
Energy application
Energy Flow
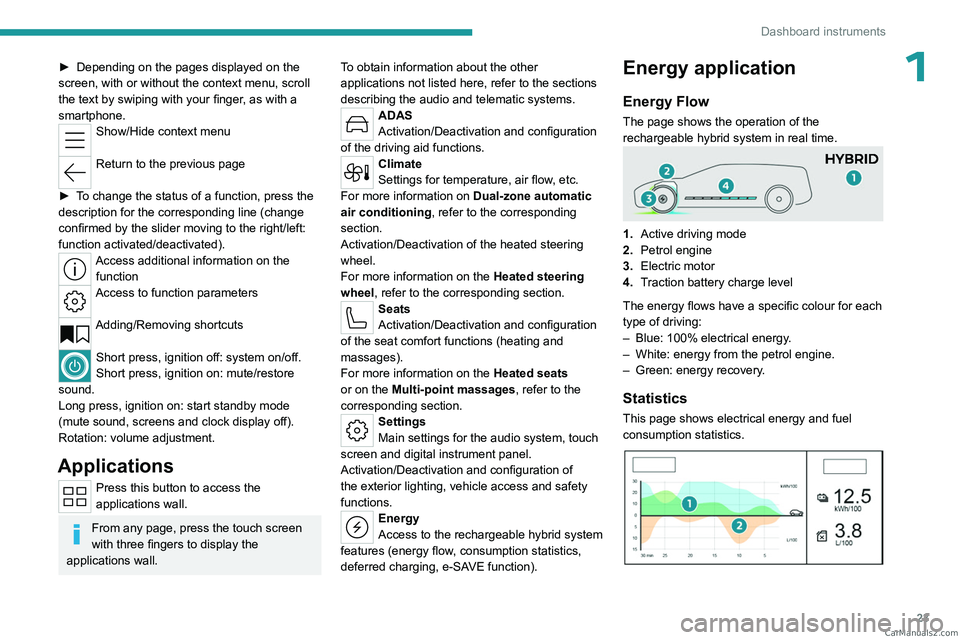
The page shows the operation of the
rechargeable hybrid system in real time.
1.Active driving mode
2. Petrol engine
3. Electric motor
4. Traction battery charge level
The energy flows have a specific colour for each
type of driving:
–
Blue: 100% electrical energy
.
–
White: energy from the petrol engine.
–
Green: energy recovery
.
Statistics
This page shows electrical energy and fuel
consumption statistics.
CarM an uals 2 .c o m
Page 44 of 260
42
Ease of use and comfort
Driving position
Correct seating position
Adopting a good driving position contributes to
improving driver comfort and protection.
It also optimises interior and exterior visibility as
well as access to controls.
Certain seat adjustments described in this
section depend on the trim level and the country
in which the vehicle is sold.
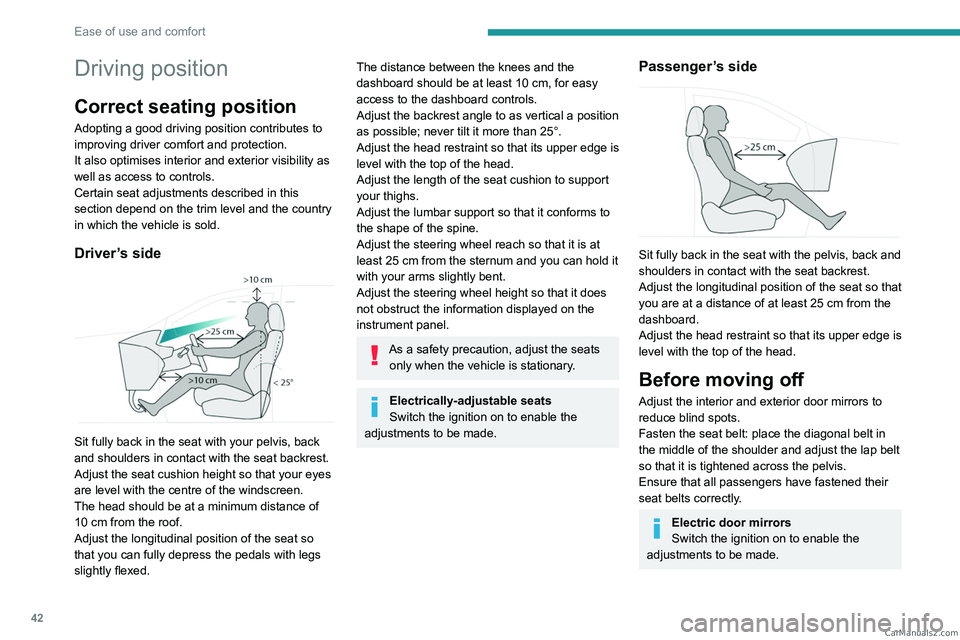
Driver’s side
Sit fully back in the seat with your pelvis, back
and shoulders in contact with the seat backrest.
Adjust the seat cushion height so that your eyes
are level with the centre of the windscreen.
The head should be at a minimum distance of
10 cm from the roof.
Adjust the longitudinal position of the seat so
that you can fully depress the pedals with legs
slightly flexed.
The distance between the knees and the
dashboard should be at least 10 cm, for easy
access to the dashboard controls.
Adjust the backrest angle to as vertical a position
as possible; never tilt it more than 25°.
Adjust the head restraint so that its upper edge is
level with the top of the head.
Adjust the length of the seat cushion to support
your thighs.
Adjust the lumbar support so that it conforms to
the shape of the spine.
Adjust the steering wheel reach so that it is at
least 25
cm from the sternum and you can hold it
with your arms slightly bent.
Adjust the steering wheel height so that it does
not obstruct the information displayed on the
instrument panel.
As a safety precaution, adjust the seats only when the vehicle is stationary.
Electrically-adjustable seats
Switch the ignition on to enable the
adjustments to be made.
Passenger’s side
Sit fully back in the seat with the pelvis, back and
shoulders in contact with the seat backrest.
Adjust the longitudinal position of the seat so that
you are at a distance of at least 25
cm from the
dashboard.
Adjust the head restraint so that its upper edge is
level with the top of the head.
Before moving off
Adjust the interior and exterior door mirrors to
reduce blind spots.
Fasten the seat belt: place the diagonal belt in
the middle of the shoulder and adjust the lap belt
so that it is tightened across the pelvis.
Ensure that all passengers have fastened their
seat belts correctly.
Electric door mirrors
Switch the ignition on to enable the
adjustments to be made. CarM an uals 2 .c o m
Page 45 of 260
43
Ease of use and comfort
3When driving
Maintain a good driving position and hold the
steering wheel with both hands at the 'quarter to
three' position, so that you can easily and quickly
reach the controls behind and near the steering
wheel.
Never adjust the seats or steering wheel
when driving.
Always keep your feet on the floor.
Front seats
Before moving the seat backwards,
ensure that there is no person or object
that might prevent the full travel of the seat.
There is a risk of trapping or pinching
passengers if present in the rear seats or of
jamming the seat if large objects are placed
on the floor behind the seat.
Front head restraints
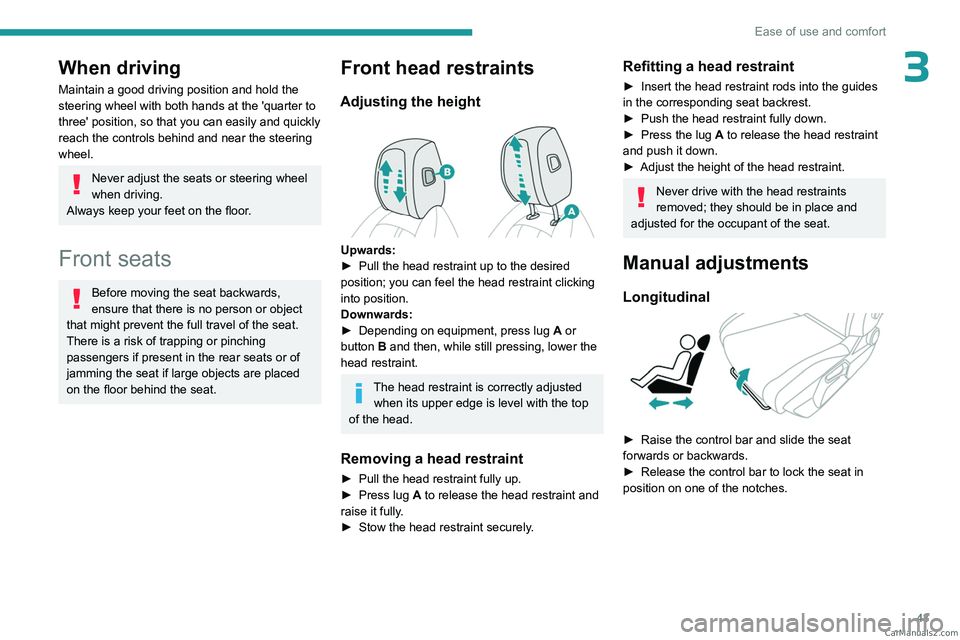
Adjusting the height
Upwards:
► Pull the head restraint up to the desired
position; you can feel the head restraint clicking
into position.
Downwards:
►
Depending on equipment, press lug A
or
button B and then, while still pressing, lower the
head restraint.
The head restraint is correctly adjusted when its upper edge is level with the top
of the head.
Removing a head restraint
► Pull the head restraint fully up.
► Press lug A to release the head restraint and
raise it fully.
►
Stow the head restraint securely
.
Refitting a head restraint
► Insert the head restraint rods into the guides
in the corresponding seat backrest.
►
Push the head restraint fully down.
►
Press the lug
A to release the head restraint
and push it down.
►
Adjust the height of the head restraint.
Never drive with the head restraints
removed; they should be in place and
adjusted for the occupant of the seat.
Manual adjustments
Longitudinal
► Raise the control bar and slide the seat
forwards or backwards.
►
Release the control bar to lock the seat in
position on one of the notches. CarM an uals 2 .c o m
Page 46 of 260
44
Ease of use and comfort
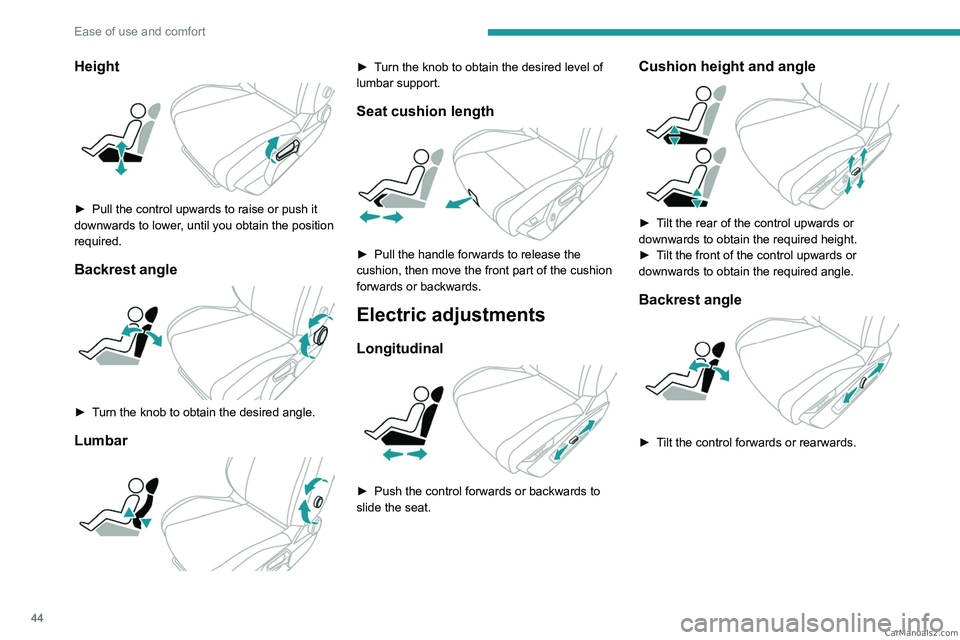
Height
► Pull the control upwards to raise or push it
downwards to lower , until you obtain the position
required.
Backrest angle
► Turn the knob to obtain the desired angle.
Lumbar
► Turn the knob to obtain the desired level of
lumbar support.
Seat cushion length
► Pull the handle forwards to release the
cushion, then move the front part of the cushion
forwards or backwards.
Electric adjustments
Longitudinal
► Push the control forwards or backwards to
slide the seat.
Cushion height and angle
► Tilt the rear of the control upwards or
downwards to obtain the required height.
►
T
ilt the front of the control upwards or
downwards to obtain the required angle.
Backrest angle
► Tilt the control forwards or rearwards. CarM an uals 2 .c o m
Page 47 of 260
45
Ease of use and comfort
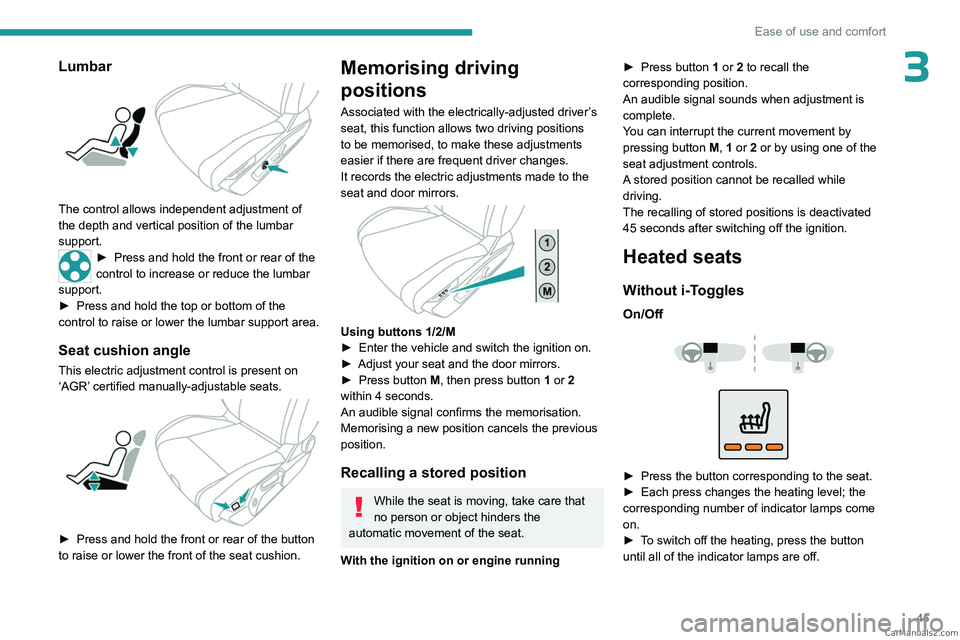
3Lumbar
The control allows independent adjustment of
the depth and vertical position of the lumbar
support.
► Press and hold the front or rear of the
control to increase or reduce the lumbar
support.
►
Press and hold the top or bottom of the
control to raise or lower the lumbar support area.
Seat cushion angle
This electric adjustment control is present on
‘AGR’ certified manually-adjustable seats.
► Press and hold the front or rear of the button
to raise or lower the front of the seat cushion.
Memorising driving
positions
Associated with the electrically-adjusted driver’s
seat, this function allows two driving positions
to be memorised, to make these adjustments
easier if there are frequent driver changes.
It records the electric adjustments made to the
seat and door mirrors.
Using buttons 1/2/M
► Enter the vehicle and switch the ignition on.
►
Adjust your seat and the door mirrors.
►
Press button
M, then press button 1 or 2
within 4 seconds.
An audible signal confirms the memorisation.
Memorising a new position cancels the previous
position.
Recalling a stored position
While the seat is moving, take care that
no person or object hinders the
automatic movement of the seat.
With the ignition on or engine running ►
Press button
1 or 2 to recall the
corresponding position.
An audible signal sounds when adjustment is
complete.
You can interrupt the current movement by
pressing button M, 1 or 2 or by using one of the
seat adjustment controls.
A stored position cannot be recalled while
driving.
The recalling of stored positions is deactivated
45 seconds after switching off the ignition.
Heated seats
Without i-Toggles
On/Off
► Press the button corresponding to the seat.
► Each press changes the heating level; the
corresponding number of indicator lamps come
on.
►
T
o switch off the heating, press the button
until all of the indicator lamps are off. CarM an uals 2 .c o m
Page 48 of 260
46
Ease of use and comfort
The system status is memorised when the
ignition is switched off.
With i-Toggles
Activation/Deactivation
In the Seats touch screen application,
select the Seats tab.
►
Select the driver or passenger seat.
The corresponding page is displayed with the
last memorised settings.
If the settings are suitable, press to
activate/deactivate the function in the
Seats application.
If no action is taken, the display returns to its
initial state.
The function status is not memorised when the
ignition is switched off.
Changing settings
► In the Seats page, select the seat concerned.
► Select an intensity from the three preset
levels: "
1" (Low), "2" (Normal) or "3" (High).
The settings are memorised when the ignition is
switched off.
Do not use the function when the seat
is not occupied.
Reduce the heating intensity as soon as
possible.
When the seat and passenger compartment
have reached a satisfactory temperature,
switch the function off; reducing electrical
consumption in turn decreases energy
consumption.
Prolonged use of heated seats is not
recommended for people with sensitive
skin.
There is a risk of burns for people whose
perception of heat is impaired (e.g.
illness,
taking medication).
To keep the heated pad intact and to prevent
a short circuit:
–
Do not place heavy or sharp objects on the
seat.
–
Do not kneel or stand on the seat.
–
Do not spill liquids onto the seat.
–
Never use the heating function if the seat
is damp.
Multipoint massage
System with a choice of type of massage and
adjustment of its intensity.
This system operates with the engine running, as
well as in STOP mode of the
Stop & Start.
Activation/Deactivation
In the Seats touch screen application,
select the Massage tab.
►
Select the driver or passenger seat.
The corresponding page is displayed with the
last memorised settings.
If the settings are suitable, press to
activate/deactivate the function in the
Seats application.
If no action is taken, the display returns to its
initial state.
The function status is not memorised when the
ignition is switched off.
Changing settings
► In the Massage page, select the seat
concerned.
►
Select a massage intensity from the three
preset levels: "
1" (Low), "2" (Normal) or "3"
(High).
►
Select another type of massage from those
offered.
The modifications are taken into account
immediately and memorised when the ignition is
switched off.
Once activated, the system starts a one hour
massage cycle, made up of sequences of 6
minutes of massage followed by 3 minutes at
rest.
The system stops automatically at the end of the
cycle. CarM an uals 2 .c o m
Page 49 of 260
47
Ease of use and comfort
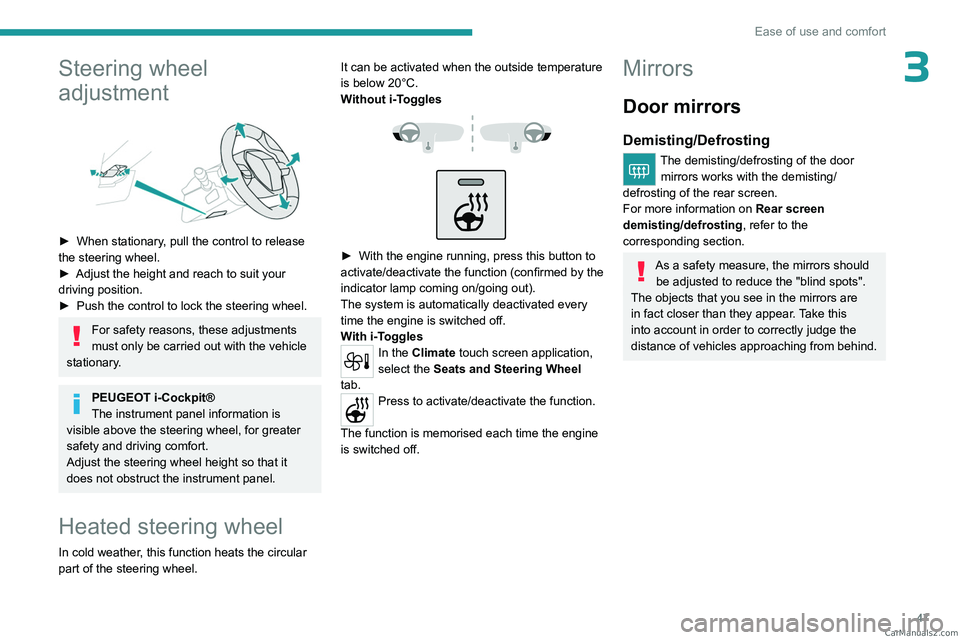
3Steering wheel
adjustment
► When stationary, pull the control to release
the steering wheel.
►
Adjust the height and reach to suit your
driving position.
►
Push the control to lock the steering wheel.
For safety reasons, these adjustments
must only be carried out with the vehicle
stationary.
PEUGEOT i-Cockpit®
The instrument panel information is
visible above the steering wheel, for greater
safety and driving comfort.
Adjust the steering wheel height so that it
does not obstruct the instrument panel.
Heated steering wheel
In cold weather, this function heats the circular
part of the steering wheel. It can be activated when the outside temperature
is below 20°C.
Without
i-Toggles
► With the engine running, press this button to
activate/deactivate the function (confirmed by the
indicator lamp coming on/going out).
The system is automatically deactivated every
time the engine is switched off.
W
ith i-Toggles
In the Climate touch screen application,
select the Seats and Steering Wheel
tab.
Press to activate/deactivate the function.
The function is memorised each time the engine
is switched off.
Mirrors
Door mirrors
Demisting/Defrosting
The demisting/defrosting of the door mirrors works with the demisting/
defrosting of the rear screen.
For more information on Rear screen
demisting/defrosting , refer to the
corresponding section.
As a safety measure, the mirrors should be adjusted to reduce the "blind spots".
The objects that you see in the mirrors are
in fact closer than they appear. Take this
into account in order to correctly judge the
distance of vehicles approaching from behind. CarM an uals 2 .c o m
Page 55 of 260
53
Ease of use and comfort
3Temperature
synchronisation
The driver side temperature setting is applied to
the passenger side.
►
Press button
6-SYNC to activate/deactivate
the function.
The function is automatically deactivated if the
passenger uses their temperature adjustment
buttons.
Automatic air conditioning
This automatic mode ensures optimum
management of the passenger compartment
temperature, air flow and air distribution, based
on the selected comfort level.
►
Press button
5-AUTO to activate/deactivate
the automatic mode of the air conditioning
system.
The indicator lamp in the button lights up
when the air conditioning system is operating
automatically.
The intensity of the automatic air conditioning
is modulated by choosing one of the following
settings:
–
AUT
O SOFT : provides soft and quiet
operation by limiting air flow.
–
AUT
O NORMAL: offers the best compromise
between a comfortable temperature and quiet
operation (default setting).
–
AUT
O FAST: provides dynamic and efficient
air distribution.
To change the AUTO mode, press button
5-AUTO successively.
To ensure passenger comfort in the rear seats,
favour settings AUTO NORMAL and AUTO
FAST.
In cold weather with the engine cold, the
air flow is increased gradually until the
comfort setting has been reached, in order to
limit the delivery of cold air into the passenger
compartment.
On entering the vehicle, if the interior
temperature is much colder or warmer than
the comfort setting requested, there is no
need to alter the value displayed to more
quickly reach the required level of comfort.
The system automatically corrects the
temperature difference as quickly as possible.
Automatic air conditioning manual settings
It is possible to manually adjust one or more
of these functions, while the system retains
automatic control of the other functions:
–
air flow
.
–
air distribution.
The indicator lamp in the " AUT
O” button goes
out if a setting is changed.
►
Press button
5-AUTO again to reactivate
automatic air conditioning.
Adjusting the air flow
Depending on version:
► Press one of the buttons 2 (fan) to decrease
or increase the air flow.
►
Press one of the buttons
2 (fan) or drag
horizontally to increase or decrease air flow.
It is also possible to directly press one of the
values.
Switching off the air conditioning
system
When the air flow is reduced to a minimum,
ventilation stops.
“OFF" is displayed alongside the fan.
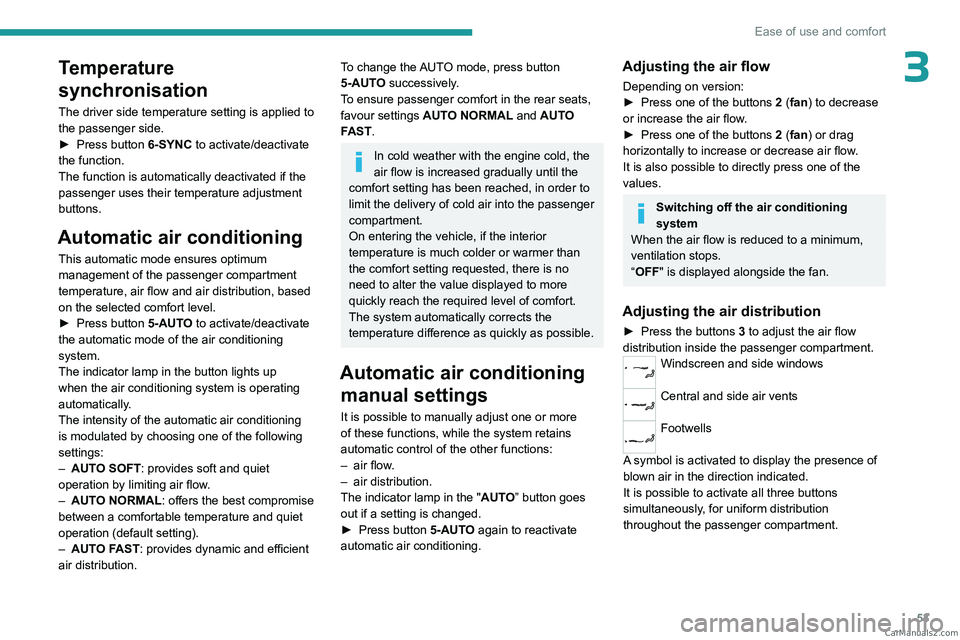
Adjusting the air distribution
► Press the buttons 3 to adjust the air flow
distribution inside the passenger compartment.
Windscreen and side windows
Central and side air vents
Footwells
A symbol is activated to display the presence of
blown air in the direction indicated.
It is possible to activate all three buttons
simultaneously, for uniform distribution
throughout the passenger compartment. CarM an uals 2 .c o m
Page 62 of 260
60
Ease of use and comfort
Reading lamps
► With the ignition on, operate the
corresponding switch.
Take care not to place anything in contact with the courtesy lamps.
Interior ambient lighting
The interior ambient lighting casts soft, coloured
lighting in the passenger compartment, when low
lighting conditions are detected.
By default, the colour of the interior ambient
lighting is linked to that of the screens,
depending on the driving mode selected.
Activation/deactivation and adjustment of the brightness are set via the Settings >
Brightness
touch screen application.
The colour is selected via the Settings >
Customization touch screen application.
Rear fittings
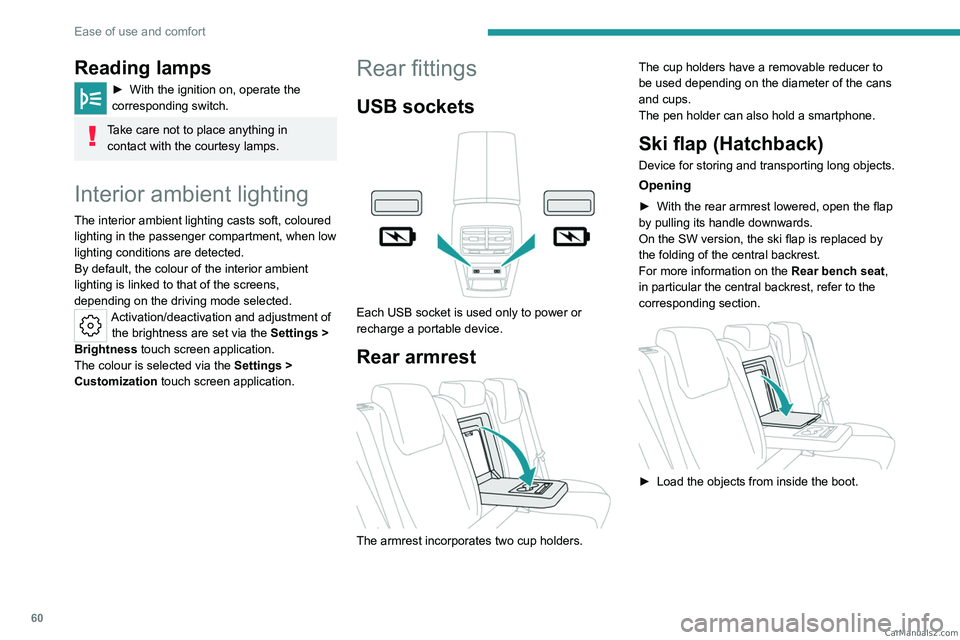
USB sockets
Each USB socket is used only to power or
recharge a portable device.
Rear armrest
The armrest incorporates two cup holders. The cup holders have a removable reducer to
be used depending on the diameter of the cans
and cups.
The pen holder can also hold a smartphone.
Ski flap (Hatchback)
Device for storing and transporting long objects.
Opening
► With the rear armrest lowered, open the flap
by pulling its handle downwards.
On the SW version, the ski flap is replaced by
the folding of the central backrest.
For more information on the Rear bench seat,
in particular the central backrest, refer to the
corresponding section.
► Load the objects from inside the boot. CarM an uals 2 .c o m