ECU PEUGEOT 5008 2016 Owners Manual
[x] Cancel search | Manufacturer: PEUGEOT, Model Year: 2016, Model line: 5008, Model: PEUGEOT 5008 2016Pages: 364, PDF Size: 12.98 MB
Page 55 of 364
53
5008_en_Chap02_ouvertures_ed01-2015
Electric windows
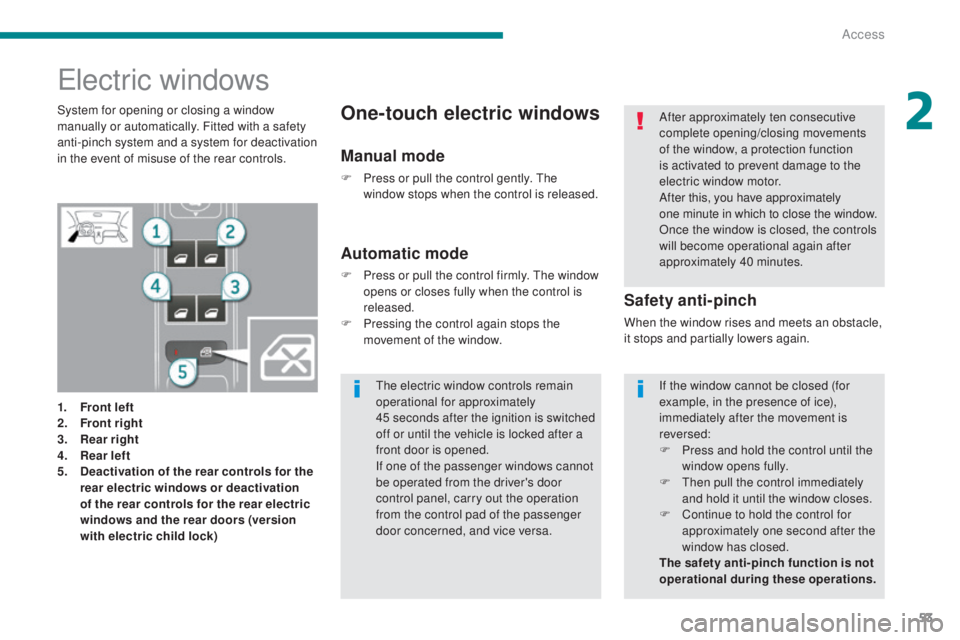
1. Front lef t
2. Front right
3.
R
ear right
4.
R
ear left
5.
D
eactivation of the rear controls for the
rear electric windows or deactivation
of the rear controls for the rear electric
windows and the rear doors (version
with electric child lock)
Safety anti-pinch
When the window rises and meets an obstacle,
it stops and partially lowers again.
Automatic mode
F Press or pull the control firmly. The window opens or closes fully when the control is
released.
F
P
ressing the control again stops the
movement of the window.
One-touch electric windowsSystem for opening or closing a window
manually or automatically. Fitted with a safety
anti-pinch system and a system for deactivation
in the event of misuse of the rear controls.
Manual mode
F Press or pull the control gently. The window stops when the control is released. After approximately ten consecutive
complete opening/closing movements
of the window, a protection function
is activated to prevent damage to the
electric window motor.
After this, you have approximately
one
minute in which to close the window.
Once the window is closed, the controls
will become operational again after
approximately 40 minutes.
If the window cannot be closed (for
example, in the presence of ice),
immediately after the movement is
reversed:
F
P
ress and hold the control until the
window opens fully.
F
T
hen pull the control immediately
and hold it until the window closes.
F
C
ontinue to hold the control for
approximately one second after the
window has closed.
The safety anti-pinch function is not
operational during these operations.
The electric window controls remain
operational for approximately
45
seconds after the ignition is switched
off or until the vehicle is locked after a
front door is opened.
If one of the passenger windows cannot
be operated from the driver's door
control panel, carry out the operation
from the control pad of the passenger
door concerned, and vice versa.
2
Access
Page 77 of 364
75
5008_en_Chap03_confort_ed01-2015
Rigid panel
Each 2nd row seat backrest has a rigid panel
attached.
This panel enables you to:
-
h
ave a continuous load sur face in the boot,
whatever the positions of the seats,
-
a
void having objects sliding under the
2
nd row seats. 30 kg maximum on each
pan el.
Releasing / Securing the rigid
panel
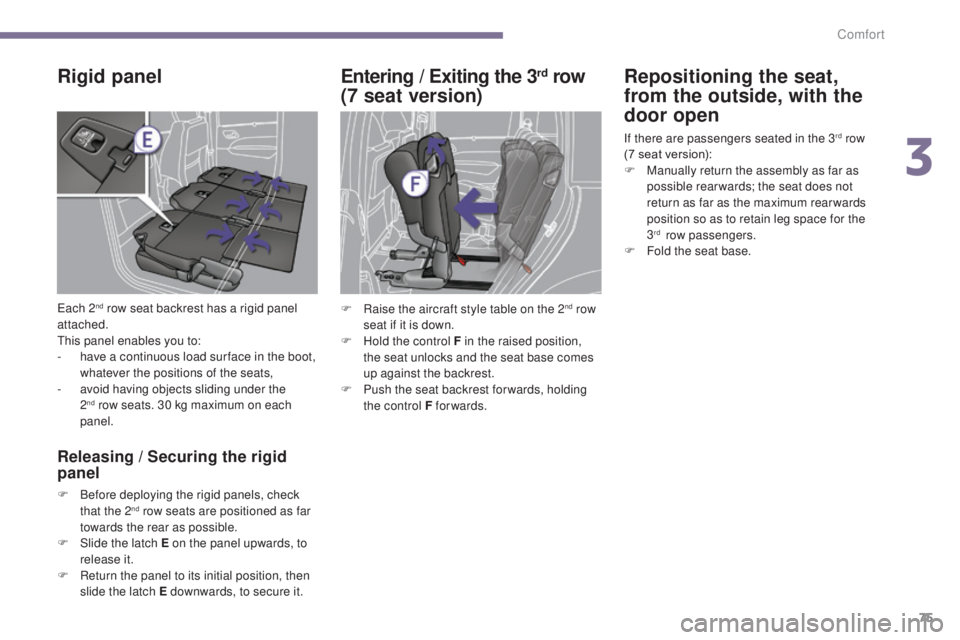
F Before deploying the rigid panels, check that the 2nd row seats are positioned as far
towards the rear as possible.
F
S
lide the latch E on the panel upwards, to
release it.
F
R
eturn the panel to its initial position, then
slide the latch E downwards, to secure it.
Entering / Exiting the 3rd row
(7 seat version) Repositioning the seat,
from the outside, with the
door open
If there are passengers seated in the 3rd row
(7 seat version):
F
M
anually return the assembly as far as
possible rear wards; the seat does not
return as far as the maximum rear wards
position so as to retain leg space for the
3
rd row passengers.
F
F
old the seat base.
F
R
aise the aircraft style table on the 2
nd row
seat if it is down.
F
H
old the control F in the raised position,
the seat unlocks and the seat base comes
up against the backrest.
F
P
ush the seat backrest for wards, holding
the control F forwards.
3
Comfort
Page 104 of 364
102
5008_en_Chap05_amenagements_ed01-2015
Mats
Refitting
To refit the mat on the driver's side:
F p osition the mat correctly,
F
r
efit the fixings by pressing,
F
c
heck that the mat is secured correctly.
Fitting
When fitting the mat for the first time, on the
driver's side use only the fixings provided in the
wallet attached.
The other mats are simply placed on the carpet.
Removal
To remove the mat on the driver's side:
F m ove the seat as far back as possible,
F
un
clip the fixings,
F
r
emove the mat.
12 V accessory
sockets
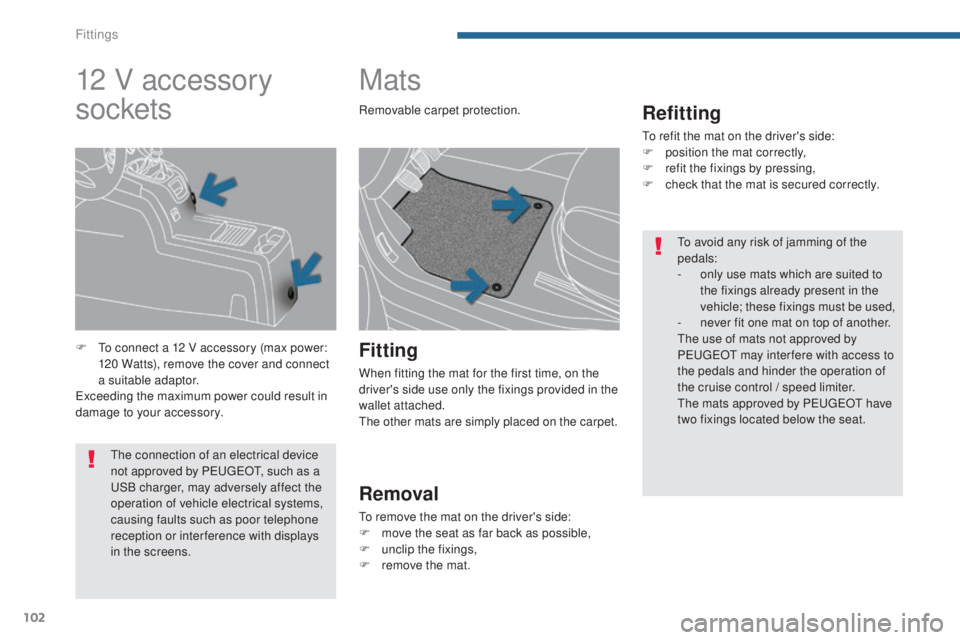
F To connect a 12 V accessory (max power: 120 Watts), remove the cover and connect
a suitable adaptor.
Exceeding the maximum power could result in
damage to your accessory. Removable carpet protection.
To avoid any risk of jamming of the
pedals:
-
o
nly use mats which are suited to
the fixings already present in the
vehicle; these fixings must be used,
-
n
ever fit one mat on top of another.
The use of mats not approved by
PEUGEOT may inter fere with access to
the pedals and hinder the operation of
the cruise control / speed limiter.
The mats approved by PEUGEOT have
two fixings located below the seat.
The connection of an electrical device
not approved by PEUGEOT, such as a
USB charger, may adversely affect the
operation of vehicle electrical systems,
causing faults such as poor telephone
reception or inter ference with displays
in the screens.
Fittings
Page 112 of 364
110
5008_en_Chap05_amenagements_ed01-2015
Roller load space cover
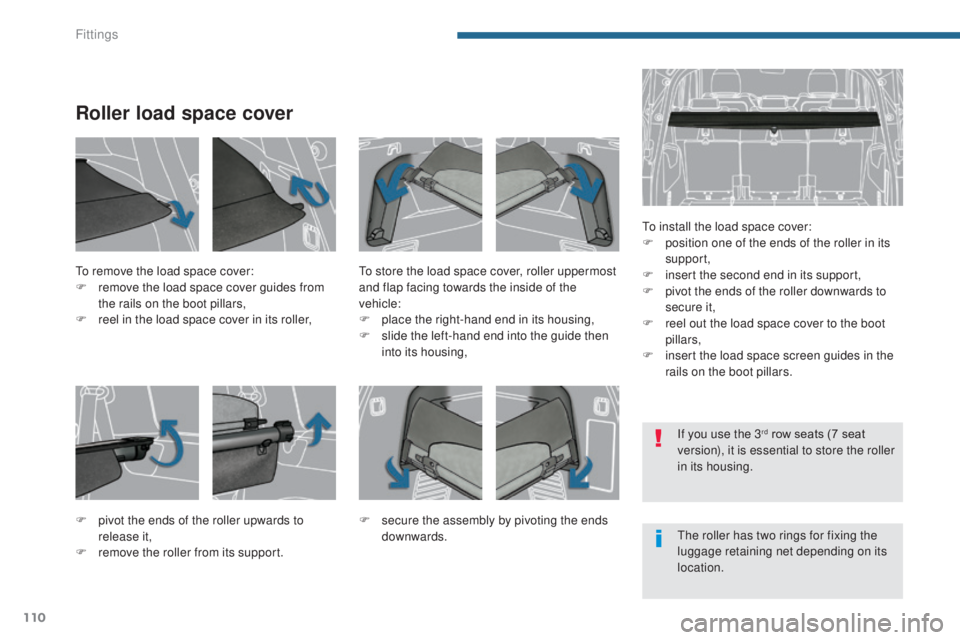
To install the load space cover:
F p osition one of the ends of the roller in its
support,
F
i
nsert the second end in its support,
F
p
ivot the ends of the roller downwards to
secure it,
F
r
eel out the load space cover to the boot
pillars,
F
i
nsert the load space screen guides in the
rails on the boot pillars.
To remove the load space cover:
F
r
emove the load space cover guides from
the rails on the boot pillars,
F
r
eel in the load space cover in its roller, To store the load space cover, roller uppermost
and flap facing towards the inside of the
vehicle:
F
p
lace the right-hand end in its housing,
F
s
lide the left-hand end into the guide then
into its housing,
F
p
ivot the ends of the roller upwards to
release it,
F
r
emove the roller from its support. F
se
cure the assembly by pivoting the ends
downwards. The roller has two rings for fixing the
luggage retaining net depending on its
location. If you use the 3
rd row seats (7 seat
version), it is essential to store the roller
in its housing.
Fittings
Page 114 of 364
112
5008_en_Chap05_amenagements_ed01-2015
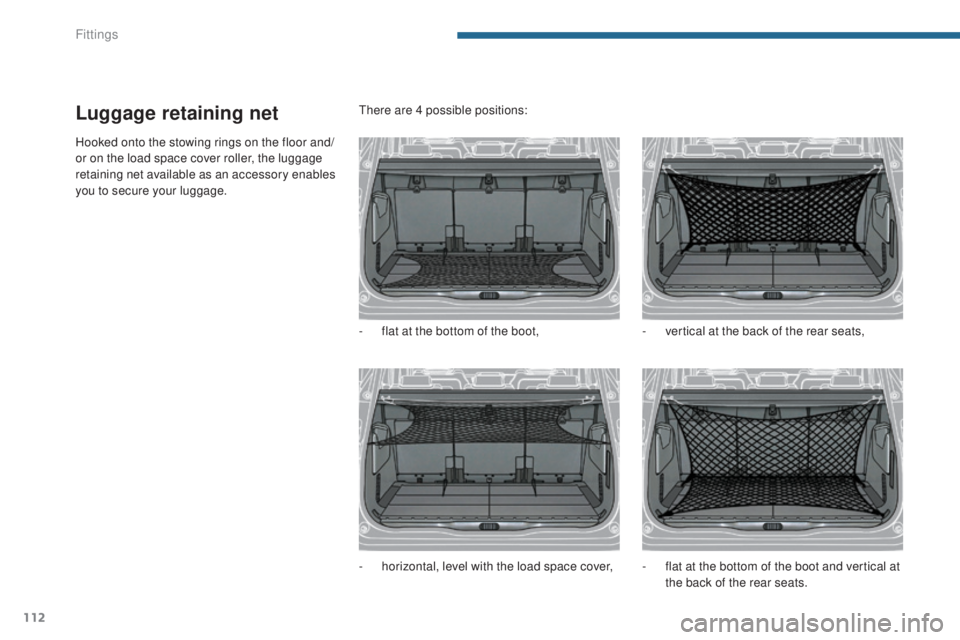
Luggage retaining net
Hooked onto the stowing rings on the floor and/
or on the load space cover roller, the luggage
retaining net available as an accessory enables
you to secure your luggage.There are 4 possible positions:
-
f
lat at the bottom of the boot,
-
h
orizontal, level with the load space cover,-
v
ertical at the back of the rear seats,
-
f
lat at the bottom of the boot and vertical at
the back of the rear seats.
Fittings
Page 115 of 364
113
5008_en_Chap05_amenagements_ed01-2015
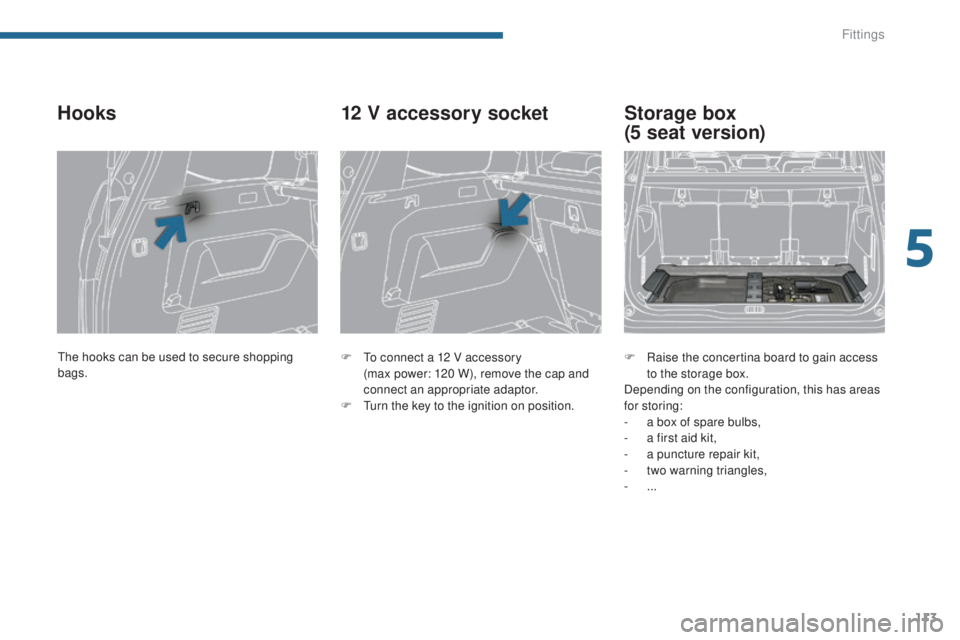
Hooks
F To connect a 12 V accessory (max power: 120 W), remove the cap and
connect an appropriate adaptor.
F
T
urn the key to the ignition on position.
12 V accessory socket
F Raise the concertina board to gain access to the storage box.
Depending on the configuration, this has areas
for storing:
-
a b
ox of spare bulbs,
-
a f
irst aid kit,
-
a p
uncture repair kit,
-
t
wo warning triangles,
-
...
Storage box
(5 seat version)
The hooks can be used to secure shopping
bags.
5
Fittings
Page 117 of 364
115
5008_en_Chap06_securite-enfants_ed01-2015
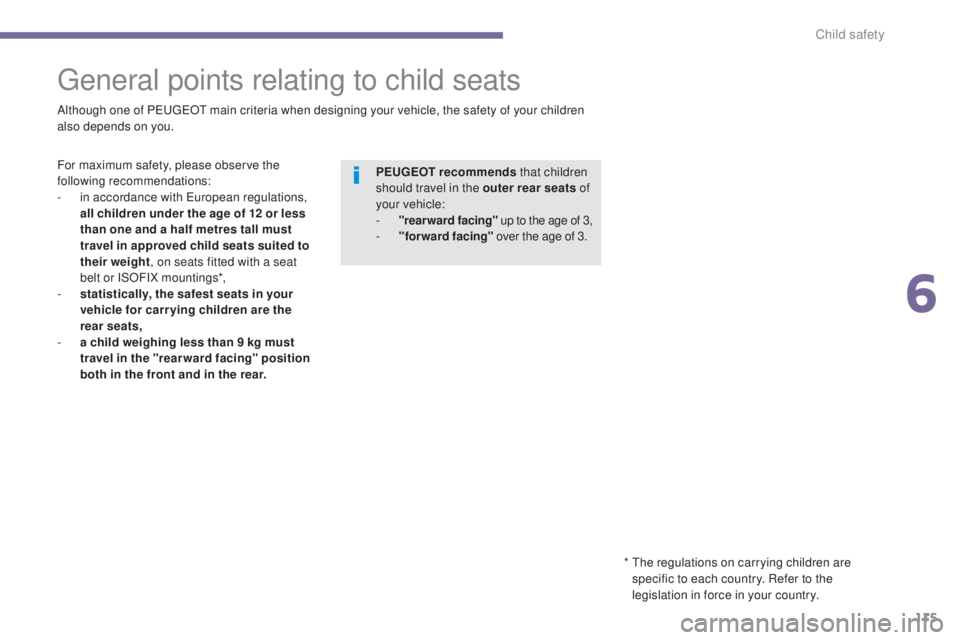
General points relating to child seats
Although one of PEUGEOT main criteria when designing your vehicle, the safety of your children
also depends on you.
For maximum safety, please observe the
following recommendations:
-
i
n accordance with European regulations,
all children under the age of 12 or less
than one and a half metres tall must
travel in approved child seats suited to
their weight , on seats fitted with a seat
belt or ISOFIX mountings*,
-
s
tatistically, the safest seats in your
vehicle for carr ying children are the
rear seats,
-
a c
hild weighing less than 9 kg must
travel in the "rear ward facing" position
both in the front and in the rear.
*
T
he regulations on carrying children are
specific to each country. Refer to the
legislation in force in your country.
PEUGEOT recommends
that children
should travel in the outer rear seats of
your vehicle:
-
"
rearward facing" up to the age of 3,
-
"
forward facing" over the age of 3.
6
Child safety
Page 118 of 364
116
5008_en_Chap06_securite-enfants_ed01-2015
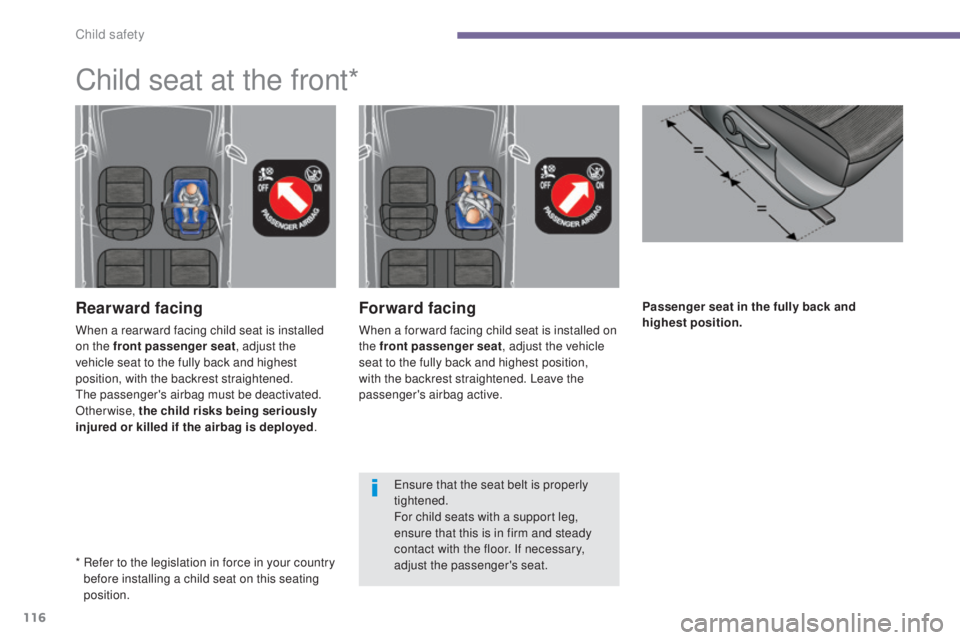
Passenger seat in the fully back and
highest position.Forward facing
When a for ward facing child seat is installed on
the front passenger seat, adjust the vehicle
seat to the fully back and highest position,
with the backrest straightened. Leave the
passenger's airbag active.
Rearward facing
When a rear ward facing child seat is installed
on the front passenger seat , adjust the
vehicle seat to the fully back and highest
position, with the backrest straightened.
The passenger's airbag must be deactivated.
Otherwise, the child risks being seriously
injured or killed if the airbag is deployed .
Child seat at the front*
Ensure that the seat belt is properly
tightened.
For child seats with a support leg,
ensure that this is in firm and steady
contact with the floor. If necessary,
adjust the passenger's seat.
*
R
efer to the legislation in force in your country
before installing a child seat on this seating
position.
Child safety
Page 119 of 364
117
5008_en_Chap06_securite-enfants_ed01-2015
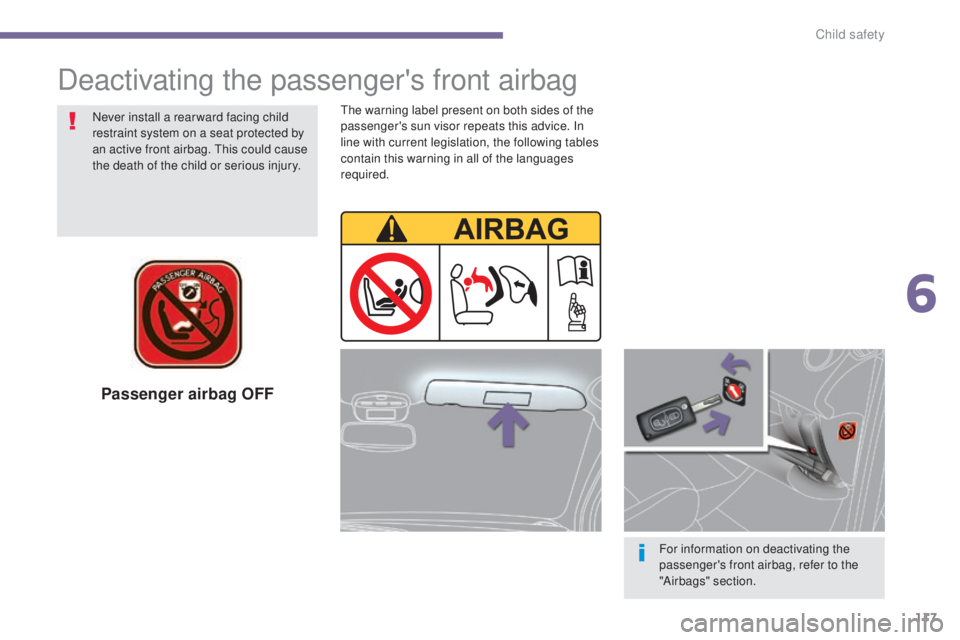
Passenger airbag OFF
For information on deactivating the
passenger's front airbag, refer to the
"Airbags" section.
Deactivating the passenger's front airbag
Never install a rear ward facing child
restraint system on a seat protected by
an active front airbag. This could cause
the death of the child or serious injury.The warning label present on both sides of the
passenger's sun visor repeats this advice. In
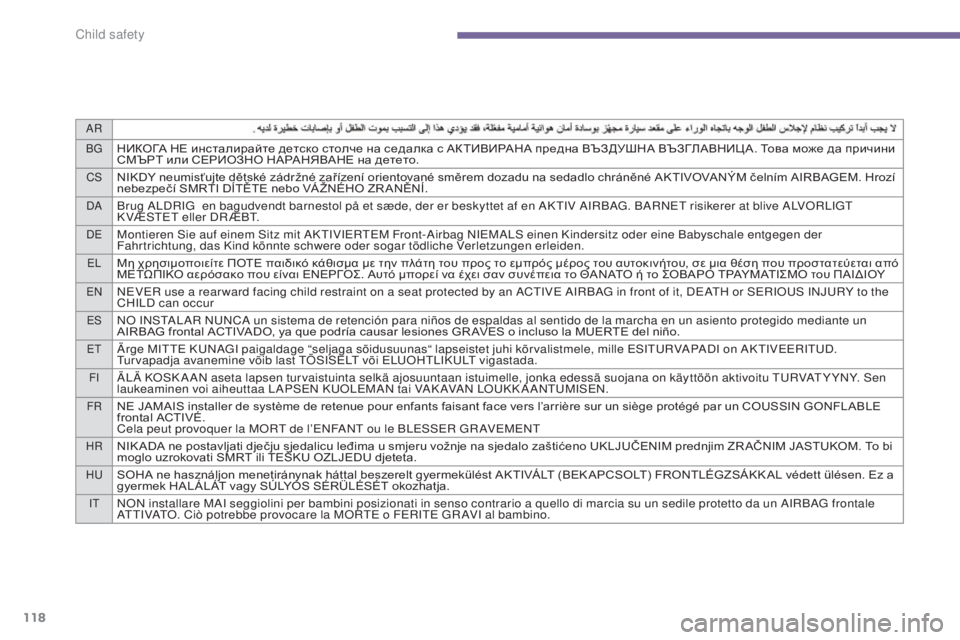
line with current legislation, the following tables
contain this warning in all of the languages
required.
6
Child safety
Page 120 of 364
AR
BG
НИКОГА НЕ инсталирайте детско столче на седалка с АКТИВИРАНА предна ВЪЗДУШНА ВЪЗГЛАВНИЦ А. Това може да причини
СМЪРТ или СЕРИОЗНО НАРАНЯВАНЕ на детето.
CSNIKDY neumisťujte dětské zádržné zařízení orientované směrem dozadu na sedadlo chráněné AKTIVOVANÝM čelním AIRBAGEM. Hrozí
nebezpečí SMRTI DÍTĚTE nebo VÁ ŽNÉHO ZR ANĚNÍ.
DABrug ALDRIG en bagudvendt barnestol på et sæde, der er beskyttet af en AKTIV AIRBAG. BARNET risikerer at blive ALVORLIGT
K VÆSTET eller DR ÆBT.
DEMontieren Sie auf einem Sitz mit AKTIVIERTEM Front-Airbag NIEMALS einen Kindersitz oder eine Babyschale entgegen der
Fahrtrichtung, das Kind könnte schwere oder sogar tödliche Verletzungen erleiden.
ELΜη χρησιμοποιείτε ΠΟΤΕ παιδικό κάθισμα με την πλάτη του προς το εμπρός μέρος του αυτοκινήτου, σε μια θέση που προστατεύεται από
ΜΕΤΩΠΙΚΟ αερόσακο που είναι ΕΝΕΡΓΟΣ. Αυτό μπορεί να έχει σαν συνέπεια το ΘΑΝΑΤΟ ή το ΣΟΒΑΡΟ ΤΡΑΥΜΑΤΙΣΜΟ του ΠΑΙΔΙΟΥ
ENNEVER use a rear ward facing child restraint on a seat protected by an ACTIVE AIRBAG in front of it, DEATH or SERIOUS INJURY to the
CHILD can occur
ESNO INSTALAR NUNCA un sistema de retención para niños de espaldas al sentido de la marcha en un asiento protegido mediante un
AIRBAG frontal ACTIVADO, ya que podría causar lesiones GR AVES o incluso la MUERTE del niño.
ETÄrge MITTE KUNAGI paigaldage “seljaga sõidusuunas“ lapseistet juhi kõrvalistmele, mille ESITURVAPADI on AKTIVEERITUD.
Tur vapadja avanemine võib last TÕSISELT või ELUOHTLIKULT vigastada.
FIÄLÄ KOSK A AN aseta lapsen tur vaistuinta selkä ajosuuntaan istuimelle, jonka edessä suojana on käyttöön aktivoitu TURVAT Y YNY. Sen
laukeaminen voi aiheuttaa LAPSEN KUOLEMAN tai VAK AVAN LOUKK A ANTUMISEN.
FRNE JAMAIS installer de système de retenue pour enfants faisant face vers l’arrière sur un siège protégé par un COUSSIN GONFLABLE
frontal ACTIVÉ.
Cela peut provoquer la MORT de l’ENFANT ou le BLESSER GR AVEMENT
HRNIK ADA ne postavljati dječju sjedalicu leđima u smjeru vožnje na sjedalo zaštićeno UKLJUČENIM prednjim ZR AČNIM JASTUKOM. To bi
moglo uzrokovati SMRT ili TEŠKU OZLJEDU djeteta.
HUSOHA ne használjon menetiránynak háttal beszerelt gyermekülést AKTIVÁLT (BEK APCSOLT) FRONTLÉGZSÁKK AL védett ülésen. Ez a
gyermek HALÁLÁT vagy SÚLYOS SÉRÜLÉSÉT okozhatja.
ITNON installare MAI seggiolini per bambini posizionati in senso contrario a quello di marcia su un sedile protetto da un AIRBAG frontale
ATTIVATO. Ciò potrebbe provocare la MORTE o FERITE GR AVI al bambino.
118
5008_en_Chap06_securite-enfants_ed01-2015
Child safety