sensor PEUGEOT 5008 2022 Owners Manual
[x] Cancel search | Manufacturer: PEUGEOT, Model Year: 2022, Model line: 5008, Model: PEUGEOT 5008 2022Pages: 292, PDF Size: 9.65 MB
Page 5 of 292
3
Contents
Lane positioning assist 140
Lane Departure Warning System 143
Active Lane Keeping Assistance 144
Active Safety Brake with Distance Alert and
Intelligent emergency braking assistance
147
Distraction detection 150
Blind Spot Monitoring 151
Active Blind Spot Monitoring System 152
Parking sensors 153
Visiopark 1 - Visiopark 2 154
Park Assist 158
7Practical informationCompatibility of fuels 163
Refuelling 163
Misfuel prevention (Diesel) 164
Rechargeable hybrid system 165
Charging the traction battery
(Rechargeable hybrid engine)
171
Towing device 173
Towing device with quickly detachable
towball
174
Tetőcsomagtartó rudak 176
Snow chains 177
Very cold climate screen 178
Energy economy mode 178
Motorháztető 179
Engine compartment 180
Checking levels 181
Checks 183
AdBlue® (BlueHDi) 184
Free-wheeling 186
Advice on care and maintenance 187
8In the event of a breakdownWarning triangle 189
Running out of fuel (Diesel) 189
Tool kit 190
Temporary puncture repair kit 192
Spare wheel 195
Changing a bulb 200
Changing a fuse 201
12
V battery 206
Accessory battery (Rechargeable hybrid) 209
Towing the vehicle 2 11
9Technical dataEngine technical data and towed loads 215
Petrol engines 216
Diesel engines 218
Rechargeable hybrid engines 220
Dimensions 221
Identification markings 222
10PEUGEOT Connect RadioFirst steps 223
Steering mounted controls 224
Menus 225
Applications 226
Radio 226
DAB (Digital Audio Broadcasting) radio 228
Media 228
Telephone 230
Settings 233
Frequently asked questions 234
11PEUGEOT Connect NavFirst steps 236
Steering mounted controls 237
Menus 237
Voice commands 239
Navigation 242
Connected navigation 245
Applications 247
Radio 250
DAB (Digital Audio Broadcasting) radio 251
Media 251
Telephone 253
Settings 255
Frequently asked questions 257
■
Alphabetical index
bit.ly/helpPSA
Access to additional videos
Page 25 of 292
23
Instruments
1Average speed
(mph or km/h)Calculated since the last trip computer
reset.
Distance travelled
(miles or km)Calculated since the last trip computer
reset.
Stop & Start time counter
(minutes/seconds or hours/minutes)
If your vehicle is fitted with the Stop & Start
function, a time counter calculates the time spent
in STOP mode during a journey.
The time counter is reset each time the ignition is
switched on.
Touch screen
This system gives access to the following elements:
–
Permanent display of the time and outside
temperature (a blue warning lamp appears if
there is a risk of ice).
–
Heating/air conditioning system controls.
–
V
ehicle functions and equipment setting
menus.
–
Audio system and telephone controls and
display of related information.
– Display of visual manoeuvring aid functions
(visual parking sensor information, Park Assist,
etc.).
–
Internet services and display of
related
information.
–
Navigation system controls and
display
of related information (depending on
version).
For safety reasons, always stop the
vehicle before performing operations
that require sustained attention.
Some functions are not accessible while
driving.
Recommendations
This screen is of the capacitive type.
– Do not use pointed objects on the touch
screen.
–
Do not touch the touch screen with wet hands.
–
Use a soft, clean cloth to clean the touch
screen.
Principles
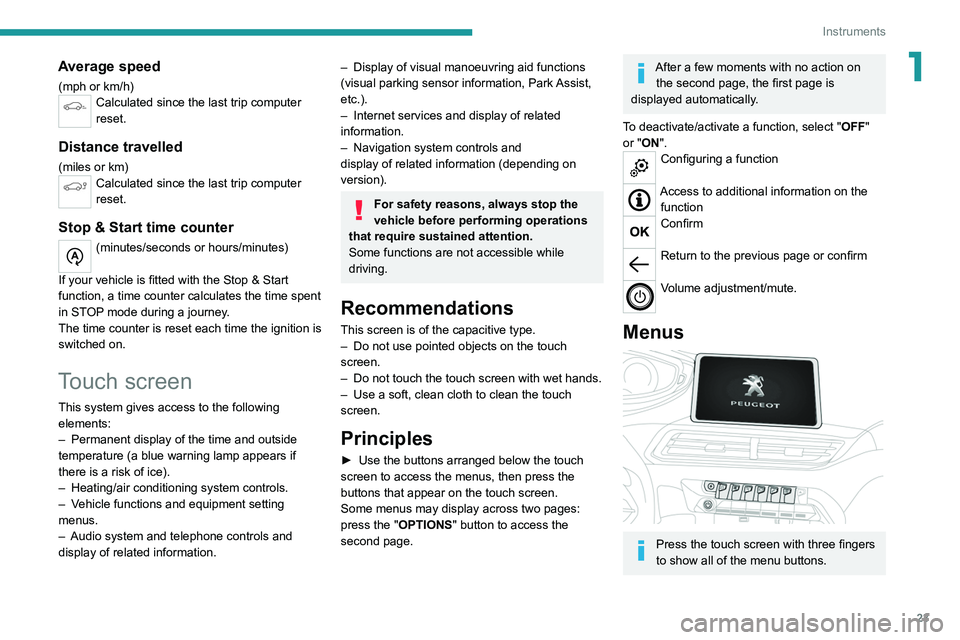
► Use the buttons arranged below the touch
screen to access the menus, then press the
buttons that appear on the touch screen.
Some menus may display across two pages:
press the "OPTIONS" button to access the
second page.
After a few moments with no action on the second page, the first page is
displayed automatically.
To deactivate/activate a function, select " OFF"
or "ON".
Configuring a function
Access to additional information on the function
Confirm
Return to the previous page or confirm
Volume adjustment/mute.
Menus
Press the touch screen with three fingers
to show all of the menu buttons.
Page 50 of 292
48
Ease of use and comfort
If the mirrors are folded using control A,
they will not unfold when the vehicle is
unlocked.
Electric unfolding
► From outside: unlock the vehicle.
► From inside: with the ignition on, place
control
A in the central position and then pull it
rearwards.
Depending on version, the automatic
door mirror folding/unfolding function is
configured via the Driving
/ Vehicle touch
screen menu.
Otherwise, this setting can be carried out at a
PEUGEOT dealer or a qualified workshop.
Automatic tilting in reverse gear
Depending on version, this function allows to
automatically tilt the mirrors downwards to assist
with parking manoeuvres in reverse gear.
With the engine running, on engaging reverse
gear, the mirror glasses tilt downwards.
They return to their initial position:
–
A
few seconds after coming out of reverse
gear.
–
Once the vehicle speed exceeds 6 mph
(10
km/h).
–
When the engine is switched off.
This function is set via the Driving/Vehicle touch screen menu.
Interior rear view mirror
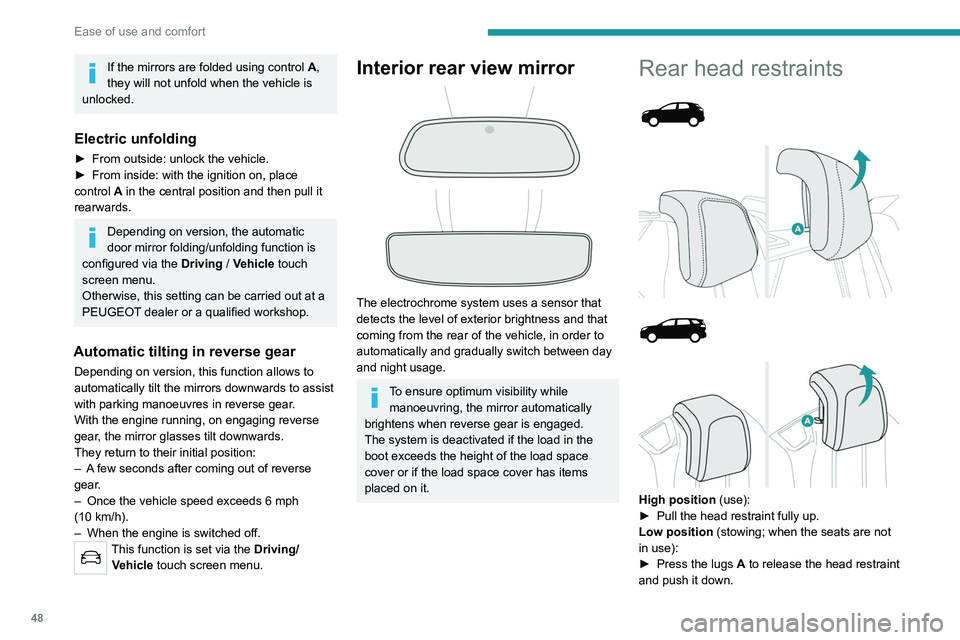
The electrochrome system uses a sensor that
detects the level of exterior brightness and that
coming from the rear of the vehicle, in order to
automatically and gradually switch between day
and night usage.
To ensure optimum visibility while manoeuvring, the mirror automatically
brightens when reverse gear is engaged.
The system is deactivated if the load in the
boot exceeds the height of the load space
cover or if the load space cover has items
placed on it.
Rear head restraints
High position (use):
► Pull the head restraint fully up.
Low position (stowing; when the seats are not
in use):
►
Press the lugs
A to release the head restraint
and push it down.
The rear head restraints can be removed.
Removing a head restraint
► Pull the head restraint fully up.
► Press the lugs A to release the head restraint
and remove it completely.
► Store the head restraint.
Refitting a head restraint
► Insert the head restraint rods into the guides
in the corresponding seat backrest.
► Push the head restraint down as far as it will
go.
► Press the lugs A to release the head restraint
and push it down.
Never drive with passengers seated at
the rear when the head restraints are
removed; the head restraints should be in
place and in the high position.
The head restraint for the central seat and those for the side seats
are not interchangeable.
Rear bench seat
Bench seat with fixed cushions and split folding
backrests (2/3-1/3) to adapt the boot load space.
Page 58 of 292
56
Ease of use and comfort
a continuous storage floor through to the back
of the front seats.
By placing the front passenger seat in the
table position, you obtain a continuous
storage floor through to the dashboard.
Operations on the seats must only be
done when the vehicle is stationary.
Heating and Ventilation
Air intake
The air circulating in the passenger compartment
is filtered and originates either from the
exterior, via the grille located at the base of the
windscreen, or from the inside in air recirculation
mode.
Controls
Depending on version, the controls are
accessible in the Climate touch screen menu
or are grouped together on the centre console
panel.
Air distribution
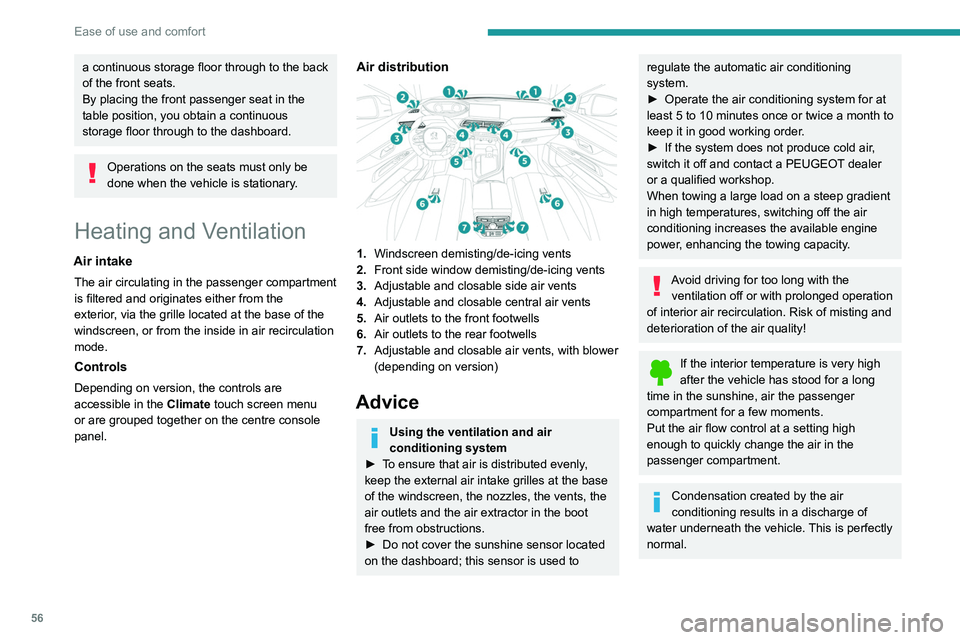
1. Windscreen demisting/de-icing vents
2. Front side window demisting/de-icing vents
3. Adjustable and closable side air vents
4. Adjustable and closable central air vents
5. Air outlets to the front footwells
6. Air outlets to the rear footwells
7. Adjustable and closable air vents, with blower
(depending on version)
Advice
Using the ventilation and air
conditioning system
►
T
o ensure that air is distributed evenly,
keep the external air intake grilles at the base
of the windscreen, the nozzles, the vents, the
air outlets and the air extractor in the boot
free from obstructions.
►
Do not cover the sunshine sensor located
on the dashboard; this sensor is used to
regulate the automatic air conditioning
system.
►
Operate the air conditioning system for at
least 5 to 10 minutes once or twice a month to
keep it in good working order
.
►
If the system does not produce cold air
,
switch it off and contact a PEUGEOT dealer
or a qualified workshop.
When towing a large load on a steep gradient
in high temperatures, switching off the air
conditioning increases the available engine
power, enhancing the towing capacity.
Avoid driving for too long with the ventilation off or with prolonged operation
of interior air recirculation. Risk of misting and
deterioration of the air quality!
If the interior temperature is very high
after the vehicle has stood for a long
time in the sunshine, air the passenger
compartment for a few moments.
Put the air flow control at a setting high
enough to quickly change the air in the
passenger compartment.
Condensation created by the air
conditioning results in a discharge of
water underneath the vehicle. This is perfectly
normal.
Servicing the ventilation and air
conditioning system
► Ensure that the passenger compartment
filter is in good condition and have the filter
elements replaced regularly.
We recommend using a composite passenger
compartment filter. Its specific active additive
helps protect against polluting gases and bad
smells.
► To ensure correct operation of the
air conditioning system, have it checked
according to the recommendations in the
Manufacturer’s service schedule.
Stop & Start
The heating and air conditioning systems
only operate when the engine is running.
Temporarily deactivate the Stop & Start
system to maintain a comfortable temperature
in the passenger compartment.
For more information on the Stop &
Start system, refer to the corresponding
section.
Dual-zone automatic air
conditioning
This system automatically controls the activation
of the air conditioning system, regulating the
temperature, air flow and air distribution inside
the passenger compartment.
Page 59 of 292
57
Ease of use and comfort
3Servicing the ventilation and air
conditioning system
►
Ensure that the passenger compartment
filter is in good condition and have the filter
elements replaced regularly
.
We recommend using a composite passenger
compartment filter. Its specific active additive
helps protect against polluting gases and bad
smells.
►
T
o ensure correct operation of the
air conditioning system, have it checked
according to the recommendations in the
Manufacturer’s service schedule.
Stop & Start
The heating and air conditioning systems
only operate when the engine is running.
Temporarily deactivate the Stop & Start
system to maintain a comfortable temperature
in the passenger compartment.
For more information on the Stop &
Start
system, refer to the corresponding
section.
Dual-zone automatic air
conditioning
This system automatically controls the activation
of the air conditioning system, regulating the
temperature, air flow and air distribution inside
the passenger compartment. This system works with the engine running, but
access to the ventilation and its controls remains
possible with the ignition on.
Press the Climate menu button to display
the system controls page.
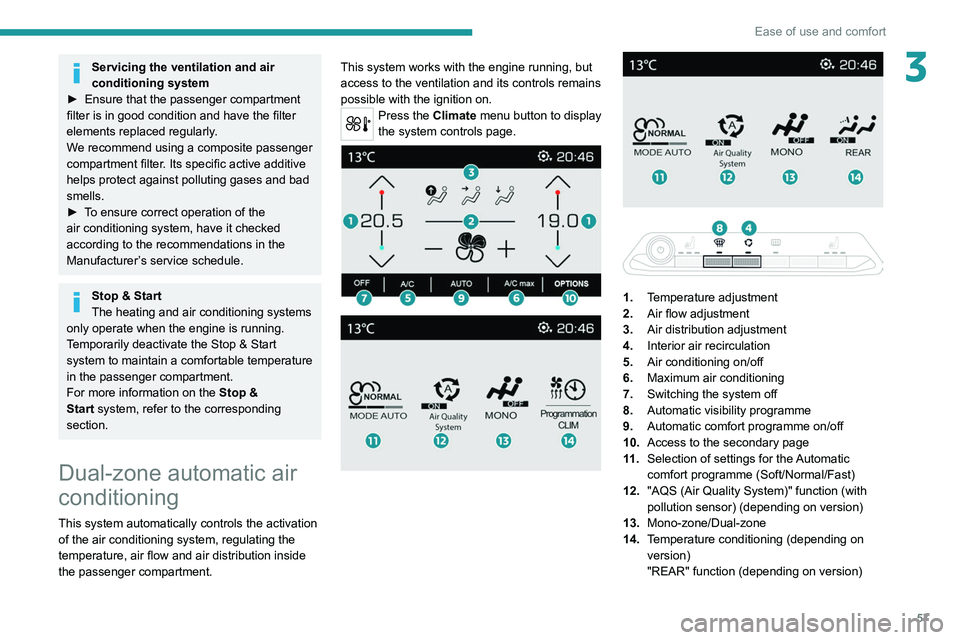
1. Temperature adjustment
2. Air flow adjustment
3. Air distribution adjustment
4. Interior air recirculation
5. Air conditioning on/off
6. Maximum air conditioning
7. Switching the system off
8. Automatic visibility programme
9. Automatic comfort programme on/off
10. Access to the secondary page
11 . Selection of settings for the Automatic
comfort programme (Soft/Normal/Fast)
12. "AQS (Air Quality System)" function (with
pollution sensor) (depending on version)
13. Mono-zone/Dual-zone
14. Temperature conditioning (depending on
version)
"REAR" function (depending on version)
Page 60 of 292
58
Ease of use and comfort
Adjusting the temperature
The driver and front passenger can each choose
their own temperature setting.
The value indicated corresponds to a level of
comfort and not to a precise temperature.
►
Press one of the buttons
1 to increase (red)
or decrease (blue) the value.
It is recommended that you avoid a difference of
more than 3°C in the settings for left and right.
Automatic Comfort programme
This automatic mode ensures optimum
management of the passenger compartment
temperature, air flow and air distribution, based
on the selected comfort level.
►
Press button
9 to activate or deactivate the
air conditioning system’s automatic mode .
The indicator lamp in the button lights up
when the air conditioning system is operating
automatically.
You can adjust the intensity of the
automatic Comfort programme by using the
"OPTIONS "
button to select one of the available
settings:
–
"Soft": provides soft and quiet operation by
limiting air flow.
–
"Normal": offers the best compromise
between a comfortable temperature and quiet
operation (default setting).
–
"Fast": provides strong and effective air flow.
To change the current setting (shown by the
corresponding indicator lamp), press button 11
repeatedly until the desired setting is displayed.
T
o ensure passenger comfort in the rear seats,
favour "Normal" and "Fast" settings.
This setting is associated with automatic mode
only. However, on deactivation of
AUTO mode,
the indicator lamp for the most recently selected
setting remains on.
Changing the setting does not reactivate AUTO
mode if it was deactivated.
In cold weather with the engine cold, the
air flow is increased gradually until the
comfort setting has been reached, in order to
limit the delivery of cold air into the passenger
compartment.
On entering the vehicle, if the interior
temperature is much colder or warmer than
the comfort setting requested, there is no
need to alter the value displayed to more
quickly reach the required level of comfort.
The system automatically corrects the
temperature difference as quickly as possible.
Automatic Visibility programme
For more information on button 8, refer to the
“Front Demisting/Defrosting ” section.
"Air Quality System" (AQS)
function
Using a pollution sensor, this function
automatically activates recirculation of the
interior air once a certain level of polluting
substances in the exterior air is detected.
When the air quality returns to a satisfactory
level, recirculation of interior air is automatically
deactivated.
This function is not designed to detect
unpleasant odours.
Recirculation is automatically activated when the
windscreen wash is used or when reverse gear
is engaged.
The function does not operate if the exterior
temperature is below 5
°C, to avoid the risk of
misting of the windscreen and side windows.
To activate or deactivate the function, go to the
secondary page by using the " OPTIONS" button,
then press button 12.
Manual control
It is possible to manually adjust one or more
of these functions, while the system retains
automatic control of the other functions:
–
air flow
.
–
air distribution.
The indicator lamp in the " AUT
O” button goes
out if a setting is changed.
►
Press button
9 again to reactivate the
automatic Comfort programme.
Adjusting the air flow
► Press one of the buttons 2 (- or +) to increase
or decrease air flow.
The air flow symbol (a fan) is filled in according
to the request.
When the air flow is reduced to a minimum,
ventilation stops.
"OFF " is displayed alongside the fan.
Adjusting the air distribution
► Press the buttons 3 to adjust the air flow
distribution inside the passenger compartment.
Windscreen and side windows.
Central and side air vents.
Footwells.
The lighting of the button indicates that air is
being blown in the specified direction.
For a uniform distribution of air in the passenger
compartment, the three buttons can be activated
simultaneously.
In AUTO mode, the indicator lamps in all three
buttons 3 are off.
Air conditioning on/off
The air conditioning system is designed to
operate effectively in all seasons, with the
windows closed.
It is used to:
– lower the temperature in summer,
Page 78 of 292
76
Lighting and visibility
Headlamp beam height
adjustment
Manual adjustment of LED
technology headlamps
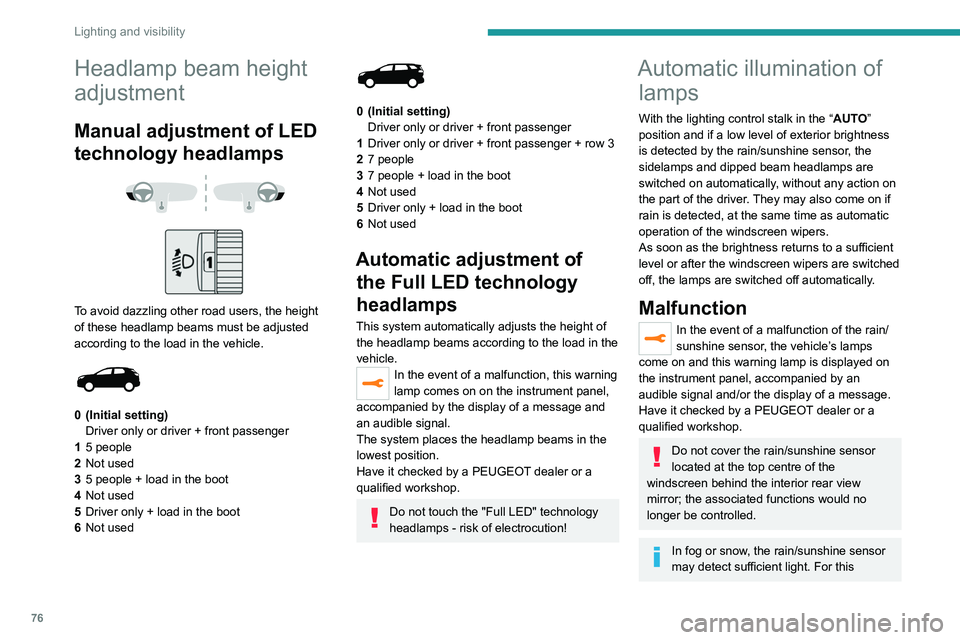
To avoid dazzling other road users, the height
of these headlamp beams must be adjusted
according to the load in the vehicle.
0 (Initial setting) Driver only or driver + front passenger
1 5 people
2 Not used
3 5 people + load in the boot
4 Not used
5 Driver only + load in the boot
6 Not used
0 (Initial setting)
Driver only or driver + front passenger
1 Driver only or driver + front passenger + row 3
2 7 people
3 7 people + load in the boot
4 Not used
5 Driver only + load in the boot
6 Not used
Automatic adjustment of
the Full LED technology
headlamps
This system automatically adjusts the height of
the headlamp beams according to the load in the
vehicle.
In the event of a malfunction, this warning
lamp comes on on the instrument panel,
accompanied by the display of a message and
an audible signal.
The system places the headlamp beams in the
lowest position.
Have it checked by a PEUGEOT dealer or a
qualified workshop.
Do not touch the "Full LED" technology
headlamps - risk of electrocution!
Automatic illumination of lamps
With the lighting control stalk in the “ AUTO”
position and if a low level of exterior brightness
is detected by the rain/sunshine sensor, the
sidelamps and dipped beam headlamps are
switched on automatically, without any action on
the part of the driver. They may also come on if
rain is detected, at the same time as automatic
operation of the windscreen wipers.
As soon as the brightness returns to a sufficient
level or after the windscreen wipers are switched
off, the lamps are switched off automatically.
Malfunction
In the event of a malfunction of the rain/
sunshine sensor, the vehicle’s lamps
come on and this warning lamp is displayed on
the instrument panel, accompanied by an
audible signal and/or the display of a message.
Have it checked by a PEUGEOT dealer or a
qualified workshop.
Do not cover the rain/sunshine sensor
located at the top centre of the
windscreen behind the interior rear view
mirror; the associated functions would no
longer be controlled.
In fog or snow, the rain/sunshine sensor
may detect sufficient light. For this
reason, the lighting will not come on
automatically.
The inner surface of the windscreen may become misted up and affect the proper
operation of the rain/sunshine sensor.
In humid and cold weather, demist the
windscreen regularly.
Guide-me-home and
welcome lighting
Guide-me-home lighting
With the ring of the lighting control stalk in the
"AUTO" position and when the light is poor, the
dipped beam headlamps come on automatically
when the ignition is switched off.
You can activate/deactivate this function and adjust the guide-me-home lighting
duration in the Driving/Vehicle touch screen
menu.
Welcome lighting
When the vehicle is unlocked, if the ambient
light is low and the "Automatic illumination of
headlamps" function is activated, this system
automatically turns on certain exterior lamps
as well as certain lamps in the passenger
compartment.
Page 79 of 292
77
Lighting and visibility
4reason, the lighting will not come on
automatically.
The inner surface of the windscreen may become misted up and affect the proper
operation of the rain/sunshine sensor.
In humid and cold weather, demist the
windscreen regularly.
Guide-me-home and
welcome lighting
Guide-me-home lighting
With the ring of the lighting control stalk in the
"AUTO" position and when the light is poor, the
dipped beam headlamps come on automatically
when the ignition is switched off.
You can activate/deactivate this function and adjust the guide-me-home lighting
duration in the Driving/Vehicle touch screen
menu.
Welcome lighting
When the vehicle is unlocked, if the ambient
light is low and the "Automatic illumination of
headlamps" function is activated, this system
automatically turns on certain exterior lamps
as well as certain lamps in the passenger
compartment.
You can activate/deactivate this function and adjust the welcome lighting duration
in the Driving
/ Vehicle touch screen menu.
Door mirror spotlamps
These spotlamps facilitate access to the vehicle
by lighting the ground near the front doors.
When the front courtesy lamp switch is in
this position, the spotlamps come on
automatically:
–
when the vehicle is unlocked.
–
when a door is opened.
–
when a request to locate the vehicle is
received from the remote control.
Whatever the position of the front courtesy lamp
switch, they also come on with the welcome
lighting and guide-me-home lighting functions.
They go off automatically after 30 seconds.
Automatic lighting systems - General
recommendations
The automatic lighting systems use a detection
camera, located at the top of the windscreen.
Operating limits
The system may be disrupted or not work
correctly:
–
When visibility conditions are poor
(e.g.
snowfall, heavy rain).
– If the windscreen is dirty , misted-up or
masked (e.g. sticker) in front of the camera.
–
If the vehicle is facing highly reflective signs
or safety barrier reflectors.
The system is not able to detect:
–
Road users that do not have their own
lighting, such as pedestrians.
–
V
ehicles with hidden lighting (e.g. travelling
behind a safety barrier on the motorway).
–
V
ehicles at the top or bottom of a steep
slope, on winding roads, on crossroads.
Maintenance
Clean the windscreen regularly,
particularly the area in front of the camera.
The internal surface of the windscreen can
also become misted around the camera.
In humid and cold weather, demist the
windscreen regularly.
Do not allow snow to accumulate on the
bonnet or roof of the vehicle as this could
obstruct the camera.
Automatic headlamp dipping
For more information, refer to the
General recommendations for
automatic lighting systems.
Page 84 of 292
82
Lighting and visibility
The rainfall detection function uses a rain/
sunshine sensor located at the top centre of the
windscreen, behind the rear view mirror.
Do not cover the rain/sunshine sensor.
When using an automatic car wash,
switch off the automatic wipers and the
ignition.
In winter, wait until the windscreen is
completely clear of ice before activating the
automatic wipers.
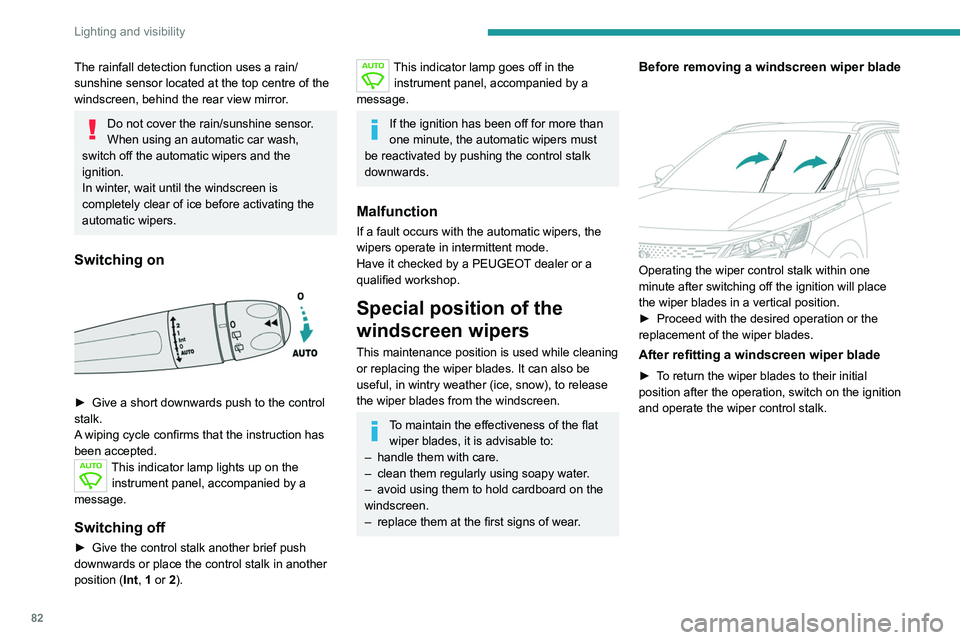
Switching on
► Give a short downwards push to the control
stalk.
A
wiping cycle confirms that the instruction has
been accepted.
This indicator lamp lights up on the instrument panel, accompanied by a
message.
Switching off
► Give the control stalk another brief push
downwards or place the control stalk in another
position ( Int
, 1 or 2).
This indicator lamp goes off in the
instrument panel, accompanied by a
message.
If the ignition has been off for more than
one minute, the automatic wipers must
be reactivated by pushing the control stalk
downwards.
Malfunction
If a fault occurs with the automatic wipers, the
wipers operate in intermittent mode.
Have it checked by a PEUGEOT dealer or a
qualified workshop.
Special position of the
windscreen wipers
This maintenance position is used while cleaning
or replacing the wiper blades. It can also be
useful, in wintry weather (ice, snow), to release
the wiper blades from the windscreen.
To maintain the effectiveness of the flat wiper blades, it is advisable to:
–
handle them with care.
–
clean them regularly using soapy water
.
–
avoid using them to hold cardboard on the
windscreen.
–
replace them at the first signs of wear
.
Before removing a windscreen wiper blade
Operating the wiper control stalk within one
minute after switching off the ignition will place
the wiper blades in a vertical position.
►
Proceed with the desired operation or the
replacement of the wiper blades.
After refitting a windscreen wiper blade
► To return the wiper blades to their initial
position after the operation, switch on the ignition
and operate the wiper control stalk.
Changing a wiper blade
Removing/Refitting at the front
► Carry out these wiper blade replacement
operations from the driver's side.
► Starting with the wiper blade farthest from
you, hold each arm by the rigid section and raise
it as far as possible.
Take care not to hold the arms at the jet locations.
Do not touch the wiper blades - risk of
irreparable deformation.
Do not release them while moving them. Risk
of damaging the windscreen!
► Clean the windscreen using screenwash
fluid.
Do not apply "Rain X" type water-
repellent products.
Page 99 of 292
97
Safety
5the head, chest or arms cannot be ruled out
when an airbag is deployed. The bag inflates
almost instantly (within a few milliseconds)
then deflates within the same time,
discharging the hot gas via openings provided
for this purpose.
After an accident or if the vehicle has been
stolen, have the airbag systems checked.
All work must be carried out only by a
PEUGEOT dealer or a qualified workshop.
Front airbags
Do not drive holding the steering wheel
by its spokes or resting your hands on the
centre part of the wheel.
Passengers must not place their feet on the
dashboard.
Do not smoke as deployment of the airbags
can cause burns or the risk of injury from a
cigarette or pipe.
Never remove or pierce the steering wheel or
hit it violently.
Do not fix or attach anything to the steering
wheel or dashboard, as this could cause
injuries when the airbags are deployed.
Lateral airbags
Use only approved seat covers
compatible with the deployment of these
airbags. For information on the range of seat
covers suitable for your vehicle, contact a
PEUGEOT dealer.
Do not fix or attach anything to the seat
backrests (e.g. clothing) as this could cause
injuries to the chest or arm when the airbag is
deployed.
Do not sit with the upper part of the body any
nearer to the door than necessary.
The vehicle's front door panels include side
impact sensors.
A damaged door or any unauthorised or
incorrectly executed work (modification or
repair) on the front doors or their interior trim
could compromise the operation of these
sensors - risk of malfunction of the lateral
airbags!
All work must be carried out only by a
PEUGEOT dealer or a qualified workshop.
Curtain airbags
Do not fix or attach anything to the roof,
as this could cause head injuries when the
curtain airbag is deployed.
Do not remove the grab handles installed on
the roof, as these help to secure the curtain
airbags.
Child seats
The regulations on carrying children are specific to each country. Refer to the
legislation in force in your country.
For maximum safety, please observe the
following recommendations:
–
In accordance with European regulations,
all children under the age of 12 or less than
1,5 metres tall must travel in approved child
seats suited to their weight , on seats fitted with
a seat belt or ISOFIX mountings.
–
Statistically
, the safest seats in your
vehicle for carrying children are the rear
seats.
–
Children weighing less than 9 kg must
travel in the "rearward facing" position,
whether in the front or rear of the vehicle.
It is recommended that children travel
on the rear seats of the vehicle:
–
‘rearward facing’ up to the age of 3,
–
‘forward facing’ over the age of 3.
Make sure that the seat belt is correctly
positioned and tightened.
For child seats with a support leg, ensure that
the support leg is in firm and steady contact
with the floor.
Advice
An incorrectly installed child seat compromises the child's safety in the
event of an accident.
Ensure that there is no seat belt or seat belt
buckle under the child seat, as this could
destabilise it.