air condition Peugeot 508 2020 Owner's Guide
[x] Cancel search | Manufacturer: PEUGEOT, Model Year: 2020, Model line: 508, Model: Peugeot 508 2020Pages: 276, PDF Size: 8.43 MB
Page 109 of 276
107
Driving
6Operation
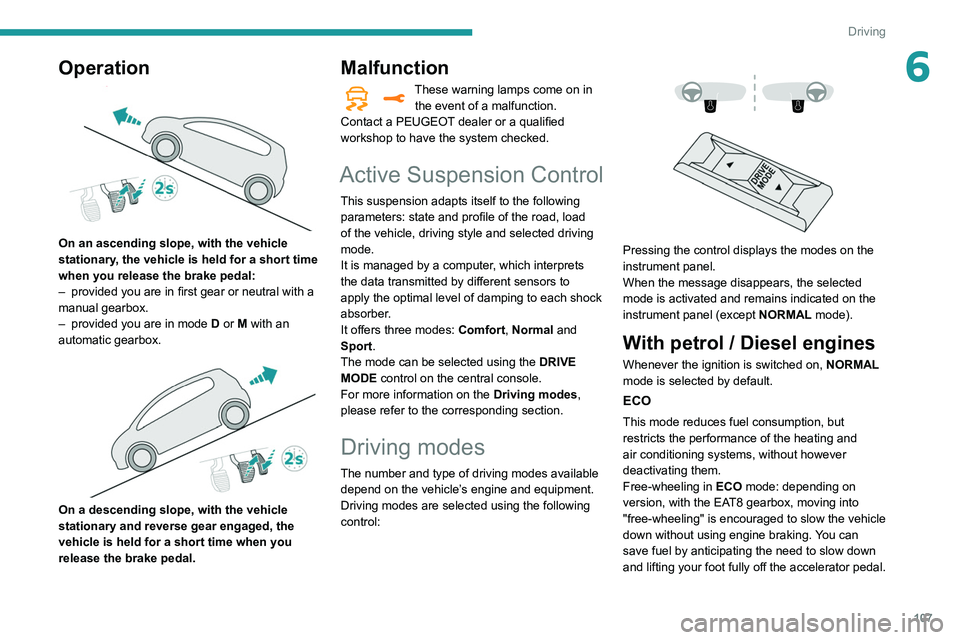
On an ascending slope, with the vehicle
stationary, the vehicle is held for a short time
when you release the brake pedal:
–
provided you are in first gear or neutral with a
manual gearbox.
–
provided you are in mode D
or M with an
automatic gearbox.
On a descending slope, with the vehicle
stationary and reverse gear engaged, the
vehicle is held for a short time when you
release the brake pedal.
Malfunction
These warning lamps come on in the event of a malfunction.
Contact a PEUGEOT dealer or a qualified
workshop to have the system checked.
Active Suspension Control
This suspension adapts itself to the following
parameters: state and profile of the road, load
of the vehicle, driving style and selected driving
mode.
It is managed by a computer, which interprets
the data transmitted by different sensors to
apply the optimal level of damping to each shock
absorber.
It offers three modes: Comfort, Normal and
Sport.
The mode can be selected using the DRIVE
MODE control on the central console.
For more information on the Driving modes,
please refer to the corresponding section.
Driving modes
The number and type of driving modes available depend on the vehicle’s engine and equipment.
Driving modes are selected using the following
control:
Pressing the control displays the modes on the
instrument panel.
When the message disappears, the selected
mode is activated and remains indicated on the
instrument panel (except NORMAL mode).
With petrol / Diesel engines
Whenever the ignition is switched on, NORMAL
mode is selected by default.
ECO
This mode reduces fuel consumption, but
restricts the performance of the heating and
air conditioning systems, without however
deactivating them.
Free-wheeling in ECO mode: depending on
version, with the EAT8 gearbox, moving into
"free-wheeling" is encouraged to slow the vehicle
down without using engine braking. You can
save fuel by anticipating the need to slow down
and lifting your foot fully off the accelerator pedal.
Page 113 of 276
111
Driving
6The system triggers an alert as soon as it
detects a drop in the inflation pressure of one or
more tyres.
Under-inflation detection does not
replace the need for vigilance on the part
of the driver.
This system does not avoid the need to
regularly check the tyre pressures (including
the spare wheel) as well as before a long
journey.
Driving with under-inflated tyres, particularly
in adverse conditions (heavy load, high
speed, long journey):
–
worsens road-holding.
–
lengthens braking distances.
–
causes premature wear of the tyres.
–
increases fuel consumption.
The inflation pressures defined for the vehicle can be found on the tyre pressure
label.
For more information on the Identification
markings, refer to the corresponding section.
Checking tyre pressures
This check should be done when the
tyres are "cold" (vehicle stopped for 1 hour or
after a journey of less than 6 miles (10
km) at
moderate speeds).
Otherwise, add 0.3 bar to the pressures
shown on the label.
Snow chains
The system does not have to be
reinitialised after fitting or removing snow
chains.
Under-inflation alert
This is signalled by the fixed illumination of this warning lamp, accompanied by an
audible signal and, depending on equipment, the
display of a message.
►
Reduce speed immediately
, avoid excessive
steering movements and avoid sudden braking.
►
Stop the vehicle as soon as it is safe to do
so.
The loss of pressure detected does not always cause visible bulging of the tyre.
Do not rely on just a visual check.
►
Using a compressor
, such as the one in
the temporary puncture repair kit, check the
pressures of the four tyres when cold.
►
If it is not possible to make this check
immediately
, drive carefully at reduced speed.
►
In the event of a puncture, use the
temporary puncture repair kit or the spare wheel
(depending on equipment).
The alert is kept active until the system is reinitialised.
Reinitialisation
Reinitialise the system after adjusting one or
more tyre pressures and after changing one or
more wheels.
Before reinitialising the system, make
sure that the pressures of the four tyres
are correct for the conditions of use of the
vehicle and conform to the values written on
the tyre pressure label.
Check the pressures of the four tyres before
performing the reinitialisation.
The system does not advise if a pressure is
incorrect at the time of reinitialisation.
With the vehicle stationary, the system is
reinitialised via the Driving /
V
ehicle touch screen menu..
Malfunction
These warning lamps come on in the event of a malfunction.
A message appears, accompanied by an audible
signal.
In this case, the tyre under-inflation monitoring
function is no longer performed.
Have the system checked by a PEUGEOT
dealer or a qualified workshop.
Page 114 of 276
11 2
Driving
Driving and manoeuvring
aids - General
recommendations
Driving and manoeuvring aids cannot, in
any circumstances, replace the need for
vigilance on the part of the driver.
The driver must comply with the Highway
Code, must remain in control of the vehicle in
all circumstances and must be able to retake
control of it at all times. The driver must adapt
the speed to climactic conditions, traffic and
the state of the road.
It is the driver's responsibility to constantly
check the traffic, to assess the relative
distances and speeds of other vehicles and to
anticipate their movements before indicating
and changing lane.
The systems cannot exceed the limits of the
laws of physics.
Driving aids
You should hold the steering wheel
with both hands, always use the interior and
exterior rear view mirrors, always keep the
feet close to the pedals and take a break
every two hours.
Manoeuvring aids
The driver must always check the
surroundings of the vehicle before and during
the whole manoeuvre, in particular using the
mirrors.
Radar
The operation of the radar as well as the
associated functions may be impaired through
the accumulation of dirt (mud, frost, etc.), in
certain difficult weather conditions (very heavy
rain, snow) or if the bumper is damaged.
If the front bumper is to be repainted, contact
a PEUGEOT dealer or a qualified workshop;
certain types of paint could interfere with the
operation of the radar.
Driving aids camera
This camera and its associated functions
may be impaired or not work if the windscreen
area in front of the camera is dirty, misty,
frosty, covered with snow, damaged or
masked by a sticker.
On versions with camera alone, this message
indicates to you that the camera is obstructed:
"Driving aids camera: visibility limited, see
user guide".
In humid and cold weather, demist the
windscreen regularly.
Poor visibility (inadequate street lighting,
heavy rain, thick fog, snowfall), dazzle
(headlamps of an oncoming vehicle, low sun,
reflections on a damp road, leaving a tunnel,
alternating shade and light) can also impair
detection performance.
In the event of a windscreen replacement,
contact a PEUGEOT dealer or a qualified
workshop to recalibrate the camera;
otherwise, the operation of the associated
driving aids may be disrupted.
Other cameras
The images from the camera(s)
displayed on the touch screen or on the
instrument panel may be distorted by the
relief.
In the presence of areas in shade, or in
conditions of bright sunlight or inadequate
lighting, the image may be darkened and with
lower contrast.
Obstacles may appear further away than they
actually are.
Sensors
The operation of the sensors as well as
the associated functions may be disturbed
by sound interference such as that emitted
by noisy vehicles and machinery (e.g. lorries,
pneumatic drills), by the accumulation of
snow or dead leaves on the road or in the
event of damaged bumpers and mirrors.
When reverse gear is engaged, an audible
signal (long beep) indicates that the sensors
may be dirty.
A front or rear impact to the vehicle can
upset the sensors’ settings, which is not
always detected by the system: distance
measurements may be distorted.
The sensors do not systematically detect
obstacles that are too low (pavements, studs)
or too thin (trees, posts, wire fences).
Certain obstacles located in the sensors’ blind
spots may not be detected or may no longer
be detected during the manoeuvre.
Certain materials (fabrics) absorb sound
waves: pedestrians may not be detected.
Maintenance
Clean the bumpers and door mirrors and
the field of vision of the cameras regularly.
When washing your vehicle at high pressure,
direct the spray from at least 30 cm away
from the radar, sensors and cameras.
Mats
The use of mats not approved by
PEUGEOT may interfere with the operation of
the speed limiter or cruise control.
To avoid any risk of jamming the pedals:
► ensure that the mat is secured correctly,
► never fit one mat on top of another.
Page 117 of 276
11 5
Driving
6Information displayed on
the instrument panel
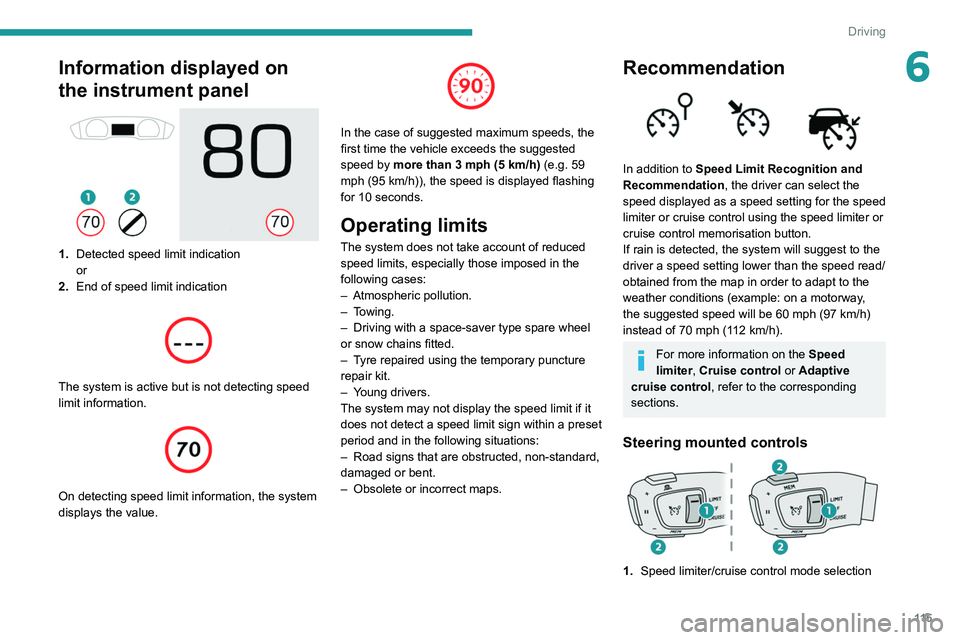
1.Detected speed limit indication
or
2. End of speed limit indication
The system is active but is not detecting speed
limit information.
On detecting speed limit information, the system
displays the value.
In the case of suggested maximum speeds, the
first time the vehicle exceeds the suggested
speed by more than 3 mph (5
km/h) (e.g. 59
mph (95
km/h)), the speed is displayed flashing
for 10 seconds.
Operating limits
The system does not take account of reduced
speed limits, especially those imposed in the
following cases:
–
Atmospheric pollution.
–
Towing.
–
Driving with a space-saver type spare wheel
or snow chains fitted.
–
T
yre repaired using the temporary puncture
repair kit.
–
Y
oung drivers.
The system may not display the speed limit if it
does not detect a speed limit sign within a preset
period and in the following situations:
–
Road signs that are obstructed, non-standard,
damaged or bent.
–
Obsolete or incorrect maps.
Recommendation
In addition to Speed Limit Recognition and
Recommendation, the driver can select the
speed displayed as a speed setting for the speed
limiter or cruise control using the speed limiter or
cruise control memorisation button.
If rain is detected, the system will suggest to the
driver a speed setting lower than the speed read/
obtained from the map in order to adapt to the
weather conditions (example: on a motorway,
the suggested speed will be 60 mph (97 km/h)
instead of 70 mph (112 km/h).
For more information on the Speed
limiter, Cruise control or Adaptive
cruise control, refer to the corresponding
sections.
Steering mounted controls
1. Speed limiter/cruise control mode selection
Page 150 of 276
148
Driving
Resuming the manoeuvre after resolving the
conditions for suspending it:
►
Release all controls (brake pedal, function
control button, steering wheel, etc.).
►
Press the function control button again.
Permanent interruption after suspending the
manoeuvre:
►
Depress the brake pedal and engage a gear
.
Abandoning the manoeuvre
The manoeuvre is abandoned in the following
situations:
–
No action by the driver within 30 seconds of
the manoeuvre being suspended.
–
Intentional application of the parking brake.
–
Gearbox mode P
engaged by the driver.
–
Driver's seat belt unfastened.
–
Opening of a door or the boot.
–
Activation of the direction indicator lamps on
the opposite side to that of the manoeuvre.
–
In certain cases, when a wheel of the vehicle
hits a pavement or a low obstacle.
–
T
riggering of anti-slip regulation on a slippery
road.
–
Engine stalling.
–
Sudden appearance in the field of the
manoeuvre of an obstacle not detected by the
system before the manoeuvre was started,
with the obstacle remaining for more than 30
seconds.
–
After 10 manoeuvres to enter or exit a
"parallel" parking space and after 7 manoeuvres
to enter a "bay" parking space, –
System malfunction during the manoeuvre.
Abandoning the manoeuvre immediately
triggers the vehicle’
s brakes and automatically
deactivates the function.
This symbol is displayed, accompanied by the message "Manoeuvre abandoned"
on the touch screen.
A message prompts the driver to take back
control of the vehicle.
The function is deactivated after a few seconds; this indicator lamp goes off and
the initial display is resumed.
The system automatically engages gearbox
mode P after 4 seconds.
End of manoeuvre
The vehicle stops as soon as the manoeuvre is
completed.
This symbol is displayed, accompanied by the message "Manoeuvre completed" on
the touch screen.
When the function is deactivated, this
indicator lamp goes off and the original
display is restored.
–
If entering a parking space, the driver may
be required to complete the manoeuvre.
The gearbox changes to
P
4 seconds after
completion of the manoeuvre.
–
When exiting a parking space, the gearbox
changes to
N when the manoeuvre is complete.
A message and symbols prompt the driver to
take back control of the vehicle. The gearbox automatically changes to mode
P if no action is taken by the driver within 30
secondss.
Operating limits
– The system may suggest an inappropriate
parking space (parking prohibited, work in
progress with damaged road surface, location
alongside a ditch, etc.).
–
The system may indicate that a space has
been found but will not offer it because of a fixed
obstacle on the opposite side of the manoeuvre,
which does not allow the vehicle to follow the
trajectory required for parking.
–
The system may indicate that a space has
been found but the manoeuvre will not be
triggered because the width of the lane is
insufficient.
–
The system is not designed to perform parking
manoeuvres on a steep slope or on a sharp
curve.
–
The system does not detect spaces that
are much larger than the vehicle itself or that
are delimited by obstacles that are too low
(pavements, studs, etc.) or too thin (trees, posts,
wire fences, etc.).
–
The system may be impaired by incorrect
inflation of the vehicle’
s tyres.
–
The tilting of the vehicle if the boot is heavily
loaded can affect the distance measurements.
Do not use the function under the
following exterior conditions:
– Alongside a soft shoulder (ditch) or quay or
on the edge of a drop.
– When the road surface is slippery (ice).
Do not use the function in the presence
of one of the following malfunctions:
– If a tyre is under-inflated.
– If one of the bumpers is damaged.
– If one of the cameras is faulty.
– If the brake lamps are not working.
Do not use the function if the vehicle has
been subject to one of the following
modifications:
– When carrying an object extending beyond
the dimensions of the vehicle (ladder on the
roof bars, bicycle carrier on the tailgate, etc.).
– With a non-approved towball in place.
– With snow chains fitted.
– When driving on a small-diameter or
"space-saver" type spare wheel.
– When the wheels fitted are a different size
from the original ones.
– After modifying one or both bumpers
(added protection).
– If the sensors have been repainted outside
the PEUGEOT dealer network.
– With sensors not approved for the vehicle.
Page 153 of 276
151
Practical information
7Compatibility of fuels
Petrol fuels conforming to the EN228 standard
containing up to 5% and 10% ethanol
respectively.
Diesel fuels conforming to the EN590, EN16734
and EN16709 standards and containing up to
7%, 10%, 20% and 30% fatty acid methyl ester
respectively. The use of B20 or B30 fuels, even
occasionally, imposes special maintenance
conditions referred to as "Arduous conditions".
Paraffinic Diesel fuel conforming to the EN15940
standard.
The use of any other type of (bio) fuel (vegetable or animal oils, pure or diluted,
domestic fuel, etc.) is strictly prohibited (risk
of damage to the engine and fuel system).
The only fuel additives authorised for use are those that meet the B715001 (petrol)
or B715000 (Diesel) standards.
Diesel at low temperature
At temperatures below 0 °C (+32 °F), the
formation of paraffins in summer-type Diesel fuels could prevent the engine from operating
correctly. In these temperature conditions, use
winter-type Diesel fuel and keep the fuel tank
more than 50
% full.
At temperatures below -15 °C (+5 °F) to avoid
problems starting, it is best to park the vehicle
under shelter (heated garage).
Travelling abroad
Certain fuels could damage your vehicle’s
engine.
In certain countries, the use of a particular
fuel may be required (specific octane rating,
specific trade name, etc.) to ensure correct
operation of the engine.
For all additional information, consult a dealer.
Refuelling
Fuel tank capacity: approximately 62 litres
(petrol), 55 litres (Diesel) or 42 litres (Hybrid).
Reserve level: approximately 6 litres.
Low fuel level
When the low fuel level is reached, this
warning lamp comes on on the instrument
panel, accompanied by an onscreen message
and an audible signal. When it first comes on,
about 6 litres of fuel remain in the tank.
Until sufficient fuel is added, this warning lamp
appears every time the ignition is switched on,
accompanied by an onscreen message and
an audible signal. When driving, this message
and audible signal are repeated with increasing
frequency as the fuel level drops towards 0.
You must refuel as soon as possible to avoid
running out of fuel.
For more information on Running out of fuel
(Diesel), refer to the corresponding section.
Stop & Start
Never refuel with the engine in STOP
mode; you must switch off the ignition.
Refuelling
Additions of fuel must be of at least 10 litres, in
order to be registered by the fuel gauge.
Opening the filler flap may create a noise caused
by an inrush of air. This vacuum is entirely
normal, resulting from the sealing of the fuel
system.
To refuel in complete safety:
►
You must switch off the engine.
Page 155 of 276
153
Practical information
7serious burns or electrical shock that can lead
to death.
In the event of a problem, always contact a
PEUGEOT dealer or a qualified workshop.
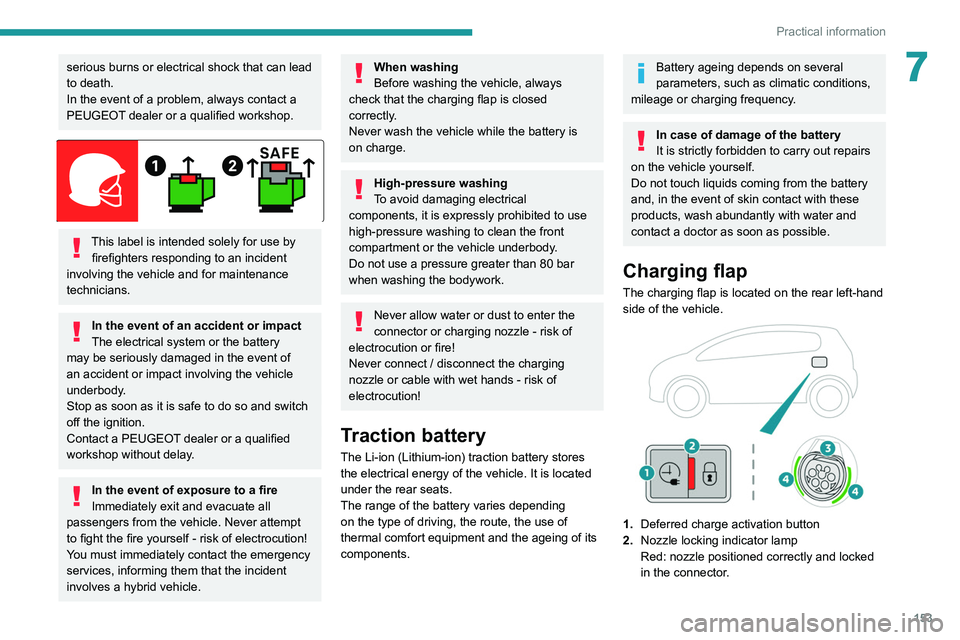
This label is intended solely for use by firefighters responding to an incident
involving the vehicle and for maintenance
technicians.
In the event of an accident or impact
The electrical system or the battery
may be seriously damaged in the event of
an accident or impact involving the vehicle
underbody.
Stop as soon as it is safe to do so and switch
off the ignition.
Contact a PEUGEOT dealer or a qualified
workshop without delay.
In the event of exposure to a fire
Immediately exit and evacuate all
passengers from the vehicle. Never attempt
to fight the fire yourself - risk of electrocution!
You must immediately
contact the emergency
services, informing them that the incident
involves a hybrid vehicle.
When washing
Before washing the vehicle, always
check that the charging flap is closed
correctly.
Never wash the vehicle while the battery is
on charge.
High-pressure washing
To avoid damaging electrical
components, it is expressly prohibited to use
high-pressure washing to clean the front
compartment or the vehicle underbody.
Do not use a pressure greater than 80 bar
when washing the bodywork.
Never allow water or dust to enter the
connector or charging nozzle - risk of
electrocution or fire!
Never connect / disconnect the charging
nozzle or cable with wet hands - risk of
electrocution!
Traction battery
The Li-ion (Lithium-ion) traction battery stores
the electrical energy of the vehicle. It is located
under the rear seats.
The range of the battery varies depending
on the type of driving, the route, the use of
thermal comfort equipment and the ageing of its
components.
Battery ageing depends on several
parameters, such as climatic conditions,
mileage or charging frequency.
In case of damage of the battery
It is strictly forbidden to carry out repairs
on the vehicle yourself.
Do not touch liquids coming from the battery
and, in the event of skin contact with these
products, wash abundantly with water and
contact a doctor as soon as possible.
Charging flap
The charging flap is located on the rear left-hand
side of the vehicle.
1. Deferred charge activation button
2. Nozzle locking indicator lamp
Red: nozzle positioned correctly and locked
in the connector.
Page 157 of 276
155
Practical information
7Cable typeCompatibilitySpecifications
Mode 3 charging cable
Wallbox accelerated charging unit
Vehicle can be recharged in 1.5 hours to 1.75
hours (with 6.6 kW charger).
Charge limited to a maximum of 32
A.
Charging times are given for
information purposes only; they may
vary according to different factors such as the
exterior temperature or the quality of the
electrical network. If the exterior temperature
is below -10°C, it is recommended to connect
the vehicle as soon as possible as the
charging time may increase significantly.
Mode 2 charging cable with integrated
control unit
It is essential to avoid damaging the cable
and to keep it intact.
In the event of damage, do not use it and
contact a PEUGEOT dealer or a qualified
workshop to replace it.
Wallbox accelerated charging unit
(mode 3)
Do not disassemble or modify the charging
unit - risk of electrocution and/or fire!
Refer to the charging unit user manual for the
operating instructions.
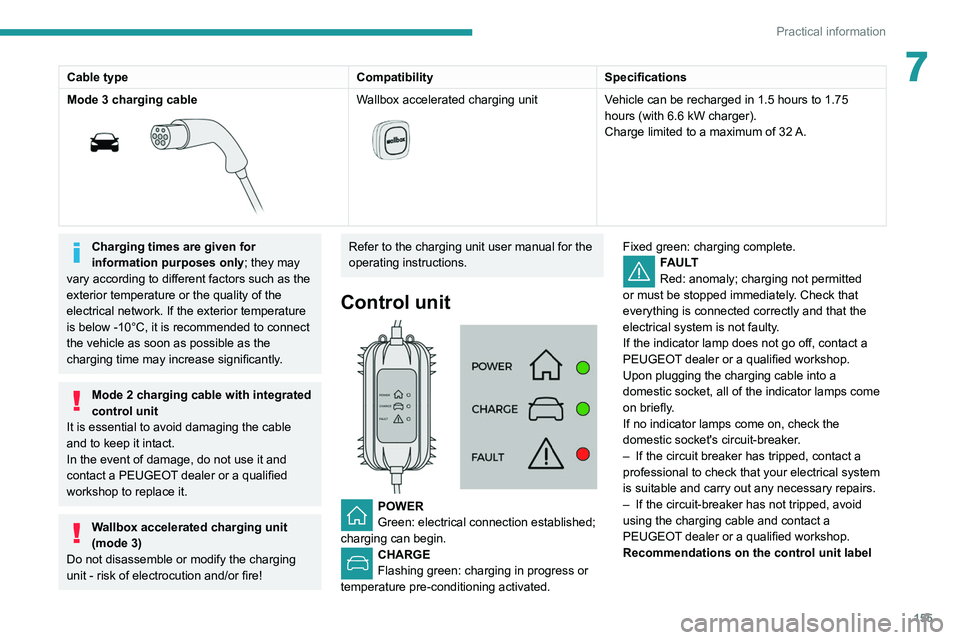
Control unit
POWER
Green: electrical connection established;
charging can begin.
CHARGE
Flashing green: charging in progress or
temperature pre-conditioning activated. Fixed green: charging complete.
FAULT
Red: anomaly; charging not permitted
or must be stopped immediately. Check that
everything is connected correctly and that the
electrical system is not faulty.
If the indicator lamp does not go off, contact a
PEUGEOT dealer or a qualified workshop.
Upon plugging the charging cable into a
domestic socket, all of the indicator lamps come
on briefly.
If no indicator lamps come on, check the
domestic socket's circuit-breaker.
–
If the circuit breaker has tripped, contact a
professional to check that your electrical system
is suitable and carry out any necessary repairs.
–
If the circuit-breaker has not tripped, avoid
using the charging cable and contact a
PEUGEOT
dealer or a qualified workshop.
Recommendations on the control unit label
Page 164 of 276
162
Practical information
Original tyre size Maximum link size235/40 R19 Not suitable for
chains
(with standard chains)
For more information on snow chains, contact a
PEUGEOT dealer or a qualified workshop.
Installation tips
► To fit the chains during a journey, stop the
vehicle on a flat surface on the side of the road.
►
Apply the parking brake and position any
wheel chocks under the wheels to prevent
movement of the vehicle.
►
Fit the chains following the instructions
provided by the manufacturer
.
►
Move off gently and drive for a few moments,
without exceeding 31
mph (50 km/h).
►
Stop the vehicle and check that the snow
chains are correctly tightened.
It is strongly recommended that before
you leave, you practise fitting the snow
chains on a level and dry surface.
Avoid driving with snow chains on roads that have been cleared of snow to avoid
damaging the vehicle's tyres and the road
surface. If the vehicle is fitted with alloy
wheels, check that no part of the chain or its
fixings is in contact with the wheel rim.
Hybrid vehicles
The use of snow chains is only
authorised on the front wheels.
Energy economy mode
This system manages the duration of use of
certain functions, in order to conserve a sufficient
level of charge in the battery with the ignition off.
After switching off the engine, you can still
use functions such as the audio and telematic
system, the wipers and the dipped beam
headlamps or courtesy lamps, for a combined
duration of approximately 40 minutes.
Selecting the mode
A confirmation message is displayed when
energy economy mode is entered, and the active
functions are placed on standby.
If a telephone call is in progress at the
time, it will be maintained for around 10
minutes via the audio system’s hands-free
system.
Exiting the mode
These functions are automatically reactivated the
next time the vehicle is used.
To restore the use of these functions
immediately, start the engine and let it run:
–
For less than 10 minutes, to use the
equipment for approximately 5 minutes.
– For more than 10 minutes, to use the
equipment for approximately 30 minutes.
Let the engine run for the specified duration to
ensure that the battery charge is sufficient.
T
o recharge the battery, avoid repeatedly or
continuously restarting the engine.
A flat battery prevents the engine from starting.
For more information on the 12
V battery,
refer to the corresponding section.
Load reduction mode
This system manages the use of certain
functions according to the level of charge
remaining in the battery.
When the vehicle is being driven, the load
reduction function temporarily deactivates certain
functions, such as the air conditioning and the
heated rear screen.
The deactivated functions are reactivated
automatically as soon as conditions permit.
Bonnet
For more information about the Active bonnet,
refer to the corresponding section.
Stop & Start
Before doing anything under the bonnet,
you must switch off the ignition to avoid any
risk of injury resulting from an automatic
change to START mode.
Hybrid vehicles
Before any work is carried out under the
bonnet, it is essential to switch off the ignition
and check that the READY indicator lamp is
off in the instrument panel - risk of serious
injury!
The location of the interior bonnet release lever prevents the bonnet being
opened when the left-hand front door is
closed.
When the engine is hot, handle the
exterior safety catch with care (risk of
burns), using the protected area.
When the bonnet is open, take care not to
damage the safety catch.
Do not open the bonnet under very windy
conditions.
Cooling of the engine when stopped
The engine cooling fan may start after
the engine has been switched off.
Take care with objects or clothing that
could be caught in the blades of the fan!
Page 165 of 276
163
Practical information
7risk of injury resulting from an automatic
change to START mode.
Hybrid vehicles
Before any work is carried out under the
bonnet, it is essential to switch off the ignition
and check that the READY indicator lamp is
off in the instrument panel - risk of serious
injury!
The location of the interior bonnet release lever prevents the bonnet being
opened when the left-hand front door is
closed.
When the engine is hot, handle the
exterior safety catch with care (risk of
burns), using the protected area.
When the bonnet is open, take care not to
damage the safety catch.
Do not open the bonnet under very windy
conditions.
Cooling of the engine when stopped
The engine cooling fan may start after
the engine has been switched off.
Take care with objects or clothing that
could be caught in the blades of the fan!
Opening
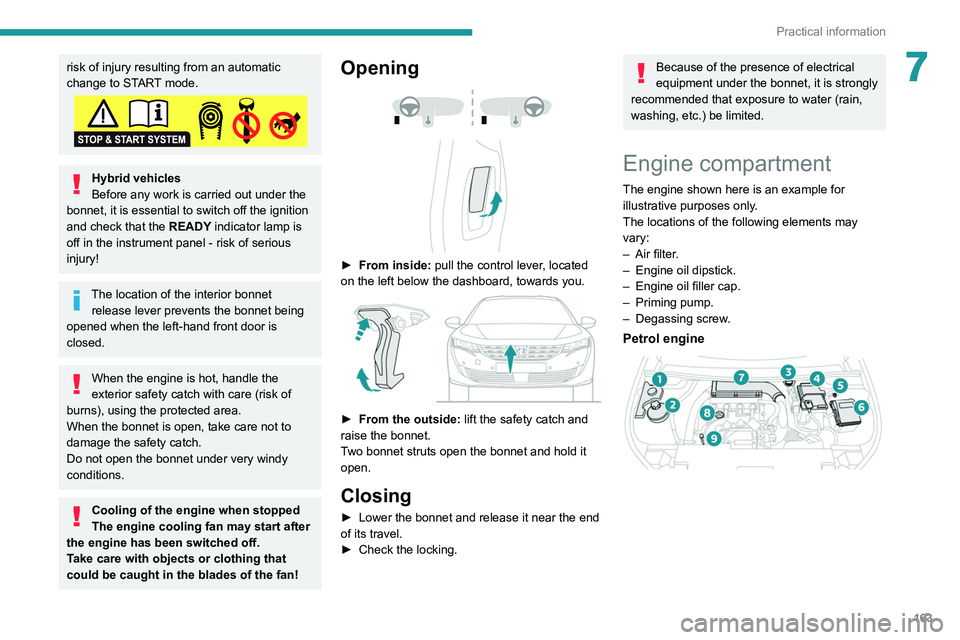
► From inside: pull the control lever , located
on the left below the dashboard, towards you.
► From the outside: lift the safety catch and
raise the bonnet.
T
wo bonnet struts open the bonnet and hold it
open.
Closing
► Lower the bonnet and release it near the end
of its travel.
►
Check the locking.
Because of the presence of electrical
equipment under the bonnet, it is strongly
recommended that exposure to water (rain,
washing, etc.) be limited.
Engine compartment
The engine shown here is an example for
illustrative purposes only.
The locations of the following elements may
vary:
–
Air filter
.
–
Engine oil dipstick.
–
Engine oil filler cap.
–
Priming pump.
–
Degassing screw
.
Petrol engine