change time Peugeot 508 2020 Owner's Manual
[x] Cancel search | Manufacturer: PEUGEOT, Model Year: 2020, Model line: 508, Model: Peugeot 508 2020Pages: 276, PDF Size: 8.43 MB
Page 9 of 276
7
Eco-driving
Eco-driving
Eco-driving refers to a range of everyday
practices that allow the motorist to optimise their
fuel consumption and CO
2emissions.
Optimise your use of the gearbox
With a manual gearbox, move off gently and
change up promptly. While accelerating, change
up early.
With an automatic gearbox, favour automatic
mode and avoid pressing the accelerator pedal
heavily or suddenly.
The gear efficiency indicator prompts you to
engage the most suitable gear: whenever this
indication is displayed on the instrument panel,
follow it straight away.
With an automatic gearbox, this indicator
appears only in manual mode.
Drive smoothly
Maintain a safe distance between vehicles, use
engine braking rather than the brake pedal and
press the accelerator gradually. These attitudes
help to save fuel, reduce CO
2 emissions and
decrease general traffic noise.
Favour the use of the "Eco" driving mode by
selecting it using the "Drive Mode" control.
If the vehicle has the steering-mounted
"CRUISE" control, use cruise control at speeds
above 25 mph (40
km/h) when the traffic is
flowing well.
Use electrical equipment wisely
Before moving off, if the passenger compartment
is too warm, ventilate it by opening the windows
and air vents before using the air conditioning.
At speeds above 31
mph (50 km/h), close the
windows and leave the air vents open.
Consider using equipment that can help keep
the temperature in the passenger compartment
down (sunroof blind and window blinds, etc.).
Unless automatically regulated, switch off the air
conditioning as soon as the desired temperature
has been reached.
Switch off the demisting and defrosting functions,
if they are not managed automatically.
Switch off the heated seat as soon as possible.
Switch off the headlamps and foglamps when
the visibility conditions do not require their use.
Avoid running the engine before moving off,
particularly in winter; your vehicle will warm up
much faster while driving.
As a passenger, avoid connecting your
multimedia devices (film, music, video game,
etc.) to help reduce consumption of electrical
energy, and hence fuel.
Disconnect all portable devices before leaving
the vehicle.
Limit the causes of excess consumption
Spread loads throughout the vehicle; place the
heaviest items in the boot, as close as possible
to the rear seats.
Limit the loads carried in the vehicle and
minimise wind resistance (roof bars, roof rack, bicycle carrier, trailer, etc.). Preferably, use a
roof box.
Remove roof bars and roof racks after use.
At the end of winter, remove snow tyres and refit
summer tyres.
Comply with servicing instructions
Check tyre pressures regularly, with the tyres
cold, referring to the label in the door aperture on
the driver's side.
Carry out this check in particular:
–
before a long journey
.
–
at each change of season.
–
after a long period out of use.
Do not overlook the spare wheel and, where
applicable, the tyres on your trailer or caravan.
Have your vehicle serviced regularly (engine oil,
oil filter
, air filter, passenger compartment filter,
etc.) and observe the schedule of operations in
the manufacturer's service schedule.
With a BlueHDi Diesel engine, if the SCR system
is faulty, your vehicle will emit pollution. Visit
a PEUGEOT dealer or a qualified workshop
as soon as possible to restore your vehicle’s
nitrogen oxide emissions to regulatory
compliance.
When filling the fuel tank, do not continue after
the third nozzle cut-out, to avoid overflow.
You will only see the fuel consumption of your
new vehicle settle down to a consistent average
after the first 1,900 miles (3,000 kilometres).
Page 22 of 276
20
Instruments
ECO Optimal use of energy (internal combustion or electric).
The cursor is located in this zone
during electric driving phases and
during optimal usage phases of the
petrol engine, accessible with suitable
driving.
An indicator indicates the restart
threshold of the petrol engine. The
driver can therefore moderate their
acceleration to remain in electric
driving mode.
CHARGE Energy recovery for recharging the traction battery.
The cursor is located in this zone
during deceleration phases: taking
your foot off the accelerator pedal or
braking.
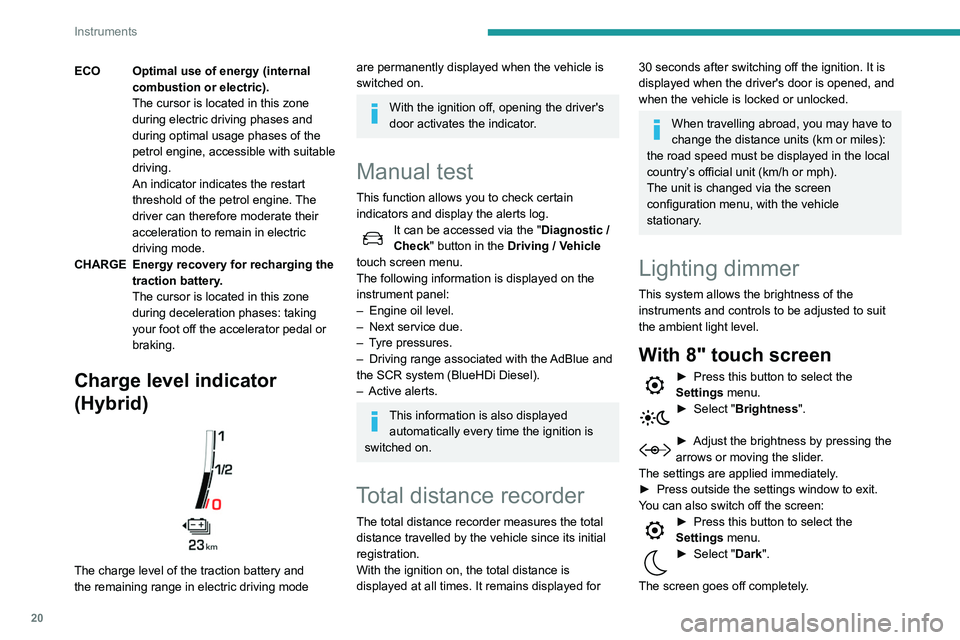
Charge level indicator
(Hybrid)
The charge level of the traction battery and
the remaining range in electric driving mode
are permanently displayed when the vehicle is
switched on.
With the ignition off, opening the driver's
door activates the indicator.
Manual test
This function allows you to check certain
indicators and display the alerts log.
It can be accessed via the "Diagnostic /
Check" button in the Driving / Vehicle
touch screen menu.
The following information is displayed on the
instrument panel:
–
Engine oil level.
–
Next service due.
–
T
yre pressures.
–
Driving range associated with the
AdBlue and
the SCR system (BlueHDi Diesel).
–
Active alerts.
This information is also displayed automatically every time the ignition is
switched on.
Total distance recorder
The total distance recorder measures the total
distance travelled by the vehicle since its initial
registration.
With the ignition on, the total distance is
displayed at all times. It remains displayed for
30 seconds after switching off the ignition. It is
displayed when the driver's door is opened, and
when the vehicle is locked or unlocked.
When travelling abroad, you may have to
change the distance units (km or miles):
the road speed must be displayed in the local
country’s official unit (km/h or mph).
The unit is changed via the screen
configuration menu, with the vehicle
stationary.
Lighting dimmer
This system allows the brightness of the
instruments and controls to be adjusted to suit
the ambient light level.
With 8" touch screen
► Press this button to select the
Settings menu.
► Select " Brightness".
► Adjust the brightness by pressing the
arrows or moving the slider .
The settings are applied immediately.
►
Press outside the settings window to exit.
Y
ou can also switch off the screen:
► Press this button to select the
Settings menu.
► Select " Dark".
The screen goes off completely.
Page 23 of 276
21
Instruments
1► Press the screen again (anywhere on its
surface) to activate it.
With 10" HD touch screen
► Press this button to select the
Settings menu.
►
Select "
OPTIONS".
► Select " Screen configuration".
►
Select the "
Brightness" tab.
► Adjust the brightness by pressing the
arrows or moving the slider .
► Press this button to save and exit.
You can also switch off the screen:
► Press this button to select the
Settings menu.
► Select " Turn off screen".
The screen goes off completely.
►
Press the screen again (anywhere on its
surface) to activate it.
Trip computer
Displays information related to the current trip
(range, fuel consumption, average speed, etc.).
Display of data in the
instrument panel
Trip computer data is displayed permanently
when the "PERSONAL" display mode is
selected.
In all other display modes, pressing the end of
the wiper control stalk causes this data to appear
temporarily in a specific window.
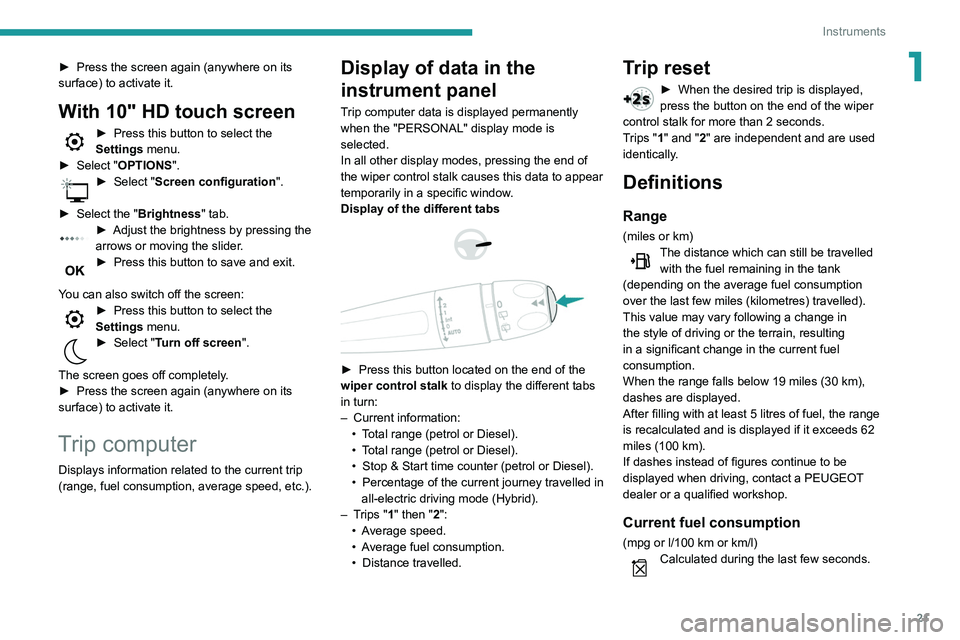
Display of the different tabs
► Press this button located on the end of the
wiper control stalk to display the different tabs
in turn:
–
Current information:
•
T
otal range (petrol or Diesel).
•
T
otal range (petrol or Diesel).
•
Stop & Start time counter (petrol or Diesel).
•
Percentage
of the current journey travelled in
all-electric driving mode (Hybrid).
–
T
rips "1" then "2":
•
A
verage speed.
•
A
verage fuel consumption.
•
Distance travelled.
Trip reset
► When the desired trip is displayed,
press the button on the end of the wiper
control stalk for more than 2
seconds.
Trips "1" and "2" are independent and are used
identically.
Definitions
Range
(miles or km)The distance which can still be travelled with the fuel remaining in the tank
(depending on the average fuel consumption
over the last few miles (kilometres) travelled).
This value may vary following a change in
the style of driving or the terrain, resulting
in a significant change in the current fuel
consumption.
When the range falls below 19 miles (30
km),
dashes are displayed.
After filling with at least 5 litres of fuel, the range
is recalculated and is displayed if it exceeds 62
miles (100
km).
If dashes instead of figures continue to be
displayed when driving, contact a PEUGEOT
dealer or a qualified workshop.
Current fuel consumption
(mpg or l/100 km or km/l)Calculated during the last few seconds.
Page 26 of 276
24
Instruments
1. Average electrical consumption for the current
trip (kWh/100 km) and historical values:
–
Blue bar chart: directly consumed energy
supplied by the traction battery
.
–
Green bar chart: energy recovered during
deceleration and braking, used to recharge the
battery
.
2. Average fuel consumption for the current trip
(kWh/100
km) and historical values (orange bar
chart).
►
Y
ou can change the displayed time scale by
pressing the
-
or + buttons.
eSave function
The eSave tab makes it possible to reserve all or
part of the electrical energy of the traction battery
for later use during a journey (e.g. driving in an
urban area or in an area reserved for electric
vehicles).
►
Activate the function by choosing ON
then
select the electrical energy to be reserved: 10
km, 20 km or all of the electrical energy ( MAX).
Activation of the function is confirmed by
the lighting up of this indicator lamp in the
instrument panel and the display of the energy
reserve in miles or kms.
►
T
o use the energy reserve, choose the
ELECTRIC driving mode in the mode selector.
The function settings are not saved when the
ignition is switched off.
If the requested range exceeds the
available range (not recommended), the internal combustion engine starts to ensure
that the traction battery is recharged to the
requested threshold - risk of downgraded
performance and overconsumption of fuel!
Information banner(s)
Certain information is displayed permanently in
the touch screen banner(s).
8" touch screen upper banner
– Time and exterior temperature (a blue warning
lamp appears if there is a risk of ice).
–
Reminder of the air conditioning information,
and direct access to the corresponding menu.
–
Reminder of the information in the
Radio
Media and Telephone menus.
–
Notifications.
–
Access to the
Settings for the touch screen
and the digital instrument panel (date/time,
languages, units, etc.).
10" HD touch screen side banners
– Exterior temperature (a blue warning lamp
appears if there is a risk of ice).
–
Access to the
Settings for the touch screen
and the digital instrument panel (date/time,
languages, units, etc.).
–
Notifications.
–
Reminder of the air conditioning information,
and direct access to the corresponding menu.
–
Time.
Remote features (Hybrid)
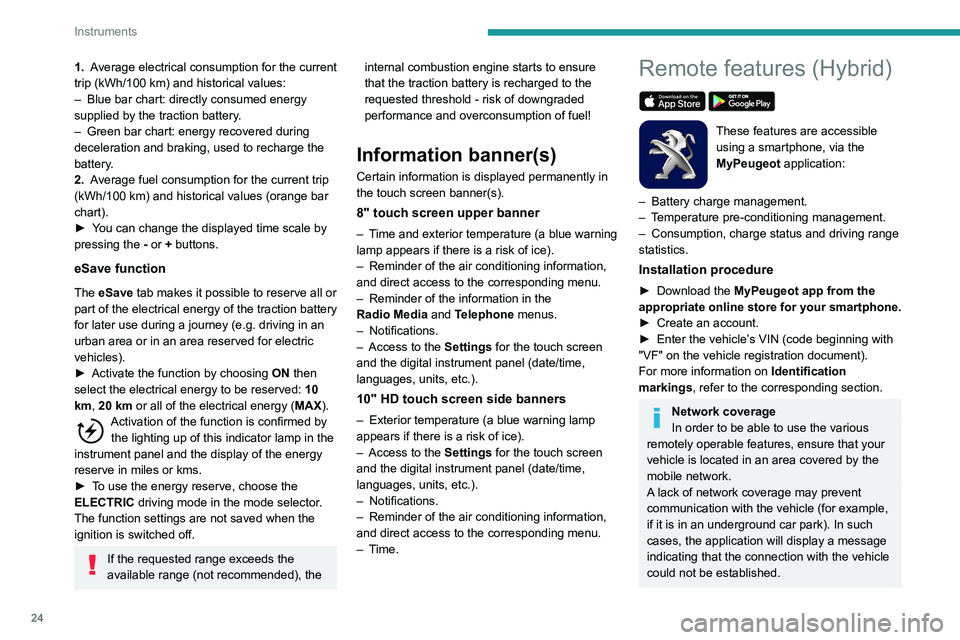
These features are accessible
using a smartphone, via the
MyPeugeot application:
–
Battery charge management.
–
T
emperature pre-conditioning management.
–
Consumption, charge status and driving range
statistics.
Installation procedure
► Download the MyPeugeot app from the
appropriate online store for your smartphone.
►
Create an account.
►
Enter the vehicle’
s VIN (code beginning with
"VF" on the vehicle registration document).
For more information on Identification
markings, refer to the corresponding section.
Network coverage
In order to be able to use the various
remotely operable features, ensure that your
vehicle is located in an area covered by the
mobile network.
A lack of network coverage may prevent
communication with the vehicle (for example,
if it is in an underground car park). In such
cases, the application will display a message
indicating that the connection with the vehicle
could not be established.
Page 33 of 276
31
Access
2Automatic (anti-intrusion security)
The doors and boot lock automatically while
driving (speed above 6 mph (10
km/h)).
To deactivate/reactivate this function (activated
by default):
►
Press the button until an audible warning is
triggered and a confirmation message appears.
Transporting long or voluminous
objects
Press the central locking control to drive
with the boot open and the doors locked.
Otherwise, every time the speed of the
vehicle exceeds 6 mph (10 km/h), the locks
will rebound and an alert will appear.
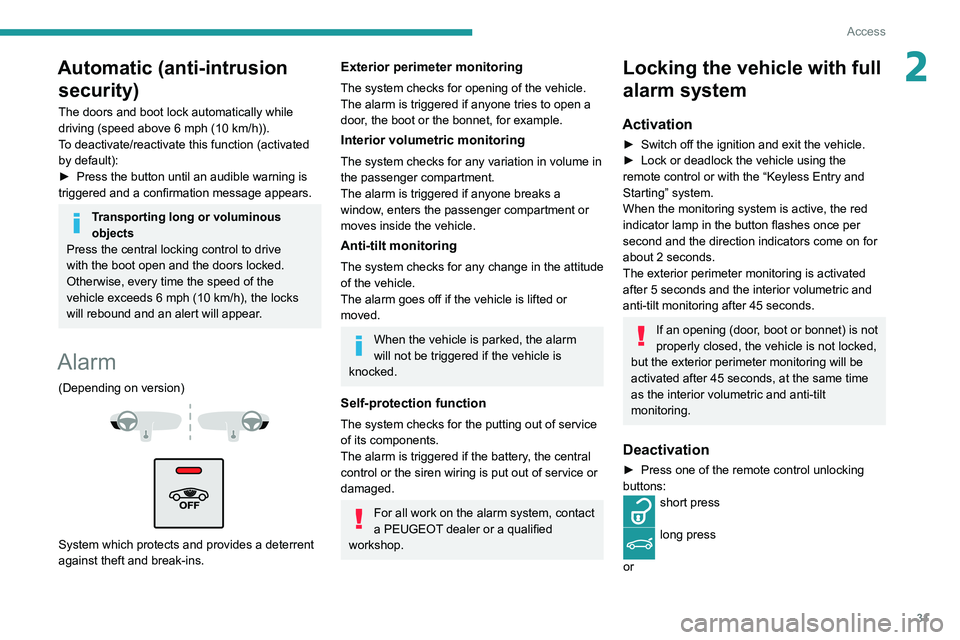
Alarm
(Depending on version)
System which protects and provides a deterrent
against theft and break-ins.
Exterior perimeter monitoring
The system checks for opening of the vehicle.
The alarm is triggered if anyone tries to open a
door, the boot or the bonnet, for example.
Interior volumetric monitoring
The system checks for any variation in volume in
the passenger compartment.
The alarm is triggered if anyone breaks a
window, enters the passenger compartment or
moves inside the vehicle.
Anti-tilt monitoring
The system checks for any change in the attitude
of the vehicle.
The alarm goes off if the vehicle is lifted or
moved.
When the vehicle is parked, the alarm
will not be triggered if the vehicle is
knocked.
Self-protection function
The system checks for the putting out of service
of its components.
The alarm is triggered if the battery, the central
control or the siren wiring is put out of service or
damaged.
For all work on the alarm system, contact
a PEUGEOT dealer or a qualified
workshop.
Locking the vehicle with full
alarm system
Activation
► Switch off the ignition and exit the vehicle.
► Lock or deadlock the vehicle using the
remote control or with the “Keyless Entry and
Starting” system.
When the monitoring system is active, the red
indicator lamp in the button flashes once per
second and the direction indicators come on for
about 2 seconds.
The exterior perimeter monitoring is activated
after 5 seconds and the interior volumetric and
anti-tilt monitoring after 45 seconds.
If an opening (door, boot or bonnet) is not
properly closed, the vehicle is not locked,
but the exterior perimeter monitoring will be
activated after 45 seconds, at the same time
as the interior volumetric and anti-tilt
monitoring.
Deactivation
► Press one of the remote control unlocking
buttons:
short press
long press
or
Page 40 of 276
38
Access
The rear electric windows can still be controlled
using the driver's controls.
In the event of a serious impact, use of
the rear electric window controls is
re-enabled, if they had been deactivated.
Reinitialising the electric
windows
Following reconnection of the battery, or if
the windows move abnormally, the anti-pinch
function must be reinitialised.
The safety anti-pinch function is not active
during these operations.
For each of the windows:
► Lower the window fully, then raise it; it will
rise in steps of a few centimetres each time the
control is pressed. Repeat the operation until the
window is fully closed.
► Continue to pull the switch for at least
one second after reaching the window closed
position.
If an electric window meets an obstacle
during operation, the movement of the
window must be reversed. To do this, press
the switch concerned.
When the driver operates the passengers’
electric window switches, it is important to
ensure that nothing can prevent the window
from closing properly.
It is important to ensure that the passengers
use the electric windows correctly.
If the failure originates from the battery, it is
recommended to recharge it or change it with the
tailgate closed.
In this situation, a significant force may be
needed to close the tailgate.
►
Close it gently without slamming, as slowly as
possible, by pushing at the centre of the tailgate.
Do not lower the tailgate by pushing at
one of its sides - risk of damage!
Precautions in use
To avoid unintentionally opening the tailgate while operating the towing
device:
–
Deactivate the hands-free function in
advance in the vehicle configuration menu.
–
Or remove the electronic key from the
recognition zone, with the tailgate closed.
For more information on the T
owing device
with retractable towball , refer to the
corresponding section.
In wintry conditions
To avoid any operating problems, remove
the snow or wait until the ice melts before
requesting motorised opening of the tailgate.
When washing
When washing the vehicle in an
automatic car wash, do not forget to lock
the vehicle to prevent any risk of unwanted
opening.
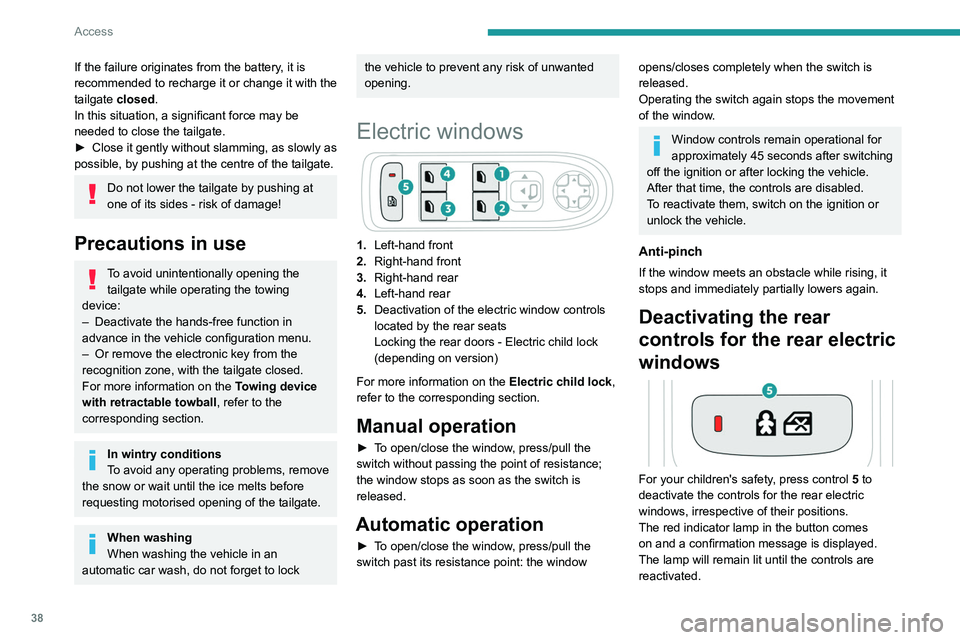
Electric windows
1. Left-hand front
2. Right-hand front
3. Right-hand rear
4. Left-hand rear
5. Deactivation of the electric window controls
located by the rear seats
Locking the rear doors - Electric child lock
(depending on version)
For more information on the Electric child lock,
refer to the corresponding section.
Manual operation
► To open/close the window, press/pull the
switch without passing the point of resistance;
the window stops as soon as the switch is
released.
Automatic operation
► To open/close the window, press/pull the
switch past its resistance point: the window
opens/closes completely when the switch is
released.
Operating the switch again stops the movement
of the window.
Window controls remain operational for
approximately 45 seconds after switching
off the ignition or after locking the vehicle.
After that time, the controls are disabled.
To reactivate them, switch on the ignition or
unlock the vehicle.
Anti-pinch
If the window meets an obstacle while rising, it
stops and immediately partially lowers again.
Deactivating the rear
controls for the rear electric
windows
For your children's safety, press control 5 to
deactivate the controls for the rear electric
windows, irrespective of their positions.
The red indicator lamp in the button comes
on and a confirmation message is displayed.
The lamp will remain lit until the controls are
reactivated.
Page 51 of 276
49
Ease of use and comfort
3If the interior temperature is very high
after the vehicle has stood for a long
time in the sunshine, air the passenger
compartment for a few moments.
Put the air flow control at a setting high
enough to quickly change the air in the
passenger compartment.
Condensation created by the air
conditioning results in a discharge of
water underneath the vehicle. This is perfectly
normal.
Servicing the ventilation and air
conditioning system
►
Ensure that the passenger compartment
filter is in good condition and have the filter
elements replaced regularly
.
We recommend using a composite passenger
compartment filter. Thanks to its special active
additive, this type of filter helps to purify the
air breathed by the occupants and keep the
passenger compartment clean (by reducing
allergic symptoms, unpleasant odours and
greasy deposits).
►
T
o ensure correct operation of the
air conditioning system, have it checked
according to the recommendations in the
Maintenance and Warranty Guide.
Stop & Start
The heating and air conditioning systems
only operate when the engine is running.
Temporarily deactivate the Stop & Start
system to maintain a comfortable temperature
in the passenger compartment.
For more information on the Stop & Start,
refer to the corresponding section.
ECO driving mode
Selection of this mode optimises fuel
consumption, but limits the performance
of the heating and air conditioning, without
however deactivating them.
Dual-zone automatic air
conditioning
This system automatically controls the activation
of the air conditioning system, regulating the
temperature, air flow and air distribution inside
the passenger compartment.
The air conditioning system operates with
the engine running, but the ventilation and its
controls can be accessed with the ignition on.
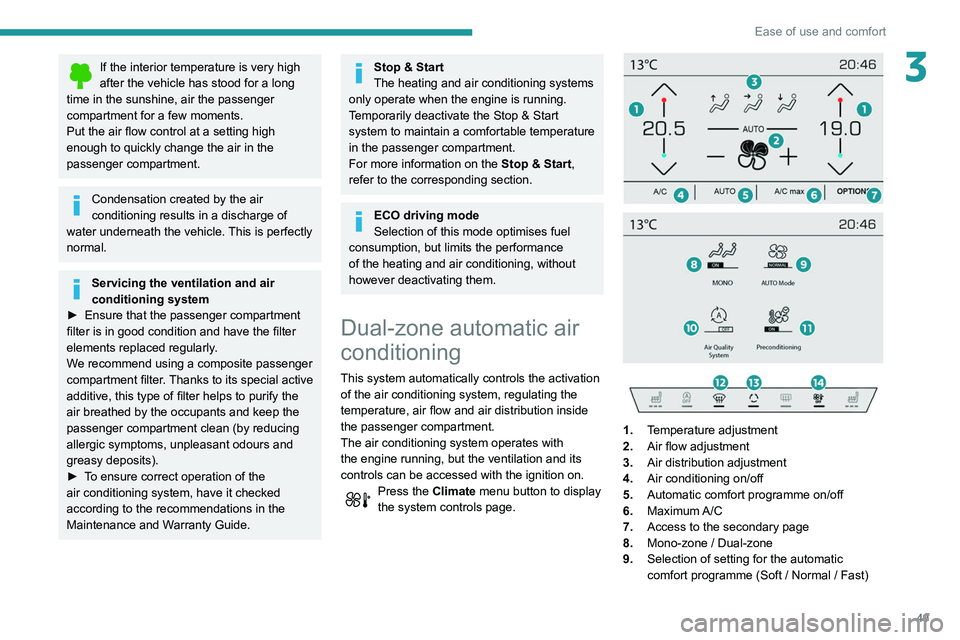
Press the Climate menu button to display
the system controls page.
1. Temperature adjustment
2. Air flow adjustment
3. Air distribution adjustment
4. Air conditioning on/off
5. Automatic comfort programme on/off
6. Maximum A/C
7. Access to the secondary page
8. Mono-zone / Dual-zone
9. Selection of setting for the automatic
comfort programme (Soft / Normal / Fast)
Page 55 of 276
53
Ease of use and comfort
3as reducing the consumption of electrical
current reduces fuel consumption.
Additional heating/ventilation system
Heating
This is an additional and separate system which
heats the passenger compartment and improves
defrosting performance.
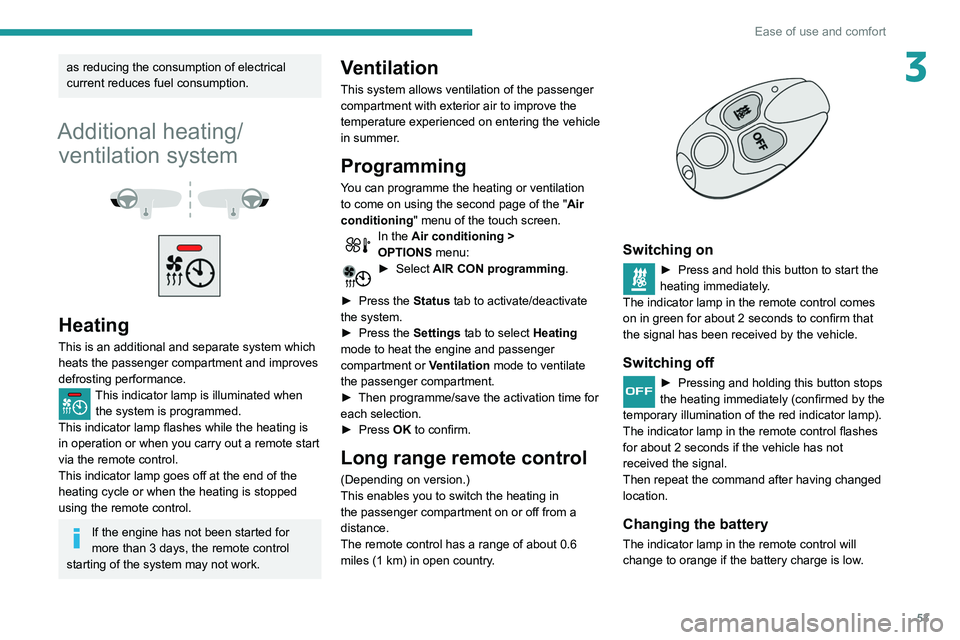
This indicator lamp is illuminated when the system is programmed.
This indicator lamp flashes while the heating is
in operation or when you carry out a remote start
via the remote control.
This indicator lamp goes off at the end of the
heating cycle or when the heating is stopped
using the remote control.
If the engine has not been started for
more than 3 days, the remote control
starting of the system may not work.
Ventilation
This system allows ventilation of the passenger
compartment with exterior air to improve the
temperature experienced on entering the vehicle
in summer.
Programming
You can programme the heating or ventilation
to come on using the second page of the " Air
conditioning " menu of the touch screen.
In the Air conditioning >
OPTIONS menu:
► Select AIR CON programming.
►
Press the
Status tab to activate/deactivate
the system.
►
Press the
Settings tab to select Heating
mode to heat the engine and passenger
compartment or Ventilation mode to ventilate
the passenger compartment.
►
Then programme/save the activation time for
each selection.
►
Press
OK to confirm.
Long range remote control
(Depending on version.)
This enables you to switch the heating in
the passenger compartment on or off from a
distance.
The remote control has a range of about 0.6
miles (1 km) in open country.
Switching on
► Press and hold this button to start the
heating immediately .
The indicator lamp in the remote control comes
on in green for about 2
seconds to confirm that
the signal has been received by the vehicle.
Switching off
► Pressing and holding this button stops
the heating immediately (confirmed by the
temporary illumination of the red indicator lamp).
The indicator lamp in the remote control flashes
for about 2 seconds if the vehicle has not
received the signal.
Then repeat the command after having changed
location.
Changing the battery
The indicator lamp in the remote control will
change to orange if the battery charge is low.
Page 70 of 276
68
Lighting and visibility
This indicator lamp goes out when the function is deactivated.
Pause
If the situation requires a change of headlamp
beam, the driver can take over at any time.
► A "headlamp flash" pauses the function:
• if the "AUTO" and "Dipped beam" indicator
lamps were on, the system changes to main
beam,
• if the "AUTO" and "Main beam" indicator
lamps were on, the system changes to
dipped beam.
To reactivate the system, flash the headlamps
again.
The system may suffer interference or not work correctly:
– under conditions of poor visibility (snow,
heavy rain, etc.),
– if the windscreen in front of the camera is
dirty, misted or obscured (for example, by a
sticker, etc.),
– if the vehicle is facing highly reflective
signs.
When the system detects thick fog, it
temporarily deactivates the function.
The system is not able to detect:
– road users that do not have their own
lighting, such as pedestrians,
– vehicles whose lighting is obscured (for
example: vehicles running behind a safety
barrier on a motorway),
Manual
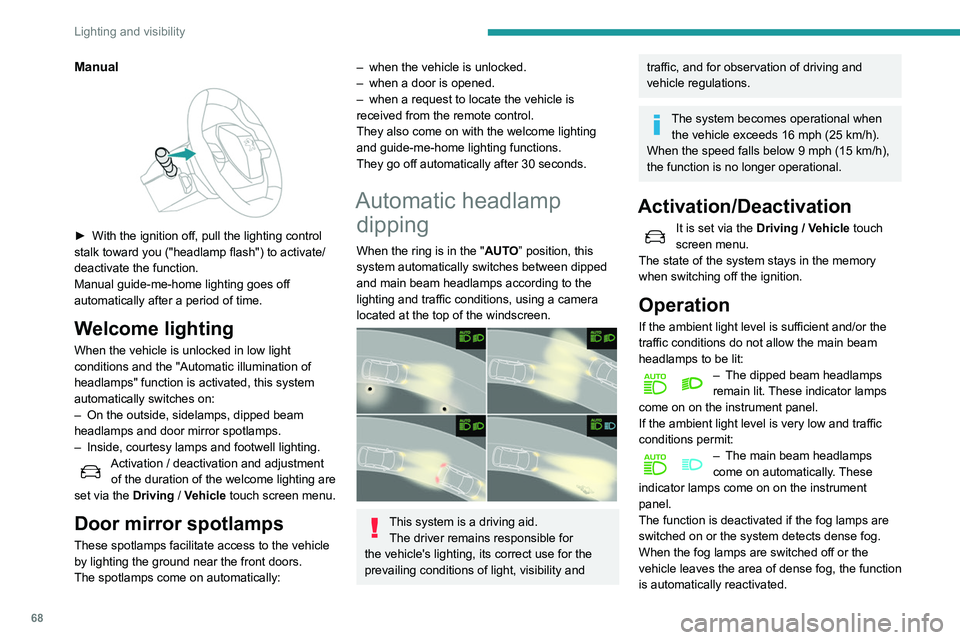
► With the ignition off, pull the lighting control
stalk toward you ("headlamp flash") to activate/
deactivate the function.
Manual guide-me-home lighting goes off
automatically after a period of time.
Welcome lighting
When the vehicle is unlocked in low light
conditions and the "Automatic illumination of
headlamps" function is activated, this system
automatically switches on:
–
On the outside, sidelamps, dipped beam
headlamps and door mirror spotlamps.
–
Inside, courtesy lamps and footwell lighting.
Activation / deactivation and adjustment of the duration of the welcome lighting are
set via the Driving
/ Vehicle touch screen menu.
Door mirror spotlamps
These spotlamps facilitate access to the vehicle
by lighting the ground near the front doors.
The spotlamps come on automatically:
– when the vehicle is unlocked.
– when a door is opened.
–
when a request to locate the vehicle is
received from the remote control.
They also come on with the welcome lighting
and guide-me-home lighting functions.
They go off automatically after 30 seconds.
Automatic headlamp dipping
When the ring is in the "AUTO” position, this
system automatically switches between dipped
and main beam headlamps according to the
lighting and traffic conditions, using a camera
located at the top of the windscreen.
This system is a driving aid.
The driver remains responsible for
the vehicle's lighting, its correct use for the
prevailing conditions of light, visibility and
traffic, and for observation of driving and
vehicle regulations.
The system becomes operational when the vehicle exceeds 16 mph (25 km/h).
When the speed falls below 9 mph (15 km/h),
the function is no longer operational.
Activation/Deactivation
It is set via the Driving / Vehicle touch
screen menu.
The state of the system stays in the memory
when switching off the ignition.
Operation
If the ambient light level is sufficient and/or the
traffic conditions do not allow the main beam
headlamps to be lit:
– The dipped beam headlamps
remain lit. These indicator lamps
come on on the instrument panel.
If the ambient light level is very low and traffic
conditions permit:
– The main beam headlamps
come on automatically . These
indicator lamps come on on the instrument
panel.
The function is deactivated if the fog lamps are
switched on or the system detects dense fog.
When the fog lamps are switched off or the
vehicle leaves the area of dense fog, the function
is automatically reactivated.
Page 71 of 276
69
Lighting and visibility
4This indicator lamp goes out when the function is deactivated.
Pause
If the situation requires a change of headlamp
beam, the driver can take over at any time.
►
A
"headlamp flash" pauses the function:
•
if the "AUT
O" and "Dipped beam" indicator
lamps were on, the system changes to main
beam,
•
if the "AUT
O" and "Main beam" indicator
lamps were on, the system changes to
dipped beam.
To reactivate the system, flash the headlamps
again.
The system may suffer interference or not work correctly:
–
under conditions of poor visibility (snow
,
heavy rain, etc.),
–
if the windscreen in front of the camera is
dirty
, misted or obscured (for example, by a
sticker, etc.),
–
if the vehicle is facing highly reflective
signs.
When the system detects thick fog, it
temporarily deactivates the function.
The system is not able to detect:
–
road users that do not have their own
lighting, such as pedestrians,
–
vehicles whose lighting is obscured (for
example: vehicles running behind a safety
barrier on a motorway),
– vehicles at the top or bottom of a steep
slope, on winding roads, on crossroads.
Clean the windscreen regularly,
particularly the area in front of the
camera.
The internal surface of the windscreen can
also become misted around the camera.
In humid and cold weather, demist the
windscreen regularly.
Do not allow snow to accumulate on the
bonnet or roof of the vehicle as this could
obstruct the detection camera.
Static cornering lighting
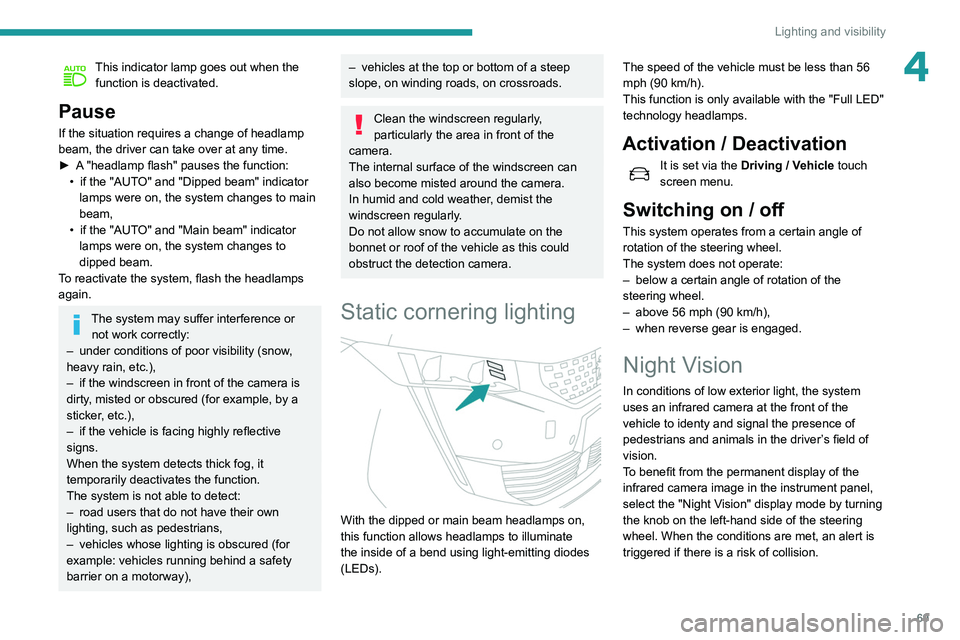
With the dipped or main beam headlamps on,
this function allows headlamps to illuminate
the inside of a bend using light-emitting diodes
(LEDs). The speed of the vehicle must be less than 56
mph (90 km/h).
This function is only available with the "Full LED"
technology headlamps.
Activation / Deactivation
It is set via the
Driving / Vehicle touch
screen menu.
Switching on / off
This system operates from a certain angle of
rotation of the steering wheel.
The system does not operate:
–
below a certain angle of rotation of the
steering wheel.
–
above 56 mph (90
km/h),
–
when reverse gear is engaged.
Night Vision
In conditions of low exterior light, the system
uses an infrared camera at the front of the
vehicle to
identy and signal the presence of
pedestrians and animals in the driver’s field of
vision.
T
o benefit from the permanent display of the
infrared camera image in the instrument panel,
select the "Night Vision" display mode by turning
the knob on the left-hand side of the steering
wheel. When the conditions are met, an alert is
triggered if there is a risk of collision.