set clock PEUGEOT 607 2003 Owners Manual
[x] Cancel search | Manufacturer: PEUGEOT, Model Year: 2003, Model line: 607, Model: PEUGEOT 607 2003Pages: 183, PDF Size: 2.66 MB
Page 39 of 183
10-02-2003
INSTRUMENTS AND CONTROLS43
Setting the parameters From the
'general menu' , the
'Display configuration' menu
allows you to access the following parameters:
Ð setting the video brightness and display,
Ð setting the date and time,
Ð choosing the language in which information is heard and displayed (German, Spanish, French, Eng-lish, Italian, Dutch), setting the for-
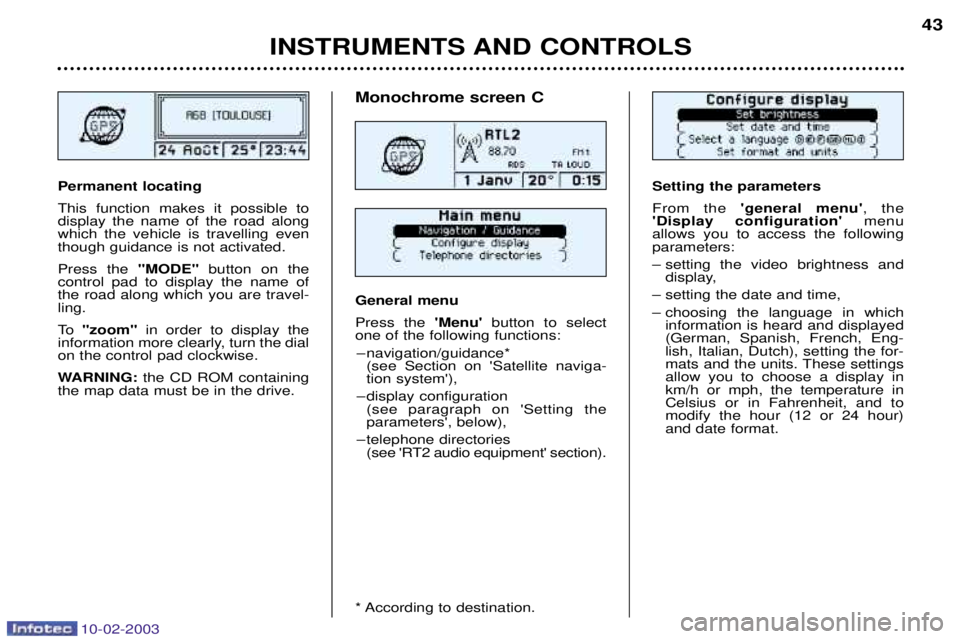
mats and the units. These settingsallow you to choose a display inkm/h or mph, the temperature inCelsius or in Fahrenheit, and tomodify the hour (12 or 24 hour)and date format.Permanent locating This function makes it possible to display the name of the road alongwhich the vehicle is travelling eventhough guidance is not activated. Press the "MODE"button on the
control pad to display the name of the road along which you are travel-ling.
To "zoom" in order to display the
information more clearly, turn the dial on the control pad clockwise.
WARNING: the CD ROM containing
the map data must be in the drive.
Monochrome screen C General menu Press the 'Menu' button to select
one of the following functions:
Ð navigation/guidance* (see Section on 'Satellite naviga- tion system'),
Ð display configuration (see paragraph on 'Setting theparameters', below),
Ð telephone directories (see 'RT2 audio equipment' section).
* According to destination.
Page 41 of 183
10-02-2003
INSTRUMENTS AND CONTROLS43
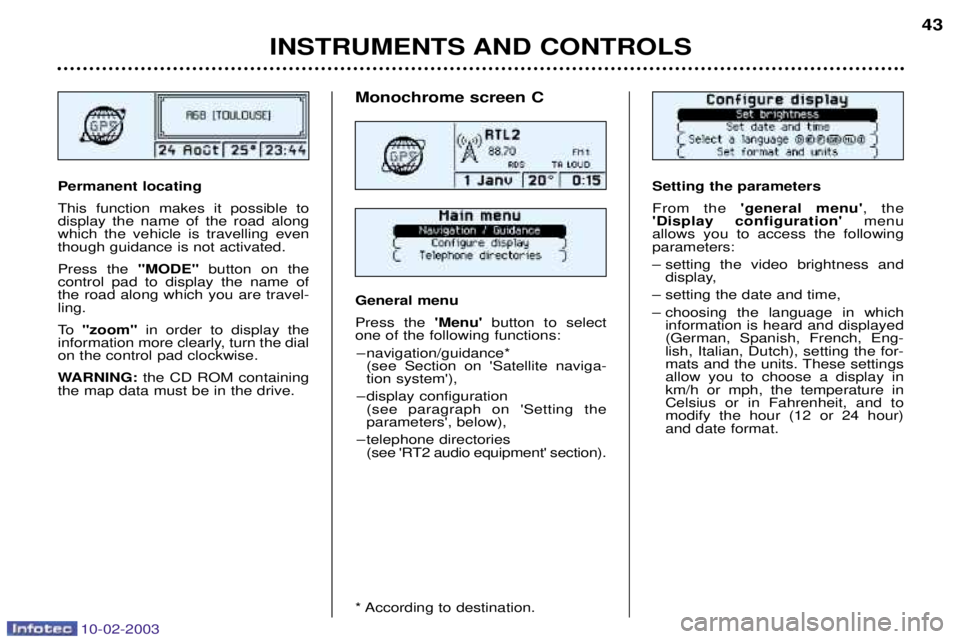
Setting the parameters From the
'general menu' , the
'Display configuration' menu
allows you to access the following parameters:
Ð setting the video brightness and display,
Ð setting the date and time,
Ð choosing the language in which information is heard and displayed (German, Spanish, French, Eng-lish, Italian, Dutch), setting the for-
mats and the units. These settingsallow you to choose a display inkm/h or mph, the temperature inCelsius or in Fahrenheit, and tomodify the hour (12 or 24 hour)and date format.Permanent locating This function makes it possible to display the name of the road alongwhich the vehicle is travelling eventhough guidance is not activated. Press the "MODE"button on the
control pad to display the name of the road along which you are travel-ling.
To "zoom" in order to display the
information more clearly, turn the dial on the control pad clockwise.
WARNING: the CD ROM containing
the map data must be in the drive.
Monochrome screen C General menu Press the 'Menu' button to select
one of the following functions:
Ð navigation/guidance* (see Section on 'Satellite naviga- tion system'),
Ð display configuration (see paragraph on 'Setting theparameters', below),
Ð telephone directories (see 'RT2 audio equipment' section).
* According to destination.
Page 44 of 183
10-02-2003
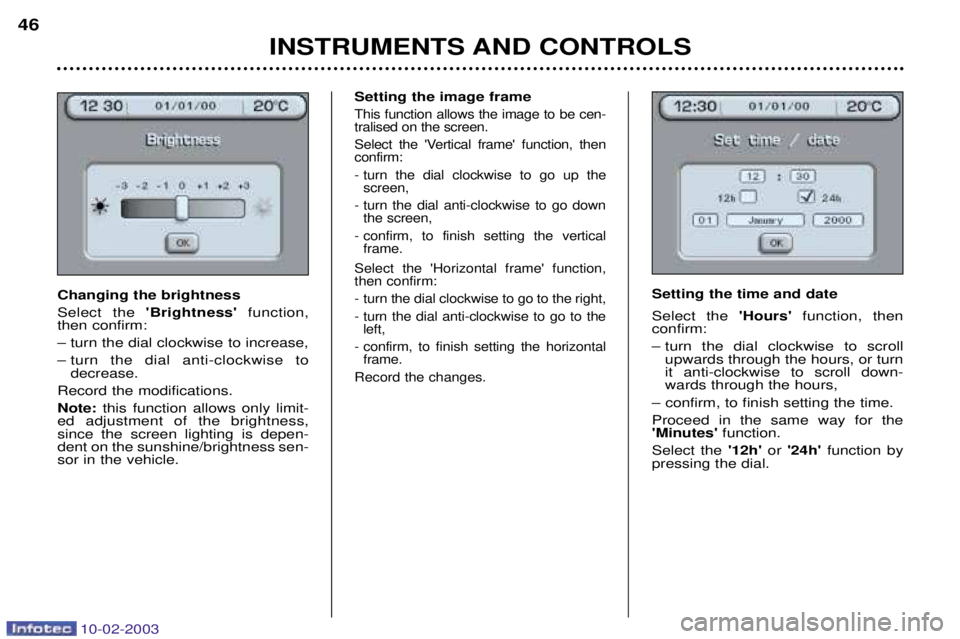
Setting the image frame
This function allows the image to be cen- tralised on the screen.
Select the 'Vertical frame' function, then confirm:
- turn the dial clockwise to go up thescreen,
- turn the dial anti-clockwise to go down the screen,
- confirm, to finish setting the vertical frame.
Select the 'Horizontal frame' function, then confirm:
- turn the dial clockwise to go to the right,
- turn the dial anti-clockwise to go to the left,
- confirm, to finish setting the horizontal frame.
Record the changes.
Setting the time and date Select the 'Hours'function, then
confirm:
Ð turn the dial clockwise to scroll upwards through the hours, or turn it anti-clockwise to scroll down-wards through the hours,
Ð confirm, to finish setting the time. Proceed in the same way for the 'Minutes' function.
Select the '12h'or '24h' function by
pressing the dial.
INSTRUMENTS AND CONTROLS
46
Changing the brightness Select the
'Brightness' function,
then confirm:Ð turn the dial clockwise to increase,
Ð turn the dial anti-clockwise to decrease.
Record the modifications.Note: this function allows only limit-
ed adjustment of the brightness, since the screen lighting is depen-dent on the sunshine/brightness sen-sor in the vehicle.
Page 45 of 183

10-02-2003
Videos
Video sockets may be used what-
ever the position of the key. It isimpossible to use the video whendriving above 20 mph (30 km/h).
You have three cinch (RCA) points, located in the glove box, for connect-
ing a camcorder, a DVD drive, etc.: Ð a video socket (yellow),
Ð two audio system sockets (red +white) for stereophonic sound.
The video connection is compatible
with PAL, SECAM and NTSC. Open the glove box and connect the equipment. Switch on the equipment.
To set the video, press the 'MENU'
button to access the general menu,
then select the 'Video'symbol and
confirm.
INSTRUMENTS AND CONTROLS 47
Select the 'Day' function, then
confirm:
Ð turn the dial clockwise to scroll for- wards through the days, or turn it
anti-clockwise to scroll backwards through the days,
Ð confirm, to finish setting the day.
Proceed in the same way for the'Month' and 'Year' functions.
Record the changes. Changing the units Select the units required, then con- firm and record the changes.
Page 46 of 183
10-02-2003
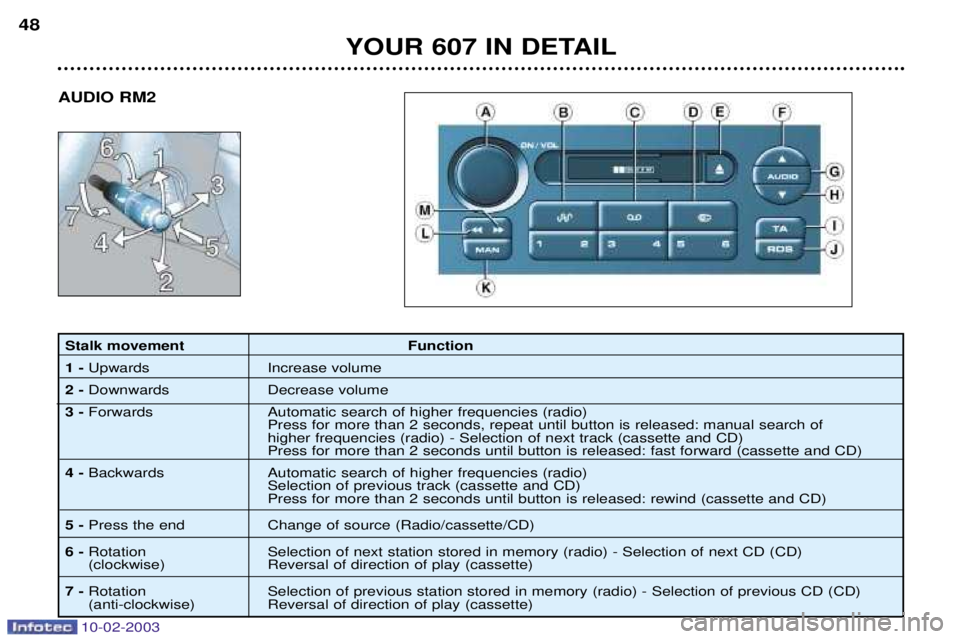
Stalk movement Function 1 - Upwards Increase volume
2 - Downwards Decrease volume
3 - Forwards Automatic search of higher frequencies (radio)
Press for more than 2 seconds, repeat until button is released: manual search of higher frequencies (radio) - Selection of next track (cassette and CD) Press for more than 2 seconds until button is released: fast forward (cassette and CD)
4 - Backwards Automatic search of higher frequencies (radio)
Selection of previous track (cassette and CD) Press for more than 2 seconds until button is released: rewind (cassette and CD)
5 - Press the end Change of source (Radio/cassette/CD)
6 - Rotation Selection of next station stored in memory (radio) - Selection of next CD (CD)
(clockwise) Reversal of direction of play (cassette)
7 - Rotation Selection of previous station stored in memory (radio) - Selection of previous CD (CD)
(anti-clockwise) Reversal of direction of play (cassette)
YOUR 607 IN DETAIL
48
AUDIO RM2
Page 59 of 183
10-02-2003
50
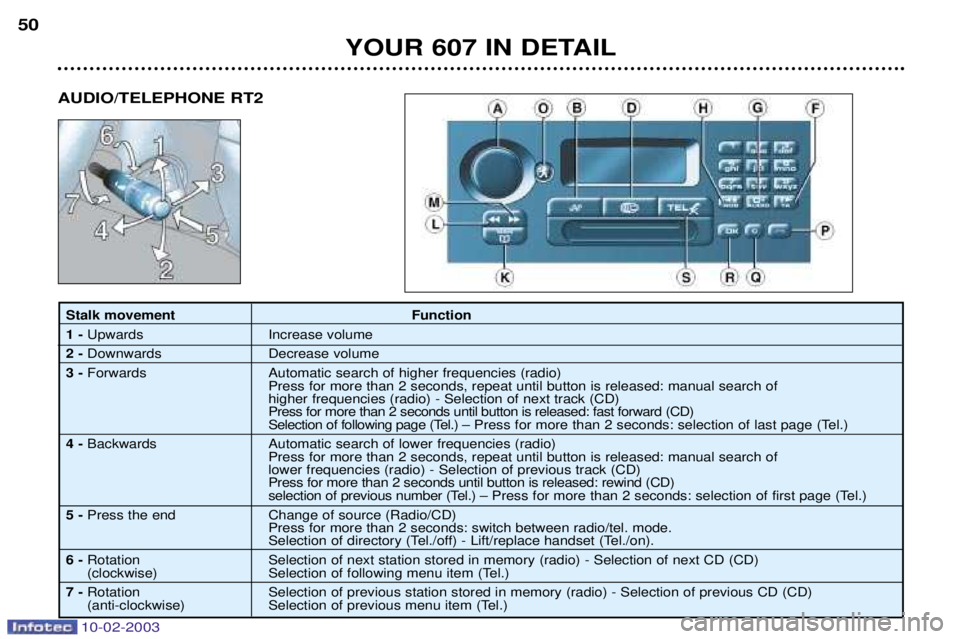
Stalk movementFunction
1 - Upwards Increase volume
2 - Downwards Decrease volume
3 - Forwards Automatic search of higher frequencies (radio)
Press for more than 2 seconds, repeat until button is released: manual search of higher frequencies (radio) - Selection of next track (CD) Press for more than 2 seconds until button is released: fast forward (CD)
Selection of following page (Tel.) Ð Press for more than 2 seconds: selection of last page (Tel.)
4 - Backwards Automatic search of lower frequencies (radio)
Press for more than 2 seconds, repeat until button is released: manual search oflower frequencies (radio) - Selection of previous track (CD) Press for more than 2 seconds until button is released: rewind (CD)
selection of previous number (Tel.) Ð Press for more than 2 seconds: selection of first page (Tel.)
5 - Press the end Change of source (Radio/CD)
Press for more than 2 seconds: switch between radio/tel. mode.
Selection of directory (Tel./off) - Lift/replace handset (Tel./on).
6 - Rotation Selection of next station stored in memory (radio) - Selection of next CD (CD)
(clockwise) Selection of following menu item (Tel.)
7 - Rotation Selection of previous station stored in memory (radio) - Selection of previous CD (CD)
(anti-clockwise) Selection of previous menu item (Tel.)
YOUR 607 IN DETAIL
AUDIO/TELEPHONE RT2
Page 90 of 183
10-02-2003
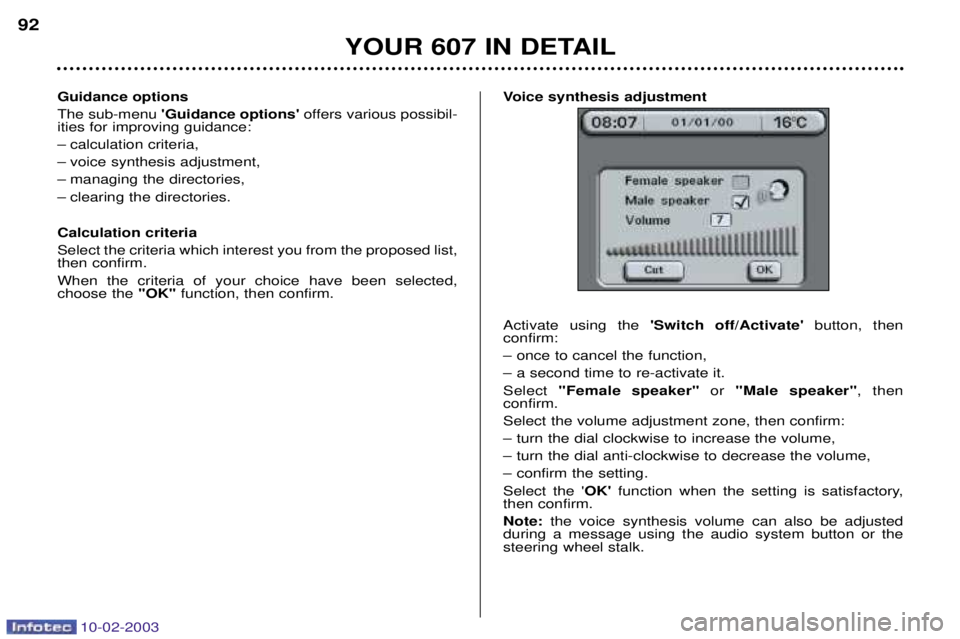
Guidance options The sub-menu 'Guidance options' offers various possibil-
ities for improving guidance:
Ð calculation criteria,
Ð voice synthesis adjustment,
Ð managing the directories,
Ð clearing the directories. Calculation criteria Select the criteria which interest you from the proposed list, then confirm. When the criteria of your choice have been selected, choose the ''OK''function, then confirm. Voice synthesis adjustment Activate using the
'Switch off/Activate' button, then
confirm: Ð once to cancel the function,Ð a second time to re-activate it.Select "Female speaker" or "Male speaker" , then
confirm.Select the volume adjustment zone, then confirm:Ð turn the dial clockwise to increase the volume,Ð turn the dial anti-clockwise to decrease the volume,Ð confirm the setting.Select the ' OK' function when the setting is satisfactory,
then confirm.Note: the voice synthesis volume can also be adjusted
during a message using the audio system button or the steering wheel stalk.
YOUR 607 IN DETAIL
92