air condition Peugeot Bipper 2014.5 - RHD (UK, Australia) User Guide
[x] Cancel search | Manufacturer: PEUGEOT, Model Year: 2014.5, Model line: Bipper, Model: Peugeot Bipper 2014.5Pages: 192, PDF Size: 7.93 MB
Page 76 of 192
74
Bipper_en_Chap04_ergonomie_ed02-2014
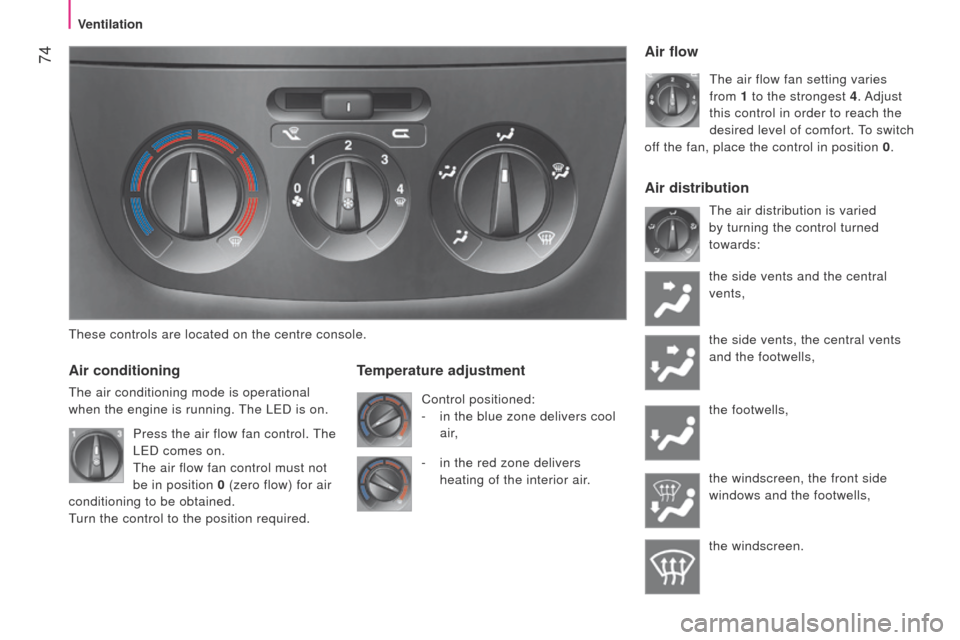
these controls are located on the centre console.
Air conditioning
the air conditioning mode is operational
when the engine is running.
t
he le D is on.
Temperature adjustment
Control positioned:
-
in the blue zone delivers cool
air,
Air flow
the air flow fan setting varies
from 1 to the strongest
4. Adjust
this control in order to reach the
desired level of comfort.
to switch
off the fan, place the control in position 0 .
t
he air distribution is varied
by turning the control turned
towards:
the side vents and the central
vents,
the side vents, the central vents
and the footwells,
the footwells,
the windscreen, the front side
windows and the footwells,
the windscreen.
Press the air flow fan control.
t
he
le
D comes on.
t
he air flow fan control must not
be in position 0 (zero flow) for air
conditioning to be obtained.
turn the control to the position required. -
in the red zone delivers
heating of the interior air.
Air distribution
Ventilation
Page 77 of 192
75
Bipper_en_Chap04_ergonomie_ed02-2014
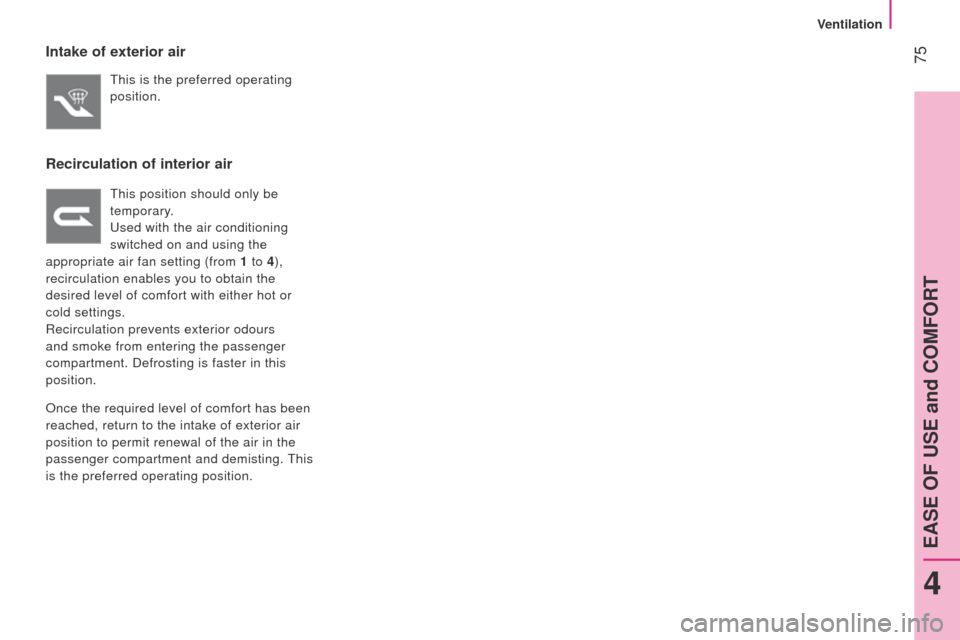
Intake of exterior air
this is the preferred operating
position.
Recirculation of interior air
this position should only be
temporary .
u
sed with the air conditioning
switched on and using the
appropriate air fan setting (from 1 to 4),
recirculation enables you to obtain the
desired level of comfort with either hot or
cold settings.
Recirculation prevents exterior odours
and smoke from entering the passenger
compartment. Defrosting is faster in this
position.
Once the required level of comfort has been
reached, return to the intake of exterior air
position to permit renewal of the air in the
passenger compartment and demisting.
t
his
is the preferred operating position.
4
EASE OF USE and COMFORT
Ventilation
Page 118 of 192
11 6
Bipper_en_Chap06_securite_ed02-2014
TYRE UNDER-INFLATION DETECTION
System which automatically checks the
pressure of the tyres while driving.
t
he system monitors the pressures on the
four tyres, once the vehicle is moving.
It compares the information given by the
four wheel speed sensors with reference
values, which must be reinitialised every
time the tyre pressures are adjusted or a
wheel changed.
t
he system triggers an alert as soon as it
detects a drop in the inflation pressure of
one or more tyres.
t
he under-inflation detection system
does not replace the vigilance or the
responsibility of the driver.
t
his system does not avoid the need to
check the tyre pressures (including the
spare wheel) every month as well as before
a long journey.
Driving with under-inflated tyres impairs
road holding, extends braking distances and
causes premature tyre wear, particularly
under arduous condition (high loading, high
speed, long journey).
Driving with under-inflated tyres increases
fuel consumption.
t
he inflation pressures defined for
your vehicle can be found on the tyre
pressure label.
See the "Identification markings" section.
tyre pressures should be checked when the
tyres are "cold" (vehicle stopped for 1 hour
or after a journey of less than 6 miles
(10 km) at moderate speeds).
Otherwise (when hot), add 0.3 bar to the
pressures shown on the label.
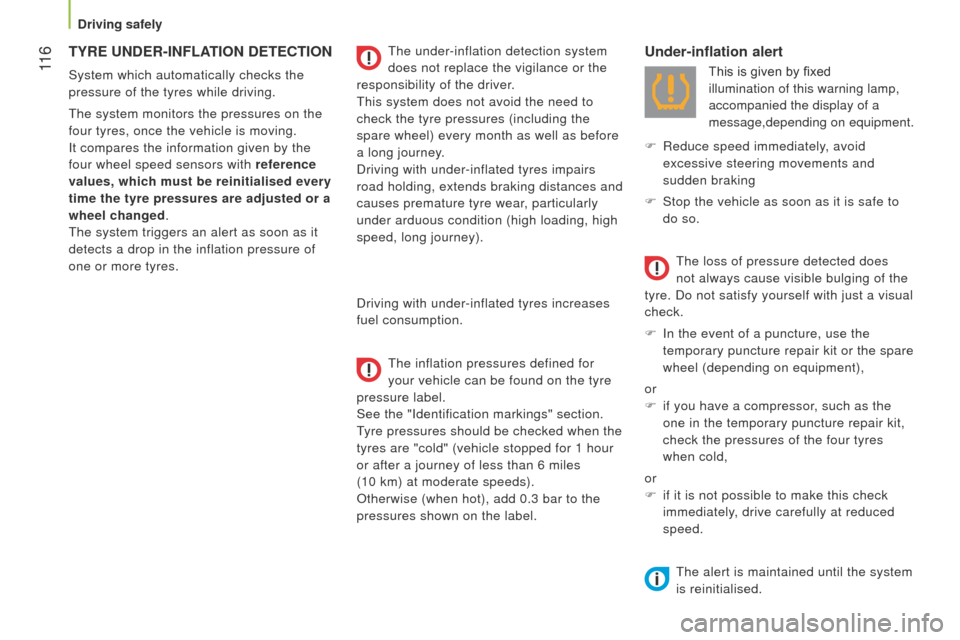
Under-inflation alert
This is given by fixed
illumination of this warning lamp,
accompanied the display of a
message,depending on equipment.
F
Reduce speed immediately
, avoid
excessive steering movements and
sudden braking
F
Stop the vehicle as soon as it is safe to
do so.
t
he loss of pressure detected does
not always cause visible bulging of the
tyre. Do not satisfy yourself with just a visual
check.
F
In the event of a puncture, use the
temporary puncture repair kit or the spare
wheel (depending on equipment),
or
F
if you have a compressor
, such as the
one in the temporary puncture repair kit,
check the pressures of the four tyres
when cold,
or
F
if it is not possible to make this check
immediately, drive carefully at reduced
speed.
t
he alert is maintained until the system
is reinitialised.
Driving safely
Page 122 of 192
120
Bipper_en_Chap06_securite_ed02-2014
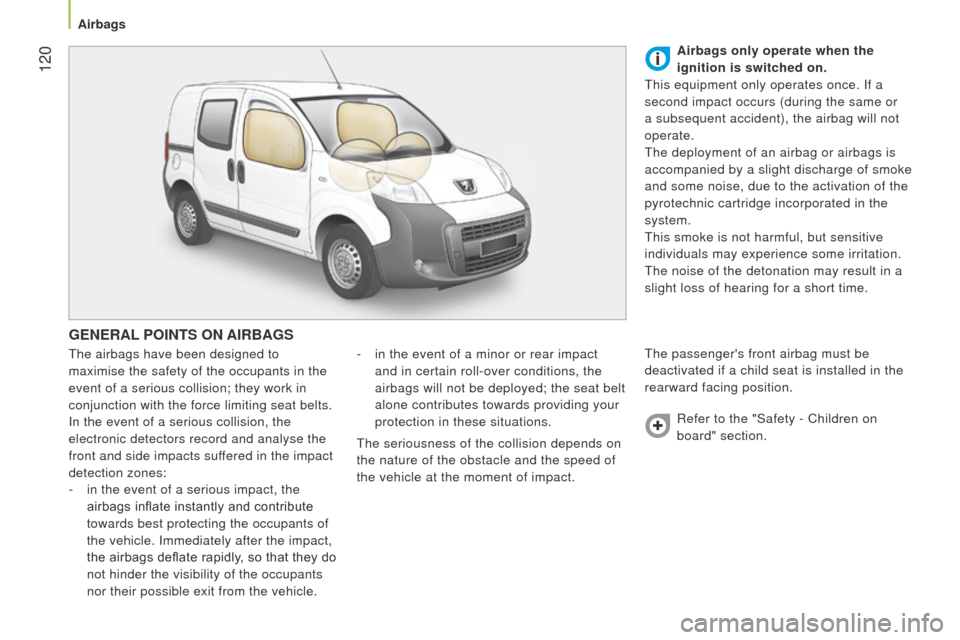
GENERAL POINTS ON AIRBAGS
the airbags have been designed to
maximise the safety of the occupants in the
event of a serious collision; they work in
conjunction with the force limiting seat belts.
In the event of a serious collision, the
electronic detectors record and analyse the
front and side impacts suffered in the impact
detection zones:
-
in the event of a serious impact, the
airbags inflate instantly and contribute
towards best protecting the occupants of
the vehicle. Immediately after the impact,
the airbags deflate rapidly, so that they do
not hinder the visibility of the occupants
nor their possible exit from the vehicle. -
in the event of a minor or rear impact
and in certain roll-over conditions, the
airbags will not be deployed; the seat belt
alone contributes towards providing your
protection in these situations.
t
he seriousness of the collision depends on
the nature of the obstacle and the speed of
the vehicle at the moment of impact. Airbags only operate when the
ignition is switched on.
t
his equipment only operates once. If a
second impact occurs (during the same or
a subsequent accident), the airbag will not
operate.
t
he deployment of an airbag or airbags is
accompanied by a slight discharge of smoke
and some noise, due to the activation of the
pyrotechnic cartridge incorporated in the
system.
t
his smoke is not harmful, but sensitive
individuals may experience some irritation.
t
he noise of the detonation may result in a
slight loss of hearing for a short time.t he passenger's front airbag must be
deactivated if a child seat is installed in the
rearward facing position.
Refer to the "Safety - Children on
board" section.
Airbags
Page 140 of 192
138
Bipper_en_Chap07_accessoire_ed02-2014
In certain cases of particularly arduous
use (towing the maximum load up a steep
slope in high temperatures), the engine
automatically limits its power. In this case,
automatic cutting off of the air conditioning
allows the engine power to be saved.If the coolant temperature
warning lamp comes on, stop the
vehicle and switch off the engine
as soon as possible.
ChecksSee the "
l evels" section of
chapter 7.
Tyres: check the tyre pressures on the
towing vehicle and the trailer, observing the
recommended pressures.
Brakes: towing increases the braking
distance. Drive at a moderate speed,
change down early and brake gradually. Side wind: sensitivity to side wind is
increased. Drive smoothly and at a
moderate speed.
ABS: the system only controls the vehicle,
not the trailer.
Distribution of loads
Distribute the load in the trailer so that the
heaviest objects are as close as possible
to the axle and the nose weight is close to
the maximum authorised without, however,
exceeding it.
t
he air density decreases with
altitude, so reducing the performance of the
engine.
t
he maximum towed load must be
reduced by 10 % for each 1 000 metres of
altitude.
Refer to the "
t
echnical data -
Identification markings" section. Rear parking sensors: the sensors will be
deactivated automatically when an genuine
P
euge O t towbar is used.
Towbar
We recommend the use of genuine
P
euge O t towbars and their harnesses,
which have been tested and approved from
the design stage of your vehicle, and that
the fitting of this equipment is entrusted to a
P
euge O t
dealer or a qualified workshop.
If this equipment is not fitted by a P
euge O t
dealer
, it is essential that it is fitted using
the electrical pre-equipment located at
the rear of the vehicle and following the
manufacturer's instructions.
t
he operation of the rear parking sensors is
deactivated automatically when the trailer
cable connector is inserted in the towbar
socket.
When the trailer cable is removed, the rear
parking sensors are re-activated.
Refer to the "
t
echnology on board -
Parking sensors" section.
For information on the maximum
weights and towed loads applicable to
your vehicle, refer to the "
t
echnical data -
Weights" section.
Towing a trailer
Page 151 of 192
149
Bipper_en_Chap08_verifications_ed02-2014
CHECKS
Bleeding water from the Diesel filter
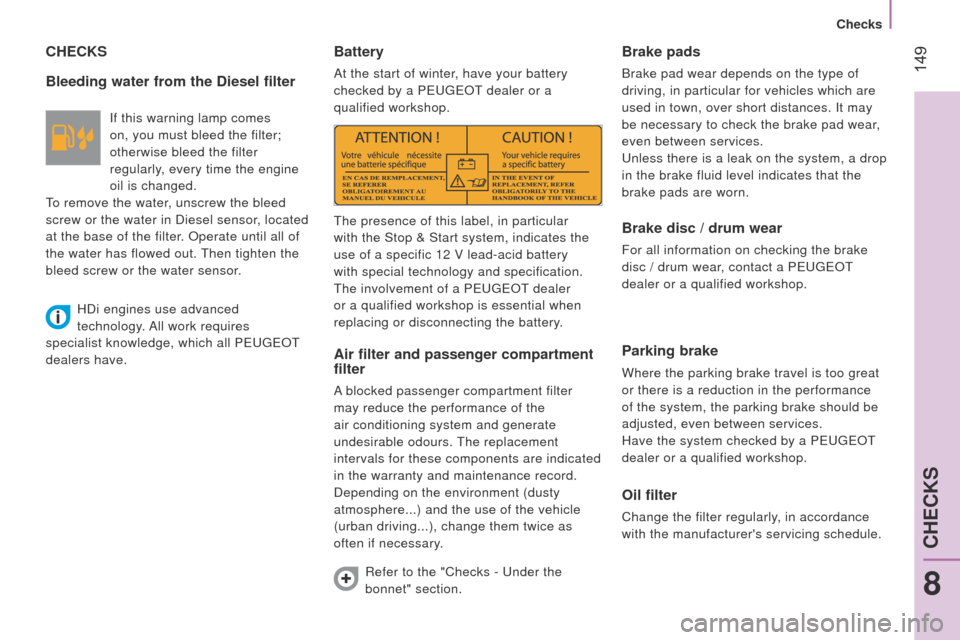
If this warning lamp comes
on, you must bleed the filter;
otherwise bleed the filter
regularly, every time the engine
oil is changed.
to remove the water
, unscrew the bleed
screw or the water in Diesel sensor, located
at the base of the filter. Operate until all of
the water has flowed out.
t
hen tighten the
bleed screw or the water sensor.
Battery
At the start of winter, have your battery
checked by a P euge O t
dealer or a
qualified workshop.
Air filter and passenger compartment
filter
A blocked passenger compartment filter
may reduce the performance of the
air conditioning system and generate
undesirable odours.
t
he replacement
intervals for these components are indicated
in the warranty and maintenance record.
Depending on the environment (dusty
atmosphere...) and the use of the vehicle
(urban driving...), change them twice as
often if necessary.
Brake pads
Brake pad wear depends on the type of
driving, in particular for vehicles which are
used in town, over short distances. It may
be necessary to check the brake pad wear,
even between services.
u
nless there is a leak on the system, a drop
in the brake fluid level indicates that the
brake pads are worn.
Brake disc / drum wear
For all information on checking the brake
disc / drum wear, contact a P euge O t
dealer or a qualified workshop.
Parking brake
Where the parking brake travel is too great
or there is a reduction in the performance
of the system, the parking brake should be
adjusted, even between services.
Have the system checked by a P
euge O t
dealer or a qualified workshop.
Oil filter
Change the filter regularly, in accordance
with the manufacturer's servicing schedule.
t
he presence of this label, in particular
with the Stop & Start system, indicates the
use of a specific 12 V lead-acid battery
with special technology and specification.
t
he involvement of a P
euge
O
t
dealer
or a qualified workshop is essential when
replacing or disconnecting the battery.
Refer to the "Checks -
u
nder the
bonnet" section.
HDi engines use advanced
technology. All work requires
specialist knowledge, which all P
euge
O
t
dealers have.
8
CHECKS
Checks
Page 153 of 192
151
Bipper_en_Chap08_verifications_ed02-2014
Particle filter (1.3 HDi 75)
An addition to the catalytic converter, this
filter makes an active contribution to the
preservation of air quality by the retaining
of the unburnt pollutant particles. Black
exhaust fumes are thus no longer emitted.
t
his filter, fitted to the exhaust system,
accumulates particles of soot.
t
he engine
control unit manages the automatic
periodic elimination of the soot particles
(regeneration).
the regeneration procedure is invoked
according to the quantity of particles
accumulated and the driving conditions
of the vehicle. During this phase, you
may notice some unusual phenomena -
increased idling speed, cooling fan running,
increase in smoke and higher exhaust gas
temperature
- which does not affect the
operation of the vehicle or the environment.
After prolonged idling or driving at very low
speeds, you may occasionally notice water
vapour being emitted from the exhaust when
accelerating.
t
his is of no consequence
to the running of the vehicle or to the
environment. Saturation / Regeneration
If there is risk of blockage of the
filter, this warning lamp comes on
in the instrument panel.
t
his alert tells you that the
particle filter is starting to fill up (in
conditions of urban driving of exceptionally
long duration: low speeds, traffic jams etc.)
to regenerate the filter
, it is advised to drive
as soon as possible, when traffic conditions
and the law permit, at a speed of at least
40 mph (around 60 km/h), with an engine
speed above 2 000 rpm for about fifteen
minutes (until the warning lamp and/or the
message disappears). Operating fault
If this alert persists, do not ignore the
warning; it indicates that a fault has occurred
in the exhaust / particle filter system.
Have it checked by a P
euge O t
dealer or a
qualified workshop.
Because of the higher exhaust
gas temperature resulting from the
normal operation of the particle filter, it is
recommended that you do not park the
vehicle over inflammable materials (grass,
dry leaves, pine needles,
...) so as to avoid
any risk of fire. If possible, avoid switching off the
engine before the end of regeneration
of the filter, repeated interruptions could
cause premature deterioration of the
engine oil. It is not recommended to end
regeneration of the filter with the vehicle
stationary.
8
CHECKS
Checks
Page 169 of 192
167
Bipper_en_Chap09_aide-rapide_ed02-2014
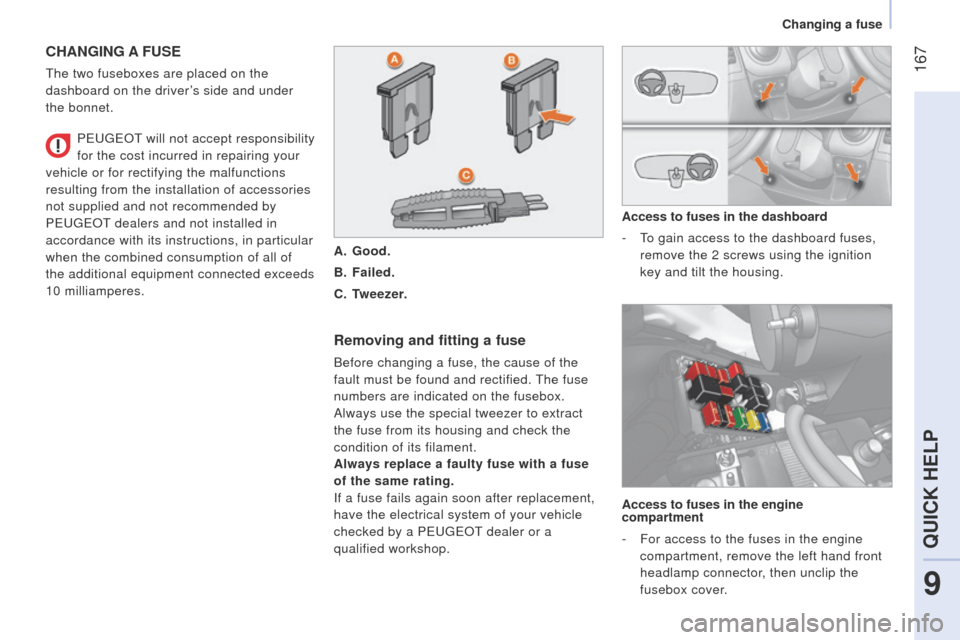
CHANGING A FUSE
the two fuseboxes are placed on the
dashboard on the driver ’s side and under
the bonnet.
Removing and fitting a fuse
Before changing a fuse, the cause of the
fault must be found and rectified.
t
he fuse
numbers are indicated on the fusebox.
Always use the special tweezer to extract
the fuse from its housing and check the
condition of its filament.
Always replace a faulty fuse with a fuse
of the same rating.
If a fuse fails again soon after replacement,
have the electrical system of your vehicle
checked by a P
euge O t
dealer or a
qualified workshop. Access to fuses in the dashboard
-
t
o gain access to the dashboard fuses,
remove the 2 screws using the ignition
key and tilt the housing.
P
euge
O
t
will not accept responsibility
for the cost incurred in repairing your
vehicle or for rectifying the malfunctions
resulting from the installation of accessories
not supplied and not recommended by
P
euge
O
t
dealers and not installed in
accordance with its instructions, in particular
when the combined consumption of all of
the additional equipment connected exceeds
10
milliamperes.
A.
Good.
B.
Failed.
C.
T
weezer.
Access to fuses in the engine
compartment
-
For access to the fuses in the engine
compartment, remove the left hand front
headlamp connector, then unclip the
fusebox cover.
9
QUICK HELP
Changing a fuse
Page 170 of 192
168
Bipper_en_Chap09_aide-rapide_ed02-2014
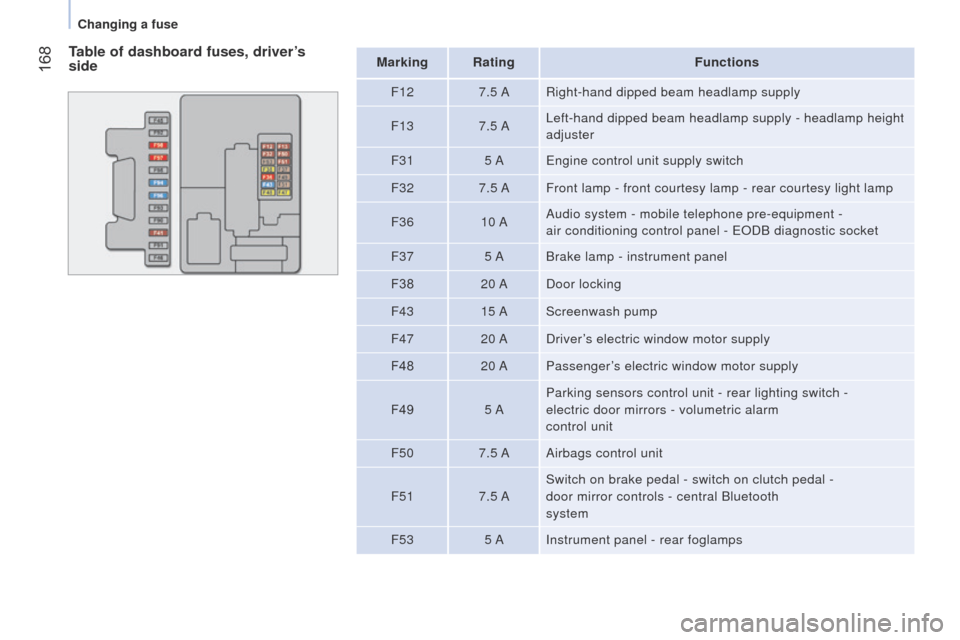
Table of dashboard fuses, driver’s
sideMarking RatingFunctions
F12 7.5 ARight-hand dipped beam headlamp supply
F13 7.5 A
l
eft-hand dipped beam headlamp supply - headlamp height
adjuster
F31 5 A
e
ngine control unit supply switch
F32 7.5 AFront lamp - front courtesy lamp - rear courtesy light lamp
F36 10 AAudio system - mobile telephone pre-equipment -
air conditioning control panel -
e ODB diagnostic socket
F37 5 ABrake lamp - instrument panel
F38 20 ADoor locking
F43 15 AScreenwash pump
F47 20 ADriver’s electric window motor supply
F48 20 APassenger’s electric window motor supply
F49 5 AParking sensors control unit - rear lighting switch -
electric door mirrors - volumetric alarm
control unit
F50 7.5 AAirbags control unit
F51 7.5 ASwitch on brake pedal - switch on clutch pedal -
door mirror controls - central Bluetooth
system
F53 5 AInstrument panel - rear foglamps
Changing a fuse
Page 172 of 192
170
Bipper_en_Chap09_aide-rapide_ed02-2014
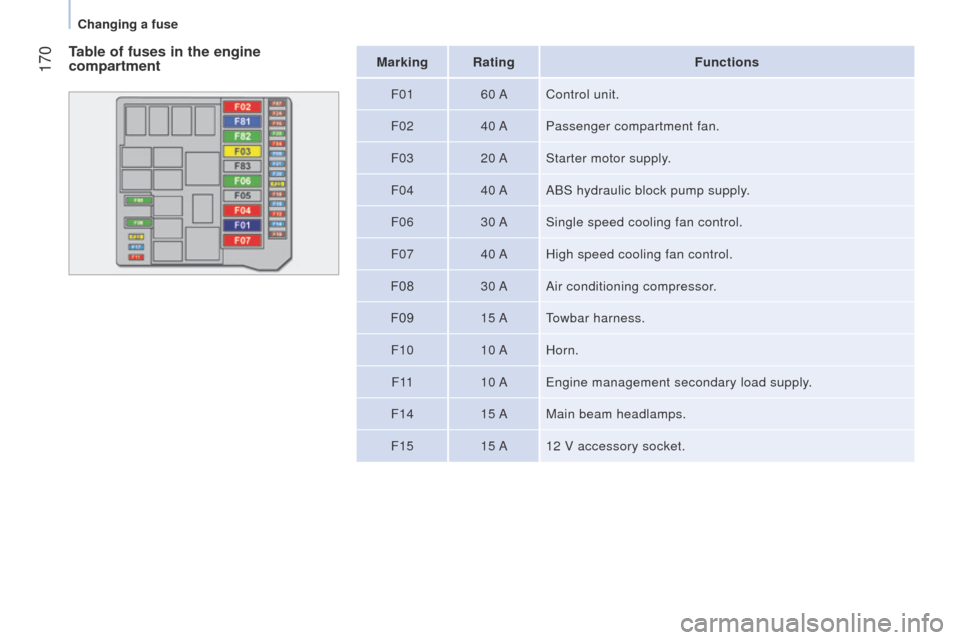
Marking RatingFunctions
F01 60 AControl unit.
F02 40 APassenger compartment fan.
F03 20 AStarter motor supply.
F04 40 AABS hydraulic block pump supply.
F06 30 ASingle speed cooling fan control.
F07 40 AHigh speed cooling fan control.
F08 30 AAir conditioning compressor.
F09 15 A
towbar harness.
F10 10 AHorn.
F
11 10 A
e
ngine management secondary load supply.
F14 15 AMain beam headlamps.
F15 15 A12 V accessory socket.Table of fuses in the engine
compartment
Changing a fuse