start stop button Peugeot Boxer 2016 Owner's Manual
[x] Cancel search | Manufacturer: PEUGEOT, Model Year: 2016, Model line: Boxer, Model: Peugeot Boxer 2016Pages: 292, PDF Size: 10.07 MB
Page 18 of 292
16
boxer_en_Chap02_Pret-a-Partir_ed01-2015
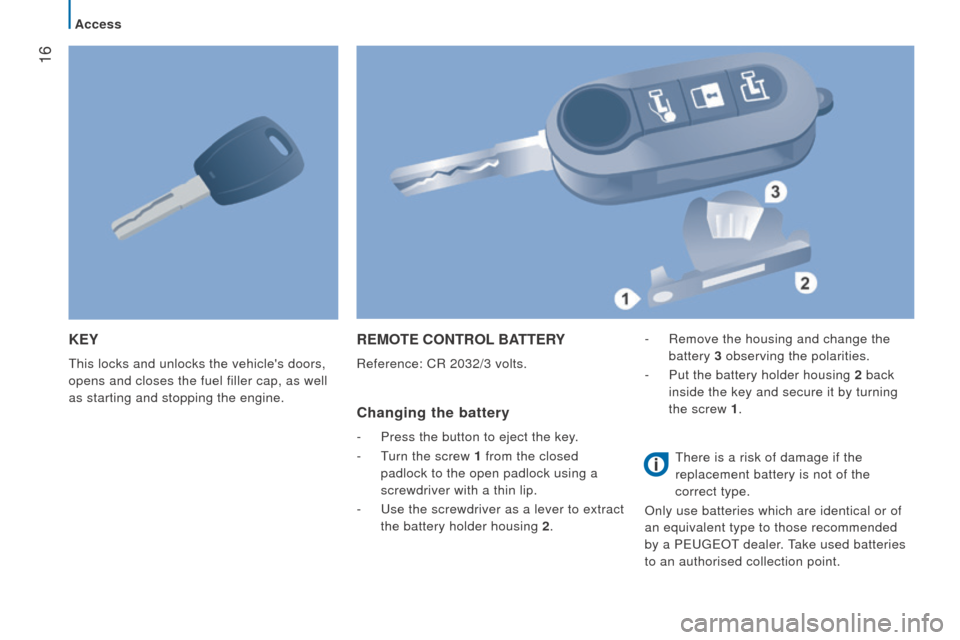
KEY
this locks and unlocks the vehicle's doors,
opens and closes the fuel filler cap, as well
as starting and stopping the engine.
rEMotE controL BAtt E rY
Reference: CR 2032/3 volts.
changing the battery
- Press the button to eject the key .
- t
urn the screw
1 from the closed
padlock to the open padlock using a
screwdriver with a thin lip.
-
u se the screwdriver as a lever to extract
the battery holder housing 2 .-
Remove the housing and change the
battery 3 observing the polarities.
-
Put the battery holder housing
2
back
inside the key and secure it by turning
the screw 1 .
t here is a risk of damage if the
replacement battery is not of the
correct type.
Only use batteries which are identical or of
an equivalent type to those recommended
by a P
euge O t
dealer
.
take used batteries
to an authorised collection point.
Access
Page 32 of 292
30
boxer_en_Chap02_Pret-a-Partir_ed01-2015
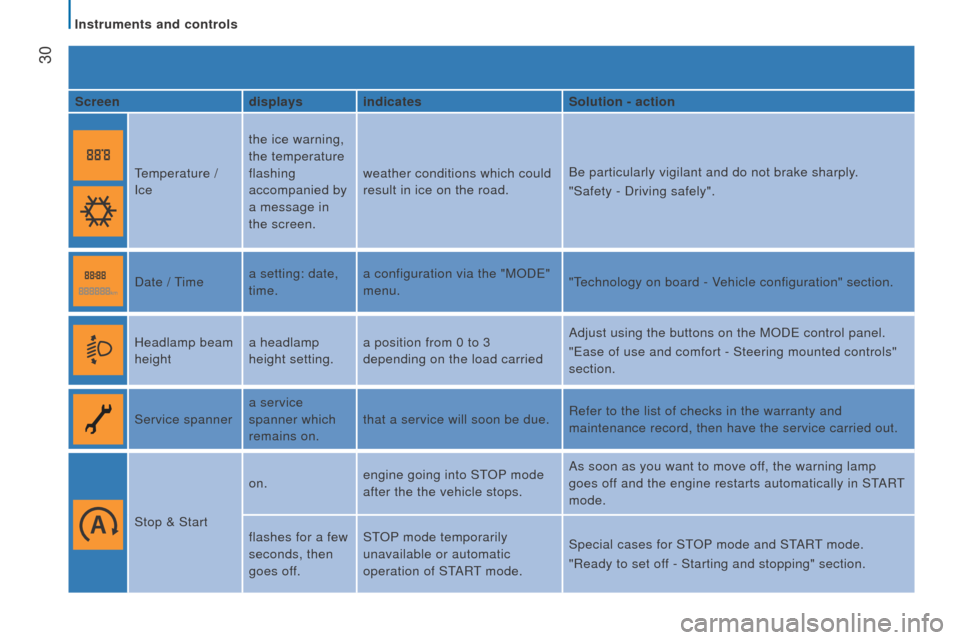
Screendisplays indicates Solution - action
temperature /
Ice the ice warning,
the temperature
flashing
accompanied by
a message in
the screen.weather conditions which could
result in ice on the road.
Be particularly vigilant and do not brake sharply.
"Safety - Driving safely".
Date /
t
imea setting: date,
time. a configuration via the "MOD
e "
menu. "
t
echnology on board
- Vehicle configuration" section.
Headlamp beam
height a headlamp
height setting.a position from 0 to 3
depending on the load carried Adjust using the buttons on the MOD
e control panel.
"
e ase of use and comfort - Steering mounted controls"
section.
Service spanner a service
spanner which
remains on.that a service will soon be due.
Refer to the list of checks in the warranty and
maintenance record, then have the service carried out.
Stop & Start on.
engine going into S
t
OP
mode
after the the vehicle stops. As soon as you want to move off, the warning lamp
goes off and the engine restarts automatically in S
t
ARt
mode.
flashes for a few
seconds, then
goes off. S
t
OP
mode temporarily
unavailable or automatic
operation of S
t
ARt mode.Special cases for S
t
OP
mode and S t
ARt mode.
"Ready to set of
f - Starting and stopping" section.
Instruments and controls
Page 37 of 292
35
boxer_en_Chap02_Pret-a-Partir_ed01-2015
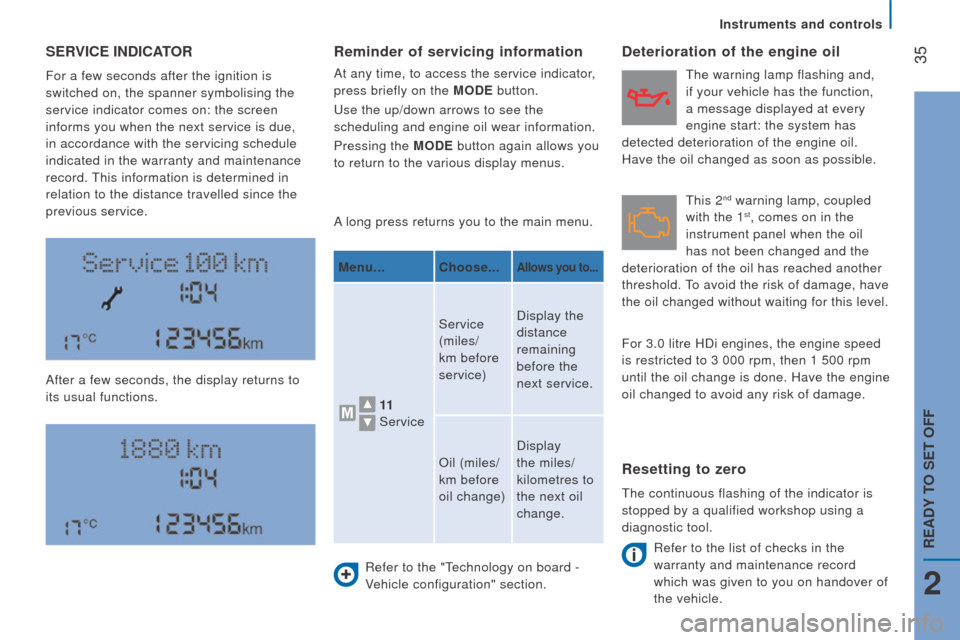
SErVIc E I nd I c At or
For a few seconds after the ignition is
switched on, the spanner symbolising the
service indicator comes on: the screen
informs you when the next service is due,
in accordance with the servicing schedule
indicated in the warranty and maintenance
record.
t
his information is determined in
relation to the distance travelled since the
previous service.
After a few seconds, the display returns to
its usual functions. A long press returns you to the main menu.
Refer to the "
t
echnology on board -
Vehicle configuration" section.
deterioration of the engine oil
Refer to the list of checks in the
warranty and maintenance record
which was given to you on handover of
the vehicle.
reminder of servicing information
At any time, to access the service indicator,
press briefly on the M od E button.
u
se the up/down arrows to see the
scheduling and engine oil wear information.
Pressing the M
od E button again allows you
to return to the various display menus.
Menu...
c
hoose...
Allows you to...
11
Service Service
(miles/
km before
service)
Display the
distance
remaining
before the
next service.
Oil (miles/
km before
oil change) Display
the miles/
kilometres to
the next oil
change.
resetting to zero
the continuous flashing of the indicator is
stopped by a qualified workshop using a
diagnostic tool.
t
his 2
nd warning lamp, coupled
with the 1st, comes on in the
instrument panel when the oil
has not been changed and the
deterioration of the oil has reached another
threshold.
to avoid the risk of damage, have
the oil changed without waiting for this level.
t
he warning lamp flashing and,
if your vehicle has the function,
a message displayed at every
engine start: the system has
detected deterioration of the engine oil.
Have the oil changed as soon as possible.
For 3.0 litre HDi engines, the engine speed
is restricted to 3 000 rpm, then 1 500 rpm
until the oil change is done. Have the engine
oil changed to avoid any risk of damage.
Instruments and controls
2
rEAdY to SEt oFF
Page 61 of 292
59
boxer_en_Chap03_ergo-et-confort_ed01-2015
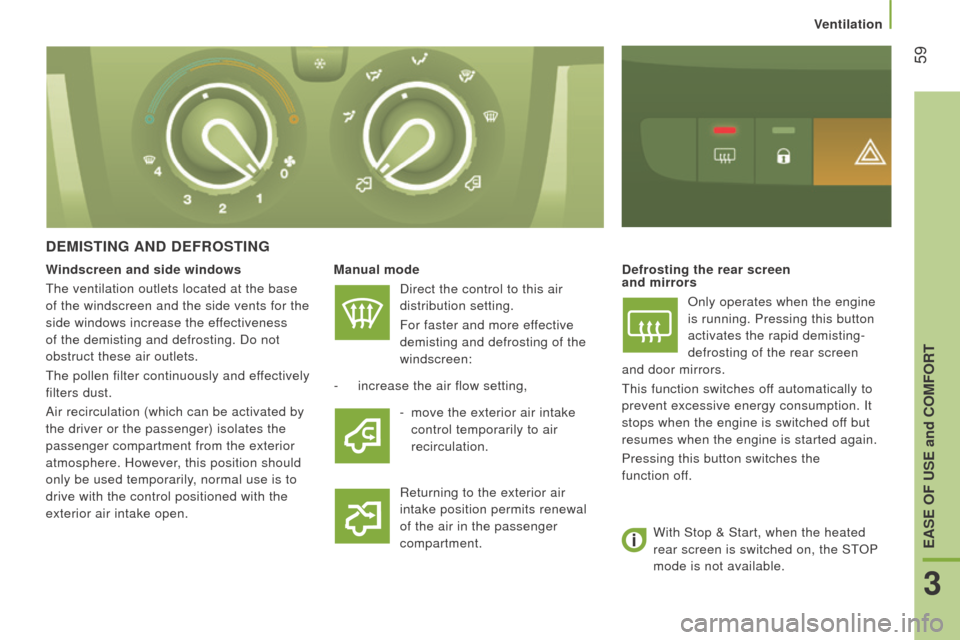
dEMIStInG And dEF ro S t I n G
Manual mode
Direct the control to this air
distribution setting.
For faster and more ef
fective
demisting and defrosting of the
windscreen:d efrosting the rear screen
and mirrors
Only operates when the engine
is running. Pressing this button
activates the rapid demisting-
defrosting of the rear screen
and
door mirrors.
t
his function switches off automatically to
prevent excessive energy consumption. It
stops when the engine is switched off but
resumes when the engine is started again.
Pressing this button switches the
function
off.
-
increase the air flow setting, Returning to the exterior air
intake position permits renewal
of the air in the passenger
compartment.
Windscreen and side windows
t
he ventilation outlets located at the base
of the windscreen and the side vents for the
side windows increase the effectiveness
of the demisting and defrosting. Do not
obstruct these air outlets.
t
he pollen filter continuously and effectively
filters dust.
Air recirculation (which can be activated by
the driver or the passenger) isolates the
passenger compartment from the exterior
atmosphere. However, this position should
only be used temporarily, normal use is to
drive with the control positioned with the
exterior air intake open. -
move the exterior air intake
control temporarily to air
recirculation.
With Stop & Start, when the heated
rear screen is switched on, the S
t
OP
mode is not available.
Ventilation
3
EASE oF uSE and coMFort
Page 71 of 292
69
boxer_en_Chap03_ergo-et-confort_ed01-2015
Have the additional heating checked at
least once a year at the beginning of
winter. Maintenance and repairs should only
be carried out by a P
euge O t
dealer or a
qualified workshop.
u
se only genuine replacement parts.
Switching off the heating
In the case of deferred operation, the
heating stops at the end of the programmed
period.
Good practice
to avoid any risk of poisoning or
asphyxiation, the additional heating must
not be used, even for short periods, in
an enclosed space such as a garage or
workshop which is not fitted with an exhaust
gas extraction system.
t
he additional heating switches off when the
battery voltage is low, so as to allow engine
starting.
t
he additional heating is supplied by the
vehicle's fuel tank.
e nsure that the low fuel
warning lamp is not on.
Always switch off the additional heating
when filling with fuel to avoid any risk of fire
or explosion.
t
he temperature near the heater must not
exceed 120 °C. A temperature higher than
this (for example in the case of painting in
an oven) could damage the components of
the electronic circuits.
t
he additional heating is fitted with
a temperature limiter which cuts off
the combustion in the event of engine
overheating due to a lack of coolant. Check
the level and if necessary top-up following
the advice given in the "Checks - Levels"
section.
t
hen press the programme
selection button before switching the heating
on again.
Setting the operating period
the period of operation can be set to
between 10 and 60 minutes.
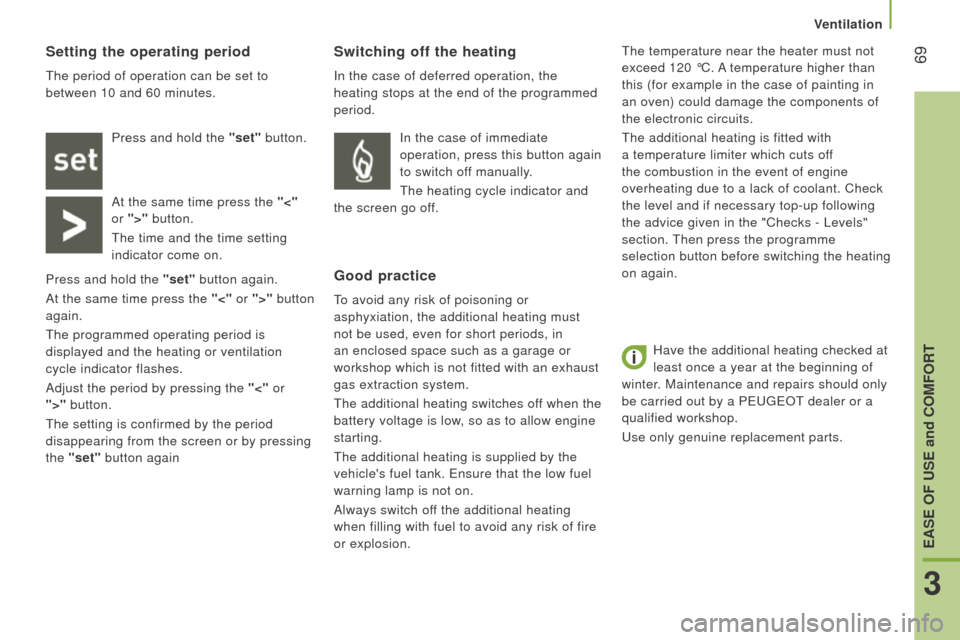
Press and hold the
"set" button.
At the same time press the "<"
or ">" button.
t
he time and the time setting
indicator come on.
Press and hold the "set" button again.
At the same time press the "<" or ">" button
again.
t
he programmed operating period is
displayed and the heating or ventilation
cycle indicator flashes.
Adjust the period by pressing the "<" or
">" button.
t
he setting is confirmed by the period
disappearing from the screen or by pressing
the "set" button again In the case of immediate
operation, press this button again
to switch off manually.
t
he heating cycle indicator and
the screen go off.
Ventilation
3
EASE oF uSE and coMFort
Page 108 of 292
106
boxer_en_Chap05_Securite_ed01-2015
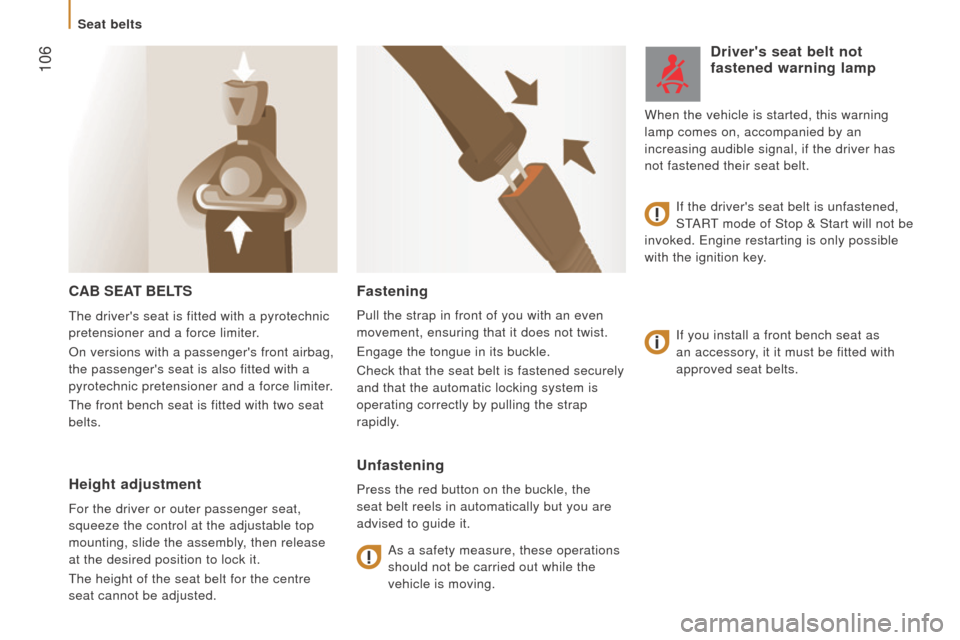
cAB SEAt BELt S
If you install a front bench seat as
an accessory, it it must be fitted with
approved seat belts.
Fastening
Pull the strap in front of you with an even
movement, ensuring that it does not twist.
e
ngage the tongue in its buckle.
Check that the seat belt is fastened securely
and that the automatic locking system is
operating correctly by pulling the strap
rapidly.
unfastening
Press the red button on the buckle, the
seat belt reels in automatically but you are
advised to guide it.
As a safety measure, these operations
should not be carried out while the
vehicle is moving.
driver's seat belt not
fastened warning lamp
If the driver's seat belt is unfastened,
S
t
ARt mode of Stop & Start will not be
invoked.
e ngine restarting is only possible
with the ignition key. When the vehicle is started, this warning
lamp comes on, accompanied by an
increasing audible signal, if the driver has
not fastened their seat belt.
t
he driver's seat is fitted with a pyrotechnic
pretensioner and a force limiter.
On versions with a passenger's front airbag,
the passenger's seat is also fitted with a
pyrotechnic pretensioner and a force limiter.
t
he front bench seat is fitted with two seat
belts.
Height adjustment
For the driver or outer passenger seat,
squeeze the control at the adjustable top
mounting, slide the assembly, then release
at the desired position to lock it.
t
he height of the seat belt for the centre
seat cannot be adjusted.
Seat belts
Page 281 of 292
3
2
READY TO GO
boxer-post-it_en_Chap02_Pret-a-Partir_ed01-2015
Starting and switching off
boxer-post-it_en_Chap02_Pret-a-Partir_ed01-2015
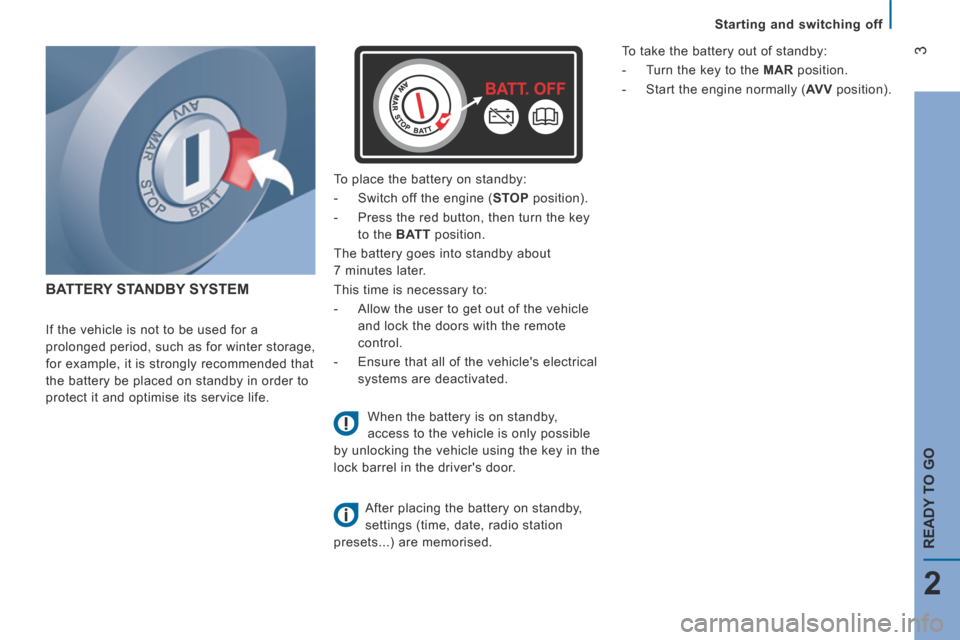
BATTERY STANDBY SYSTEM
If the vehicle is not to be used for a
prolonged period, such as for winter storage,
for example, it is strongly recommended that
the battery be placed on standby in order to
protect it and optimise its service life.
To place the battery on standby:
- Switch off the engine ( STOP position).
- Press the red button, then turn the key
to the BATT position.
The battery goes into standby about
7 minutes later.
This time is necessary to:
- Allow the user to get out of the vehicle
and lock the doors with the remote
control.
- Ensure that all of the vehicle's electrical
systems are deactivated.
When the battery is on standby,
access to the vehicle is only possible
by unlocking the vehicle using the key in the
lock barrel in the driver's door.
After placing the battery on standby,
settings (time, date, radio station
presets...) are memorised.
To take the battery out of standby:
- Turn the key to the MAR position.
- Start the engine normally ( AV V position).