wiring Peugeot Expert Dag 2001.5 Owner's Manual
[x] Cancel search | Manufacturer: PEUGEOT, Model Year: 2001.5, Model line: Expert Dag, Model: Peugeot Expert Dag 2001.5Pages: 149, PDF Size: 5.87 MB
Page 87 of 149

RADIO PRE-EQUIPMENT*III-5
72
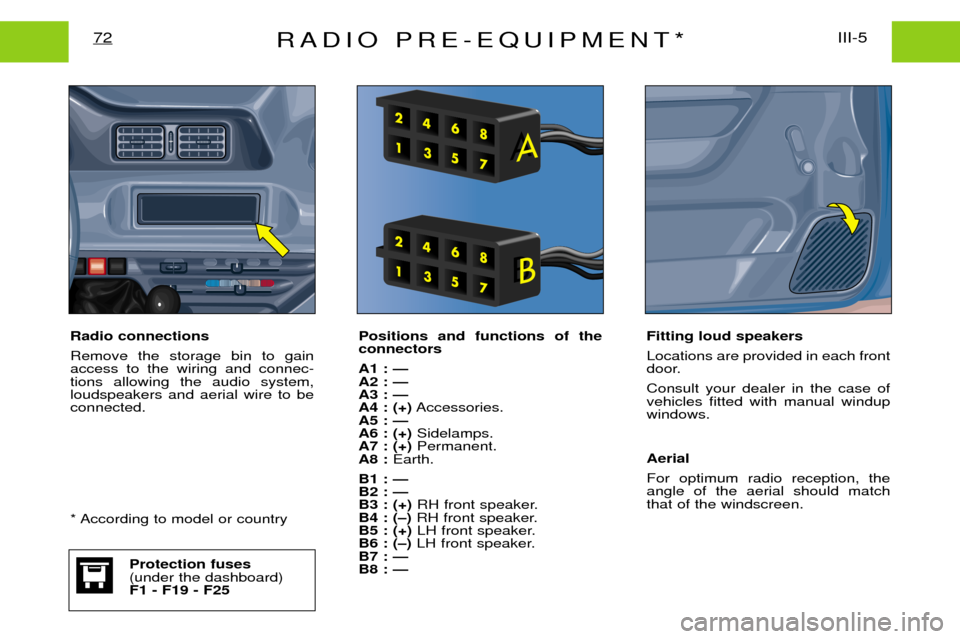
Positions and functions of the connectors A1 : Ñ A2 : ÑA3 : ÑA4 : (+) Accessories.
A5 : ÑA6 : (+) Sidelamps.
A7 : (+) Permanent.
A8 : Earth.
B1 : ÑB2 : ÑB3 : (+) RH front speaker.
B4 : (Ð) RH front speaker.
B5 : (+) LH front speaker.
B6 : (Ð) LH front speaker.
B7 : ÑB8 : Ñ Fitting loud speakers Locations are provided in each front
door. Consult your dealer in the case of vehicles fitted with manual windupwindows. Aerial For optimum radio reception, the angle of the aerial should matchthat of the windscreen.
Radio connections Remove the storage bin to gain access to the wiring and connec-tions allowing the audio system,loudspeakers and aerial wire to beconnected.
* According to model or country
Protection fuses (under the dashboard)F1 - F19 - F25
Page 118 of 149

REPLACING BULBS*97V- 3
Beware
The halogen bulbs should not be changed until they have been off for a few minutes (risk of serious burns). Do not touch the new bulb directly withyour fingers; use a lint-free cloth. After replacing a bulb, check the correct operation of the lighting and signalling.
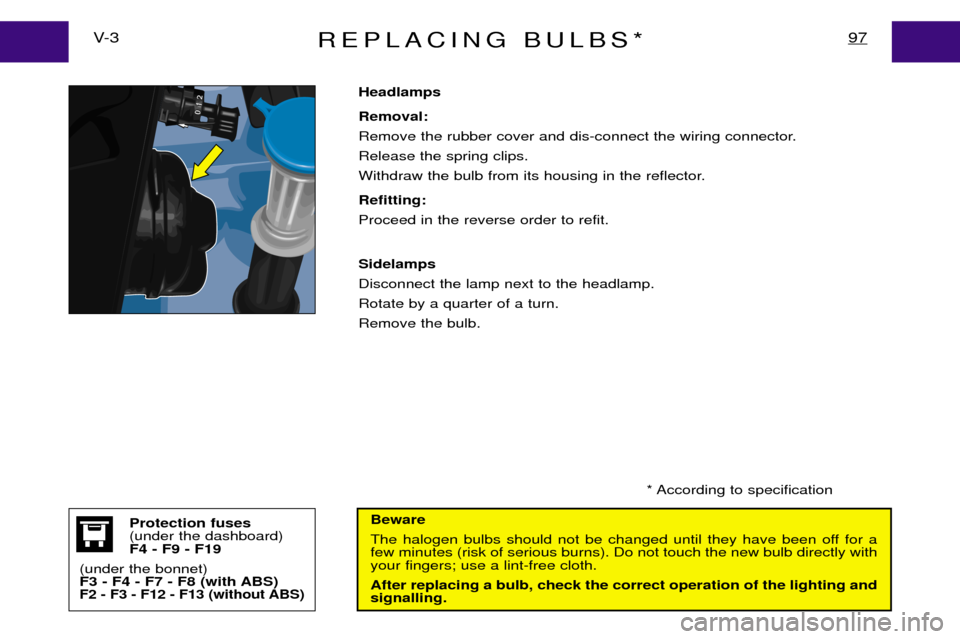
Headlamps Removal:
Remove the rubber cover and dis-connect the wiring connector.Release the spring clips.
Withdraw the bulb from its housing in the reflector. Refitting: Proceed in the reverse order to refit. Sidelamps Disconnect the lamp next to the headlamp.Rotate by a quarter of a turn.Remove the bulb.Protection fuses (under the dashboard)F4 - F9 - F19
(under the bonnet)
F3 - F4 - F7 - F8 (with ABS)
F2 - F3 - F12 - F13 (without ABS)
* According to specification
Page 120 of 149

REPLACING BULBS*99V- 3
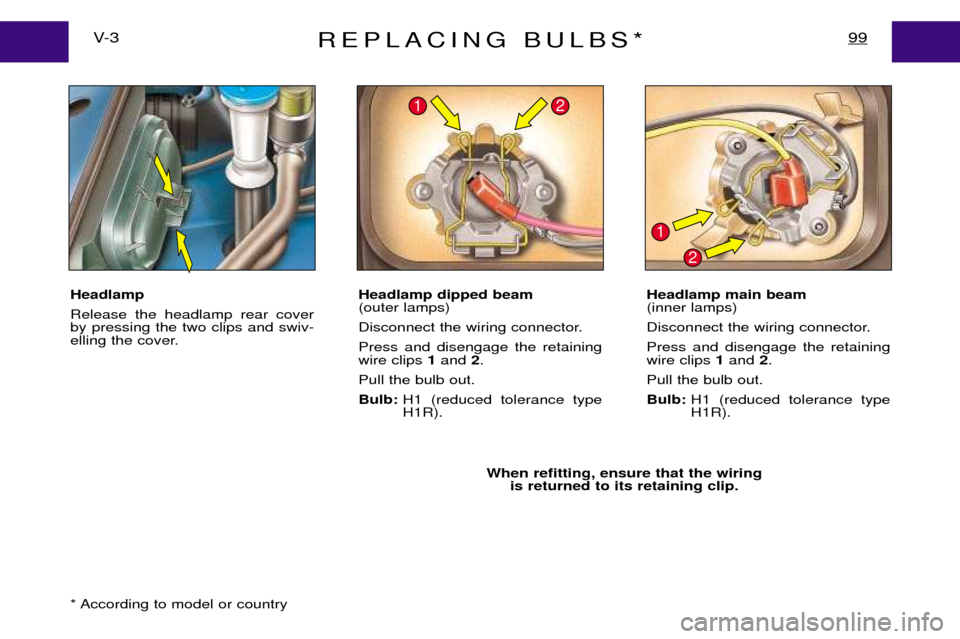
Headlamp Release the headlamp rear cover by pressing the two clips and swiv-
elling the cover.When refitting, ensure that the wiringis returned to its retaining clip.
Headlamp dipped beam (outer lamps)
Disconnect the wiring connector.Press and disengage the retaining wire clips
1and 2.
Pull the bulb out. Bulb: H1 (reduced tolerance type H1R). Headlamp main beam(inner lamps)
Disconnect the wiring connector.Press and disengage the retaining wire clips
1and 2.
Pull the bulb out. Bulb: H1 (reduced tolerance type H1R).
21
1
2
* According to model or country
Page 121 of 149

REPLACING BULBS*V- 3
100
BEWARE
The halogen bulbs should not be changed until they have been off for a few minutes (risk of serious burns). Do not touch the new bulb di- rectly with your fingers; use a lint-free cloth.
After replacing a bulb, check the correct operation of the lighting and signalling.
Badly adjusted headlamps are dangerous. Correct headlamp adjust- ment requires precision and must be carried out by a member of the dealer network in a suitably equipped workshop. Having replaced a headlamp bulb, have the alignment checked.
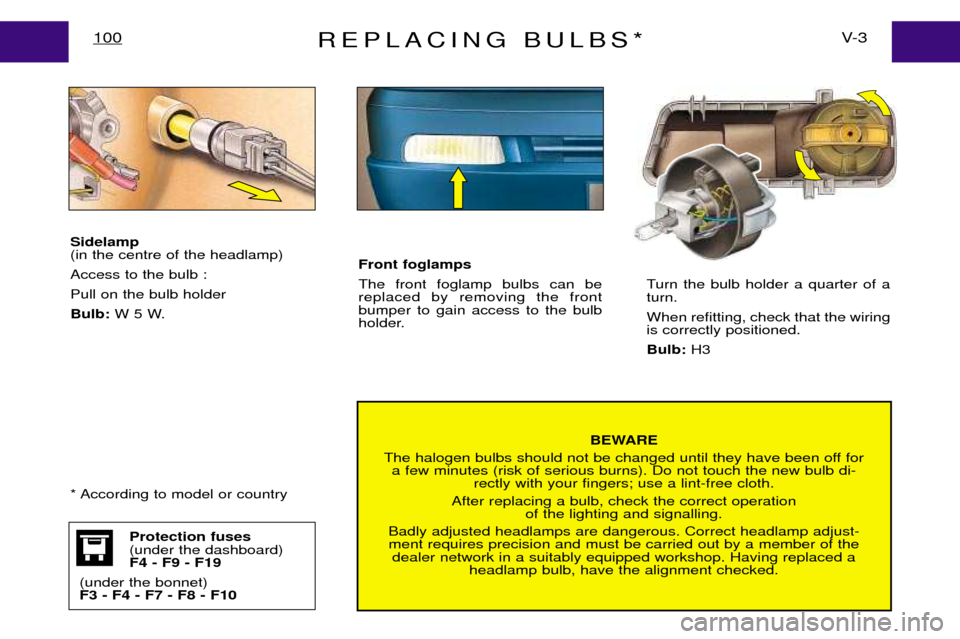
Sidelamp (in the centre of the headlamp) Access to the bulb :Pull on the bulb holderBulb:
W 5 W. Turn the bulb holder a quarter of a turn. When refitting, check that the wiring is correctly positioned. Bulb:
H3
Protection fuses (under the dashboard)F4 - F9 - F19
(under the bonnet)F3 - F4 - F7 - F8 - F10
Front foglamps The front foglamp bulbs can be replaced by removing the frontbumper to gain access to the bulb
holder.
* According to model or country