rele Peugeot Expert Tepee 2012 Owner's Manual
[x] Cancel search | Manufacturer: PEUGEOT, Model Year: 2012, Model line: Expert Tepee, Model: Peugeot Expert Tepee 2012Pages: 276, PDF Size: 10.01 MB
Page 6 of 276
4PRESENTATION
Within the chapters, symbols draw your attention to specific
information: This handbook has been designed to familiarise you with your
new vehicle from the moment you get behind the wheel and to
describe the operating features.
Reading the handbook is made easy with the content consisting
of 10 identified chapters, which can be located by means of a
colour code specific to each one. Its sections cover, by subject, all
of the functions of the vehicle in its most complete specification.
Chapter 8 gives all of the technical data relating to your vehicle.
At the end of the document, diagrams of the outside and inside of
the vehicle will assist you in locating equipment or functions and
page numbers refer you to the relevant section of the handbook. directs you to the chapter and section which contains detailed
information concerning a function,
indicates important information relating to use of the equipment,
alerts you to the safety of individuals and equipment on board.
Page 10 of 276
6
7
6
6
Exterior
8
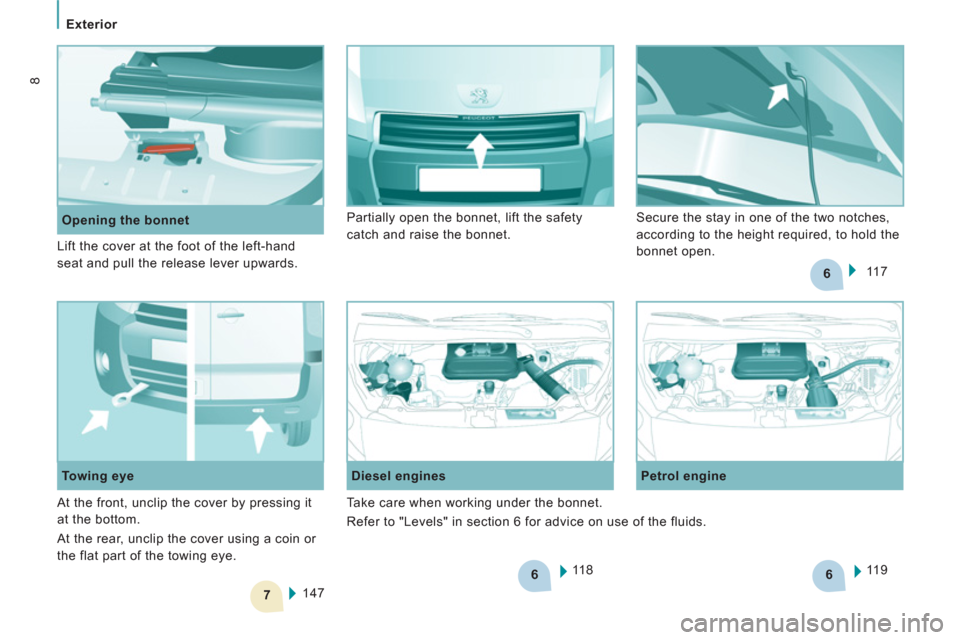
Opening the bonnet
11 8
Diesel engines
Petrol engine
11 9
147
Towing eye 11 7 Partially open the bonnet, lift the safety
catch and raise the bonnet. Secure the stay in one of the two notches,
according to the height required, to hold the
bonnet open. Lift the cover at the foot of the left-hand
seat and pull the release lever upwards.
At the front, unclip the cover by pressing it
at the bottom.
At the rear, unclip the cover using a coin or
the flat part of the towing eye. Take care when working under the bonnet.
Refer to "Levels" in section 6 for advice on use of the fluids.
Page 23 of 276
21
Access
READY TO SET OFF
2
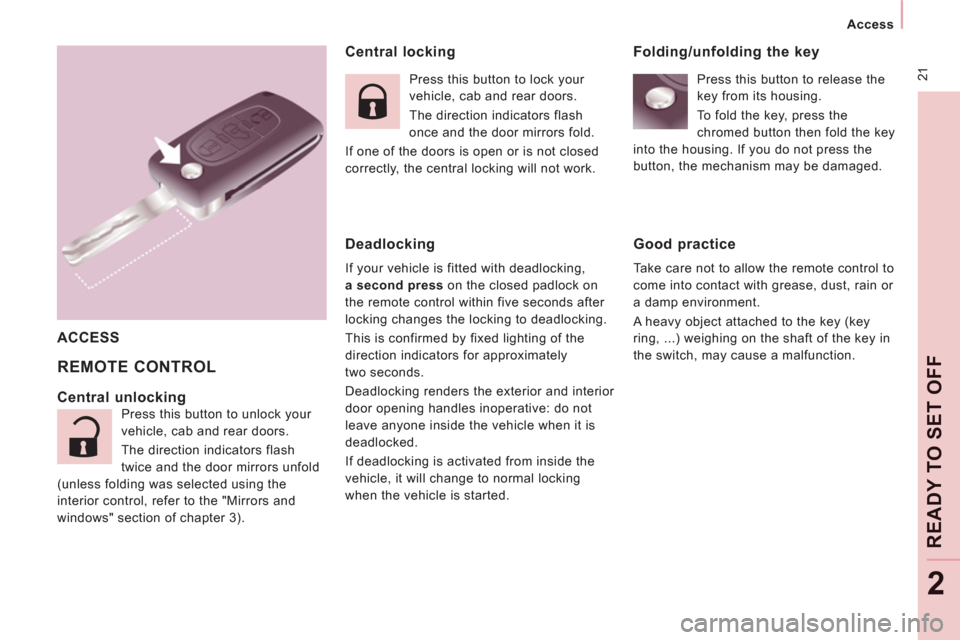
Central locking
REMOTE CONTROL
ACCESS
Central unlocking
Press this button to unlock your
vehicle, cab and rear doors.
The direction indicators flash
twice and the door mirrors unfold
(unless folding was selected using the
interior control, refer to the "Mirrors and
windows" section of chapter 3). Press this button to lock your
vehicle, cab and rear doors.
The direction indicators flash
once and the door mirrors fold.
If one of the doors is open or is not closed
correctly, the central locking will not work.
Deadlocking
If your vehicle is fitted with deadlocking,
a second press
on the closed padlock on
the remote control within five seconds after
locking changes the locking to deadlocking.
This is confirmed by fixed lighting of the
direction indicators for approximately
two seconds.
Deadlocking renders the exterior and interior
door opening handles inoperative: do not
leave anyone inside the vehicle when it is
deadlocked.
If deadlocking is activated from inside the
vehicle, it will change to normal locking
when the vehicle is started.
Folding/unfolding the key
Press this button to release the
key from its housing.
To fold the key, press the
chromed button then fold the key
into the housing. If you do not press the
button, the mechanism may be damaged.
Good practice
Take care not to allow the remote control to
come into contact with grease, dust, rain or
a damp environment.
A heavy object attached to the key (key
ring, ...) weighing on the shaft of the key in
the switch, may cause a malfunction.
Page 32 of 276
Instruments and controls
WARNING LAMPS
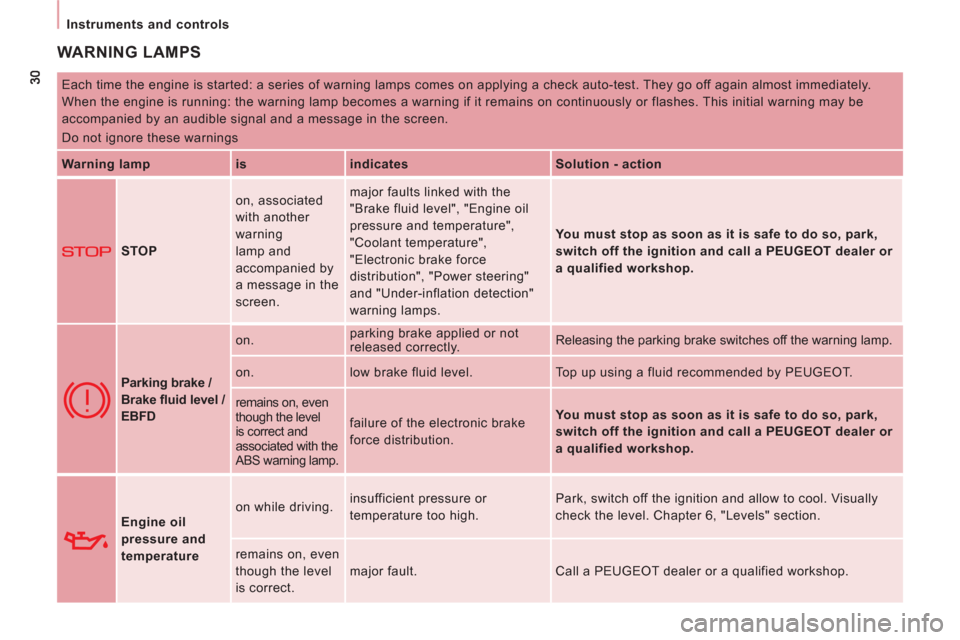
Each time the engine is started: a series of warning lamps comes on applying a check auto-test. They go off again almost immediately.
When the engine is running: the warning lamp becomes a warning if it remains on continuously or flashes. This initial warning may be
accompanied by an audible signal and a message in the screen.
Do not ignore these warnings
Warning lamp
is
indicates
Solution - action
STOP on, associated
with another
warning
lamp and
accompanied by
a message in the
screen. major faults linked with the
"Brake fluid level", "Engine oil
pressure and temperature",
"Coolant temperature",
"Electronic brake force
distribution", "Power steering"
and "Under-inflation detection"
warning lamps.
You must stop as soon as it is safe to do so, park,
switch off the ignition and call a PEUGEOT dealer or
a qualified workshop.
Parking brake /
Brake fl uid level /
EBFD on. parking brake applied or not
released correctly. Releasing the parking brake switches off the warning lamp.
on. low brake fluid level. Top up using a fluid recommended by PEUGEOT.
remains on, even
though the level
is correct and
associated with the
ABS warning lamp. failure of the electronic brake
force distribution.
You must stop as soon as it is safe to do so, park,
switch off the ignition and call a PEUGEOT dealer or
a qualified workshop.
Engine oil
pressure and
temperature on while driving. insufficient pressure or
temperature too high. Park, switch off the ignition and allow to cool. Visually
check the level. Chapter 6, "Levels" section.
remains on, even
though the level
is correct. major fault. Call a PEUGEOT dealer or a qualified workshop.
Page 41 of 276
39
Instruments and controls
READY TO SET OFF
2
After this operation, if you wish to
disconnect the battery, lock the vehicle
and wait for at least five minutes, otherwise
the zero re-set will not be registered.
Zero re-set
Your PEUGEOT dealer or a qualified
workshop carries out this operation after
each service.
However, if you carry out the service
yourself, the re-set procedure is as follows:
- switch off the ignition,
- press and hold the trip recorder reset
button,
- switch on the ignition.
The display begins a countdown.
When the display shows "=0"
, release the
button; the spanner disappears.
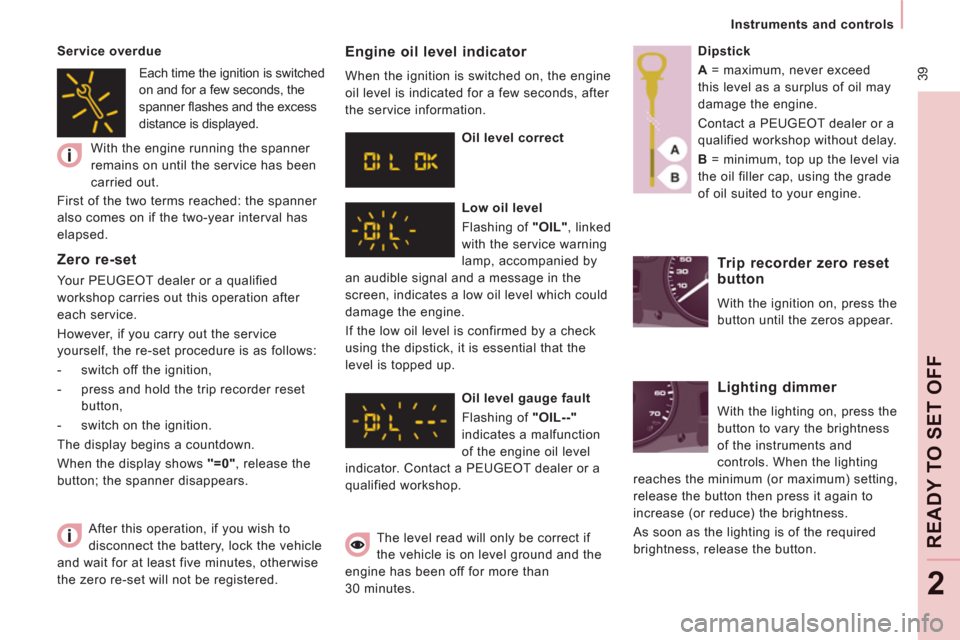
Engine oil level indicator
When the ignition is switched on, the engine
oil level is indicated for a few seconds, after
the service information.
Oil level correct
Low oil level
Flashing of "OIL"
, linked
with the service warning
lamp, accompanied by
an audible signal and a message in the
screen, indicates a low oil level which could
damage the engine.
If the low oil level is confirmed by a check
using the dipstick, it is essential that the
level is topped up.
Oil level gauge fault
Flashing of "OIL--"
indicates a malfunction
of the engine oil level
indicator. Contact a PEUGEOT dealer or a
qualified workshop.
The level read will only be correct if
the vehicle is on level ground and the
engine has been off for more than
30 minutes.
Dipstick
A
= maximum, never exceed
this level as a surplus of oil may
damage the engine.
Contact a PEUGEOT dealer or a
qualified workshop without delay.
B
= minimum, top up the level via
the oil filler cap, using the grade
of oil suited to your engine.
Trip recorder zero reset
button
With the ignition on, press the
button until the zeros appear.
Lighting dimmer
With the lighting on, press the
button to vary the brightness
of the instruments and
controls. When the lighting
reaches the minimum (or maximum) setting,
release the button then press it again to
increase (or reduce) the brightness.
As soon as the lighting is of the required
brightness, release the button.
Service overdue
With the engine running the spanner
remains on until the service has been
carried out.
First of the two terms reached: the spanner
also comes on if the two-year interval has
elapsed.
Each time the ignition is switched
on and for a few seconds, the
spanner fl ashes and the excess
distance is displayed.
Page 44 of 276
42
Gearboxes and steering wheel
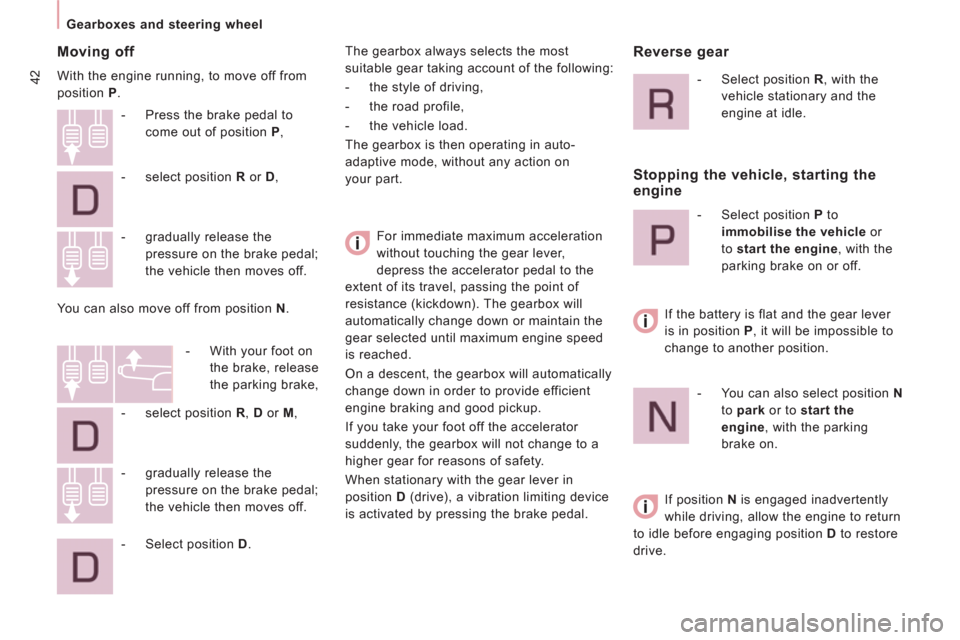
Moving off
With the engine running, to move off from
position P
.
For immediate maximum acceleration
without touching the gear lever,
depress the accelerator pedal to the
extent of its travel, passing the point of
resistance (kickdown). The gearbox will
automatically change down or maintain the
gear selected until maximum engine speed
is reached.
On a descent, the gearbox will automatically
change down in order to provide efficient
engine braking and good pickup.
If you take your foot off the accelerator
suddenly, the gearbox will not change to a
higher gear for reasons of safety.
When stationary with the gear lever in
position D
(drive), a vibration limiting device
is activated by pressing the brake pedal.
- gradually release the
pressure on the brake pedal;
the vehicle then moves off.
- Press the brake pedal to
come out of position P
,
- select position R
or D
,
- gradually release the
pressure on the brake pedal;
the vehicle then moves off.
You can also move off from position N
.
- With your foot on
the brake, release
the parking brake,
- select position R
, D
or M
,
- Select position D
. The gearbox always selects the most
suitable gear taking account of the following:
- the style of driving,
- the road profile,
- the vehicle load.
The gearbox is then operating in auto-
adaptive mode, without any action on
your part.
Reverse gear
- Select position R
, with the
vehicle stationary and the
engine at idle.
Stopping the vehicle, starting the
engine
- Select position P
to
immobilise the vehicle
or
to start the engine
, with the
parking brake on or off.
If the battery is flat and the gear lever
is in position P
, it will be impossible to
change to another position.
- You can also select position N
to park
or to start the
engine
, with the parking
brake on.
If position N
is engaged inadvertently
while driving, allow the engine to return
to idle before engaging position D
to restore
drive.
Page 46 of 276
44
Gearboxes and steering wheel
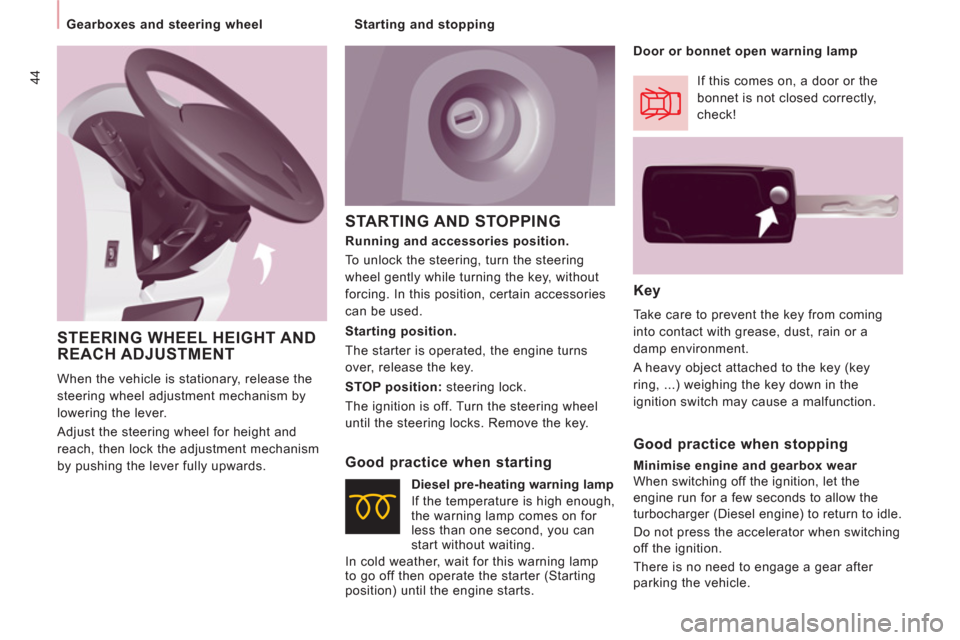
STARTING AND STOPPING
Key
Take care to prevent the key from coming
into contact with grease, dust, rain or a
damp environment.
A heavy object attached to the key (key
ring, ...) weighing the key down in the
ignition switch may cause a malfunction.
Starting position.
The starter is operated, the engine turns
over, release the key.
STOP position:
steering lock.
The ignition is off. Turn the steering wheel
until the steering locks. Remove the key.
Good practice when starting
If this comes on, a door or the
bonnet is not closed correctly,
check!
Diesel pre-heating warning lamp
If the temperature is high enough,
the warning lamp comes on for
less than one second, you can
start without waiting.
In cold weather, wait for this warning lamp
to go off then operate the starter (Starting
position) until the engine starts.
Good practice when stopping
Minimise engine and gearbox wear
When switching off the ignition, let the
engine run for a few seconds to allow the
turbocharger (Diesel engine) to return to idle.
Do not press the accelerator when switching
off the ignition.
There is no need to engage a gear after
parking the vehicle.
Running and accessories position.
To unlock the steering, turn the steering
wheel gently while turning the key, without
forcing. In this position, certain accessories
can be used.
Door or bonnet open warning lamp
STEERING WHEEL HEIGHT AND
REACH ADJUSTMENT
When the vehicle is stationary, release the
steering wheel adjustment mechanism by
lowering the lever.
Adjust the steering wheel for height and
reach, then lock the adjustment mechanism
by pushing the lever fully upwards.
Starting and stopping
Page 53 of 276
51
Steering mounted controls
EASE OF USE and COMFOR
T
3
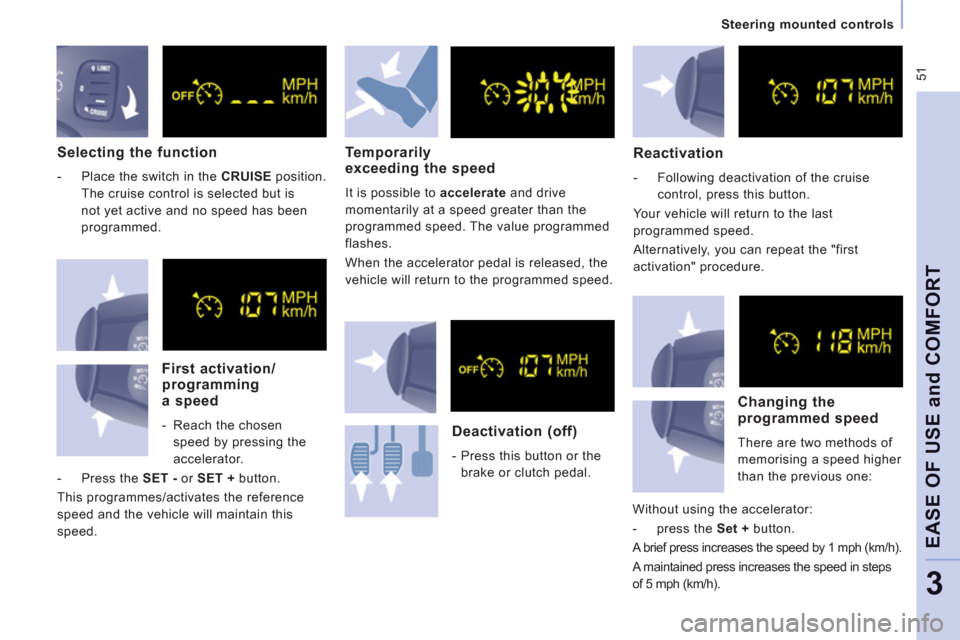
Selecting the function
- Place the switch in the CRUISE
position.
The cruise control is selected but is
not yet active and no speed has been
programmed.
First activation/programminga speed
- Reach the chosen
speed by pressing the
accelerator.
- Press the SET -
or SET +
button.
This programmes/activates the reference
speed and the vehicle will maintain this
speed.
Temporarily
exceeding the speed
It is possible to accelerate
and drive
momentarily at a speed greater than the
programmed speed. The value programmed
flashes.
When the accelerator pedal is released, the
vehicle will return to the programmed speed.
Reactivation
- Following deactivation of the cruise
control, press this button.
Your vehicle will return to the last
programmed speed.
Alternatively, you can repeat the "first
activation" procedure.
Deactivation (off)
- Press this button or the
brake or clutch pedal.
Changing the programmed speed
There are two methods of
memorising a speed higher
than the previous one:
Without using the accelerator:
- press the Set +
button.
A brief press increases the speed by 1 mph (km/h).
A maintained press increases the speed in steps
of 5 mph (km/h).
Page 88 of 276
Practical information
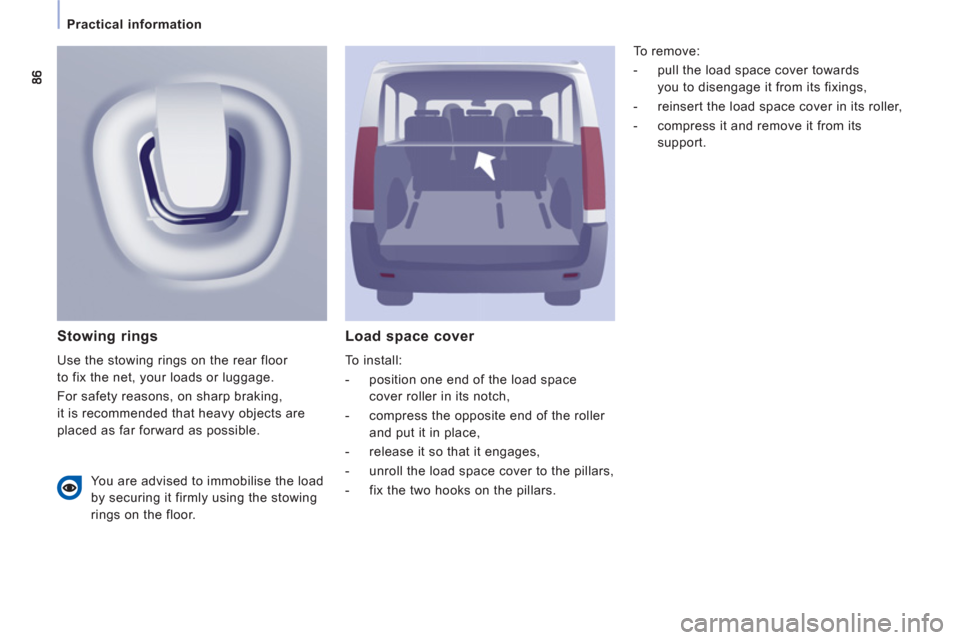
Load space cover
To install:
- position one end of the load space
cover roller in its notch,
- compress the opposite end of the roller
and put it in place,
- release it so that it engages,
- unroll the load space cover to the pillars,
- fix the two hooks on the pillars.
Stowing rings
Use the stowing rings on the rear floor
to fix the net, your loads or luggage.
For safety reasons, on sharp braking,
it is recommended that heavy objects are
placed as far forward as possible. To remove:
- pull the load space cover towards
you to disengage it from its fixings,
- reinsert the load space cover in its roller,
- compress it and remove it from its
support.
You are advised to immobilise the load
by securing it firmly using the stowing
rings on the floor.
Page 89 of 276
87
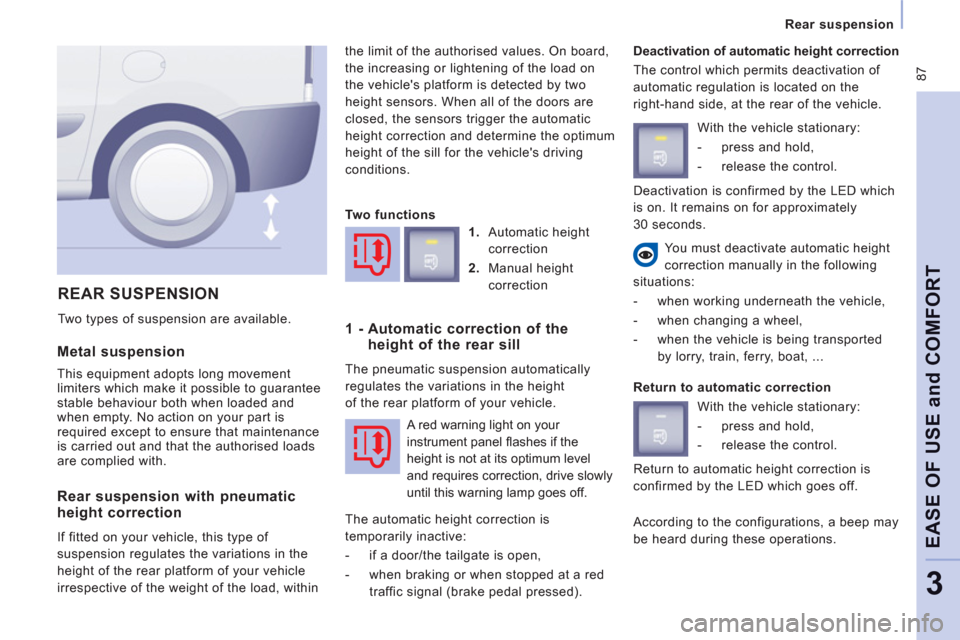
Rear suspension
EASE OF USE and COMFOR
T
3
Metal suspension
This equipment adopts long movement
limiters which make it possible to guarantee
stable behaviour both when loaded and
when empty. No action on your part is
required except to ensure that maintenance
is carried out and that the authorised loads
are complied with. the limit of the authorised values. On board,
the increasing or lightening of the load on
the vehicle's platform is detected by two
height sensors. When all of the doors are
closed, the sensors trigger the automatic
height correction and determine the optimum
height of the sill for the vehicle's driving
conditions.
Deactivation of automatic height correction
The control which permits deactivation of
automatic regulation is located on the
right-hand side, at the rear of the vehicle.
REAR SUSPENSION
Two types of suspension are available. You must deactivate automatic height
correction manually in the following
situations:
- when working underneath the vehicle,
- when changing a wheel,
- when the vehicle is being transported
by lorry, train, ferry, boat, ...
Rear suspension with pneumatic
height correction
If fitted on your vehicle, this type of
suspension regulates the variations in the
height of the rear platform of your vehicle
irrespective of the weight of the load, within
Two functions
1.
Automatic height
correction
2.
Manual height
correction
1 - Automatic correction of the
height of the rear sill
The pneumatic suspension automatically
regulates the variations in the height
of the rear platform of your vehicle.
The automatic height correction is
temporarily inactive:
- if a door/the tailgate is open,
- when braking or when stopped at a red
traffic signal (brake pedal pressed). With the vehicle stationary:
- press and hold,
- release the control.
Return to automatic correction
With the vehicle stationary:
- press and hold,
- release the control.
According to the configurations, a beep may
be heard during these operations.
A red warning light on your
instrument panel fl ashes if the
height is not at its optimum level
and requires correction, drive slowly
until this warning lamp goes off. Return to automatic height correction is
confirmed by the LED which goes off. Deactivation is confirmed by the LED which
is on. It remains on for approximately
30 seconds.