change wheel Peugeot Expert VU 2009 Owner's Manual
[x] Cancel search | Manufacturer: PEUGEOT, Model Year: 2009, Model line: Expert VU, Model: Peugeot Expert VU 2009Pages: 226, PDF Size: 10.49 MB
Page 1 of 226
4 PRESENTATION
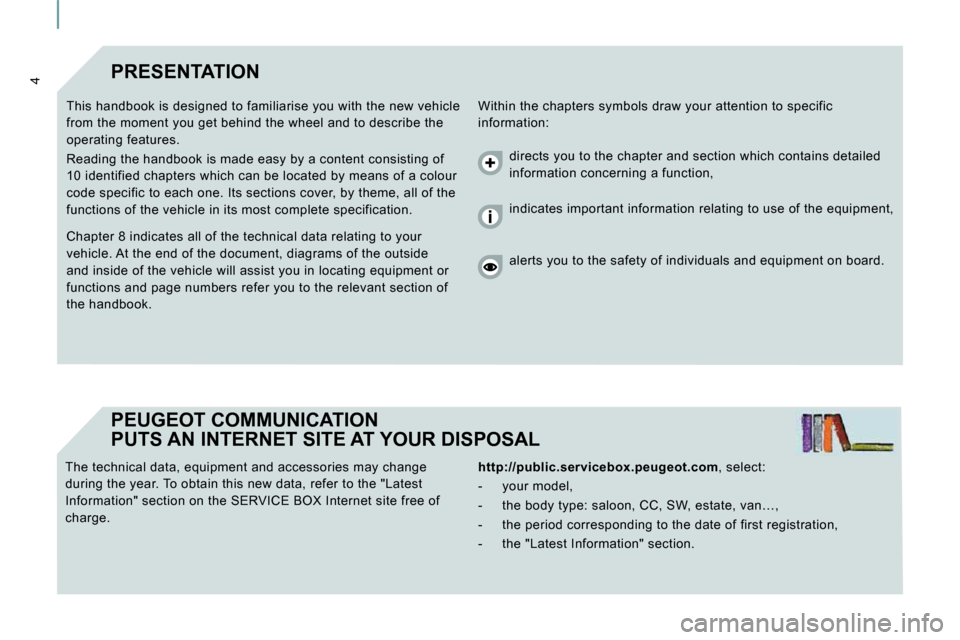
Within the chapters symbols draw your attention to specific
information:
This handbook is designed to familiarise you with
the new vehicle
from the moment you get behind the wheel and to des cribe the
operating features.
Reading the handbook is made easy by a content con sisting of
10 identified chapters which can be located by mean s of a colour
code specific to each one. Its sections cover, by t heme, all of the
functions of the vehicle in its most complete speci fication.
PEUGEOT COMMUNICATION
PUTS AN INTERNET SITE AT YOUR DISPOSAL
http://public.servicebox.peugeot.com , select:
- your model,
- the body type: saloon, CC, SW, estate, van…,
- the period corresponding to the date of first registration,
- the "Latest Information" section.
The technical data, equipment and accessories may
change
during the year. To obtain this new data, refer to the "Latest
Information" section on the SERVICE BOX Internet si te free of
charge. Chapter 8 indicates all of the technical data rela
ting to your
vehicle. At the end of the document, diagrams of th e outside
and inside of the vehicle will assist you in locati ng equipment or
functions and page numbers refer you to the relevan t section of
the handbook. directs you to the chapter and section which conta
ins detailed
information concerning a function,
indicates important information relating to use of the equipment,
alerts you to the safety of individuals and equipm ent on board.
Page 30 of 226
30
Instruments and controls
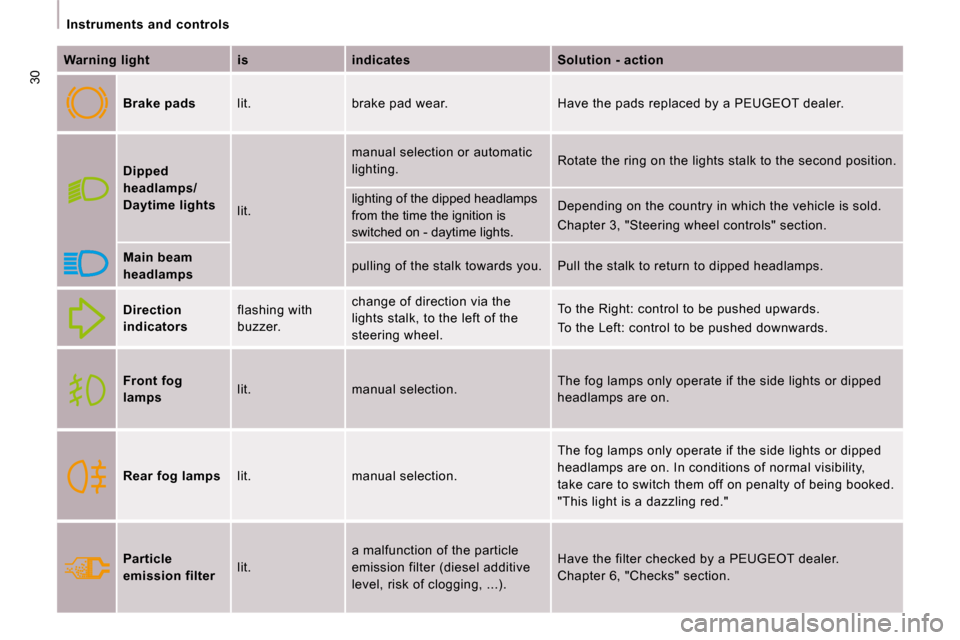
Warning light is indicates Solution - action
Brake pads lit. brake pad wear. Have the pads replaced by a PEUGEOT dealer.
Dipped
headlamps/
Daytime lights
lit. manual selection or automatic
lighting.
Rotate the ring on the lights stalk to the second
position.
lighting of the dipped headlamps
from the time the ignition is
switched on - daytime lights. Depending on the country in which the vehicle is s
old.
Chapter 3, "Steering wheel controls" section.
Main beam
headlamps pulling of the stalk towards you. Pull the stalk
to return to dipped headlamps.
Direction
indicators flashing with
buzzer. change of direction via the
lights stalk, to the left of the
steering wheel. To the Right: control to be pushed upwards.
To the Left: control to be pushed downwards.
Front fog
lamps lit. manual selection. The fog lamps only operate if the side lights or d
ipped
headlamps are on.
Rear fog lamps lit. manual selection. The fog lamps only operate if the side lights or d
ipped
headlamps are on. In conditions of normal visibilit y,
take care to switch them off on penalty of being bo oked.
"This light is a dazzling red."
Particle
emission filter lit. a malfunction of the particle
emission filter (diesel additive
level, risk of clogging, ...). Have the filter checked by a PEUGEOT dealer.
Chapter 6, "Checks" section.
Page 37 of 226
35
Gearboxes and steering wheel
READY TO SET OFF
2
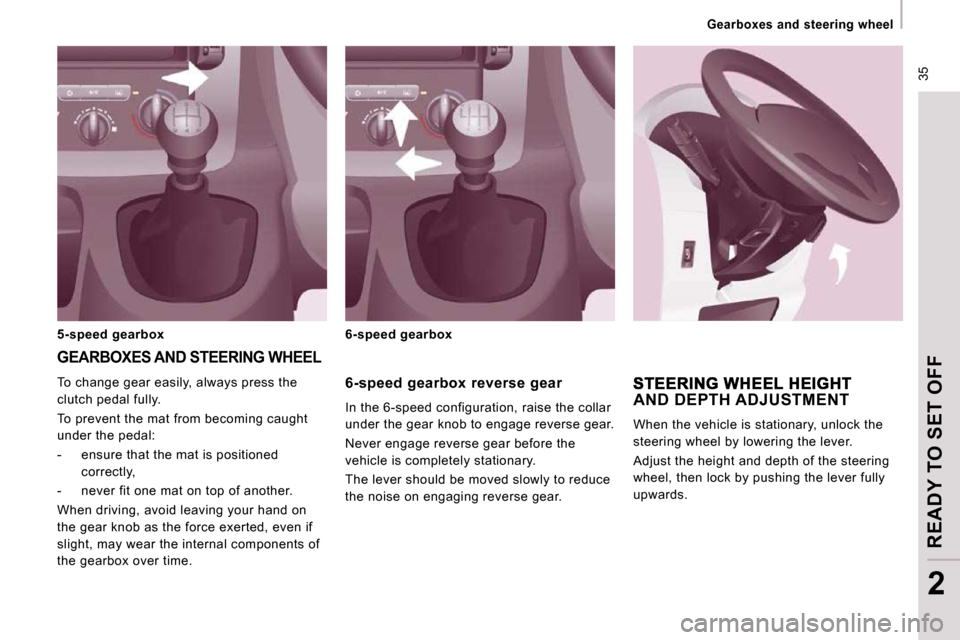
6-speed gearbox reverse gear
In the 6-speed configuration, raise the collar
under the gear knob to engage reverse gear.
Never engage reverse gear before the
vehicle is completely stationary.
The lever should be moved slowly to reduce
the noise on engaging reverse gear.
To change gear easily, always press the
clutch pedal fully.
To prevent the mat from becoming caught
under the pedal:
- ensure that the mat is positioned
correctly,
- never fit one mat on top of another.
When driving, avoid leaving your hand on
the gear knob as the force exerted, even if
slight, may wear the internal components of
the gearbox over time.
AND DEPTH ADJUSTMENT
When the vehicle is stationary, unlock the
steering wheel by lowering the lever.
Adjust the height and depth of the steering
wheel, then lock by pushing the lever fully
upwards.
GEARBOXES AND STEERING WHEEL
5-speed gearbox 6-speed gearbox
Page 39 of 226
37
Steering wheel controls
ERGONOMICS and COMFORT
3
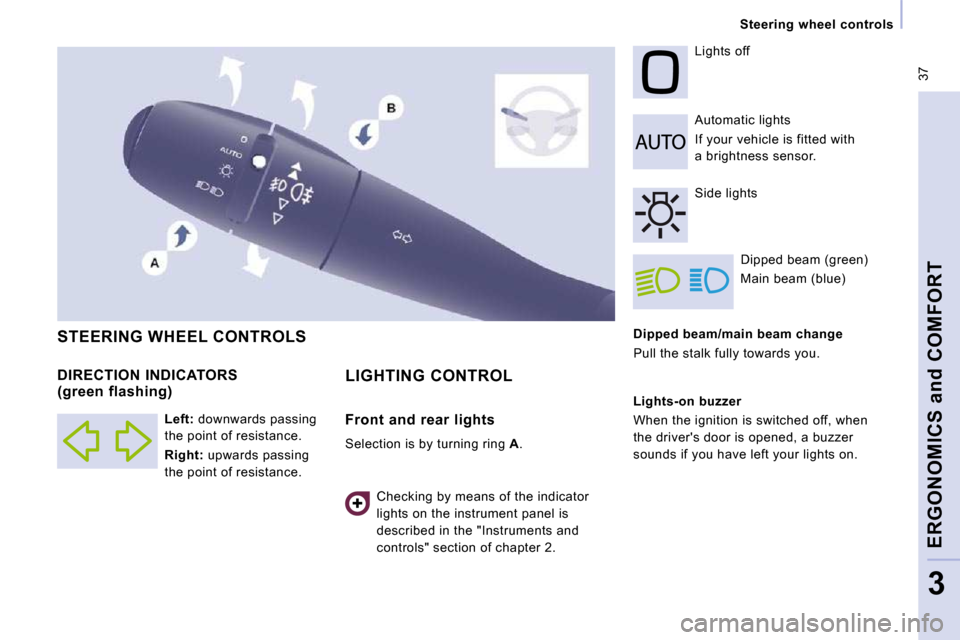
Dipped beam/main beam change
Pull the stalk fully towards you. Automatic lights
If your vehicle is fitted with
a brightness sensor.
Lights off
Dipped beam (green)
Main beam (blue)
DIRECTION INDICATORS
(green flashing) STEERING WHEEL CONTROLS
Checking by means of the indicator
lights on the instrument panel is
described in the "Instruments and
controls" section of chapter 2. Side lights
Lights-on buzzer
When the ignition is switched off, when
the driver's door is opened, a buzzer
sounds if you have left your lights on.
Left: downwards passing
the point of resistance.
Right: upwards passing
the point of resistance.
LIGHTING CONTROL
Front and rear lights
Selection is by turning ring A .
Page 74 of 226

72
Rear suspension
Deactivation of the manual correction Good practice
When stationary and with the ignition key
removed, excessive use of the system
consumes battery charge. Parking for a long duration
Avoid parking for a long duration on ground
which could present a potential obstacle as
your vehicle could lower.
Following a long period out of use, the
height of the platform may change due to the
automatic compensation on unlocking or on
opening one of your vehicle's doors.
With the vehicle stationary:
- press and hold,
- release the control.
Deactivation is confirmed by
the diode which is lit. It remains lit for
approximately 30 seconds.
Return to manual correction
According to the configurations, a bleep may
be heard during these operations.
You must deactivate the manual
correction in the following
situations:
- when working underneath the vehicle,
- when changing a wheel,
- when the vehicle is being transported by lorry, train, ferry, boat, ... Warning light
Driving with the height of the rear platform:
- too low, risks damaging the technical
components underneath the vehicle,
- too high, risks unstable driving.
With the vehicle stationary:
- press and hold,
- release the control.
Return to manual correction is
confirmed by the diode which is switched off. Refer to the "Instruments and controls"
section of chapter 2.
If you start and the warning light flashes,
to switch it off:
- correct the position of the manual
control which is still at the lower or
upper limit,
- or drive slowly at above 6 mph (10 km/h), until the compensation
returns to automatic mode.
Page 98 of 226
93
Equipment
ACCESSORIES
5
OTHER ACCESSORIES
These accessories and parts, having been
tested and approved for reliability and
safety, are all adapted to your vehicle.
A wide range of recommended products and
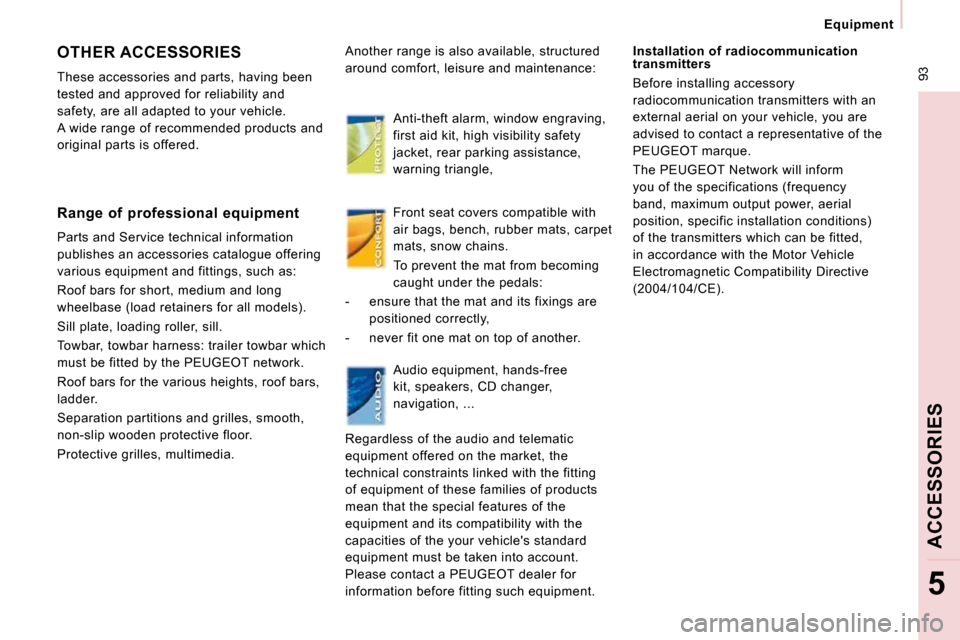
original parts is offered. Anti-theft alarm, window engraving,
first aid kit, high visibility safety
jacket, rear parking assistance,
warning triangle,
Another range is also available, structured
around comfort, leisure and maintenance:
Audio equipment, hands-free
kit, speakers, CD changer,
navigation, ...
Regardless of the audio and telematic
equipment offered on the market, the
technical constraints linked with the fitting
of equipment of these families of products
mean that the special features of the
equipment and its compatibility with the
capacities of the your vehicle's standard
equipment must be taken into account.
Please contact a PEUGEOT dealer for
information before fitting such equipment. Installation of radiocommunication
transmitters
Before installing accessory
radiocommunication transmitters with an
external aerial on your vehicle, you are
advised to contact a representative of the
PEUGEOT marque.
The PEUGEOT Network will inform
you of the specifications (frequency
band, maximum output power, aerial
position, specific installation conditions)
of the transmitters which can be fitted,
in accordance with the Motor Vehicle
Electromagnetic Compatibility Directive
(2004/104/CE).
Range of professional equipment
Parts and Service technical information
publishes an accessories catalogue offering
various equipment and fittings, such as:
Roof bars for short, medium and long
wheelbase (load retainers for all models).
Sill plate, loading roller, sill.
Towbar, towbar harness: trailer towbar which
must be fitted by the PEUGEOT network.
Roof bars for the various heights, roof bars,
ladder.
Separation partitions and grilles, smooth,
non-slip wooden protective floor.
Protective grilles, multimedia. Front seat covers compatible with
air bags, bench, rubber mats, carpet
mats, snow chains.
To prevent the mat from becoming
caught under the pedals:
- ensure that the mat and its fixings are positioned correctly,
- never fit one mat on top of another.
Page 110 of 226
106
Changing a wheel
CHANGING A WHEEL
1. PARKING THE VEHICLE
- It is imperative that you ensure that the occupants get out of the vehicle and
wait in a safe location.
- If possible, park the vehicle on level, stable and non-slippery ground. - Apply the handbrake, switch off the
ignition and engage first or reverse gear.
- If available, place a chock under the wheel diagonally opposite the one to be
changed.
On certain types of ground and/or if
considerable loads are being transported,
the vehicle must be raised in order to
disengage the spare wheel from the carrier.
Call a PEUGEOT dealer.
If your vehicle is fitted with suspension
with pneumatic compensation, please
deactivate the system. Refer to the "Rear
suspension" section of chapter 3.
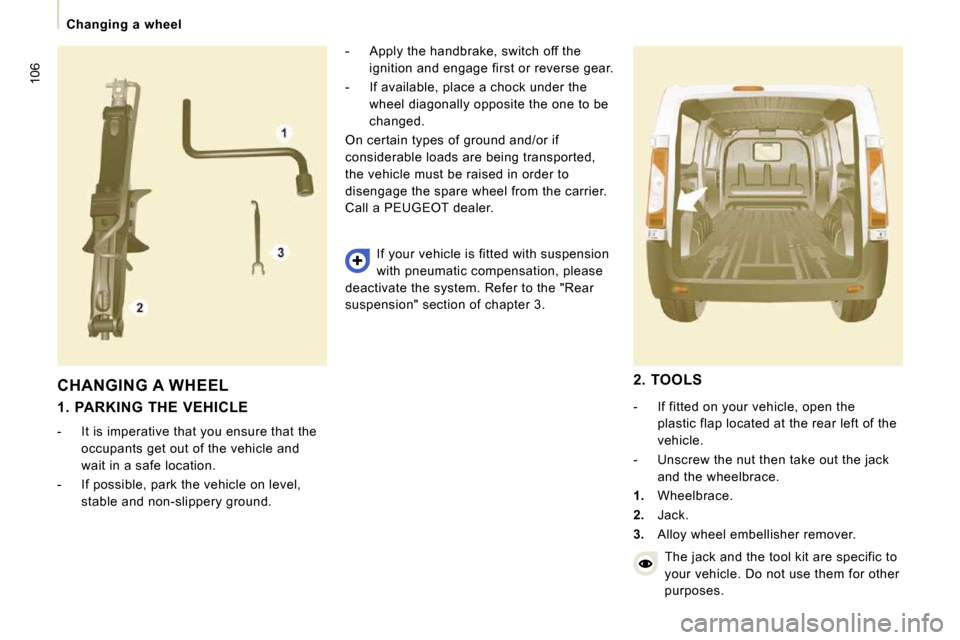
2. TOOLS
- If fitted on your vehicle, open the plastic flap located at the rear left of the
vehicle.
- Unscrew the nut then take out the jack and the wheelbrace.
1. Wheelbrace.
2. Jack.
3. Alloy wheel embellisher remover.
The jack and the tool kit are specific to
your vehicle. Do not use them for other
purposes.
Page 111 of 226
107
Changing a wheel
TROUBLESHOOTING
7
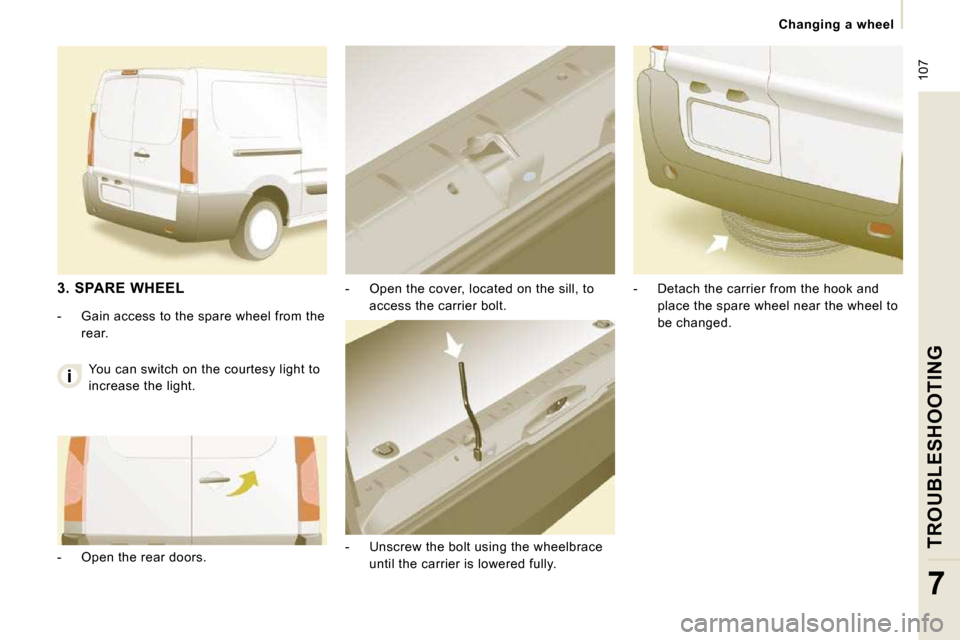
- Open the cover, located on the sill, to access the carrier bolt.
- Unscrew the bolt using the wheelbrace until the carrier is lowered fully. - Detach the carrier from the hook and
place the spare wheel near the wheel to
be changed.
3. SPARE WHEEL
- Gain access to the spare wheel from the
rear.
- Open the rear doors. You can switch on the courtesy light to
increase the light.
Page 112 of 226
108
Changing a wheel
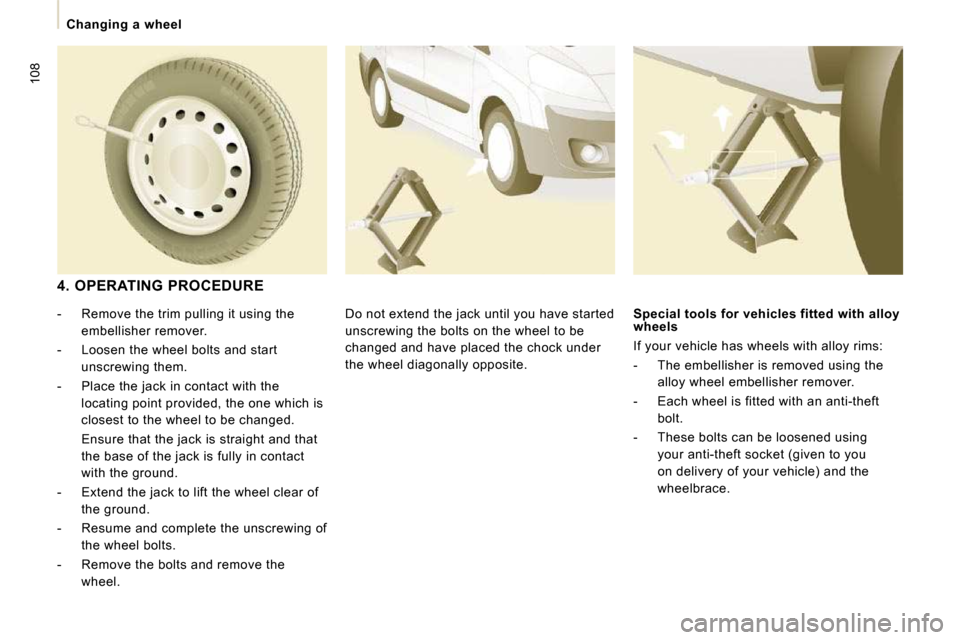
4. OPERATING PROCEDURE Do not extend the jack until you have started
unscrewing the bolts on the wheel to be
changed and have placed the chock under
the wheel diagonally opposite.
- Remove the trim pulling it using the
embellisher remover.
- Loosen the wheel bolts and start unscrewing them.
- Place the jack in contact with the locating point provided, the one which is
closest to the wheel to be changed.
Ensure that the jack is straight and that the base of the jack is fully in contact
with the ground.
- Extend the jack to lift the wheel clear of the ground.
- Resume and complete the unscrewing of the wheel bolts.
- Remove the bolts and remove the wheel. Special tools for vehicles fitted with alloy
wheels
If your vehicle has wheels with alloy rims:
- The embellisher is removed using the
alloy wheel embellisher remover.
- Each wheel is fitted with an anti-theft bolt.
- These bolts can be loosened using your anti-theft socket (given to you
on delivery of your vehicle) and the
wheelbrace.
Page 122 of 226
117
Changing a fuse
TROUBLESHOOTING
7
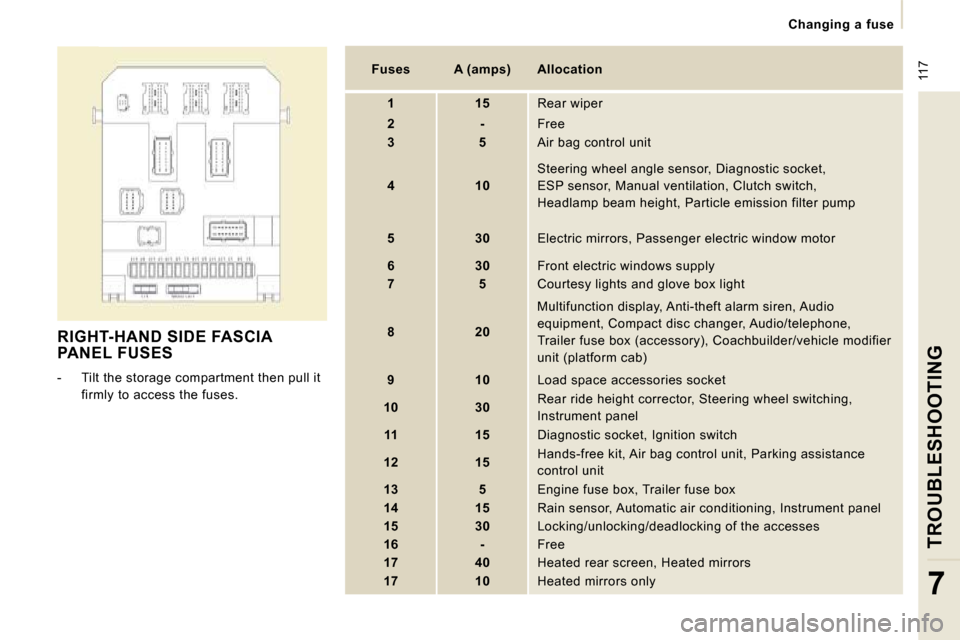
RIGHT-HAND SIDE FASCIA PANEL FUSES
- Tilt the storage compartment then pull it firmly to access the fuses.
Fuses A (amps) Allocation
1 15 Rear wiper
2 - Free
3 5 Air bag control unit
4 10 Steering wheel angle sensor, Diagnostic socket,
ESP sensor, Manual ventilation, Clutch switch,
Headlamp beam height, Particle emission filter pump
5 30 Electric mirrors, Passenger electric window mot or
6 30 Front electric windows supply
7 5 Courtesy lights and glove box light
8 20 Multifunction display, Anti-theft alarm siren, Aud
io
equipment, Compact disc changer, Audio/telephone,
Trailer fuse box (accessory), Coachbuilder/vehicle modifier
unit (platform cab)
9 10 Load space accessories socket
10 30 Rear ride height corrector, Steering wheel switchi
ng,
Instrument panel
11 15 Diagnostic socket, Ignition switch
12 15 Hands-free kit, Air bag control unit, Parking assi
stance
control unit
13 5 Engine fuse box, Trailer fuse box
14 15 Rain sensor, Automatic air conditioning, Instru ment panel
15 30 Locking/unlocking/deadlocking of the accesses
16 - Free
17 40 Heated rear screen, Heated mirrors
17 10 Heated mirrors only