rear lights Peugeot Expert VU 2009 Owner's Manual
[x] Cancel search | Manufacturer: PEUGEOT, Model Year: 2009, Model line: Expert VU, Model: Peugeot Expert VU 2009Pages: 226, PDF Size: 10.49 MB
Page 23 of 226
23
Accesses
READY TO SET OFF
2
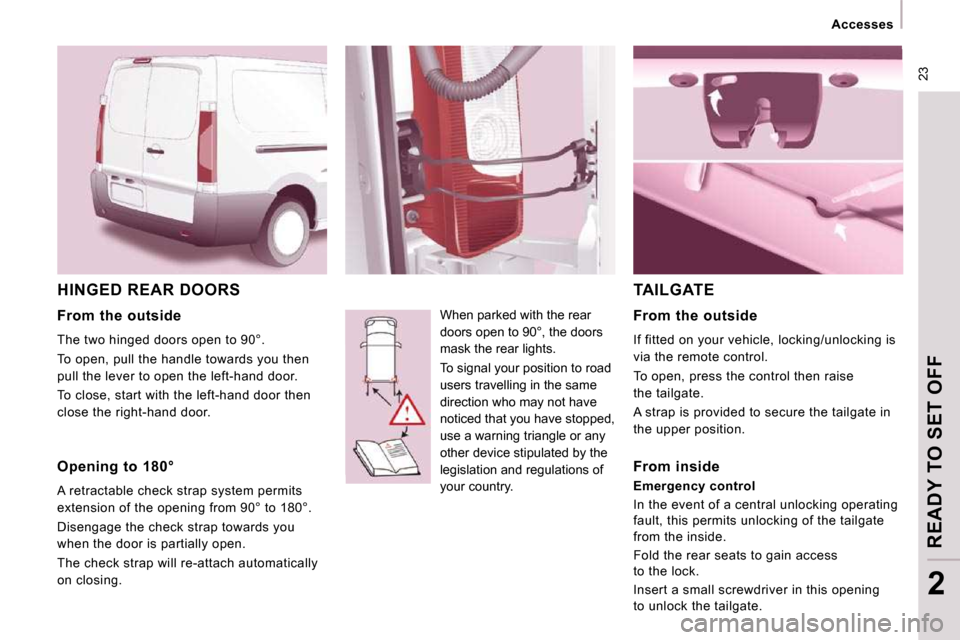
HINGED REAR DOORS
When parked with the rear
doors open to 90°, the doors
mask the rear lights.
To signal your position to road
users travelling in the same
direction who may not have
noticed that you have stopped,
use a warning triangle or any
other device stipulated by the
legislation and regulations of
your country.
TAILGATE
From the outside
The two hinged doors open to 90°.
To open, pull the handle towards you then
pull the lever to open the left-hand door.
To close, start with the left-hand door then
close the right-hand door.
Opening to 180°
A retractable check strap system permits
extension of the opening from 90° to 180°.
Disengage the check strap towards you
when the door is partially open.
The check strap will re-attach automatically
on closing. From the outside
If fitted on your vehicle, locking/unlocking is
via the remote control.
To open, press the control then raise
the tailgate.
A strap is provided to secure the tailgate in
the upper position.
From inside
Emergency control
In the event of a central unlocking operating
fault, this permits unlocking of the tailgate
from the inside.
Fold the rear seats to gain access
to the lock.
Insert a small screwdriver in this opening
to unlock the tailgate.
Page 30 of 226
30
Instruments and controls
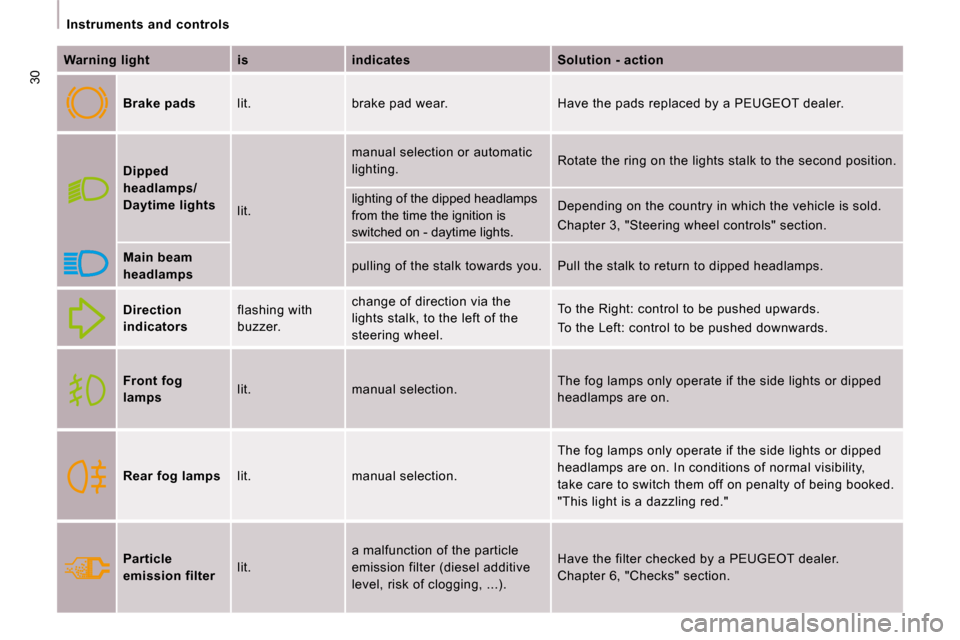
Warning light is indicates Solution - action
Brake pads lit. brake pad wear. Have the pads replaced by a PEUGEOT dealer.
Dipped
headlamps/
Daytime lights
lit. manual selection or automatic
lighting.
Rotate the ring on the lights stalk to the second
position.
lighting of the dipped headlamps
from the time the ignition is
switched on - daytime lights. Depending on the country in which the vehicle is s
old.
Chapter 3, "Steering wheel controls" section.
Main beam
headlamps pulling of the stalk towards you. Pull the stalk
to return to dipped headlamps.
Direction
indicators flashing with
buzzer. change of direction via the
lights stalk, to the left of the
steering wheel. To the Right: control to be pushed upwards.
To the Left: control to be pushed downwards.
Front fog
lamps lit. manual selection. The fog lamps only operate if the side lights or d
ipped
headlamps are on.
Rear fog lamps lit. manual selection. The fog lamps only operate if the side lights or d
ipped
headlamps are on. In conditions of normal visibilit y,
take care to switch them off on penalty of being bo oked.
"This light is a dazzling red."
Particle
emission filter lit. a malfunction of the particle
emission filter (diesel additive
level, risk of clogging, ...). Have the filter checked by a PEUGEOT dealer.
Chapter 6, "Checks" section.
Page 39 of 226
37
Steering wheel controls
ERGONOMICS and COMFORT
3
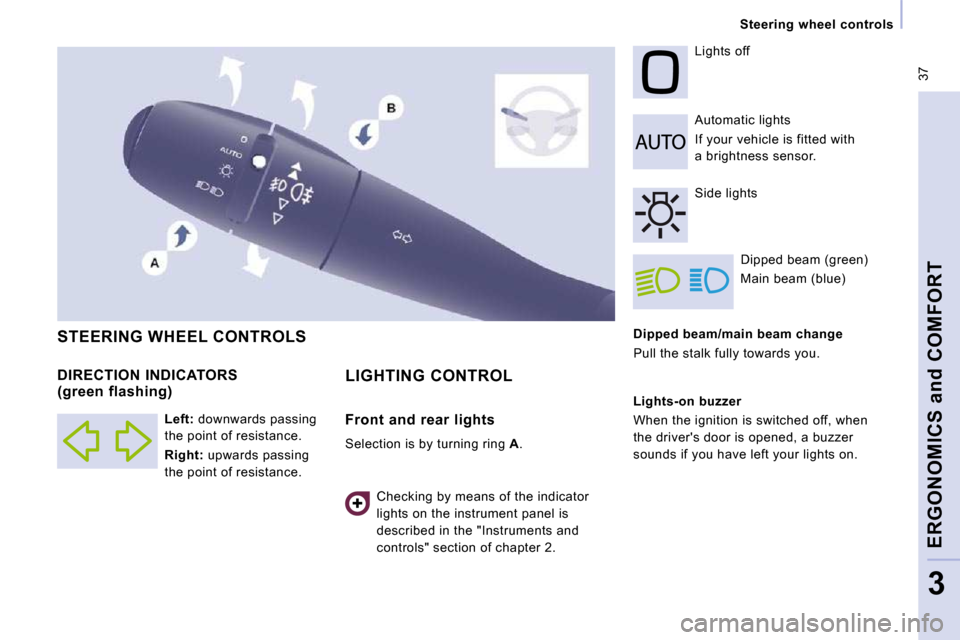
Dipped beam/main beam change
Pull the stalk fully towards you. Automatic lights
If your vehicle is fitted with
a brightness sensor.
Lights off
Dipped beam (green)
Main beam (blue)
DIRECTION INDICATORS
(green flashing) STEERING WHEEL CONTROLS
Checking by means of the indicator
lights on the instrument panel is
described in the "Instruments and
controls" section of chapter 2. Side lights
Lights-on buzzer
When the ignition is switched off, when
the driver's door is opened, a buzzer
sounds if you have left your lights on.
Left: downwards passing
the point of resistance.
Right: upwards passing
the point of resistance.
LIGHTING CONTROL
Front and rear lights
Selection is by turning ring A .
Page 40 of 226
38
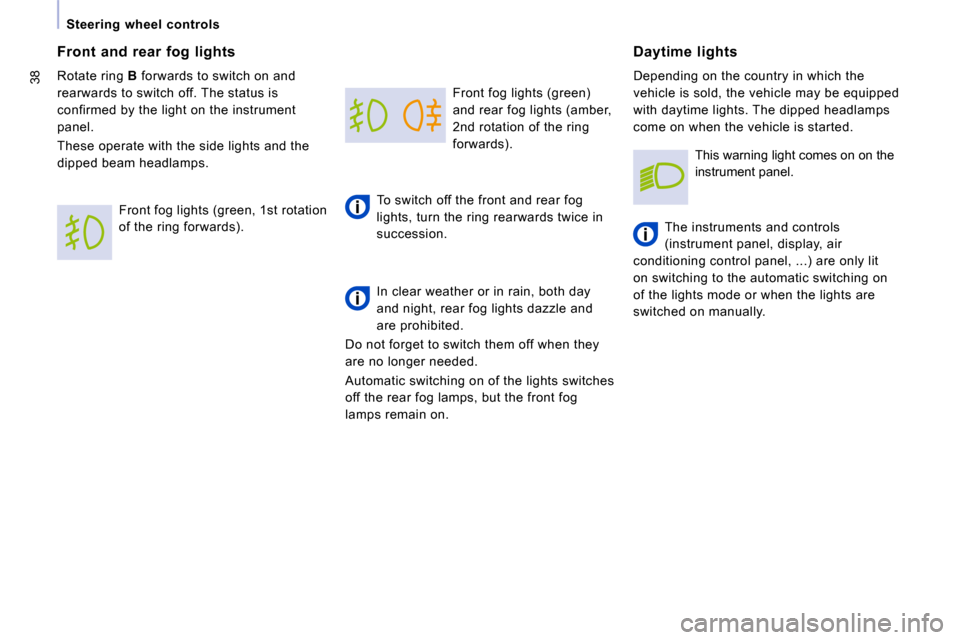
Steering wheel controls Front fog lights (green)
and rear fog lights (amber,
2nd rotation of the ring
forwards).
To switch off the front and rear fog
lights, turn the ring rearwards twice in
succession.
In clear weather or in rain, both day
and night, rear fog lights dazzle and
are prohibited.
Do not forget to switch them off when they
are no longer needed.
Automatic switching on of the lights switches
off the rear fog lamps, but the front fog
lamps remain on. Daytime lights
Depending on the country in which the
vehicle is sold, the vehicle may be equipped
with daytime lights. The dipped headlamps
come on when the vehicle is started.
The instruments and controls
(instrument panel, display, air
conditioning control panel, ...) are only lit
on switching to the automatic switching on
of the lights mode or when the lights are
switched on manually.
Front and rear fog lights
Rotate ring
B forwards to switch on and
rearwards to switch off. The status is
confirmed by the light on the instrument
panel.
These operate with the side lights and the
dipped beam headlamps.
Front fog lights (green, 1st rotation
of the ring forwards). This warning light comes on on the
instrument panel.
Page 41 of 226
39
Steering wheel controls
ERGONOMICS and COMFORT
3
Automatic switching on of the lights Activation
Turn the ring to the
AUTO position.
The activation of this function is
accompanied by a message on the display.
If the brightness sensor does not
function correctly , the lights come on
accompanied by the service warning light,
an audible signal and a message on the
display.
Consult a PEUGEOT dealer.
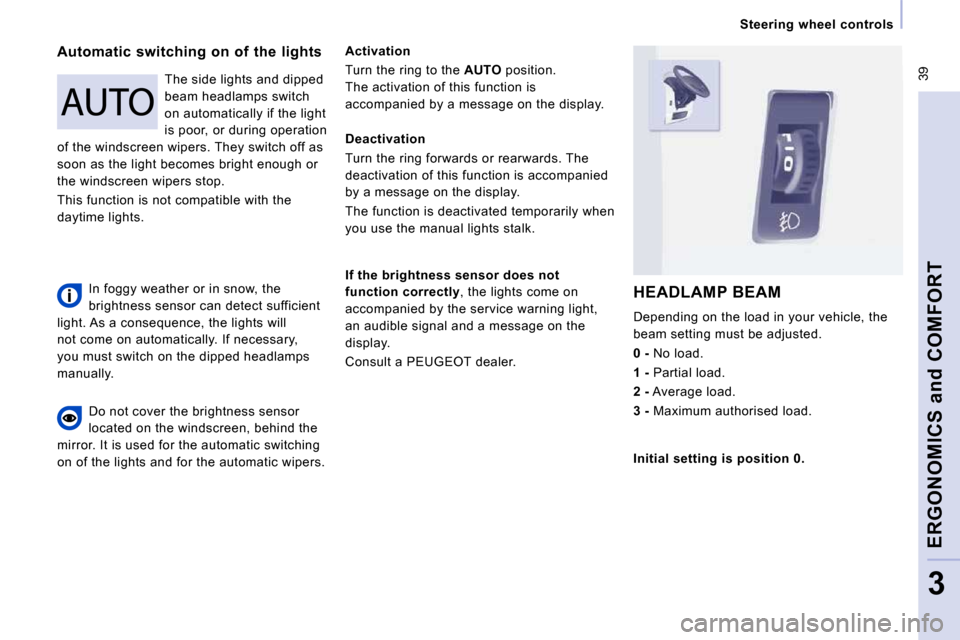
HEADLAMP BEAM
Depending on the load in your vehicle, the
beam setting must be adjusted.
0 - No load.
1 - Partial load.
2 - Average load.
3 - Maximum authorised load.
Do not cover the brightness sensor
located on the windscreen, behind the
mirror. It is used for the automatic switching
on of the lights and for the automatic wipers. The side lights and dipped
beam headlamps switch
on automatically if the light
is poor, or during operation
of the windscreen wipers. They switch off as
soon as the light becomes bright enough or
the windscreen wipers stop.
This function is not compatible with the
daytime lights. Deactivation
Turn the ring forwards or rearwards. The
deactivation of this function is accompanied
by a message on the display.
The function is deactivated temporarily when
you use the manual lights stalk.
Initial setting is position 0.
In foggy weather or in snow, the
brightness sensor can detect sufficient
light. As a consequence, the lights will
not come on automatically. If necessary,
you must switch on the dipped headlamps
manually.
Page 68 of 226
66
Practical information
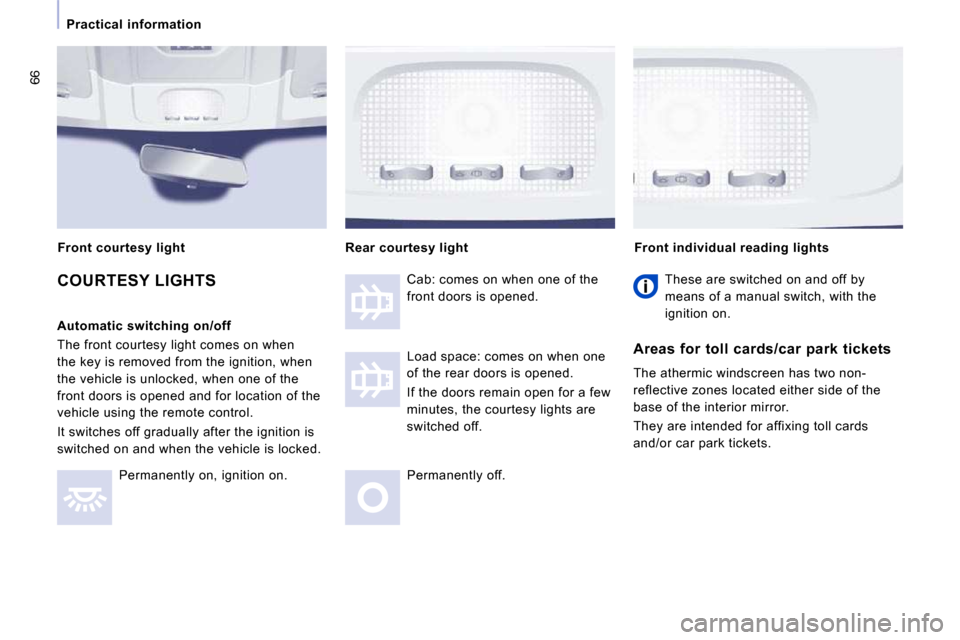
COURTESY LIGHTS
Automatic switching on/off
The front courtesy light comes on when
the key is removed from the ignition, when
the vehicle is unlocked, when one of the
front doors is opened and for location of the
vehicle using the remote control.
It switches off gradually after the ignition is
switched on and when the vehicle is locked. Permanently on, ignition on. Cab: comes on when one of the
front doors is opened.
Load space: comes on when one
of the rear doors is opened.
If the doors remain open for a few
minutes, the courtesy lights are
switched off.
Permanently off. Front individual reading lights
Rear courtesy light
These are switched on and off by
means of a manual switch, with the
ignition on.
Areas for toll cards/car park tickets
The athermic windscreen has two non-
reflective zones located either side of the
base of the interior mirror.
They are intended for affixing toll cards
and/or car park tickets.
Front courtesy light
Page 87 of 226
86
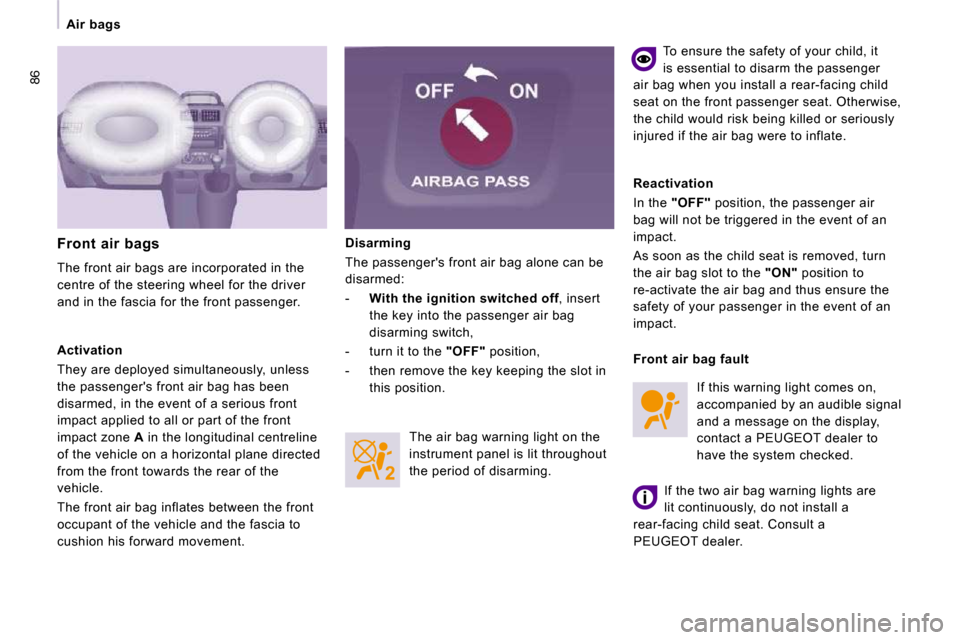
Air bags Disarming
The passenger's front air bag alone can be
disarmed:
- With the ignition switched off , insert
the key into the passenger air bag
disarming switch,
- turn it to the "OFF" position,
- then remove the key keeping the slot in this position.
Front air bags
The front air bags are incorporated in the
centre of the steering wheel for the driver
and in the fascia for the front passenger.
Reactivation
In the
"OFF" position, the passenger air
bag will not be triggered in the event of an
impact.
As soon as the child seat is removed, turn
the air bag slot to the "ON" position to
re-activate the air bag and thus ensure the
safety of your passenger in the event of an
impact. To ensure the safety of your child, it
is essential to disarm the passenger
air bag when you install a rear-facing child
seat on the front passenger seat. Otherwise,
the child would risk being killed or seriously
injured if the air bag were to inflate.
The air bag warning light on the
instrument panel is lit throughout
the period of disarming.
Activation
They are deployed simultaneously, unless
the passenger's front air bag has been
disarmed, in the event of a serious front
impact applied to all or part of the front
impact zone
A in the longitudinal centreline
of the vehicle on a horizontal plane directed
from the front towards the rear of the
vehicle.
The front air bag inflates between the front
occupant of the vehicle and the fascia to
cushion his forward movement. If this warning light comes on,
accompanied by an audible signal
and a message on the display,
contact a PEUGEOT dealer to
have the system checked.
Front air bag fault
If the two air bag warning lights are
lit continuously, do not install a
rear-facing child seat. Consult a
PEUGEOT dealer.
Page 118 of 226
113
Changing a bulb
TROUBLESHOOTING
7
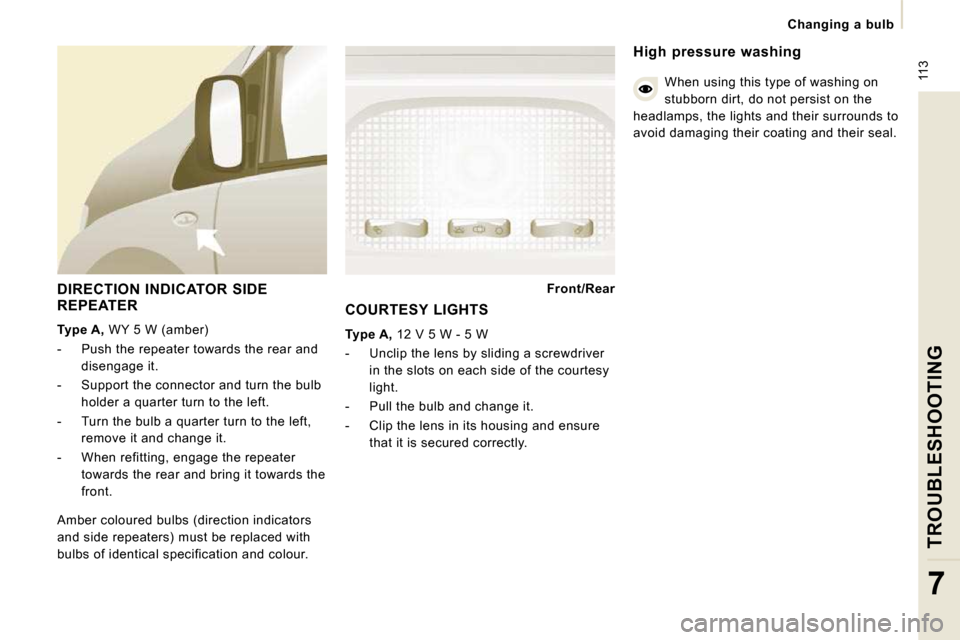
DIRECTION INDICATOR SIDE
REPEATER
Type A, WY 5 W (amber)
- Push the repeater towards the rear and disengage it.
- Support the connector and turn the bulb holder a quarter turn to the left.
- Turn the bulb a quarter turn to the left, remove it and change it.
- When refitting, engage the repeater towards the rear and bring it towards the
front.
Front/Rear
Amber coloured bulbs (direction indicators
and side repeaters) must be replaced with
bulbs of identical specification and colour. COURTESY LIGHTS
Type A, 12 V 5 W - 5 W
- Unclip the lens by sliding a screwdriver in the slots on each side of the courtesy
light.
- Pull the bulb and change it.
- Clip the lens in its housing and ensure that it is secured correctly. High pressure washing
When using this type of washing on
stubborn dirt, do not persist on the
headlamps, the lights and their surrounds to
avoid damaging their coating and their seal.
Page 119 of 226
114
Changing a bulb
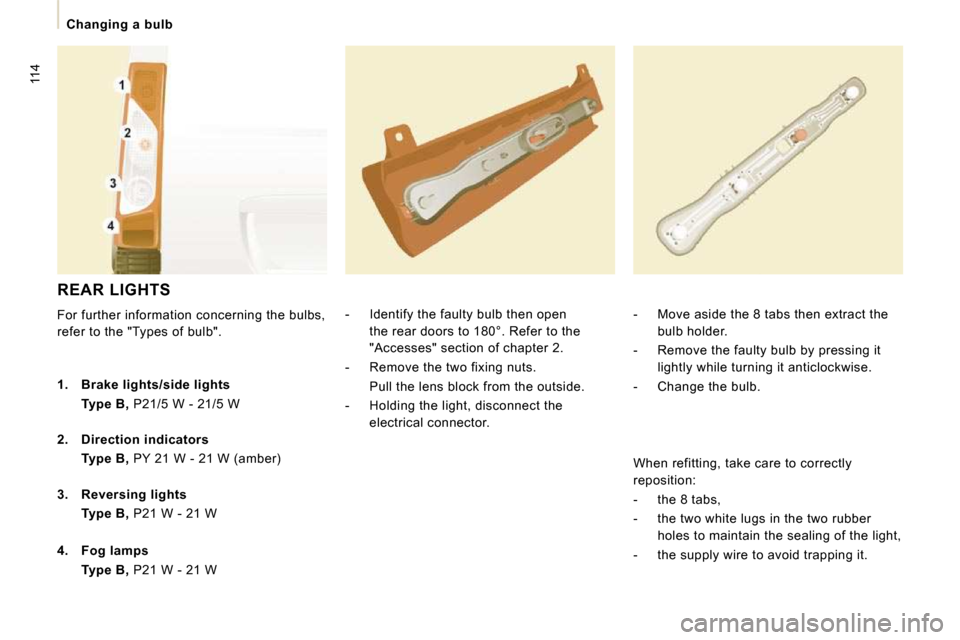
REAR LIGHTS
For further information concerning the bulbs,
refer to the "Types of bulb". - Identify the faulty bulb then open
the rear doors to 180°. Refer to the
"Accesses" section of chapter 2.
- Remove the two fixing nuts.
Pull the lens block from the outside.
- Holding the light, disconnect the electrical connector. - Move aside the 8 tabs then extract the
bulb holder.
- Remove the faulty bulb by pressing it lightly while turning it anticlockwise.
- Change the bulb.
1. Brake lights/side lights
Type B, P21/5 W - 21/5 W
2. Direction indicators
Type B, PY 21 W - 21 W (amber)
3. Reversing lights
Type B, P21 W - 21 W
4. Fog lamps
Type B, P21 W - 21 W When refitting, take care to correctly
reposition:
- the 8 tabs,
- the two white lugs in the two rubber
holes to maintain the sealing of the light,
- the supply wire to avoid trapping it.
Page 122 of 226
117
Changing a fuse
TROUBLESHOOTING
7
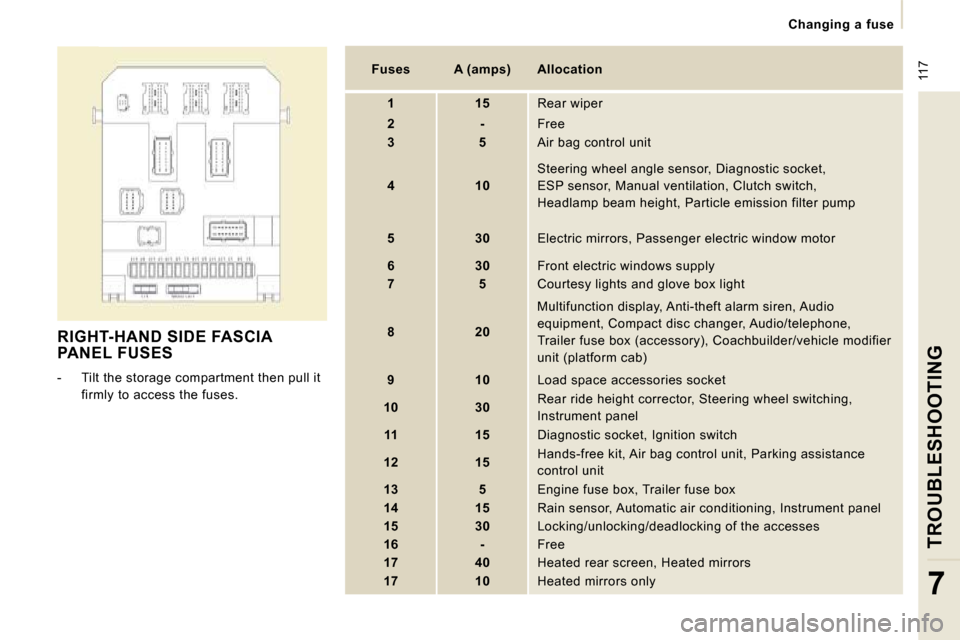
RIGHT-HAND SIDE FASCIA PANEL FUSES
- Tilt the storage compartment then pull it firmly to access the fuses.
Fuses A (amps) Allocation
1 15 Rear wiper
2 - Free
3 5 Air bag control unit
4 10 Steering wheel angle sensor, Diagnostic socket,
ESP sensor, Manual ventilation, Clutch switch,
Headlamp beam height, Particle emission filter pump
5 30 Electric mirrors, Passenger electric window mot or
6 30 Front electric windows supply
7 5 Courtesy lights and glove box light
8 20 Multifunction display, Anti-theft alarm siren, Aud
io
equipment, Compact disc changer, Audio/telephone,
Trailer fuse box (accessory), Coachbuilder/vehicle modifier
unit (platform cab)
9 10 Load space accessories socket
10 30 Rear ride height corrector, Steering wheel switchi
ng,
Instrument panel
11 15 Diagnostic socket, Ignition switch
12 15 Hands-free kit, Air bag control unit, Parking assi
stance
control unit
13 5 Engine fuse box, Trailer fuse box
14 15 Rain sensor, Automatic air conditioning, Instru ment panel
15 30 Locking/unlocking/deadlocking of the accesses
16 - Free
17 40 Heated rear screen, Heated mirrors
17 10 Heated mirrors only