brake Peugeot Expert VU 2012 Owner's Manual
[x] Cancel search | Manufacturer: PEUGEOT, Model Year: 2012, Model line: Expert VU, Model: Peugeot Expert VU 2012Pages: 268, PDF Size: 9.73 MB
Page 4 of 268
2
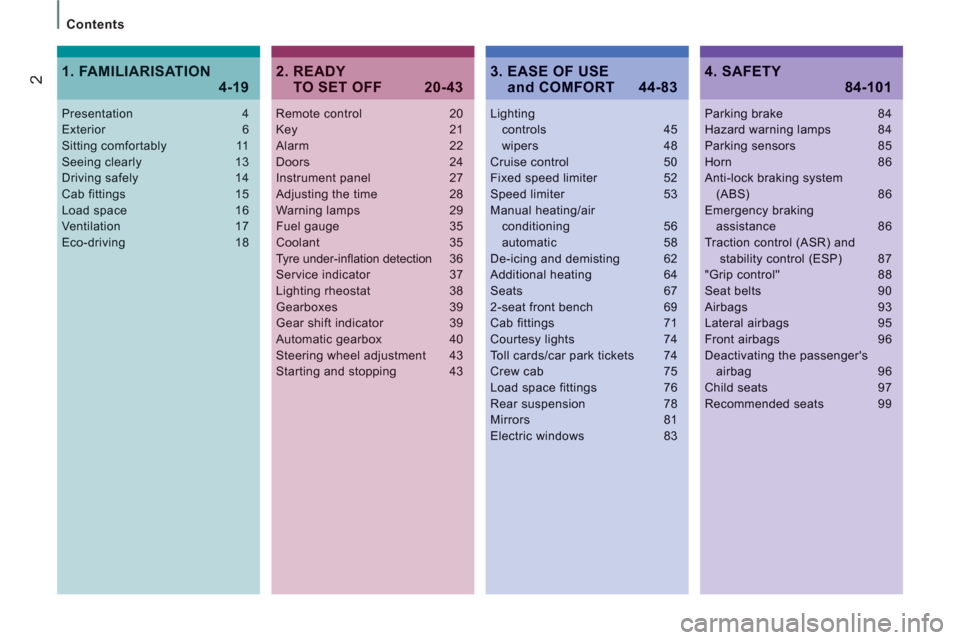
Contents
Remote control 20Key 21Alarm 22Doors 24Instrument panel 27Adjusting the time 28Warning lamps 29Fuel gauge 35Coolant 35Tyre under-infl ation detection36Service indicator 37Lighting rheostat 38Gearboxes 39Gear shift indicator 39Automatic gearbox 40Steering wheel adjustment 43Starting and stopping 43
Lightingcontrols 45wipers 48Cruise control 50Fixed speed limiter 52Speed limiter 53Manual heating/air conditioning 56automatic 58De-icing and demisting 62Additional heating 64Seats 672-seat front bench 69Cab fittings 71Courtesy lights 74Toll cards/car park tickets 74Crew cab 75Load space fittings 76Rear suspension 78Mirrors 81
Electric windows 83
2. READY
TO SET OFF 20-43
4. SAFETY
84-101
Presentation 4Exterior 6Sitting comfortably 11Seeing clearly 13Driving safely 14Cab fittings 15Load space 16Ventilation 17Eco-driving 18
1. FAMILIARISATION
4-19
Parking brake 84Hazard warning lamps 84Parking sensors 85Horn 86Anti-lock braking system(ABS) 86Emergency braking assistance 86Traction control (ASR) andstability control (ESP) 87"Grip control" 88Seat belts 90Airbags 93Lateral airbags 95Front airbags 96Deactivating the passenger'sairbag 96Child seats 97Recommended seats 99
3. EASE OF USE and COMFORT 44-83
Page 20 of 268
Interior
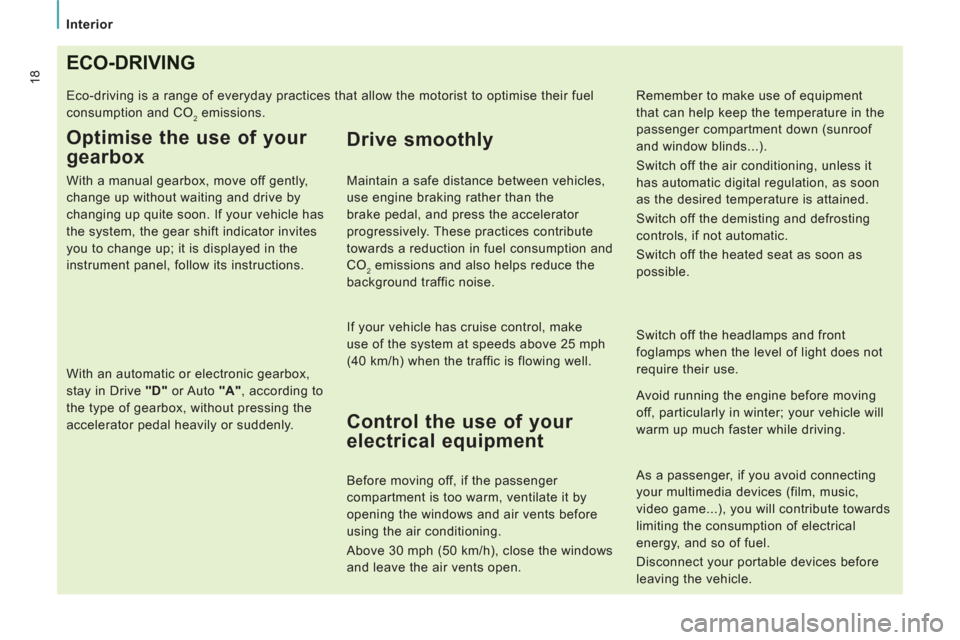
18ECO-DRIVING
Eco-driving is a range of everyday practices that allow the motorist to optimise their fuel
consumption and CO
2 emissions.
Optimise the use of your
gearbox
With a manual gearbox, move off gently,
change up without waiting and drive by
changing up quite soon. If your vehicle has
the system, the gear shift indicator invites
you to change up; it is displayed in the
instrument panel, follow its instructions.
With an automatic or electronic gearbox,
stay in Drive "D"
or Auto "A"
, according to
the type of gearbox, without pressing the
accelerator pedal heavily or suddenly.
Control the use of your
electrical equipment
Before moving off, if the passenger
compartment is too warm, ventilate it by
opening the windows and air vents before
using the air conditioning.
Above 30 mph (50 km/h), close the windows
and leave the air vents open.
Switch off the headlamps and front
foglamps when the level of light does not
require their use.
Avoid running the engine before moving
off, particularly in winter; your vehicle will
warm up much faster while driving.
Drive smoothly
Maintain a safe distance between vehicles,
use engine braking rather than the
brake pedal, and press the accelerator
progressively. These practices contribute
towards a reduction in fuel consumption and
CO
2 emissions and also helps reduce the
background traffic noise.
If your vehicle has cruise control, make
use of the system at speeds above 25 mph
(40 km/h) when the traffic is flowing well.
As a passenger, if you avoid connecting
your multimedia devices (film, music,
video game...), you will contribute towards
limiting the consumption of electrical
energy, and so of fuel.
Disconnect your portable devices before
leaving the vehicle.
Remember to make use of equipment
that can help keep the temperature in the
passenger compartment down (sunroof
and window blinds...).
Switch off the air conditioning, unless it
has automatic digital regulation, as soon
as the desired temperature is attained.
Switch off the demisting and defrosting
controls, if not automatic.
Switch off the heated seat as soon as
possible.
Page 31 of 268
29
Instruments and controls
READY TO SET OFF
2
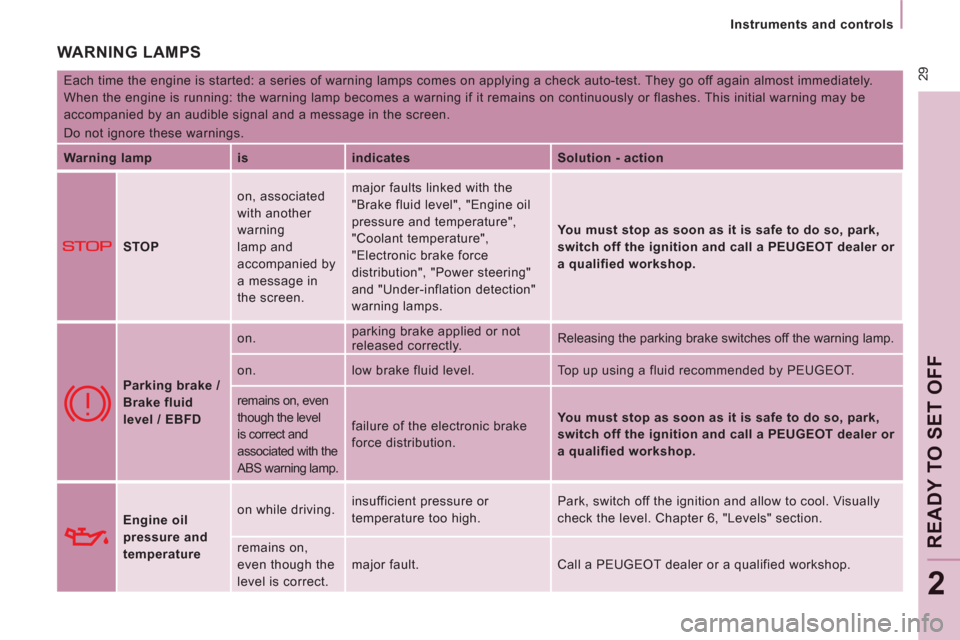
WARNING LAMPS
Each time the engine is started: a series of warning lamps comes on applying a check auto-test. They go off again almost immediately.
When the engine is running: the warning lamp becomes a warning if it remains on continuously or flashes. This initial warning may be
accompanied by an audible signal and a message in the screen.
Do not ignore these warnings.
Warning lamp
is
indicates
Solution - action
STOP on, associated
with another
warning
lamp and
accompanied by
a message in
the screen. major faults linked with the
"Brake fluid level", "Engine oil
pressure and temperature",
"Coolant temperature",
"Electronic brake force
distribution", "Power steering"
and "Under-inflation detection"
warning lamps.
You must stop as soon as it is safe to do so, park,
switch off the ignition and call a PEUGEOT dealer or
a qualified workshop.
Parking brake /
Brake fluid
level / EBFD on. parking brake applied or not
released correctly. Releasing the parking brake switches off the warning lamp.
on. low brake fluid level. Top up using a fluid recommended by PEUGEOT.
remains on, even
though the level
is correct and
associated with the
ABS warning lamp.
failure of the electronic brake
force distribution.
You must stop as soon as it is safe to do so, park,
switch off the ignition and call a PEUGEOT dealer or
a qualified workshop.
Engine oil
pressure and
temperature on while driving. insufficient pressure or
temperature too high. Park, switch off the ignition and allow to cool. Visually
check the level. Chapter 6, "Levels" section.
remains on,
even though the
level is correct. major fault. Call a PEUGEOT dealer or a qualified workshop.
Page 35 of 268
33
Instruments and controls
READY TO SET OFF
2
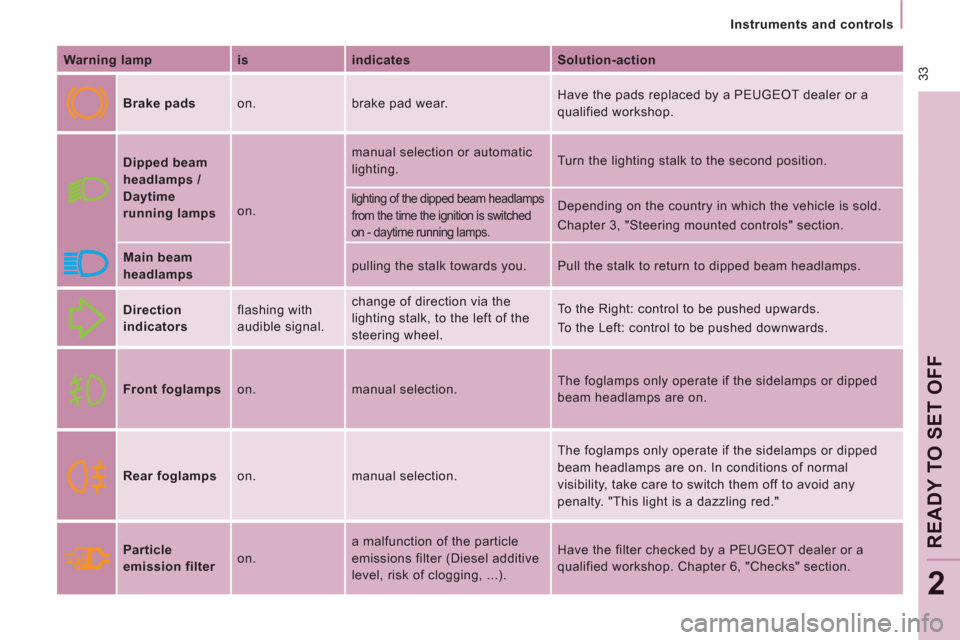
Warning lamp
is
indicates
Solution-action
Brake pads on. brake pad wear. Have the pads replaced by a PEUGEOT dealer or a
qualified workshop.
Dipped beam
headlamps /
Daytime
running lamps on. manual selection or automatic
lighting. Turn the lighting stalk to the second position.
lighting of the dipped beam headlamps
from the time the ignition is switched
on - daytime running lamps. Depending on the country in which the vehicle is sold.
Chapter 3, "Steering mounted controls" section.
Main beam
headlamps pulling the stalk towards you. Pull the stalk to return to dipped beam headlamps.
Direction
indicators flashing with
audible signal. change of direction via the
lighting stalk, to the left of the
steering wheel. To the Right: control to be pushed upwards.
To the Left: control to be pushed downwards.
Front foglamps
on. manual selection. The foglamps only operate if the sidelamps or dipped
beam headlamps are on.
Rear foglamps on. manual selection. The foglamps only operate if the sidelamps or dipped
beam headlamps are on. In conditions of normal
visibility, take care to switch them off to avoid any
penalty. "This light is a dazzling red."
Particle
emission filter on. a malfunction of the particle
emissions filter (Diesel additive
level, risk of clogging, ...). Have the filter checked by a PEUGEOT dealer or a
qualified workshop. Chapter 6, "Checks" section.
Page 38 of 268
36
Instruments and controls
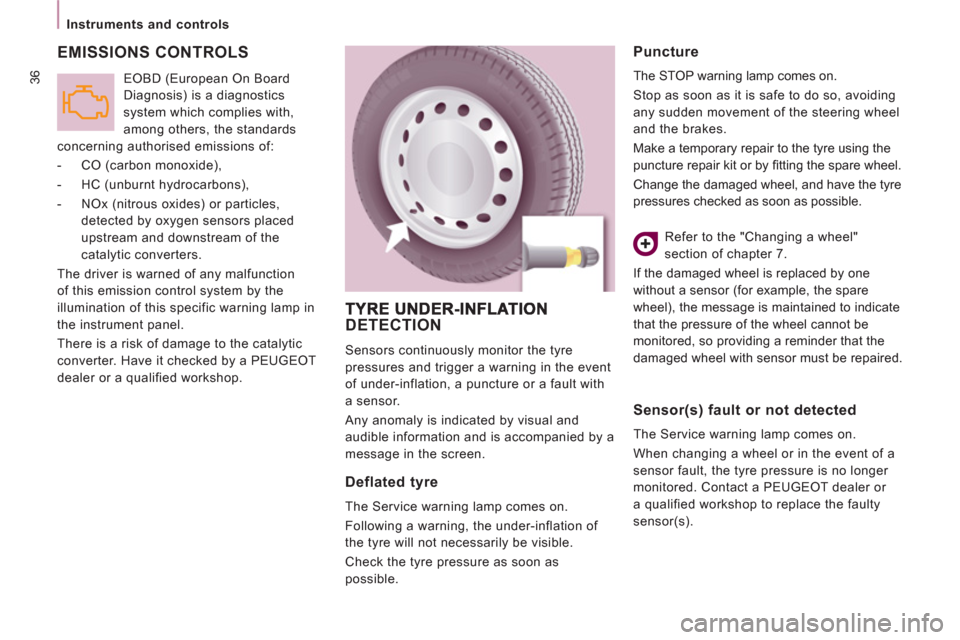
EMISSIONS CONTROLS
EOBD (European On Board
Diagnosis) is a diagnostics
system which complies with,
among others, the standards
concerning authorised emissions of:
- CO (carbon monoxide),
- HC (unburnt hydrocarbons),
- NOx (nitrous oxides) or particles,
detected by oxygen sensors placed
upstream and downstream of the
catalytic converters.
The driver is warned of any malfunction
of this emission control system by the
illumination of this specific warning lamp in
the instrument panel.
There is a risk of damage to the catalytic
converter. Have it checked by a PEUGEOT
dealer or a qualified workshop.
DETECTION
Sensors continuously monitor the tyre
pressures and trigger a warning in the event
of under-inflation, a puncture or a fault with
a sensor.
Any anomaly is indicated by visual and
audible information and is accompanied by a
message in the screen.
Deflated tyre
The Service warning lamp comes on.
Following a warning, the under-inflation of
the tyre will not necessarily be visible.
Check the tyre pressure as soon as
possible.
Puncture
The STOP warning lamp comes on.
Stop as soon as it is safe to do so, avoiding
any sudden movement of the steering wheel
and the brakes.
Make a temporary repair to the tyre using the
puncture repair kit or by fi tting the spare wheel.
Change the damaged wheel, and have the tyre
pressures checked as soon as possible.
Refer to the "Changing a wheel"
section of chapter 7.
If the damaged wheel is replaced by one
without a sensor (for example, the spare
wheel), the message is maintained to indicate
that the pressure of the wheel cannot be
monitored, so providing a reminder that the
damaged wheel with sensor must be repaired.
Sensor(s) fault or not detected
The Service warning lamp comes on.
When changing a wheel or in the event of a
sensor fault, the tyre pressure is no longer
monitored. Contact a PEUGEOT dealer or
a qualified workshop to replace the faulty
sensor(s).
Page 42 of 268
40
Gearboxes and steering wheel
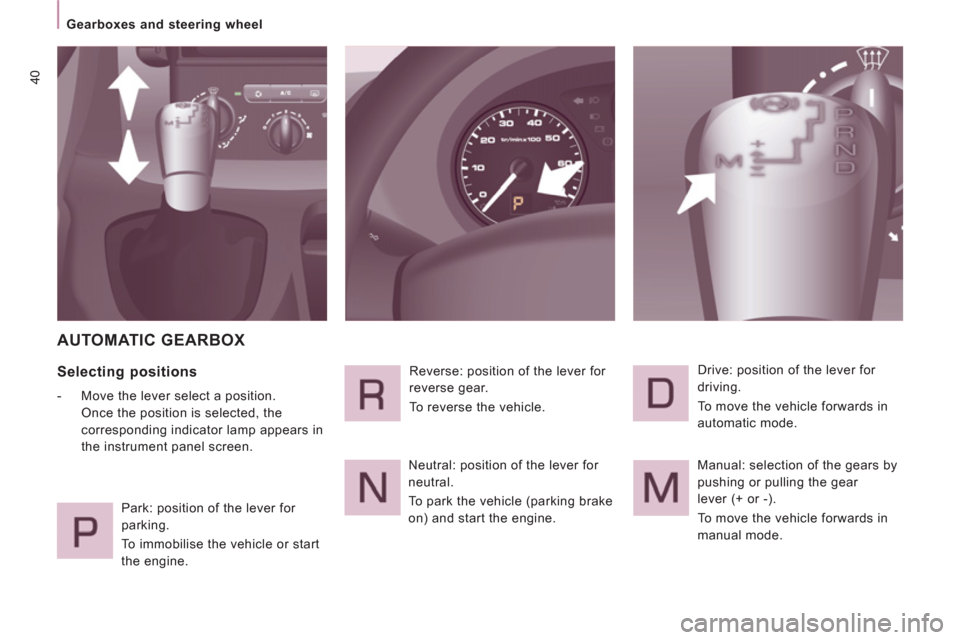
AUTOMATIC GEARBOX
Selecting positions
- Move the lever select a position.
Once the position is selected, the
corresponding indicator lamp appears in
the instrument panel screen.
Park: position of the lever for
parking.
To immobilise the vehicle or start
the engine. Reverse: position of the lever for
reverse gear.
To reverse the vehicle.
Neutral: position of the lever for
neutral.
To park the vehicle (parking brake
on) and start the engine. Drive: position of the lever for
driving.
To move the vehicle forwards in
automatic mode.
Manual: selection of the gears by
pushing or pulling the gear
lever (+ or -).
To move the vehicle forwards in
manual mode.
Page 43 of 268
41
Gearboxes and steering wheel
READY TO SET OFF
2
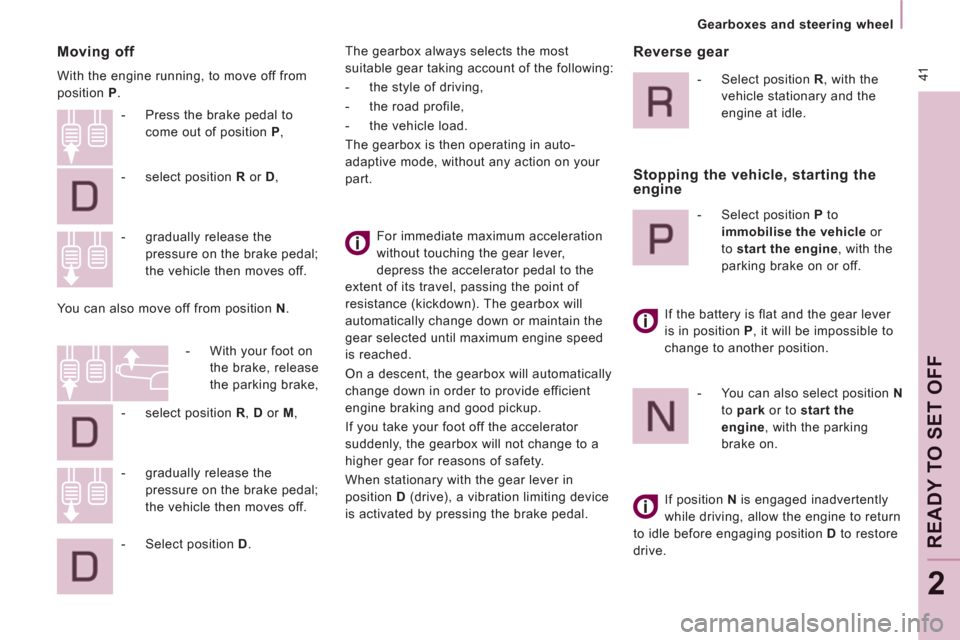
Moving off
With the engine running, to move off from
position P
.
For immediate maximum acceleration
without touching the gear lever,
depress the accelerator pedal to the
extent of its travel, passing the point of
resistance (kickdown). The gearbox will
automatically change down or maintain the
gear selected until maximum engine speed
is reached.
On a descent, the gearbox will automatically
change down in order to provide efficient
engine braking and good pickup.
If you take your foot off the accelerator
suddenly, the gearbox will not change to a
higher gear for reasons of safety.
When stationary with the gear lever in
position D
(drive), a vibration limiting device
is activated by pressing the brake pedal.
- gradually release the
pressure on the brake pedal;
the vehicle then moves off.
- Press the brake pedal to
come out of position P
,
- select position R
or D
,
- gradually release the
pressure on the brake pedal;
the vehicle then moves off.
You can also move off from position N
.
- With your foot on
the brake, release
the parking brake,
- select position R
, D
or M
,
- Select position D
. The gearbox always selects the most
suitable gear taking account of the following:
- the style of driving,
- the road profile,
- the vehicle load.
The gearbox is then operating in auto-
adaptive mode, without any action on your
part.
Reverse gear
- Select position R
, with the
vehicle stationary and the
engine at idle.
Stopping the vehicle, starting the
engine
- Select position P
to
immobilise the vehicle
or
to start the engine
, with the
parking brake on or off.
If the battery is flat and the gear lever
is in position P
, it will be impossible to
change to another position.
- You can also select position N
to park
or to start the
engine
, with the parking
brake on.
If position N
is engaged inadvertently
while driving, allow the engine to return
to idle before engaging position D
to restore
drive.
Page 44 of 268
42
Gearboxes and steering wheel
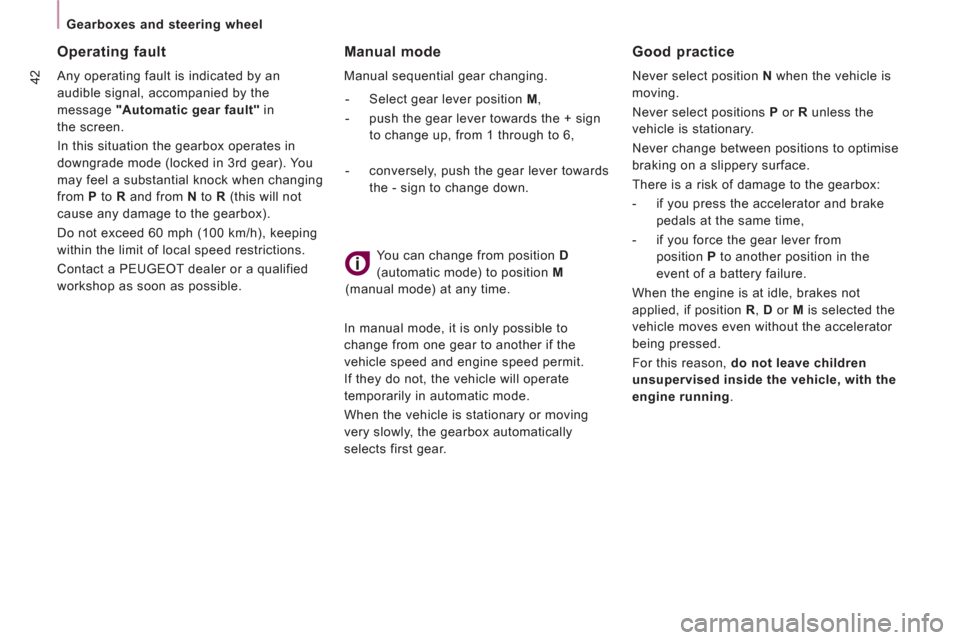
Manual mode
Manual sequential gear changing.
- Select gear lever position M
,
- push the gear lever towards the + sign
to change up, from 1 through to 6,
In manual mode, it is only possible to
change from one gear to another if the
vehicle speed and engine speed permit.
If they do not, the vehicle will operate
temporarily in automatic mode.
When the vehicle is stationary or moving
very slowly, the gearbox automatically
selects first gear.
- conversely, push the gear lever towards
the - sign to change down.
You can change from position D
(automatic mode) to position M
(manual mode) at any time.
Good practice
Never select position N
when the vehicle is
moving.
Never select positions P
or R
unless the
vehicle is stationary.
Never change between positions to optimise
braking on a slippery surface.
There is a risk of damage to the gearbox:
- if you press the accelerator and brake
pedals at the same time,
- if you force the gear lever from
position P
to another position in the
event of a battery failure.
When the engine is at idle, brakes not
applied, if position R
, D
or M
is selected the
vehicle moves even without the accelerator
being pressed.
For this reason, do not leave children
unsupervised inside the vehicle, with the
engine running
.
Operating fault
Any operating fault is indicated by an
audible signal, accompanied by the
message "Automatic gear fault"
in
the screen.
In this situation the gearbox operates in
downgrade mode (locked in 3rd gear). You
may feel a substantial knock when changing
from P
to R
and from N
to R
(this will not
cause any damage to the gearbox).
Do not exceed 60 mph (100 km/h), keeping
within the limit of local speed restrictions.
Contact a PEUGEOT dealer or a qualified
workshop as soon as possible.
Page 53 of 268
51
Steering mounted controls
EASE OF USE AND COMFOR
T
3
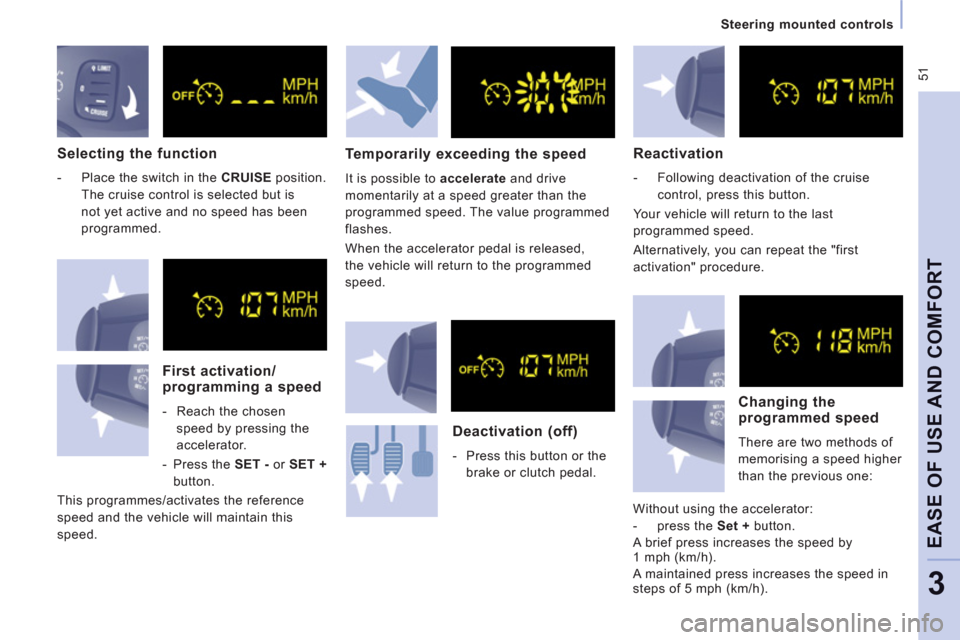
Selecting the function
- Place the switch in the CRUISE
position.
The cruise control is selected but is
not yet active and no speed has been
programmed.
First activation/programming a speed
- Reach the chosen
speed by pressing the
accelerator.
- Press the SET -
or SET +
button.
This programmes
/activates the reference
speed and the vehicle will maintain this
speed.
Temporarily exceeding the speed
It is possible to accelerate
and drive
momentarily at a speed greater than the
pro
grammed speed. The value programmed
flashes.
When the accelerator pedal is released,
the vehicle will return to the programmed
speed.
Reactivation
- Following deactivation of the cruise
control, press this button.
Y
our vehicle will return to the last
programmed speed.
Alternatively, you can repeat the "first
activation" procedure.
Deactivation (off)
- Press this button or the
brake or clutch pedal.
Changing the
programmed speed
There are two methods of
memorisin
g a speed higher
t
han the previous one:
Without using the accelerator:
- press the Set +
button.
A brie
f press increases the speed by1 mph (km/h).
A maintained press increases the speed in
steps of 5 mph (km/h).
Page 80 of 268
78
Rear suspension
Metal suspension
This equipment adopts long movement limiters
which make it possible to
guarantee stable
behaviour both when loaded and when empt
y.
No action on your part is required except to
ensure that maintenance is carried out and that
the authorised loads are com
plied with.irrespective o
f the weight of the load, within
the limit of the authorised values.
On board,
the increasin
g or lightening of the load on
the vehicle's plat
form is detected by two
hei
ght sensors. When all of the doors are
closed, the sensors trigger the automatic
hei
ght correction and determine the optimum
hei
ght of the sill for the vehicle's driving
conditions.
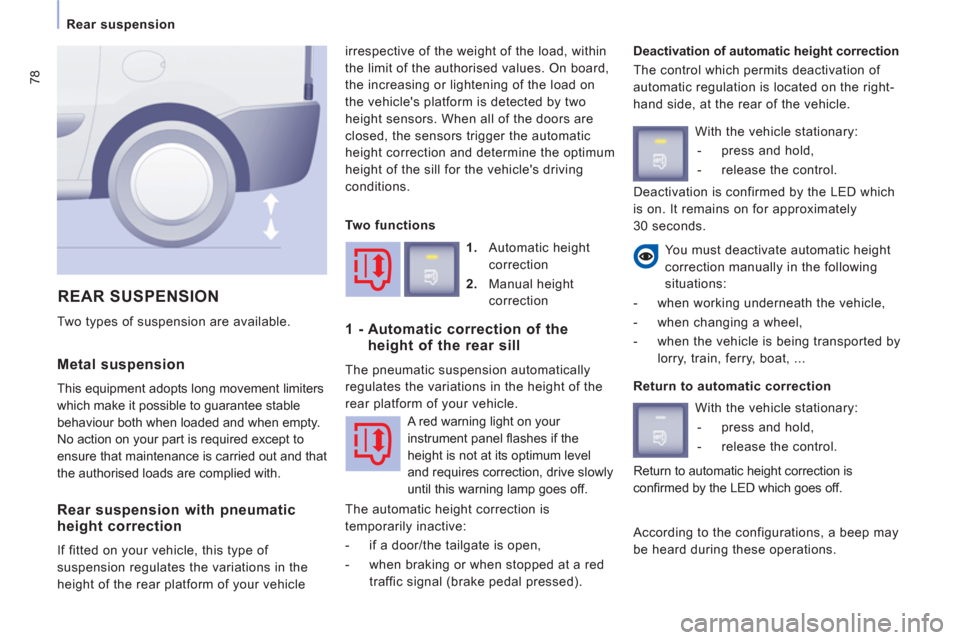
Deactivation of automatic height correction
The control which permits deactivation o
f
automatic re
gulation is located on the right-
hand side, at the rear of the vehicle.
REAR SUSPENSION
You must deactivate automatic height
correction manually in the following
situations:
- when working underneath the vehicle,
- when changing a wheel,
- when the vehicle is being transported by
lorry, train, ferry, boat, ...
Two t
ypes of suspension are available.
Rear suspension with pneumatic height correction
If fitted on your vehicle, this type of
suspension regulates the variations in the
height of the rear platform of your vehicle
1.
Automatic height
correction
2.
Manual height
correction
1 - Automatic correction of the
height of the rear sill
The pneumatic suspension automatically
re
gulates the variations in the height of the
rear plat
form of your vehicle.
A red warning light on your
instrument panel
fl ashes if the
height is not at its optimum level
and requires correction, drive slowl
y
until this warning lamp goes off.
The automatic hei
ght correction is
temporar
ily inactive:
- if a door/the tailgate is open,
- when braking or when stopped at a red
traffic signal (brake pedal pressed).
With the vehicle stationary:
- press and hold,
- release the control.
Return to automatic correction
With the vehicle stationary:
- press and hold,
- release the control.
According to the configurations, a beep may
be heard durin
g these operations.
Two functions Deactivation is con
firmed by the LED which
is on. It remains on for approximatel
y
30 seconds.
Return to automatic hei
ght correction is
confi rmed by the LED which goes off.