brake light Peugeot Partner 2013 Owner's Manual - RHD (UK, Australia)
[x] Cancel search | Manufacturer: PEUGEOT, Model Year: 2013, Model line: Partner, Model: Peugeot Partner 2013Pages: 236, PDF Size: 8.86 MB
Page 4 of 236
2
Contents
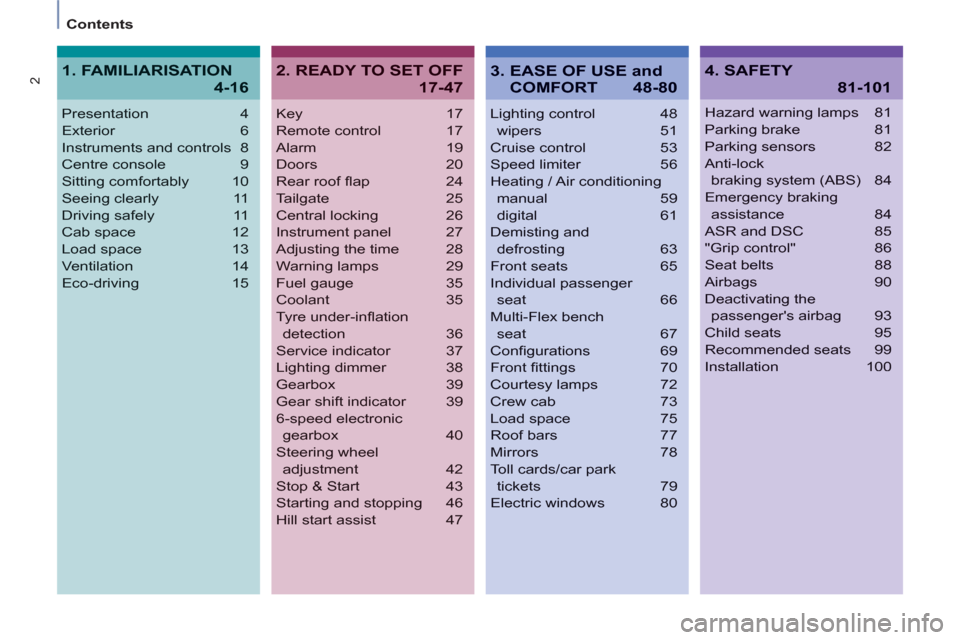
Key 17
Remote control 17
Alarm 19
Doors 20
Rear roof fl ap 24
Tailgate 25
Central locking 26
Instrument panel 27
Adjusting the time 28
Warning lamps 29
Fuel gauge 35
Coolant 35
Tyre under-infl ation
detection 36
Service indicator 37
Lighting dimmer 38
Gearbox 39
Gear shift indicator 39
6-speed electronic
gearbox 40
Steering wheel
adjustment 42
Stop & Start 43
Starting and stopping 46
Hill start assist 47
Lighting control 48
wipers 51
Cruise control 53
Speed limiter 56
Heating / Air conditioning
manual 59
digital 61
Demisting and
defrosting 63
Front seats 65
Individual passenger
seat 66
Multi-Flex bench
seat 67
Confi gurations 69
Front fi ttings 70
Courtesy lamps 72
Crew cab 73
Load space 75
Roof bars 77
Mirrors 78
Toll cards/car park
tickets 79
Electric windows 80
Presentation4
Exterior 6
Instruments and controls 8
Centre console9
Sitting comfortably 10
Seeing clearly 11
Driving safely 11
Cab space 12
Load space 13
Ventilation 14
Eco-driving 15
Hazard warning lamps 81
Parking brake 81
Parking sensors 82
Anti-lock
braking system (ABS) 84
Emergency braking
assistance 84
ASR and DSC 85
"Grip control" 86
Seat belts 88
Airbags 90
Deactivating the
passenger's airbag 93
Child seats 95
Recommended seats 99
Installation 100
2. READY TO SET OFF
17-47
4. SAFETY
81-101
1. FAMILIARISATION
4-16
3. EASE OF USE and
COMFORT 48-80
Page 17 of 236
15
1
FAMILIARISATIO
N
ECO-DRIVING
Eco-driving is a range of everyday practices that allow the motorist to optimise their fuel consumption and CO2
emissions.
Optimise the use of your
gearbox
With a manual gearbox, move off
gently, change up without waiting and
drive by changing up quite soon. If
your vehicle has the system, the gear
shift indicator invites you to change
up; it is displayed in the instrument
panel, follow its instructions.
With an automatic or electronic
gearbox, stay in Drive "D"
or
Auto "A"
, according to the type
of gearbox, without pressing
the accelerator pedal heavily or
suddenly.
Control the use of your
electrical equipment
Before moving off, if the passenger
compartment is too warm, ventilate it
by opening the windows and air vents
before using the air conditioning.
Above 30 mph (50 km/h), close the
windows and leave the air vents open.
Remember to make use of equipment
that can help keep the temperature
in the passenger compartment down
(sunroof and window blinds...).
Switch off the headlamps and front
foglamps when the level of light does
not require their use.
Avoid running the engine before
moving off, particularly in winter; your
vehicle will warm up much faster
while driving.
Drive smoothly
Maintain a safe distance between
vehicles, use engine braking rather
than the brake pedal, and press the
accelerator progressively. These
practices contribute towards a
reduction in fuel consumption and CO
2
emissions and also helps reduce the
background traffi c noise.
If your vehicle has cruise control,
make use of the system at speeds
above 25 mph (40 km/h) when the
traffi c is fl owing well.
As a passenger, if you avoid
connecting your multimedia devices
(fi lm, music, video game...), you
will contribute towards limiting the
consumption of electrical energy, and
so of fuel.
Disconnect your portable devices
before leaving the vehicle.
Switch off the air conditioning, unless
it has automatic digital regulation, as
soon as the desired temperature is
attained.
Switch off the demisting and
defrosting controls, if not automatic.
Switch off the heated seat as soon as
possible.
Page 45 of 236
43
Stop & Start
READY TO SET OFF
2
STOP & START
The Stop & Start system puts the
engine temporarily on standby - STOP
mode - during stops in the traffi c (red
lights, traffi c jams, or other...). The
engine restarts automatically - START
mode - as soon as you want to move
off. The restart takes place instantly,
quickly and silently.
Perfect for urban use, the Stop & Start
system reduces fuel consumption and
exhaust emissions as well as the noise
level when stationary.
Operation
Going into engine STOP mode
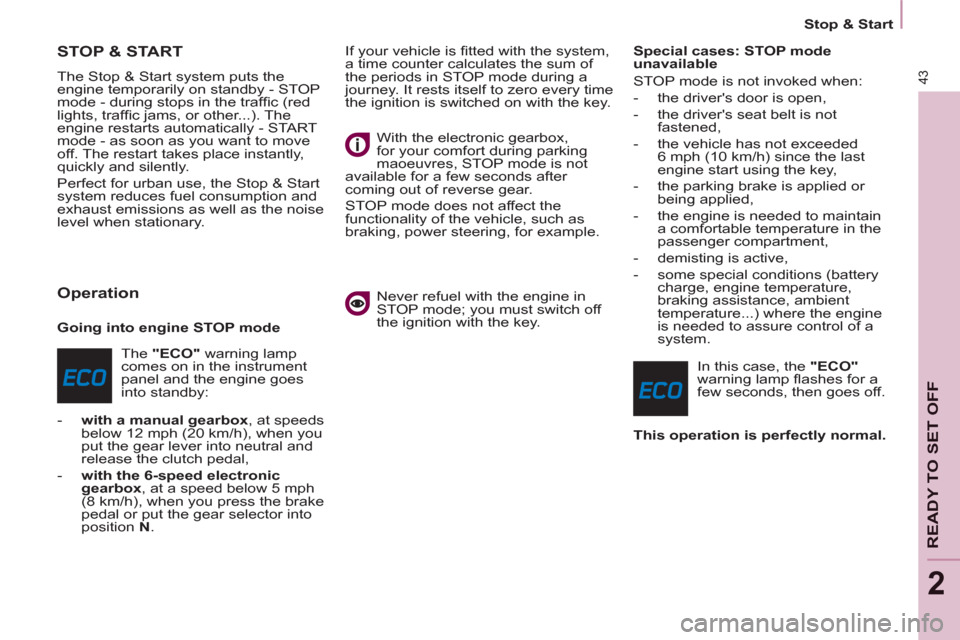
The "ECO"
warning lamp
comes on in the instrument
panel and the engine goes
into standby:
- with a manual gearbox
, at speeds
below 12 mph (20 km/h), when you
put the gear lever into neutral and
release the clutch pedal,
- with the 6-speed electronic
gearbox
, at a speed below 5 mph
(8 km/h), when you press the brake
pedal or put the gear selector into
position N
. If your vehicle is fi tted with the system,
a time counter calculates the sum of
the periods in STOP mode during a
journey. It rests itself to zero every time
the ignition is switched on with the key.
With the electronic gearbox,
for your comfort during parking
maoeuvres, STOP mode is not
available for a few seconds after
coming out of reverse gear.
STOP mode does not affect the
functionality of the vehicle, such as
braking, power steering, for example.
Never refuel with the engine in
STOP mode; you must switch off
the ignition with the key.
Special cases: STOP mode
unavailable
STOP mode is not invoked when:
- the driver's door is open,
- the driver's seat belt is not
fastened,
- the vehicle has not exceeded
6 mph (10 km/h) since the last
engine start using the key,
- the parking brake is applied or
being applied,
- the engine is needed to maintain
a comfortable temperature in the
passenger compartment,
- demisting is active,
- some special conditions (battery
charge, engine temperature,
braking assistance, ambient
temperature...) where the engine
is needed to assure control of a
system.
In this case, the "ECO"
warning lamp fl ashes for a
few seconds, then goes off.
This operation is perfectly normal.
Page 86 of 236

ABS
ABS
84
Driving safely
(ABS - EBFD)
The ABS and EBFD (electronic brake
force distribution) systems improve the
stability and manoeuvrability of your
vehicle on braking, in particular on
poor or slippery surfaces.
The ABS prevents locking of the
wheels, the EBFD provides control of
the braking pressure wheel by wheel. If this warning lamp comes
on, accompanied by an
audible signal and a message
in the screen, it indicates a
malfunction of the ABS which
could result in a loss of control of the
vehicle on braking.
If this warning lamp comes
on, together with the brake
and STOP warning lamps,
accompanied by an audible
signal and a message in the
screen, it indicates a malfunction of
the electronic brake force distribution
which could result in a loss of control of
the vehicle on braking.
EMERGENCY BRAKING
ASSISTANCE SYSTEM
(EBA)
In an emergency, this system enables
the optimum braking pressure to be
reached more quickly, press the pedal
fi rmly without releasing it.
It is triggered by the speed at which the
brake pedal is activated.
This alters the resistance of the brake
pedal under your foot.
To prolong the operation of the
emergency braking assistance system:
keep your foot on the brake pedal.
Good practice
The anti-lock braking system comes
into operation automatically when
there is a risk of wheel lock. It does not
reduce the braking distance.
On very slippery surfaces (ice, oil,
etc...) the ABS may increase the
braking distance. When braking in
an emergency, do not hesitate to
press the brake pedal fi rmly, without
releasing the pressure, even on a
slippery surface, you will then be able
to continue to manoeuvre the vehicle
to avoid an obstacle.
Normal operation of the ABS may be
felt by slight vibration of the brake
pedal.
When changing wheels (tyres
and rims), ensure that these are
recommended by PEUGEOT.
Stop as soon as it is safe to do so.
In both cases, contact a PEUGEOT
dealer or a qualifi ed workshop.
Page 112 of 236
Levels
11 0
Cooling system
Only use the fl uid recommended by the
manufacturer.
Otherwise, you risk seriously damaging
your engine.
When the engine is warm, the
temperature of the coolant is controlled
by the engine fan. As this fan can
operate with the ignition key removed
and because the cooling system is
pressurised, wait for at least one hour
after the engine has stopped before
carrying out any work.
Slacken the cap by 1/4 of a turn to
release the pressure to prevent any
risk of scalding. When the pressure
has dropped, remove the cap and top
up the level with coolant.
If fl uid has to be added frequently,
this indicates a fault which must be
checked by a PEUGEOT dealer as
soon as possible.
Power steering fluid level
The vehicle must be parked on level
ground with the engine cold. Unscrew
the cap integrated with the gauge and
check the level which must be between
the MIN and MAX marks. In order to regenerate the fi lter, you
are advised to drive at a speed higher
than 40 mph (60 km/h) for at least fi ve
minutes as soon as possible, when
traffi c conditions permit (until the
message disappears and the service
warning lamp goes off).
During regeneration of the particle
emission fi lter, the noise of a relay
operating may be heard under the
dashboard.
If the message is still displayed and
if the service warning lamp remains
on, consult a PEUGEOT dealer or a
qualifi ed workshop.
Topping up
The level must be between the MIN
and MAX marks on the expansion
bottle. If more than 1 litre of fl uid is
required to top up the level, have
the system checked by a PEUGEOT
dealer or a qualifi ed workshop.
Screenwash and headlamp
wash level
For best quality cleaning and for your
safety, we would advise that you use
products of the PEUGEOT range.
For optimum cleaning and to avoid
freezing, this fl uid must not be topped
up or replaced with plain water.
Capacity of the screenwash reservoir:
approximately 3 litres.
If your vehicle is fi tted with headlamp
washers, the capacity of the reservoir
is 6 litres.
Diesel additive level
(Diesel with particle
emission filter)
Topping up
This additive must be topped up by
a PEUGEOT dealer or a qualifi ed
workshop without delay.
Waste products
Avoid prolonged contact of used oil
with the skin.
Brake fl uid is harmful to health and
very corrosive.
Do not dispose of used oil, brake fl uid
or coolant into drains or into the ground
but into the containers dedicated to this
use at PEUGEOT dealer (France) or
an authorised waste disposal site. The minimum level of this additive
is indicated by lighting of the service
warning lamp, accompanied by an
audible signal and a message in the
screen.
When this occurs with the engine
running it is due to the start of
saturation of the particle emission fi lter
(exceptionally prolonged urban type
driving conditions: low speed, long
traffi c jams, ...).
Page 114 of 236
11 2
Checks
To check the main levels
and certain components,
in accordance with the
manufacturer's servicing schedule,
refer to the pages of the servicing and
warranty booklet which correspond to
your vehicle's engine.
Bleeding water from the Diesel
filter
Manual gearbox
Have the level checked in accordance with
the manufacturer's servicing schedule.
Only use products recommended
by PEUGEOT or products
of equivalent quality and
specifi cation.
In order to optimise the operation
of units as important as the braking
system, PEUGEOT selects and offers
specifi c products.
In order to avoid damaging the
electrical units, high pressure washing
to clean the engine compartment is
strictly prohibited.
After washing the vehicle dampness,
or in winter, ice may form on the brake
discs and pads: braking effi ciency may
be reduced. Make some light brake
applications to dry and de-ice the
brakes. If this warning lamp comes
on, bleed the fi lter. Otherwise
bleed regularly each time the
engine oil is changed.
To drain the water, unscrew the bleed
screw located on the fi lter.
Operate until all of the water no longer
fl ows in the transparent pipe, then
tighten the bleed screw.
HDi engines use advanced technology.
All work requires special training, which
is assured by a PEUGEOT dealer.
Depending on country of sale.
Page 119 of 236
11 7
QUICK HELP
7
Changing a wheel
1. PARKING THE VEHICLE
- The occupants must get out of the
vehicle and wait in a safe location.
- If possible, park the vehicle on level,
stable and non-slippery ground.
- Apply the parking brake, switch
off the ignition and engage fi rst or
reverse gear.
- If available, place a chock under
the wheel diagonally opposite the
one to be changed.
If the vehicle is fi tted with a towbar,
it is sometimes necessary to raise
the vehicle slightly to make it easier
to remove the spare wheel from its
carrier.
On certain types of ground and/or
if considerable loads are being
transported, call a PEUGEOT dealer or
a qualifi ed workshop.
CHANGING A WHEEL
2. TOOLS
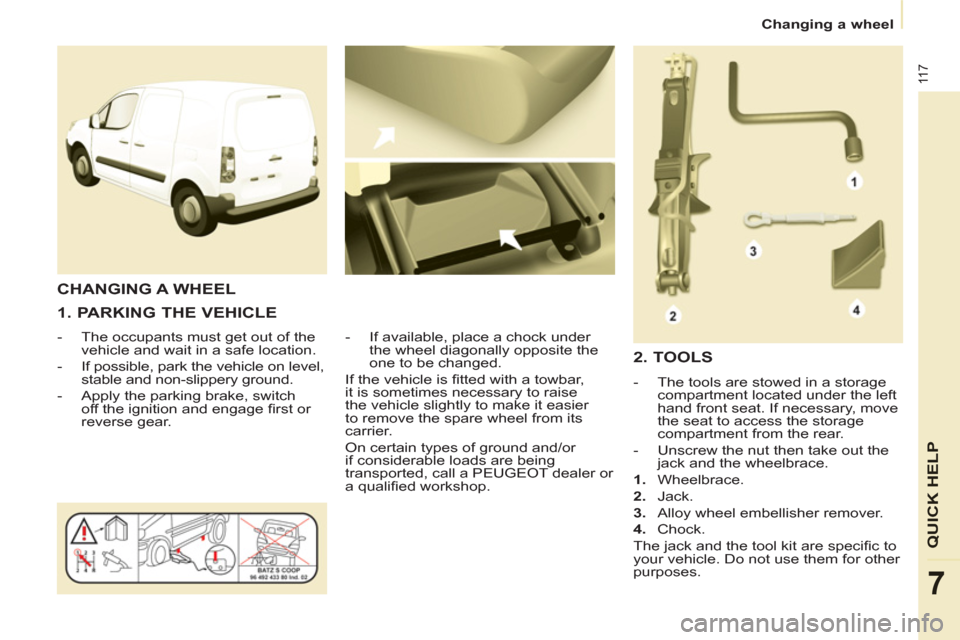
- The tools are stowed in a storage
compartment located under the left
hand front seat. If necessary, move
the seat to access the storage
compartment from the rear.
- Unscrew the nut then take out the
jack and the wheelbrace.
1.
Wheelbrace.
2.
Jack.
3.
Alloy wheel embellisher remover.
4.
Chock.
The jack and the tool kit are specifi c to
your vehicle. Do not use them for other
purposes.
Page 128 of 236
126
Changing a bulb
For more information concerning the
bulbs, refer to the "Types of bulb".
1.
Brake lamps / sidelamps
Type B
, P21/5W - 21/5W
2.
Direction indicators
Type B
, PY21W - 21W (amber)
3.
Reversing lamps
Type B
, P21W - 21W
4.
Foglamps
Type B
, P21W - 21W
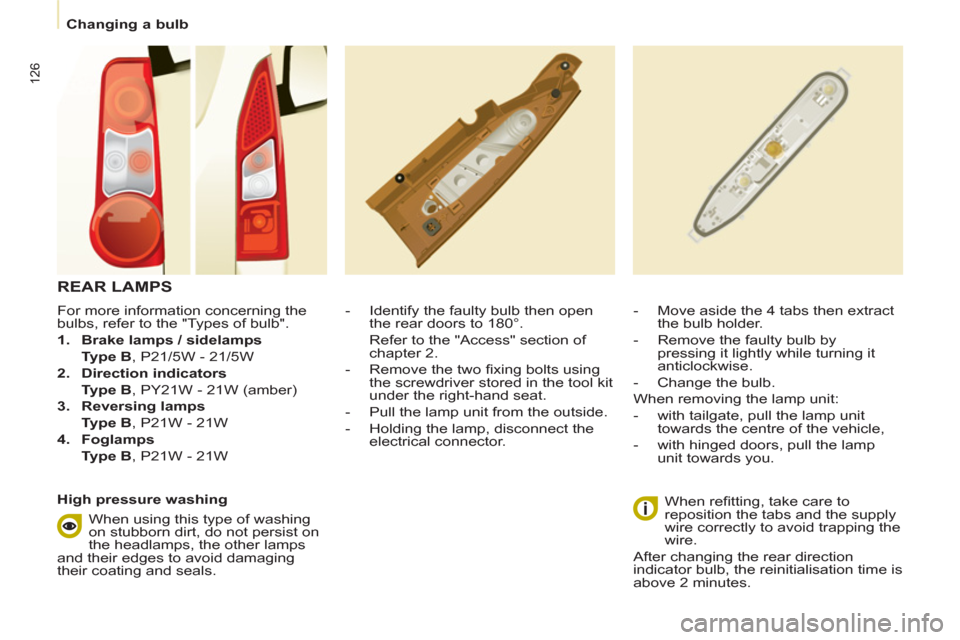
- Identify the faulty bulb then open
the rear doors to 180°.
Refer to the "Access" section of
chapter 2.
- Remove the two fi xing bolts using
the screwdriver stored in the tool kit
under the right-hand seat.
- Pull the lamp unit from the outside.
- Holding the lamp, disconnect the
electrical connector.
- Move aside the 4 tabs then extract
the bulb holder.
- Remove the faulty bulb by
pressing it lightly while turning it
anticlockwise.
- Change the bulb.
When removing the lamp unit:
- with tailgate, pull the lamp unit
towards the centre of the vehicle,
- with hinged doors, pull the lamp
unit towards you.
When refi tting, take care to
reposition the tabs and the supply
wire correctly to avoid trapping the
wire.
After changing the rear direction
indicator bulb, the reinitialisation time is
above 2 minutes.
REAR LAMPS
High pressure washing
When using this type of washing
on stubborn dirt, do not persist on
the headlamps, the other lamps
and their edges to avoid damaging
their coating and seals.
Page 141 of 236
139
TECHNICAL DAT
A
8
Weights
WEIGHTS AND TOWED LOADS (KG)
General points
The GTW and towed load values
indicated are valid up to a maximum
altitude of 1000 metres; the towed load
mentioned must be reduced by 10 %
for each additional 1000 metres.
The speed of a towing vehicle must not
exceed 50 mph (80 km/h) (comply with
the legislation in force in your country).
With load transfer, the braked trailer
weight can be increased, on condition
that the equivalent of this load is
removed from the vehicle so that the
GTW is not exceeded. Warning: towing
with a lightly loaded towing vehicle
may have an adverse effect on its road
holding. High ambient temperatures may result
in a reduction in the performance
of the vehicle in order to protect the
engine; when the ambient temperature
is higher than 37 °C, limit the towed
weight.
The kerb weight is equal to the weight
without load + driver (75 kg) + fuel tank
fi lled to 90%. For more information, refer to your
registration certifi cate.
In each country, it is imperative that
the towed loads authorised by local
legislation are complied with. To fi nd
out your vehicle's towing capacities
and its gross train weight, consult a
PEUGEOT dealer.
Page 228 of 236
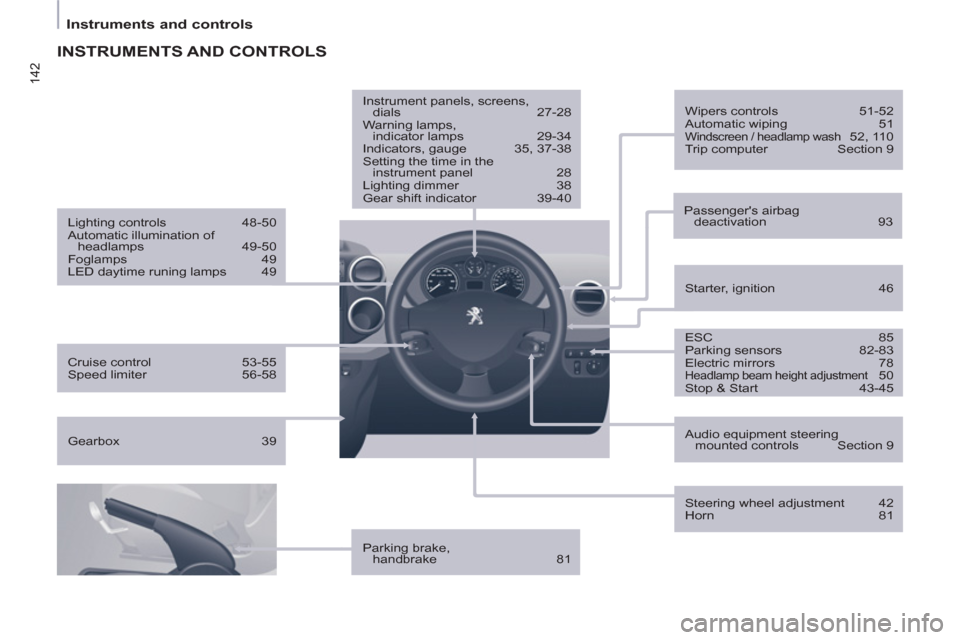
142
Instruments and controls
INSTRUMENTS AND CONTROLS
ESC 85
Parking sensors 82-83
Electric mirrors 78
Headlamp beam height adjustment 50
Stop & Start 43-45
Starter, ignition 46
Wipers controls 51-52
Automatic wiping 51
Windscreen / headlamp wash 52, 110
Trip computer Section 9
Cruise control 53-55
Speed limiter 56-58
Lighting controls 48-50
Automatic illumination of
headlamps 49-50
Foglamps 49
LED daytime runing lamps 49
Parking brake,
handbrake 81
Instrument panels, screens,
dials 27-28
Warning lamps,
indicator lamps 29-34
Indicators, gauge 35, 37-38
Setting the time in the
instrument panel 28
Lighting dimmer 38
Gear shift indicator 39-40
Audio equipment steering
mounted controls Section 9
Steering wheel adjustment 42
Horn 81
Passenger's airbag
deactivation 93
Gearbox 39