steering wheel Peugeot Partner 2013 Owner's Manual
[x] Cancel search | Manufacturer: PEUGEOT, Model Year: 2013, Model line: Partner, Model: Peugeot Partner 2013Pages: 236, PDF Size: 9.04 MB
Page 4 of 236
2
Contents
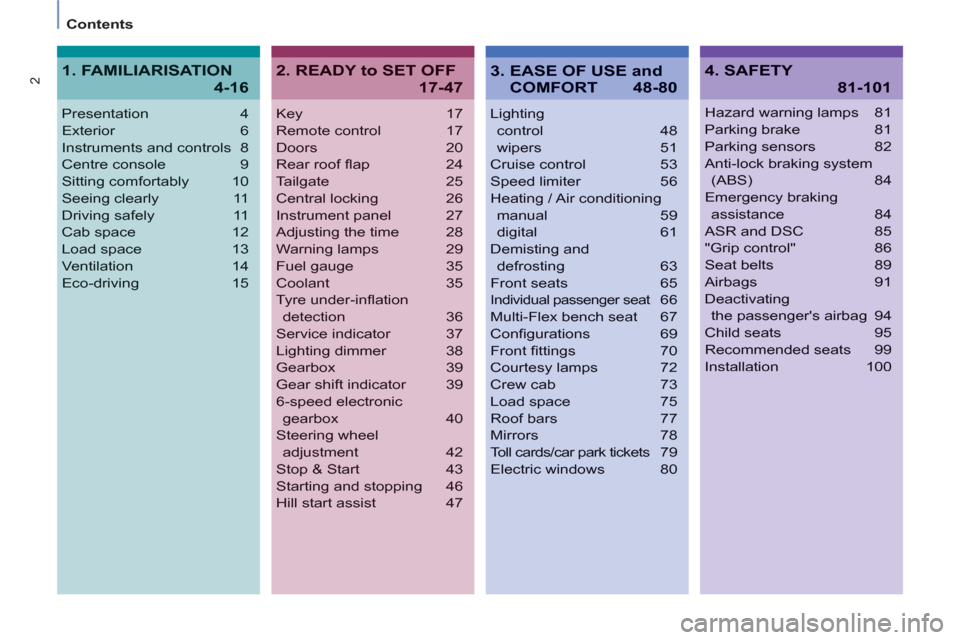
Key 17
Remote control 17
Doors 20
Rear roof fl ap 24
Tailgate 25
Central locking 26
Instrument panel 27
Adjusting the time 28
Warning lamps 29
Fuel gauge 35
Coolant 35
Tyre under-infl ation
detection 36
Service indicator 37
Lighting dimmer 38
Gearbox 39
Gear shift indicator 39
6-speed electronic
gearbox 40
Steering wheel
adjustment 42
Stop & Start 43
Starting and stopping 46
Hill start assist 47
Lighting
control 48
wipers 51
Cruise control 53
Speed limiter 56
Heating / Air conditioning
manual 59
digital 61
Demisting and
defrosting 63
Front seats 65
Individual passenger seat 6t6
Multi-Flex bench seat 67
Confi gurations 69
Front fi ttings 70
Courtesy lamps 72
Crew cab 73
Load space 75
Roof bars 77
Mirrors 78
Toll cards/car park tickets 79
Electric windows 80
Presentation4
Exterior 6
Instruments and controls 8
Centre console9
Sitting comfortably 10
Seeing clearly 11
Driving safely 11
Cab space 12
Load space 13
Ventilation 14
Eco-driving 15
Hazard warning lamps 81
Parking brake 81
Parking sensors 82
Anti-lock braking system
(ABS) 84
Emergency braking
assistance 84
ASR and DSC 85
"Grip control" 86
Seat belts 89
Airbags 91
Deactivating
the passenger's airbag 94
Child seats 95
Recommended seats 99
Installation 100
2. READY to SET OFF
17-47
4. SAFETY
81-101
1. FAMILIARISATION
4-16
3. EASE OF USE and
COMFORT 48-80
Page 10 of 236
8
Interior
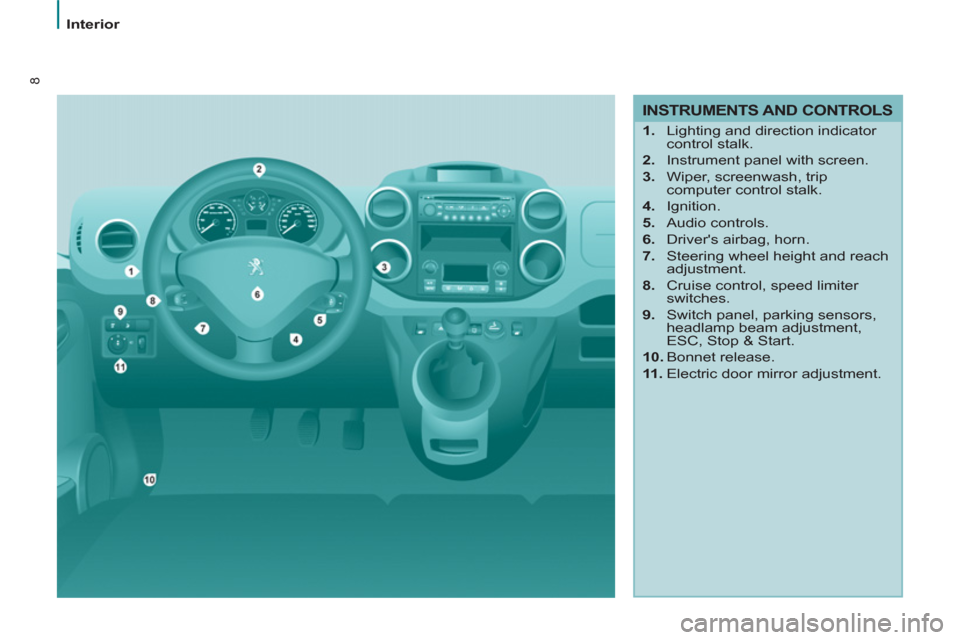
INSTRUMENTS AND CONTROLS
1.
Lighting and direction indicator
control stalk.
2.
Instrument panel with screen.
3.
Wiper, screenwash, trip
computer control stalk.
4.
Ignition.
5.
Audio controls.
6.
Driver's airbag, horn.
7.
Steering wheel height and reach
adjustment.
8.
Cruise control, speed limiter
switches.
9.
Switch panel, parking sensors,
headlamp beam adjustment,
ESC, Stop & Start.
10.
Bonnet release.
11 .
Electric door mirror adjustment.
Page 12 of 236
3
43
2
3
10
Interior
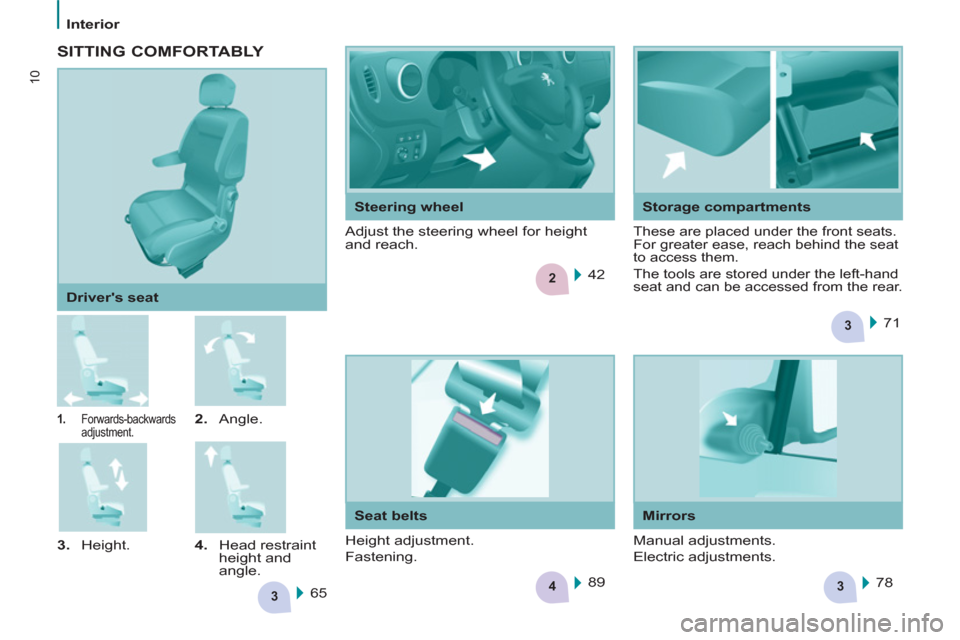
1.
Forwards-backwards
adjustment.
2.
Angle.
3.
Height.
4.
Head restraint
height and
angle.
Driver's seat
65 71
42
78 89
SITTING COMFORTABLY
Steering wheel
Adjust the steering wheel for height
and reach.
Storage compartments
These are placed under the front seats.
For greater ease, reach behind the seat
to access them.
The tools are stored under the left-hand
seat and can be accessed from the rear.
Seat belts
Height adjustment.
Fastening.
Mirrors
Manual adjustments.
Electric adjustments.
Page 34 of 236
ABS
Instruments and controls
32
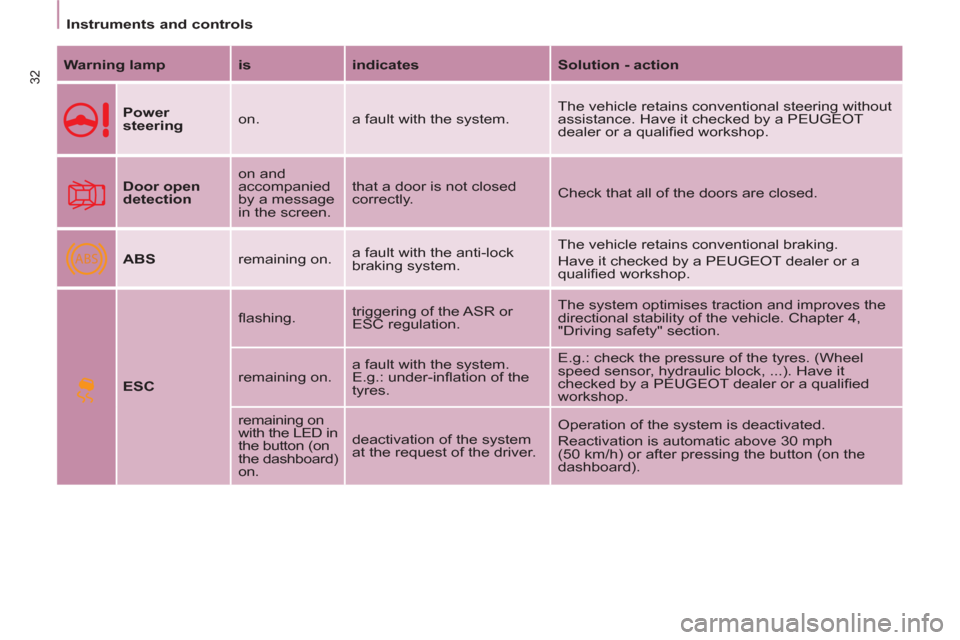
Warning lamp
is
indicates
Solution - action
Power
steering
on. a fault with the system. The vehicle retains conventional steering without
assistance. Have it checked by a PEUGEOT
dealer or a qualifi ed workshop.
Door open
detection
on and
accompanied
by a message
in the screen. that a door is not closed
correctly. Check that all of the doors are closed.
ABS
remaining on. a fault with the anti-lock
braking system. The vehicle retains conventional braking.
Have it checked by a PEUGEOT dealer or a
qualifi ed workshop.
ESC
fl ashing. triggering of the ASR or
ESC regulation. The system optimises traction and improves the
directional stability of the vehicle. Chapter 4,
"Driving safety" section.
remaining on. a fault with the system.
E.g.: under-infl ation of the
tyres. E.g.: check the pressure of the tyres. (Wheel
speed sensor, hydraulic block, ...). Have it
checked by a PEUGEOT dealer or a qualifi ed
workshop.
remaining on
with the LED in
the button (on
the dashboard)
on. deactivation of the system
at the request of the driver. Operation of the system is deactivated.
Reactivation is automatic above 30 mph
(50 km/h) or after pressing the button (on the
dashboard).
Page 35 of 236
2
Instruments and controls
33
READY TO SET OFF
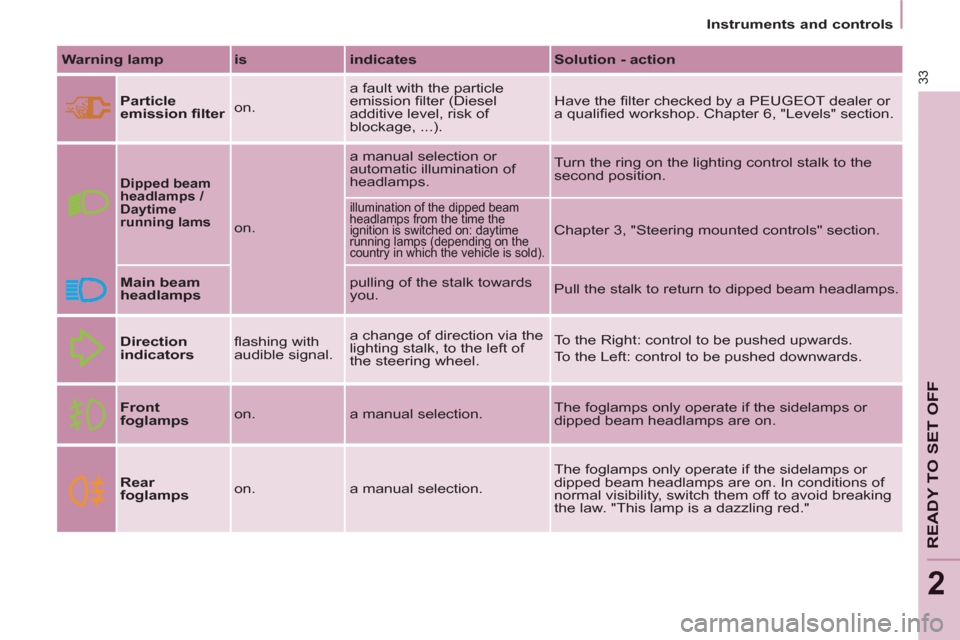
Warning lamp
is
indicates
Solution - action
Particle
emission fi lter
on. a fault with the particle
emission fi lter (Diesel
additive level, risk of
blockage, ...). Have the fi lter checked by a PEUGEOT dealer or
a qualifi ed workshop. Chapter 6, "Levels" section.
Dipped beam
headlamps /
Daytime
running lams
on. a manual selection or
automatic illumination of
headlamps. Turn the ring on the lighting control stalk to the
second position.
illumination of the dipped beam
headlamps from the time the
ignition is switched on: daytime
running lamps (depending on the
country in which the vehicle is sold).
Chapter 3, "Steering mounted controls" section.
Main beam
headlamps
pulling of the stalk towards
you. Pull the stalk to return to dipped beam headlamps.
Direction
indicators
fl ashing with
audible signal. a change of direction via the
lighting stalk, to the left of
the steering wheel. To the Right: control to be pushed upwards.
To the Left: control to be pushed downwards.
Front
foglamps
on. a manual selection. The foglamps only operate if the sidelamps or
dipped beam headlamps are on.
Rear
foglamps
on. a manual selection. The foglamps only operate if the sidelamps or
dipped beam headlamps are on. In conditions of
normal visibility, switch them off to avoid breaking
the law. "This lamp is a dazzling red."
Page 38 of 236
Instruments and controls
36
Puncture
The STOP warning lamp comes on.
Stop as soon as it is safe to do so,
avoiding any sudden movement of the
steering wheel and the brakes.
Make a temporary repair to the tyre
using the puncture repair kit or by
fi tting the spare wheel.
Change the damaged wheel, and have
the tyre pressures checked as soon as
possible.
Sensor(s) fault or not detected
The Service warning lamp comes on.
When changing a wheel or in the
event of a sensor fault, the tyre
pressure is no longer monitored.
Contact a PEUGEOT dealer or a
qualifi ed workshop to replace the faulty
sensor(s).
All repairs and changing of tyres on a
wheel fi tted with this system must be
carried out by a PEUGEOT dealer or a
qualifi ed workshop.
If when changing a tyre, you fi t a
wheel not detected by your vehicle
(for example: fi tting snow tyres), you
must have the system reinitialised
by a PEUGEOT dealer or a qualifi ed
workshop.
The tyre under-infl ation detection
system is a driving aid which does
not take the place of vigilance or the
responsibility of the driver.
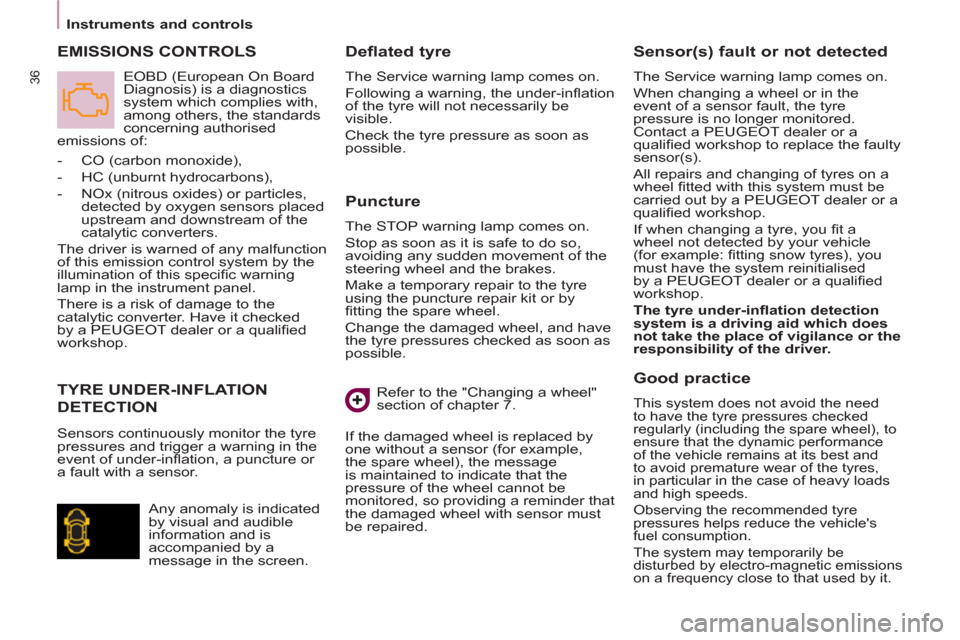
TYRE UNDER-INFLATION
DETECTION
- CO (carbon monoxide),
- HC (unburnt hydrocarbons),
- NOx (nitrous oxides) or particles,
detected by oxygen sensors placed
upstream and downstream of the
catalytic converters.
The driver is warned of any malfunction
of this emission control system by the
illumination of this specifi c warning
lamp in the instrument panel.
There is a risk of damage to the
catalytic converter. Have it checked
by a PEUGEOT dealer or a qualifi ed
workshop.
EMISSIONS CONTROLS
Deflated tyre
The Service warning lamp comes on.
Following a warning, the under-infl ation
of the tyre will not necessarily be
visible.
Check the tyre pressure as soon as
possible.
Refer to the "Changing a wheel"
section of chapter 7.
If the damaged wheel is replaced by
one without a sensor (for example,
the spare wheel), the message
is maintained to indicate that the
pressure of the wheel cannot be
monitored, so providing a reminder that
the damaged wheel with sensor must
be repaired. Sensors continuously monitor the tyre
pressures and trigger a warning in the
event of under-infl ation, a puncture or
a fault with a sensor. EOBD (European On Board
Diagnosis) is a diagnostics
system which complies with,
among others, the standards
concerning authorised
emissions of:
Any anomaly is indicated
by visual and audible
information and is
accompanied by a
message in the screen.
Good practice
This system does not avoid the need
to have the tyre pressures checked
regularly (including the spare wheel), to
ensure that the dynamic performance
of the vehicle remains at its best and
to avoid premature wear of the tyres,
in particular in the case of heavy loads
and high speeds.
Observing the recommended tyre
pressures helps reduce the vehicle's
fuel consumption.
The system may temporarily be
disturbed by electro-magnetic emissions
on a frequency close to that used by it.
Page 41 of 236

2
Gearbox and steering wheel
39
READY TO SET OFF
GEARBOX
5-speed gearbox - reverse
To change gear easily, always press
the clutch pedal fully.
To prevent the mat from becoming
caught under the pedal:
- ensure that the mat and its fi xings
on the fl oor are positioned correctly,
- never fi t one mat on top of another.
When driving, avoid leaving your hand
on the gear knob as the force exerted,
even if slight, may wear the internal
components of the gearbox over time.
Engaging 5 th
gear.
Push the gear lever fully to the right to
engage 5 th gear.
GEAR SHIFT INDICATOR
This system allows fuel consumption
to be reduced by suggesting when to
change up.
With an electronic gearbox, the system
is only active in Manual mode.
Depending on the driving conditions
and the equipment of your vehicle,
the system may recommend skipping
one or more gears. You can follow this
indication without going through the
intermediate gears.
The gear engagement
recommendations should not be
considered to be compulsory. This
because the confi guration of the road,
the traffi c density and safety remain
determining factors when choosing
the best gear. Therefore, the driver
remains responsible for deciding
whether or not to follow the advice
given by the system.
This system cannot be deactivated.
Engaging reverse
To engage reverse gear, wait until the
vehicle is stationary then push the gear
lever to the right then back.
The lever should be moved slowly to
reduce the noise on engaging reverse
gear.
Page 43 of 236

2
Gearbox and steering wheel
41
READY TO SET OFF
Moving off
- To start the engine, the gear
selector must be in position N
.
- Press fi rmly on the brake pedal.
- Operate the starter.
- When the engine is running, place
the gear selector on R
, A
or M
as
desired.
- Release the brake pedal and
accelerate.
If the gear selector is not in position N
,
and/or if the brake pedal is not pressed,
the engine will not start. Repeat the
above procedure.
Reverse gear
Engaging reverse gear
Move the gear selector to R
.
Only attempt to select reverse gear
when the vehicle is stationary.
Neutral
Changing to neutral
Move the gear selector to N
. If the
vehicle is moving, do not select this
position even momentarily.
Manual mode
Changing to manual mode
Move the gear selector to M
.
Automatic mode
Changing to automatic
mode
Move the gear selector to A
.
The gearbox then operates in
automatic mode, without any action on
your part.
It constantly selects the gear that is
best suited to the following conditions:
- driving style,
- road profi le,
- optimum fuel consumption.
Page 44 of 236

Gearbox and steering wheel
42
STEERING WHEEL ADJUSTMENT
When the vehicle is stationary,
release the steering wheel adjustment
mechanism by pulling the lever.
Adjust the steering wheel for height
and reach, then lock the mechanism by
pushing the lever fully forwards.
Acceleration
For optimum acceleration (e.g. to
overtake another vehicle), simply
press the pedal beyond the point of
resistance at the end of its travel, by
pressing down fi rmly.
Vehicle stationary, with the
engine running
In the event of a prolonged stop with
the engine running, the gearbox
changes automatically to neutral N
.
Stopping the vehicle
Before stopping the engine, put the
gear selector in position N
.
In all cases, it is essential to apply
the parking brake. Check that the
parking brake warning lamp is on in the
instrument panel.
Before doing anything in the
engine compartment, check that
the gear selector is in neutral N
.
Changing gear
In situations of high engine speeds
(heavy acceleration), a change
up will not occur unless the driver
operates the electronic gearbox control
paddle. Pull on the " +
" control
paddle to change up.
Pull on the " -
" control
paddle to change down.
- If the vehicle stops or reduces
speed (for example when
approaching a stop sign),
the gearbox changes down
automatically, to fi rst gear if
needed.
- It is not necessary to release the
accelerator completely during gear
changes.
- A gear change instruction is
accepted only if the engine speed
permits.
- For safety reasons, depending on
the engine speed, a change down
may be performed automatically.
Page 48 of 236
Starting and stopping
46
Good practice when stopping
Good practice when starting
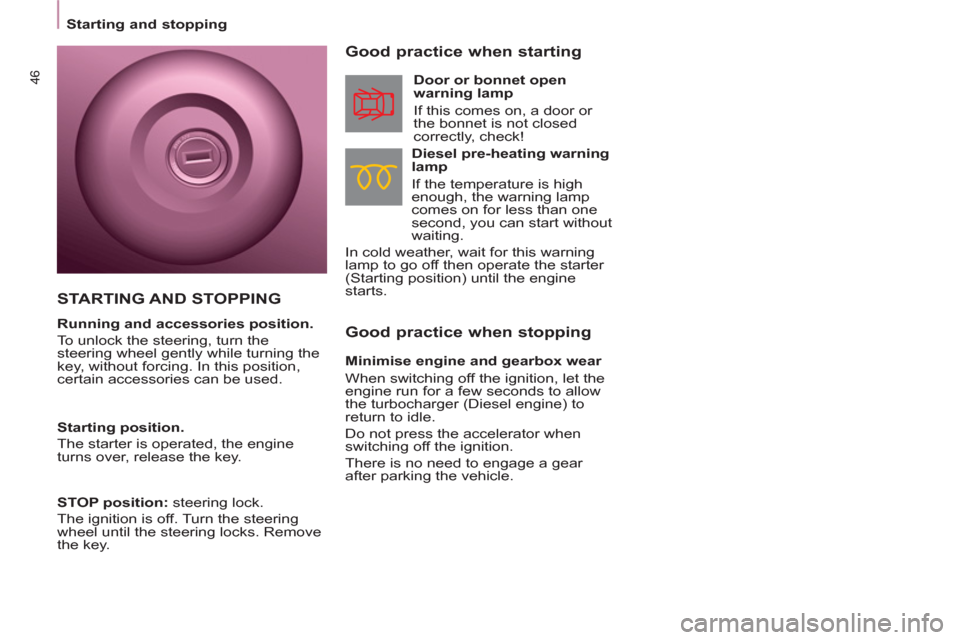
Diesel pre-heating warning
lamp
If the temperature is high
enough, the warning lamp
comes on for less than one
second, you can start without
waiting.
In cold weather, wait for this warning
lamp to go off then operate the starter
(Starting position) until the engine
starts.
Door or bonnet open
warning lamp
If this comes on, a door or
the bonnet is not closed
correctly, check!
Minimise engine and gearbox wear
When switching off the ignition, let the
engine run for a few seconds to allow
the turbocharger (Diesel engine) to
return to idle.
Do not press the accelerator when
switching off the ignition.
There is no need to engage a gear
after parking the vehicle.
STARTING AND STOPPING
Running and accessories position.
To unlock the steering, turn the
steering wheel gently while turning the
key, without forcing. In this position,
certain accessories can be used.
Starting position.
The starter is operated, the engine
turns over, release the key.
STOP position:
steering lock.
The ignition is off. Turn the steering
wheel until the steering locks. Remove
the key.