seat adjustment Peugeot Partner Tepee 2015 Owner's Manual
[x] Cancel search | Manufacturer: PEUGEOT, Model Year: 2015, Model line: Partner Tepee, Model: Peugeot Partner Tepee 2015Pages: 276, PDF Size: 12.76 MB
Page 4 of 276
2
Partner_2_VP_en_Chap00a_Sommaire_ed02-2014
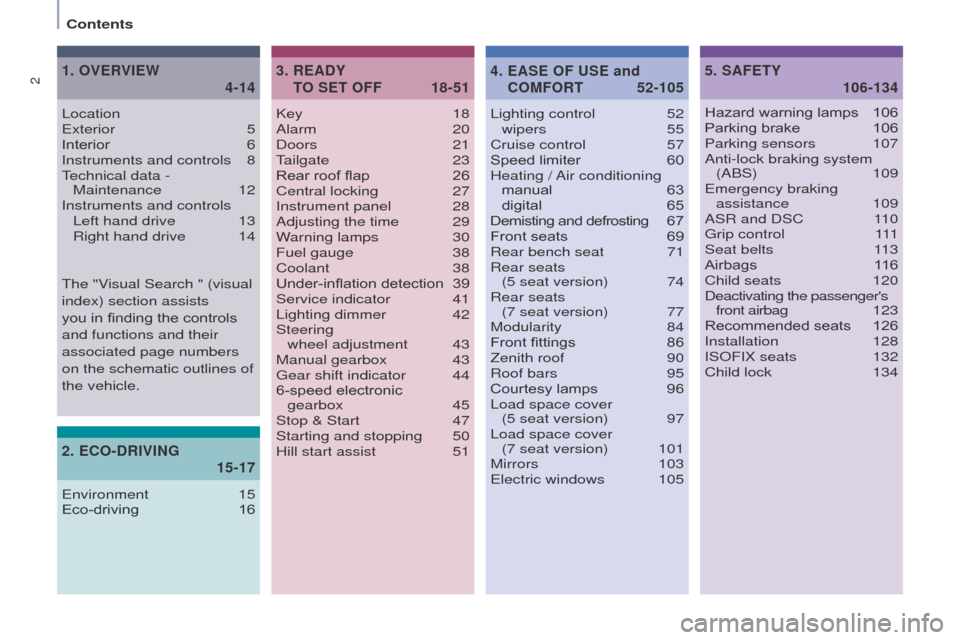
Key 18
Alarm 20
Doors
21tailgate
23
Rear roof flap
26
Central locking
27
Instrument panel
28
Adjusting the time
29
W
arning lamps
30
Fuel gauge
38
Coolant
38
Under-inflation detection
39
Service indicator
41
Lighting dimmer
42
Steering
wheel adjustment
43
Manual gearbox
43g
ear shift indicator
44
6-speed electronic
gearbox
45
Stop & Start
47
Starting and stopping
50
Hill start assist
51Lighting control
52
wipers 55
Cruise control
57
Speed limiter
60
Heating /
Air conditioning
manual
63 digital
65
Demisting and defrosting
6
7
Front seats
69
Rear bench seat
71
Rear seats
(5 seat version)
74
Rear seats
(7 seat version)
77
Modularity
84
Front fittings
86
Zenith roof
90
Roof bars
95
Courtesy lamps
96
Load space cover
(5 seat version)
97
Load space cover
(7 seat version)
101
Mirrors
103e
lectric windows
105
READY
TO SET OFF
3.
18-51 SAFETY
5.
106-134
Locatione
xterior 5
Interior
6
Instruments and controls
8technical data - Maintenance
12
Instruments and controls Left hand drive
13
Right hand drive
14
OVERVIEW
1.
4-14
Hazard warning lamps 106
Parking brake 106
Parking sensors
107
Anti-lock braking system (ABS)
109
e
mergency braking assistance
109
ASR and DSC
1
10
g
rip control
1
11
Seat belts
1
13
Airbags
1
16
Child seats
120
Deactivating the passenger's
front airbag
1
23
Recommended seats
126
Installation
128
ISOFIX seats
132
Child lock
134
EASE OF USE and
COMFORT
4.
52-105
2.
15-17
ECO-DRIVING
environment 15
Eco-driving 16
t
he "Visual Search " (visual
index) section assists
you in finding the controls
and functions and their
associated page numbers
on the schematic outlines of
the vehicle.
Contents
Page 8 of 276
6
Partner_2_VP_en_Chap01_vue-ensemble_ed02-2014
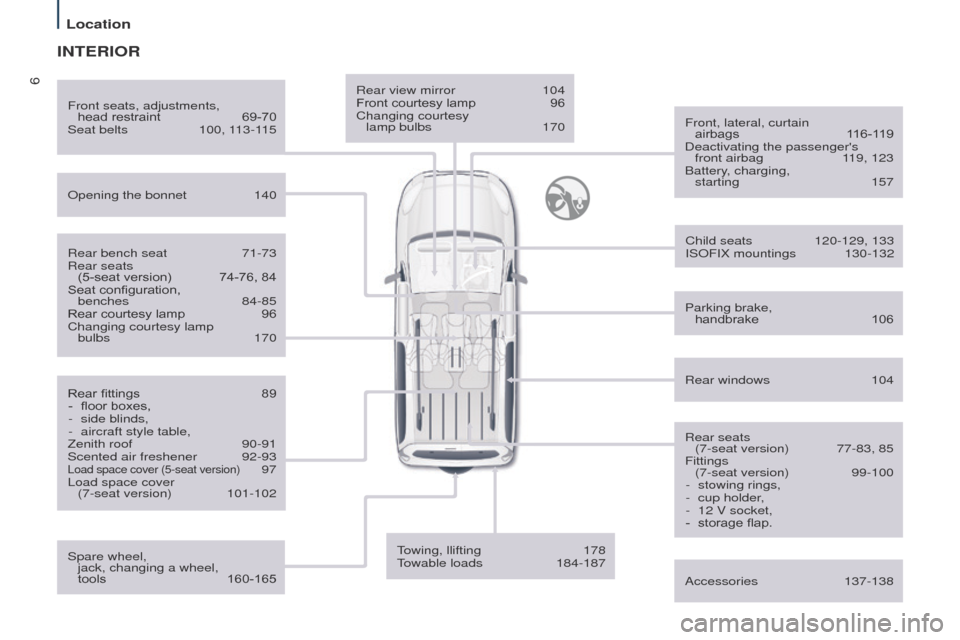
Rear view mirror 104
Front courtesy lamp 96
Changing courtesy
lamp bulbs
170 Front, lateral, curtain
airbags
1
16-119
Deactivating the passenger's front airbag
1
19, 123
Battery, charging, starting
157
Opening the bonnet
140
Rear windows
104
Front seats, adjustments,
head restraint
69-70
Seat belts
100, 1
13-115
Accessories
137-138
INTERIOR
Rear bench seat 71-73
Rear seats
(5-seat version)
74-76, 84
Seat configuration,
benches
84-85
Rear courtesy lamp
96
Changing courtesy lamp
bulbs
170
Rear fittings
89
-
floor boxes,
-
side blinds,
-
aircraft style table,
Zenith roof
90-91
Scented air freshener
92-93Load space cover (5-seat version) 97
Load space cover
(7-seat version)
101-102 Child seats
120-129, 133
ISOFIX mountings
130-132
Parking brake,
handbrake
106
Rear seats
(7-seat version)
77-83, 85
Fittings
(7-seat version) 99-100
-
stowing rings,
-
cup holder
,
-
12 V socket,
-
storage flap.
towing, llifting
178towable loads
184-187
Spare wheel,
jack, changing a wheel,
tools
160-165
Location
Page 9 of 276
7
Partner_2_VP_en_Chap01_vue-ensemble_ed02-2014
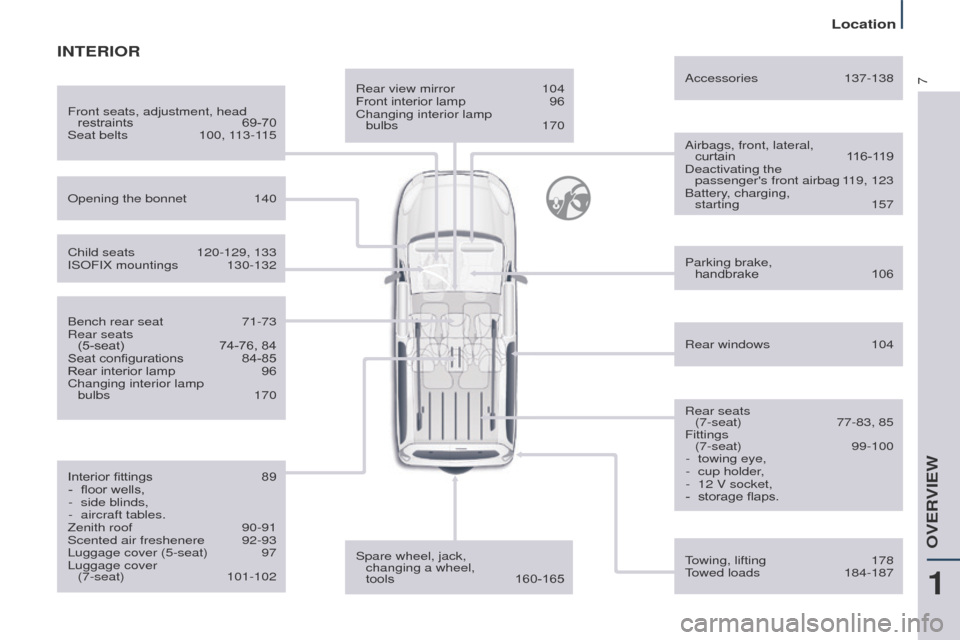
Rear view mirror 104
Front interior lamp 96
Changing interior lamp
bulbs
170 Airbags, front, lateral,
curtain
1
16-119
Deactivating the passenger's front airbag
1
19, 123
Battery, charging, starting
157
Opening the bonnet
140
Rear windows
104
Front seats, adjustment, head
restraints
69-70
Seat belts
100, 1
13-115 Accessories
137-138
INTERIOR
Bench rear seat 71-73
Rear seats
(5-seat)
74-76, 84
Seat configurations
84-85
Rear interior lamp
96
Changing interior lamp
bulbs
170
Interior fittings
89
-
floor wells,
-
side blinds,
-
aircraft tables.
Zenith roof
90-91
Scented air freshenere
92-93
Luggage cover (5-seat)
97
Luggage cover
(7-seat)
101-102
Child seats
120-129, 133
ISOFIX mountings
130-132
Parking brake,
handbrake
106
Rear seats
(7-seat)
77-83, 85
Fittings
(7-seat)
99-100
-
towing eye,
-
cup holder
,
-
12 V socket,
-
storage flaps.
towing, lifting
178towed loads
184-187
Spare wheel, jack,
changing a wheel,
tools
160-165
1
OVeRVIeW
Location
Page 71 of 276
69
Partner_2_VP_en_Chap04_ergonomie_ed02-2014
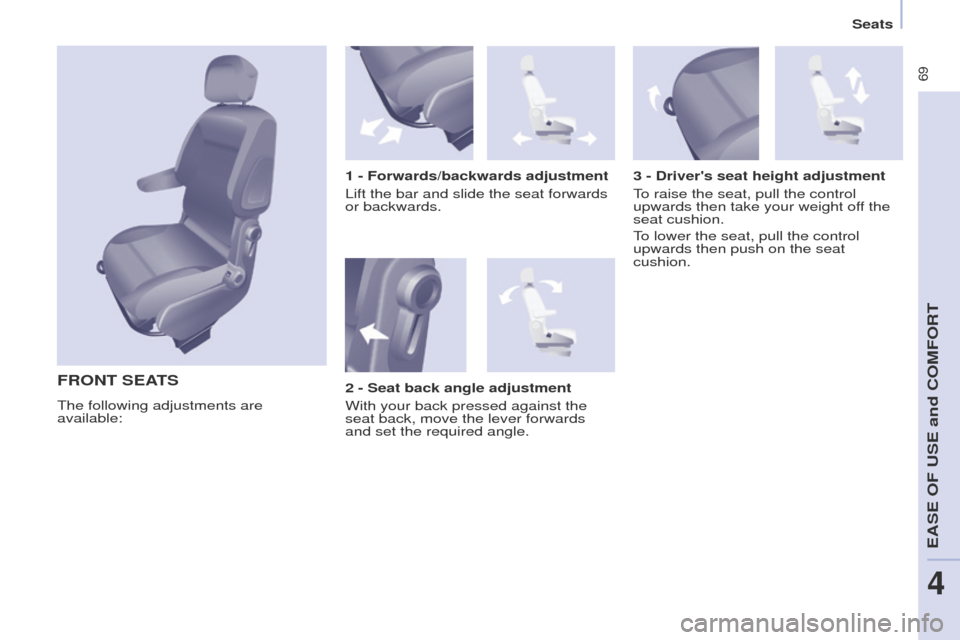
FRONT SEATS
the following adjustments are
available: 1 - Forwards/backwards adjustment
Lift the bar and slide the seat forwards
or backwards.
3 - Driver's seat height adjustment
to raise the seat, pull the control
upwards then take your weight of
f the
seat cushion.
to lower the seat, pull the control
upwards then push on the seat
cushion.
2 - Seat back angle adjustment
With your back pressed against the
seat back, move the lever forwards
and set the required angle.
Seats
eASe OF uSe and COMFORt
4
Page 72 of 276
70
Partner_2_VP_en_Chap04_ergonomie_ed02-2014
Never drive with the head
restraints removed; they must be
in place and correctly adjusted.Adjustable armrest
to access the vertical position, raise
the armrest until it locks.
Lower the armrest to return it to a
position for use.
to remove the armrest, press the
release
button from the vertical position
and move aside the armrest.
to put the armrest back in place, clip it
in the vertical position.
If the vehicle is fitted with the additional
console and an armrest, to fold the
passenger seat to the table position
remove the console or the armrest.
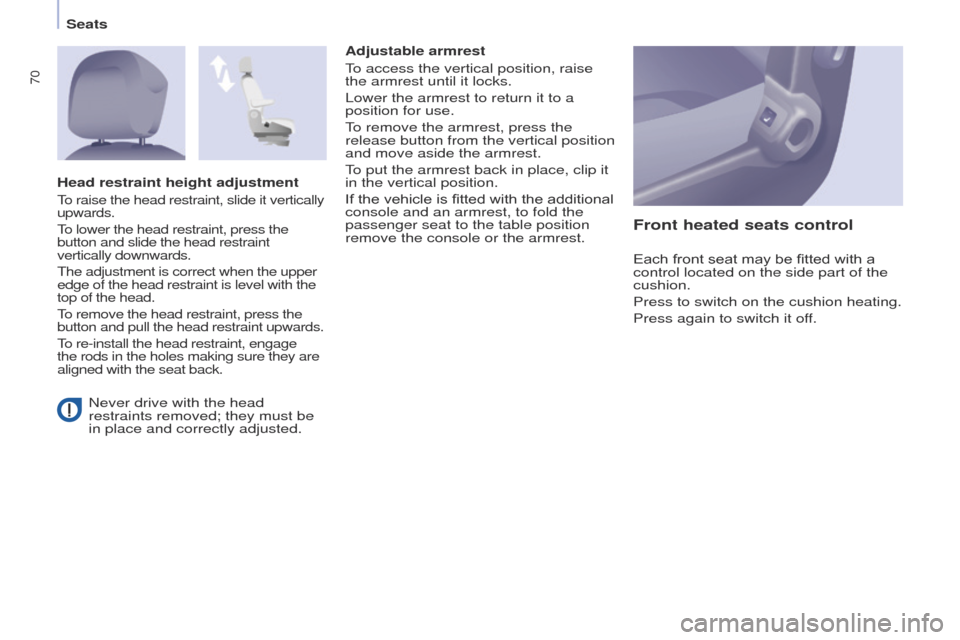
Front heated seats control
Each front seat may be fitted with a
control located on the side part of the
cushion.
Press to switch on the cushion heating.
Press again to switch it off.
Head restraint height adjustment
to raise the head restraint, slide it vertically
upwards.
to lower the head restraint, press the
button and slide the head restraint
vertically downwards.
t
he adjustment is correct when the upper
edge of the head restraint is level with the
top of the head.
to remove the head restraint, press the
button and pull the head restraint upwards.
to re-install the head restraint, engage
the rods in the holes making sure they are
aligned with the seat back.
Seats
Page 81 of 276
79
Partner_2_VP_en_Chap04_ergonomie_ed02-2014
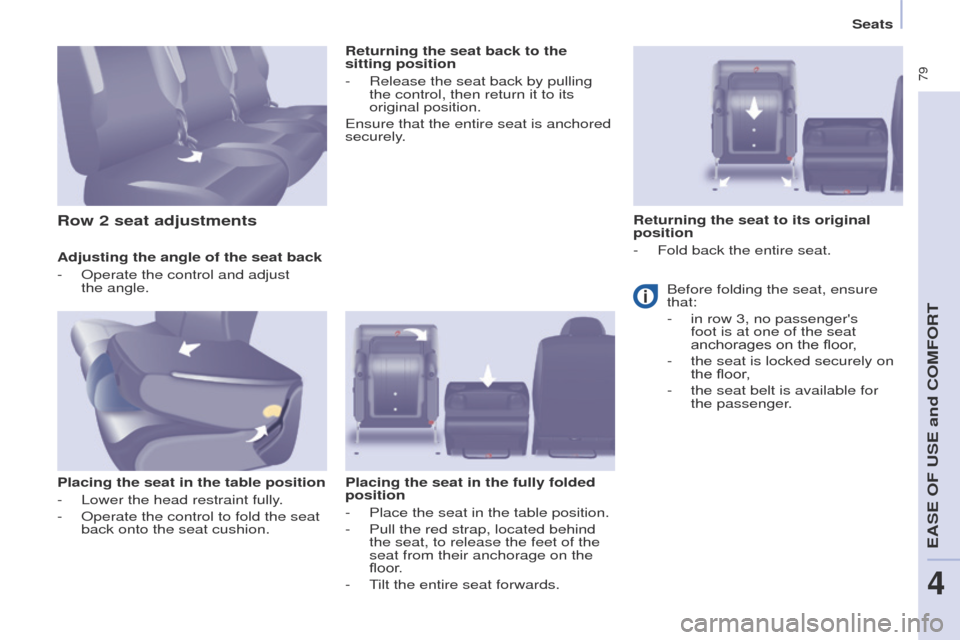
Adjusting the angle of the seat back
-
Operate the control and adjust
the
angle.
Placing the seat in the table position
-
Lower the head restraint fully
.
-
Operate the control to fold the seat
back onto the seat cushion. Returning the seat back to the
sitting position
-
Release the seat back by pullin
g
the control, then return it to its
original position.
e
nsure that the entire seat is anchored
securely.
Placing the seat in the fully folded
position
-
Place the seat in the table position.
-
Pull the red strap, located behind
the seat, to release the feet of the
seat from their anchorage on the
floor
.
-
t
ilt the entire seat forwards.
Row 2 seat adjustmentsReturning the seat to its original
position
-
Fold back the entire seat.
Before folding the seat, ensure
that:
-
in row 3, no passenger's
foot is at one of the seat
anchorages on the floor
,
-
the seat is locked securely on
the floor
,
-
the seat belt is available for
the passenger
.
Seats
eASe OF uSe and COMFORt
4
Page 82 of 276
80
Partner_2_VP_en_Chap04_ergonomie_ed02-2014
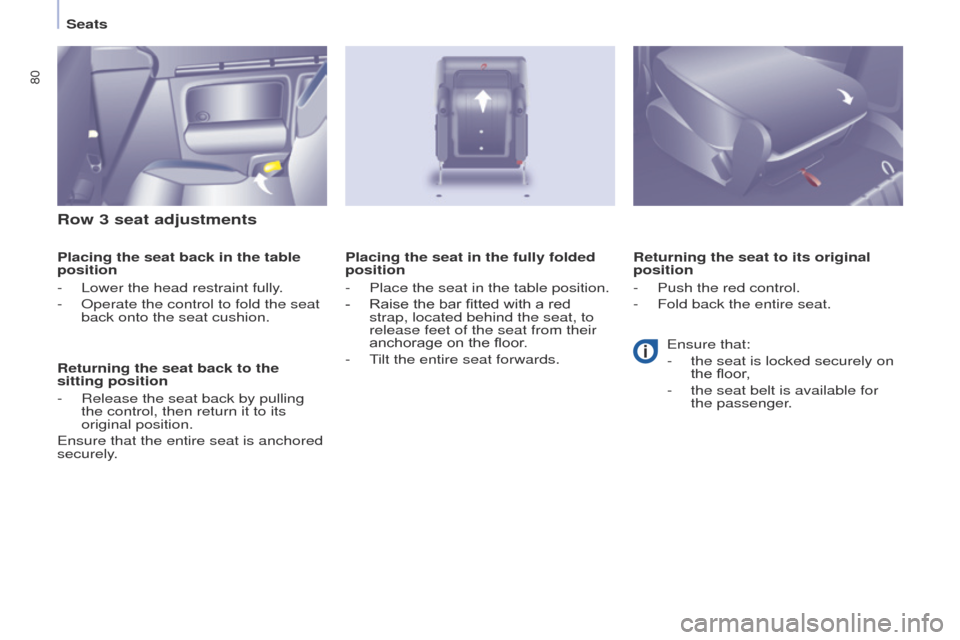
Row 3 seat adjustments
Placing the seat back in the table
position
-
Lower the head restraint fully
.
-
Operate the control to fold the seat
back onto the seat cushion.
Returning the seat back to the
sitting position
-
Release the seat back by pullin
g
the control, then return it to its
original position.
e
nsure that the entire seat is anchored
securely. Returning the seat to its original
position
-
Push the red control.
-
Fold back the entire seat.
Placing the seat in the fully folded
position
-
Place the seat in the table position.
-
Raise the bar fitted with a red
strap, located behind the seat, to
release feet of the seat from their
anchorage on the floor
.
-
t
ilt the entire seat forwards.e
nsure that:
-
the seat is locked securely on
the floor
,
-
the seat belt is available for
the passenger
.
Seats
Page 106 of 276
104
Partner_2_VP_en_Chap04_ergonomie_ed02-2014
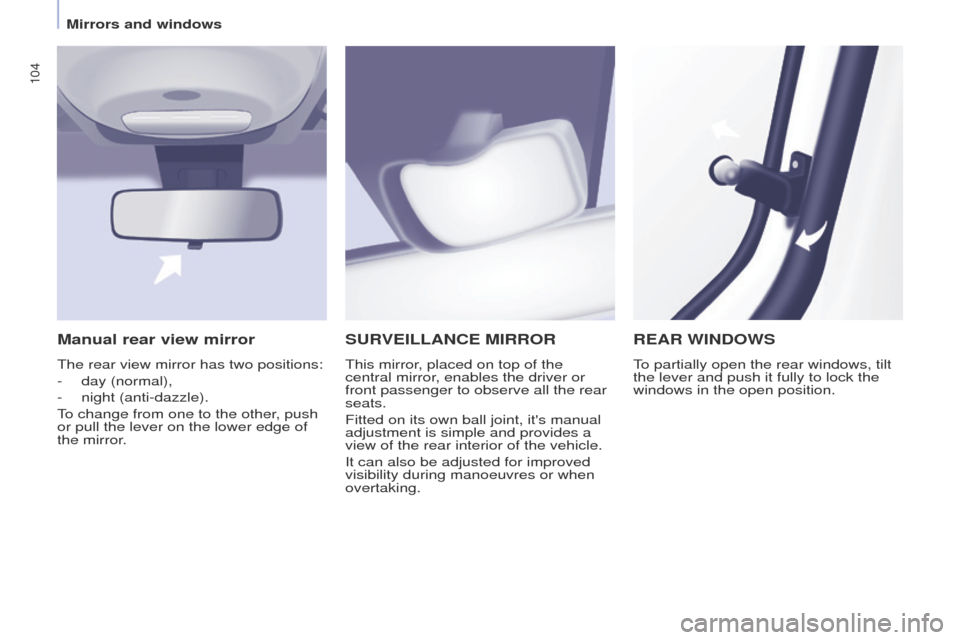
SURVEILLANCE MIRROR
this mirror, placed on top of the
central mirror , enables the driver or
front passenger to observe all the rear
seats.
Fitted on its own ball joint, it's manual
adjustment is simple and provides a
view of the rear interior of the vehicle.
It can also be adjusted for improved
visibility during manoeuvres or when
overtaking.
REAR WINDOWS
to partially open the rear windows, tilt
the lever and push it fully to lock the
windows in the open position.
Manual rear view mirror
the rear view mirror has two positions:
-
day (normal),
-
night (anti-dazzle).
to change from one to the other
, push
or pull the lever on the lower edge of
the mirror.
Mirrors and windows
Page 115 of 276
11 3
Partner_2_VP_en_Chap05_Securite_ed02-2014
SEAT BELTS
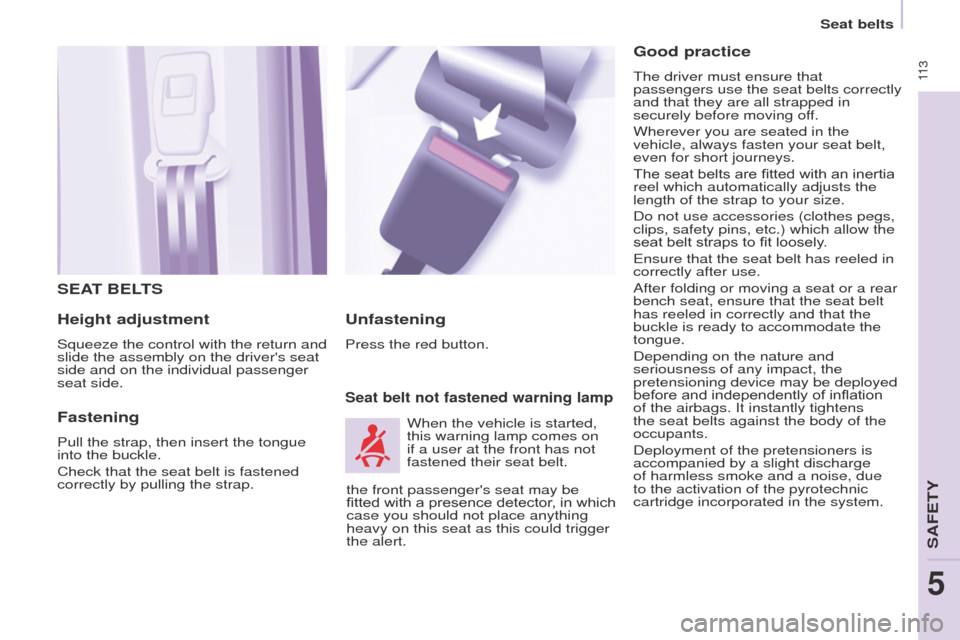
Height adjustment
Squeeze the control with the return and
slide the assembly on the driver's seat
side and on the individual passenger
seat side.
Fastening
Pull the strap, then insert the tongue
into the buckle.
Check that the seat belt is fastened
correctly by pulling the strap.
Seat belt not fastened warning lamp
Unfastening
Press the red button.When the vehicle is started,
this warning lamp comes on
if a user at the front has not
fastened their seat belt.
Good practice
the driver must ensure that
passengers use the seat belts correctly
and that they are all strapped in
securely before moving of
f.
Wherever you are seated in the
vehicle, always fasten your seat belt,
even for short journeys.
The seat belts are fitted with an inertia
reel which automatically adjusts the
length of the strap to your size.
Do not use accessories (clothes pegs,
clips, safety pins, etc.) which allow the
seat belt straps to fit loosely.
e
nsure that the seat belt has reeled in
correctly after use.
After folding or moving a seat or a rear
bench seat, ensure that the seat belt
has reeled in correctly and that the
buckle is ready to accommodate the
tongue.
Depending on the nature and
seriousness of any impact, the
pretensioning device may be deployed
before and independently of inflation
of the airbags. It instantly tightens
the seat belts against the body of the
occupants.
Deployment of the pretensioners is
accompanied by a slight discharge
of harmless smoke and a noise, due
to the activation of the pyrotechnic
cartridge incorporated in the system.
the front passenger's seat may be
fitted with a presence detector, in which
case you should not place anything
heavy on this seat as this could trigger
the alert.
Seat belts
SAFetY
5
Page 129 of 276
127
Partner_2_VP_en_Chap05_Securite_ed02-2014
INSTALLING A CHILD SEAT
WITH
A
SUPPORT LEG
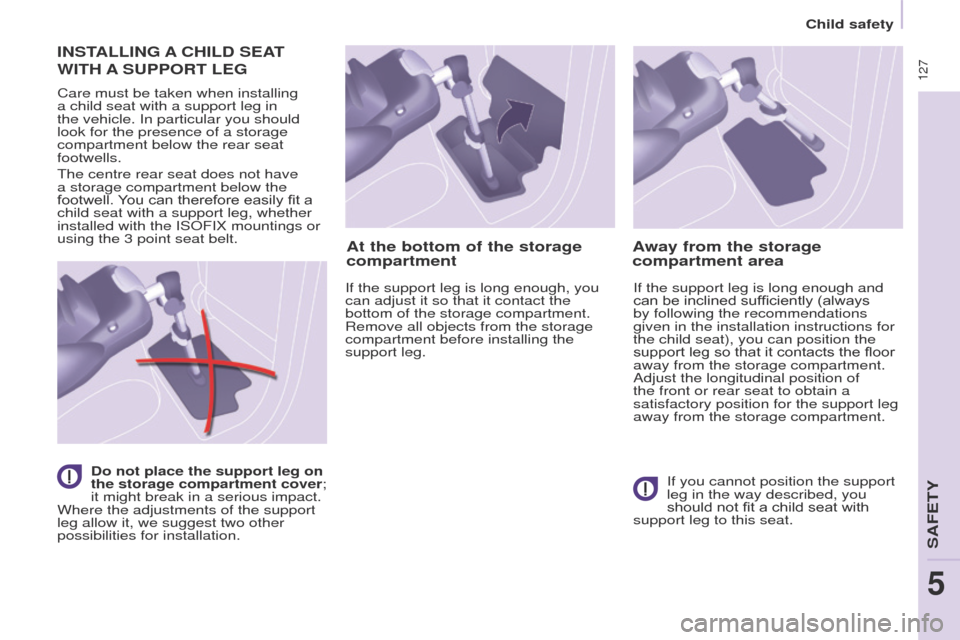
Care must be taken when installing
a child seat with a support leg in
the vehicle. In particular you should
look for the presence of a storage
compartment below the rear seat
footwells.
t
he centre rear seat does not have
a storage compartment below the
footwell. You can therefore easily fit a
child seat with a support leg, whether
installed with the ISOFIX mountings or
using the 3 point seat belt.
Do not place the support leg on
the storage compartment cover;
it might break in a serious impact.
Where the adjustments of the support
leg allow it, we suggest two other
possibilities for installation.
At the bottom of the storage
compartment
If the support leg is long enough, you
can adjust it so that it contact the
bottom of the storage compartment.
Remove all objects from the storage
compartment before installing the
support leg.
Away from the storage
compartment area
If the support leg is long enough and
can be inclined sufficiently (always
by following the recommendations
given in the installation instructions for
the child seat), you can position the
support leg so that it contacts the floor
away from the storage compartment.
Adjust the longitudinal position of
the front or rear seat to obtain a
satisfactory position for the support leg
away from the storage compartment.
If you cannot position the support
leg in the way described, you
should not fit a child seat with
support leg to this seat.
Child safety
SAFetY
5