seats Peugeot Partner Tepee 2016 Service Manual
[x] Cancel search | Manufacturer: PEUGEOT, Model Year: 2016, Model line: Partner Tepee, Model: Peugeot Partner Tepee 2016Pages: 296, PDF Size: 10.76 MB
Page 147 of 296
145
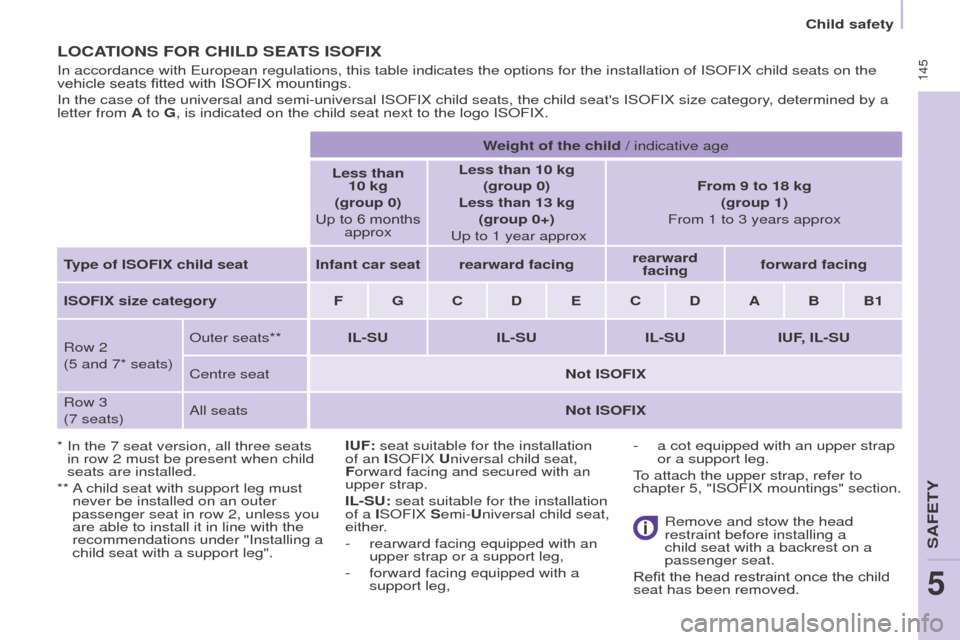
LoCAtI o NS F o R CHILD S e At S IS o FI x
* In the 7 seat version, all three seats
in row 2 must be present when child
seats are installed.
**
A
child seat with support leg must
never be installed on an outer
passenger seat in row 2, unless you
are able to install it in line with the
recommendations under "Installing a
child seat with a support leg".
In accordance with
e uropean regulations, this table indicates the options for the installati\
on of IS o FIX child seats on the
vehicle seats fitted with ISOFIX mountings.
In the case of the universal and semi-universal IS o FIX child seats, the child seat's IS o FIX size category, determined by a
letter from A to g , is indicated on the child seat next to the logo IS o FIX.
Weight of the child / indicative age
Less than 10 kg
(group 0)
Up to 6 months approx Less than 10 kg
(group 0)
Less than 13 kg (group 0+)
u p to 1 year approx
From 9 to 18 kg
(group 1)
From 1 to 3 years approx
type of
IS o FI x child seat Infant car seat rearward facing
rearward
facing forward facing
IS o FI x size category
F
gC DeC D A B B1
Row 2
(5 and 7* seats)
o
uter seats**
IL-S u
IL-S
u
IL-S
u
I
u F, IL-S u
Centre seat
Not IS
o FI x
Row 3
(7 seats)
All seats
Not
IS o FI xI
u F: seat suitable for the installation
of an IS o FIX u niversal child seat,
Forward facing and secured with an
upper strap.
IL-S
u : seat suitable for the installation
of a IS
o FIX Semi- u niversal child seat,
either.
-
rearward facing equipped with an
upper strap or a support leg,
-
forward facing equipped with a
support leg, Remove and stow the head
restraint before installin
g a
child seat with a backrest on a
passenger seat.
Refit the head restraint once the child
seat has been removed.
-
a cot equipped with an upper strap
or a support leg.
T
o attach the upper strap, refer to
chapter 5, "IS
o FIX mountings" section.
5
SAFeTY
Child safety
Page 148 of 296
146
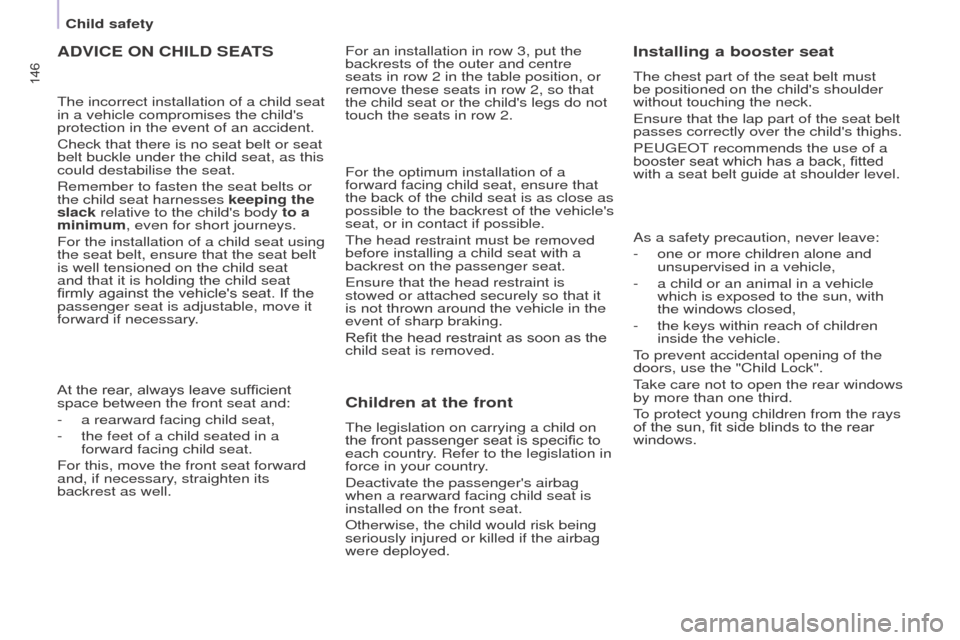
ADVICe oN CHILD SeAtS
At the rear, always leave sufficient
space between the front seat and:
-
a rearward facing child seat,
-
the feet of a child seated in a
forward facing child seat.
For this, move the front seat forward
and, if necessary
, straighten its
backrest as well. The incorrect installation of a child seat
in a vehicle compromises the child's
protection in the event of an accident.
Check that there is no seat belt or seat
belt buckle under the child seat, as this
could destabilise the seat.
Remember to fasten the seat belts or
the child seat harnesses keeping the
slack relative to the child's body to a
minimum, even for short journeys.
For the installation of a child seat using
the seat belt, ensure that the seat belt
is well tensioned on the child seat
and that it is holding the child seat
firmly against the vehicle's seat. If the
passenger seat is adjustable, move it
forward if necessary. For the optimum installation of a
forward facing child seat, ensure that
the back of the child seat is as close as
possible to the backrest of the vehicle's
seat, or in contact if possible.
The head restraint must be removed
before installing a child seat with a
backrest on the passenger seat.
e
nsure that the head restraint is
stowed or attached securely so that it
is not thrown around the vehicle in the
event of sharp braking.
Refit the head restraint as soon as the
child seat is removed.Children at the front
The legislation on carrying a child on
the front passenger seat is specific to
each country. Refer to the legislation in
force in your country.
Deactivate the passenger's airbag
when a rearward facing child seat is
installed on the front seat.
o
therwise, the child would risk being
seriously injured or killed if the airbag
were deployed.
Installing a booster seat
The chest part of the seat belt must
be positioned on the child's shoulder
without touching the neck.
e
nsure that the lap part of the seat belt
passes correctly over the child's thighs.
P
eugeo T recommends the use of a
booster seat which has a back, fitted
with a seat belt guide at shoulder level.
As a safety precaution, never leave:
-
one or more children alone and
unsupervised in a vehicle,
-
a child or an animal in a vehicle
which is exposed to the sun, with
the windows closed,
-
the keys within reach of children
inside the vehicle.
T
o prevent accidental opening of the
doors, use the "Child Lock".
Take care not to open the rear windows
by more than one third.
To protect young children from the rays
of the sun, fit side blinds to the rear
windows.
For an installation in row 3, put the
backrests of the outer and centre
seats in row 2 in the table position, or
remove these seats in row 2, so that
the child seat or the child's legs do not
touch the seats in row 2.
Child safety
Page 154 of 296
152
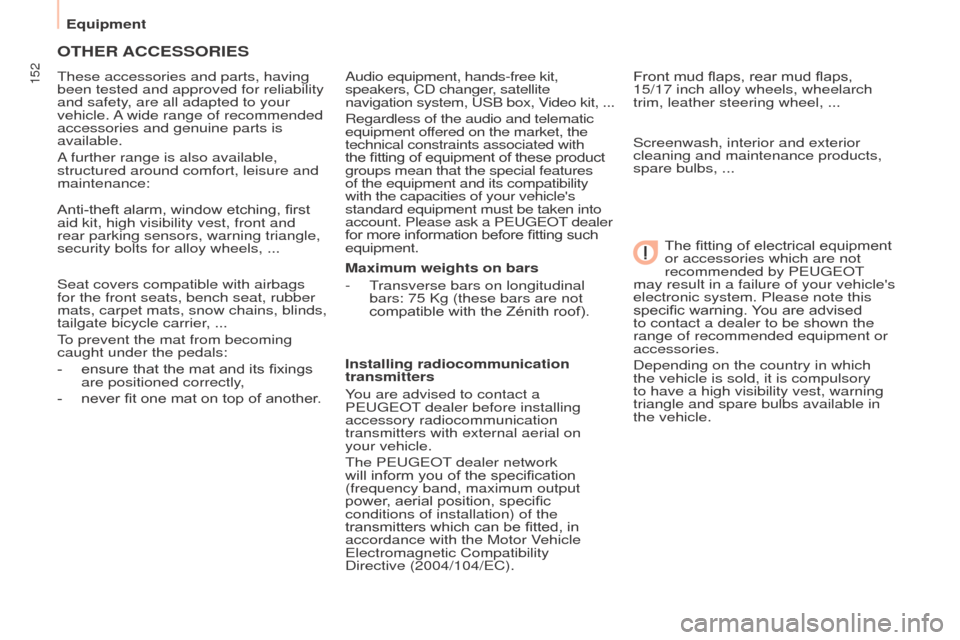
otHeR ACCeSSoRIeS
These accessories and parts, having
been tested and approved for reliability
and safety, are all adapted to your
vehicle. A wide range of recommended
accessories and genuine parts is
available.
A further range is also available,
structured around comfort, leisure and
maintenance:
Anti-theft alarm, window etching, first
aid kit, high visibility vest, front and
rear parking sensors, warning triangle,
security bolts for alloy wheels, ...
Seat covers compatible with airbags
for the front seats, bench seat, rubber
mats, carpet mats, snow chains, blinds,
tailgate bicycle carrier, ...
To prevent the mat from becoming
caught under the pedals:
-
ensure that the mat and its fixings
are positioned correctly
,
-
never fit one mat on top of another
.Audio equipment, hands-free kit,
speakers, CD changer, satellite
navigation system,
u
SB box, Video kit,
...
Regardless of the audio and telematic
equipment offered on the market, the
technical constraints associated with
the fitting of equipment of these product
groups mean that the special features
of the equipment and its compatibility
with the capacities of your vehicle's
standard equipment must be taken into
account. Please ask a P
eugeo T dealer
for more information before fitting such
equipment.
Maximum weights on bars
-
T
ransverse bars on longitudinal
bars: 75 Kg (these bars are not
compatible with the Zénith roof).
Installing radiocommunication
transmitters
You are advised to contact a
P
eugeo T dealer before installing
accessory radiocommunication
transmitters with external aerial on
your vehicle.
The P
eugeo T dealer network
will inform you of the specification
(frequency band, maximum output
power, aerial position, specific
conditions of installation) of the
transmitters which can be fitted, in
accordance with the Motor Vehicle
e
lectromagnetic Compatibility
Directive (2004/104/
e C).Front mud flaps, rear mud flaps,
15/17
inch alloy wheels, wheelarch
trim, leather steering wheel, ...
Screenwash, interior and exterior
cleaning and maintenance products,
spare bulbs, ...
The fitting of electrical equipment
or accessories which are not
recommended by P
eugeo T
may result in a failure of your vehicle's
electronic system. Please note this
specific warning. You are advised
to contact a dealer to be shown the
range of recommended equipment or
accessories.
Depending on the country in which
the vehicle is sold, it is compulsory
to have a high visibility vest, warning
triangle and spare bulbs available in
the vehicle.
equipment
Page 173 of 296
171
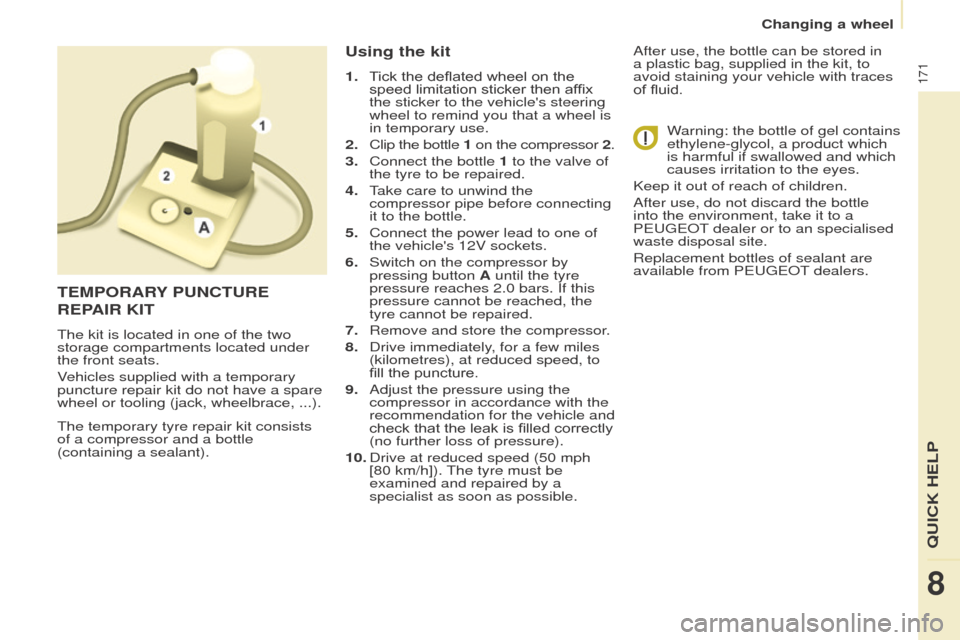
The temporary tyre repair kit consists
of a compressor and a bottle
(containing a sealant).
using the kit
1. Tick the deflated wheel on the speed limitation sticker then affix
the sticker to the vehicle's steering
wheel to remind you that a wheel is
in temporary use.
2.
Clip the bottle
1 on the compressor
2.
3.
Connect the bottle
1 to the valve of
the tyre to be repaired.
4.
T
ake care to unwind the
compressor pipe before connecting
it to the bottle.
5.
Connect the power lead to one of
the vehicle's 12V sockets.
6.
Switch on the compressor by
pressing button
A until the tyre
pressure reaches 2.0 bars. If this
pressure cannot be reached, the
tyre cannot be repaired.
7.
Remove and store the compressor
.
8.
Drive immediately
, for a few miles
(kilometres), at reduced speed, to
fill the puncture.
9.
Adjust the pressure using the
compressor in accordance with the
recommendation for the vehicle and
check that the leak is filled correctly
(no further loss of pressure).
10.
Drive at reduced speed (50
mph
[80 km/h]). The tyre must be
examined and repaired by a
specialist as soon as possible. After use, the bottle can be stored in
a plastic bag, supplied in the kit, to
avoid staining your vehicle with traces
of fluid.
Warning: the bottle of gel contains
ethylene-glycol, a product which
is harmful if swallowed and which
causes irritation to the eyes.
Keep it out of reach of children.
After use, do not discard the bottle
into the environment, take it to a
P
eugeo T dealer or to an specialised
waste disposal site.
Replacement bottles of sealant are
available from P
eugeo T dealers.
teMPoRARY P u NC tu R e
R
e PAIR KI t
The kit is located in one of the two
storage compartments located under
the front seats.
Vehicles supplied with a temporary
puncture repair kit do not have a spare
wheel or tooling (jack, wheelbrace, ...).
8
QuICK HeLP
Changing a wheel
Page 190 of 296

188
Passenger compartment fuses
Fuses F Amperes
A Allocation
1 - Not used
2 20 Heated seats
3 - Not used
4 15 Folding mirrors relay
5 15 Refrigeration equipment socket relay
Changing a fuse