fuses PONTIAC BONNEVILLE 1996 Owners Manual
[x] Cancel search | Manufacturer: PONTIAC, Model Year: 1996, Model line: BONNEVILLE, Model: PONTIAC BONNEVILLE 1996Pages: 387, PDF Size: 18.71 MB
Page 65 of 387
Universal Theft-Deterrent (Option)
If your Pontiac has this option, it has a theft-deterrent
alm system. With this system, the SECURITY light
will flash as you open the door (if your ignition is OFF).
This light reminds you to activate the theft-deterrent
system when leaving
your vehicle.
Activating the
sys tern:
1.
2.
3.
Open the door.
Lock the door with
the power door lock switch or
Remote Keyless
Entry transmitter. The SEC-Y
light should come on and stay on.
Close
all doors. The SECUFUTY light should go afT after
about
30 seconds and the system will then be armed.
If the SECURITY light comes on for one minute and
then shuts
off while the ignition is on, the security
system has detected a problem with itself. See your
dealer for service.
If a door ‘or the trunk is opened without the key or
Remote Keyless Entry transmitter, the
alarm will go off.
It will also go off if the trunk lock is damaged. Your
vehicle’s lamps will flash and the horn will sound for
three minutes, then will
go off to save battery power.
Remember, the theft-deterrent system won’t activate if
you lock the doors with
a key or manual door lock. It
activates only if you use a power door lock
switch ox
Remote Keyless Entry transmitter.
Avoid setting
bff the alarm by accident.
Always unlock
a door with a key, or use the Remote
Keyless Entry transmitter. Unlocking a door any other
way will set
off the alarm.
Stopping the alarm: If you set off the alarm by accident,
unlock
any door with your key. You can also turn off the
alarm by pressing the
UNLOCK button on the Remote
Keyless
Entry transmitter. The alarm won’t stop if you
try to dock a door any other way.
Testing the alarm: Open the, window, then follow the
directions for activating the system described earlier.
Once the alarm is set, reach through the window and
manually uvlock the door
from the inside or turn on the
ignition.
The alarm should sound.
If the alarm does not sound when it should, check to see if
the horn works. The horn fuse may be blown. To replace
the fuse, see “Fuses and Circuit Breakers” in the Index.
To reduce the possibility of theft, always activate the
theft-deterrent
system when leaving your vehicle.
ProCarManuals.com
Page 66 of 387
PASS-Key@ I1
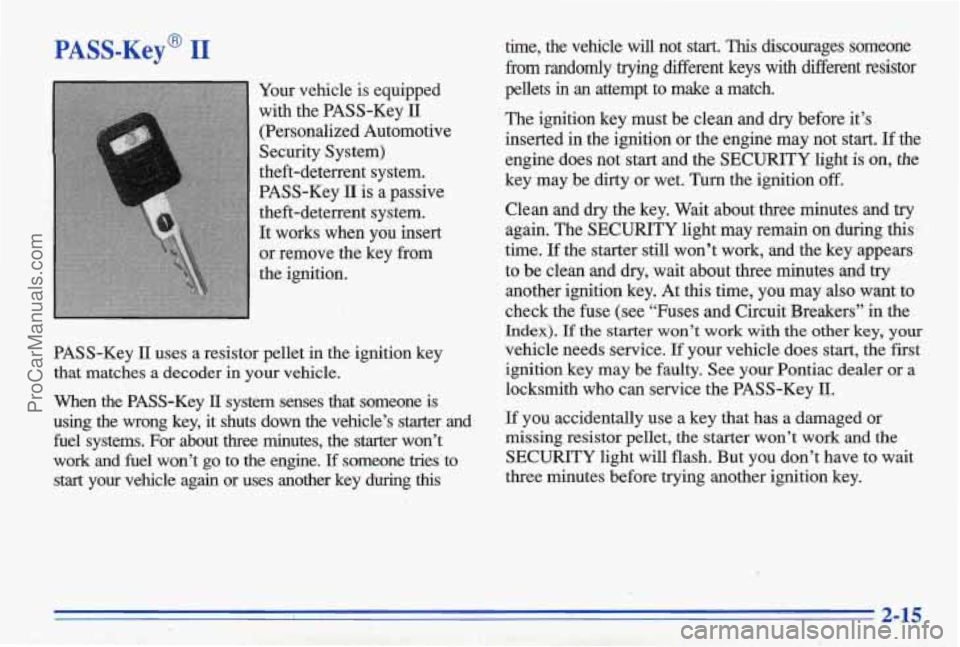
Your vehicle is equipped
with the PASS-Key
II
(Personalized Automotive
Security System)
theft-deterrent system.
PASS-Key
II is a passive
theft-deterrent system.
It works when you insert
or remove the key from
the ignition.
PASS-Key
II uses a resistor pellet in the ignition key
that matches a decoder
in your vehicle.
When the PASS-Key
11 system senses that someone is
using the wrong key, it shuts
down the vehicle’s starter and
fuel systems. For about three minutes, the starter won’t
work and fuel won’t go to
the engine. Lf someone tries to
start your vehicle again or uses another key during
this
time, the vehicle will not start. This discourages someone
fiom randomly trying different keys with different resistor
pellets
in an attempt to make a match.
The ignition key, must be clean and dry before it’s
inserted in the ignition
or the engine may not start. If the
engine does not start and the SECURITY light
is on, the
key may be dirty or wet. Turn the ignition off.
Ciean and dry the key. Wait about three minutes and try
again. The SECURITY light may remain on during this
time. If the starter still won’t work, and the key appears
to be clean and dry, wait about three minutes and try
another ignition key. At this time, you may also want to
check the fuse (see “Fuses and Circuit Breakers” in the
Index). If the starter won’t work with the other key, your
vehicle needs service. If your vehicle does start, the first
ignition key may be faulty.
See your Pontiac dealer or a
locksmith who can service the PASS-Key
Q.
If you accidentally use a key that has a damaged or
missing resistor pellet, the starter won’t work and the
SECURITY light will flash. But you don’t have to wait
three minutes before trying another ignition key.
! 2-15
ProCarManuals.com
Page 86 of 387
As you signal a turn or a lane change, if the arrows don’t
flash but just stay on, a signal bulb may be burned out
and other drivers won’t see your turn signal. If you have
the Driver Information Center, it
will tell you if you
have a burned out bulb. See “Driver Information
Center” in the Index.
If a bulb is burned out, replace it to help avoid an
accident.
If the arrows don’t go on at all when you
signal a turn, check the fuse and for burned-out bulbs.
See “Fuses and Circuit Breakers” in the Index.
nrn Signal On Chime
If your turn signal is left on for more than 3/4 of a mile
(1.2 km), a chime will sound at each flash of the turn
signal. To turn
off the chime, move the turn signal lever
to the
off position.
Headlamp HighlLow Beam Changer
To change the headlamps
from
low b’eam to high
beam or high beam
to low
beam, pull the turn
signal
lever toward you. Then
release it. When the high
beams are
on, this light 011.
the instrument panel will also be on.
Flash-To-Pass Feature
This feature lets you use your high-beam headlamps to
signal a driver
in front of you that you want to pass. It
works even if your headlamps are off.
To use it, pull the turn signal lever toward you a little,
but not
so far that you hear a click.
If your headlamps are off or on low beam, your
high-beam headlamps
will turn on. They’ll stay on -
as long as you hold the lever toward you and the
high-beam indicator
on the dash will come on. Release
the lever to turn the high-beam headlamps
off.
I-
ProCarManuals.com
Page 129 of 387
2. Adjust the seat, if necessary, b’efore setting the
height control.
Slide the
ADJUST (image height) cimtrol all the way
up,
raising the image as far ,as possible. Then slide
the HUD image height control down so the image is
as low as possible but in full view.
image
is no brighter than necessary. To turn the HUD
off, slide the HUB dimmer coptrol all the way down.
If the sun comes out, or it becomes cloudy, ur if you turn
on your headlamps, you may need to adjust them
brightness using the HUD ciirrmer co&ol. Polarizing
sunglasses could make
the HUD image harder to see.
Pushing $he uptional ENG/MET (English/metric) button
on the instrument panel cluster will switch the HUD
speedometer from English (conventional) to metric
units, or back again.
Clean the inside
of the windshield as needed to remove
any dirt or film -that reducesthe sharpness CJT clarity of
the HUD image.
3. Slide the dimmer control downward until the HUD
Spray household glass cleaner on a soft, clean cloth.
Wipe the
HUD lens gently, then dry it. Do not spray
cleaner directly on the lens, because the cleaner
fluid
could leak inside the unit if you do.
If you can’t see the HUD image when the ignition is on,
check
to see if:
0 The headlamps are on.
Anything is covering the HUD unit.
0 The HUD dimmer control is adjusted correctly.
The HUD image is adjusted to the proper height.
0 A fuse in the fuse panel may be blown. See “Fuses
and Circuit Breakas” in the Index.
If the F€WR image is not clear it could be too bright,
move the HUD dimmer control further downward. You
may need to clean the windshield and HUD lens.
Your windshield is part of the
HUD system. If you ever
have
to have a new windshield, be sure to get one
designed for WUD. If you don’t, the HUD image may
look blurred and out
of focus.
ProCarManuals.com
Page 303 of 387
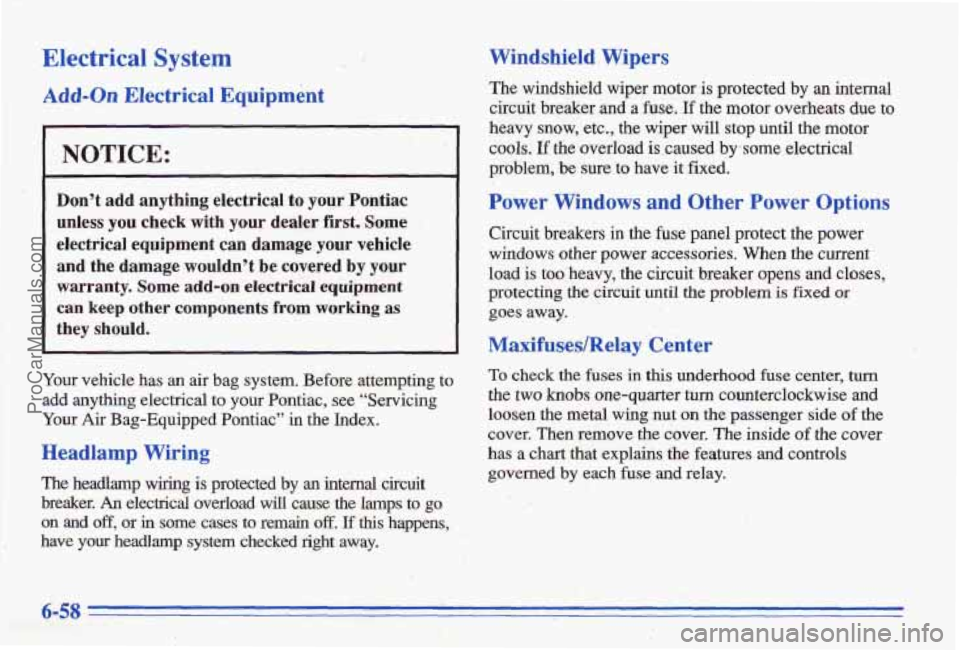
Electrical System
Add-on Electrical Equipment
NOTICE:
Don’t add anything electrical to your Pontiac
s; i; unless you check with your dealer first. Some
. +, and the damage wouldn’t be covered by your
warranty.
Some add-on electrical equipment
can keep other components from working as
they should.
...a . . % .-
.. b.., r -‘ ‘i ’-’ t electrical equipment can damage your vehicle
Youfvehicle has an air bag system. Before attempting to
add anything electrical to your Pontiac, see “Servicing
Ysur Air Bag-Equipped Pontiac” in the Index.
Headlamp Wiring
The headlamp wiring is protected by an internal circuit
breaker.
An electrical overload will cause the lamps to go
on
.and off, or in mrne cases to re& off. .If this happens,
have
your headlamp system checked right away.
Windshield Wipers
The windshield wiper motor is protected by an internal
circuit breaker
and a fuse. If the motor overheats due to
heavy snow, etc., the wiper
will stop until the motor
cools. If tbe overload is .caused by some electrical
problem, be
sure to have it fixed.
Power Windows and Other Power Options
Circuit breakers in the fuse panel protect the power
windows other power accessories. When the current
load is too’heavy, the circ,uit breaker opens and closes,
protecting
the circuit until the problem is fixed or
goes away.
MaxifusedRelay Center
To check the fuses in this underhood fuse center, turn
the two knobs one-quarter turn counterclockwise and
loosen the metal wing nut on the passenger side of the
cover. Then remov’e the cover. The inside of the cover
has
a chart that explahs the features and controls
governed
by each fuse and relay.
I -.: ~ _I = L i , -. . :. . ,
6-58
ProCarManuals.com
Page 304 of 387
Fuses and Circuit Breakers
The wiring circuits in your vehicle are protected from
short circuits by a combination of fuses, circuit breakers
and fusible thermal links. This greatly reduces the
chance of damage caused by electrical problems.
Look at the silver-colored band inside the fuse. If the
band is broken
or melted, replace the fuse. Be sure you
replace a bad fuse with a new one
of the identical size
and rating.
If you ever have a problem on the road and don’t have a
spare fuse,
you can borrow one that has the same
amperage. Just pick some feature of
your vehicle that
you can get along without -- like the radio or cigarette
lighter -- and use its fuse, if it is the eomect amperage.
Replace it as soon as you can.
There are two fuse blocks in your vehicle: the driver’s
side and passenger’s side fuse blocks.
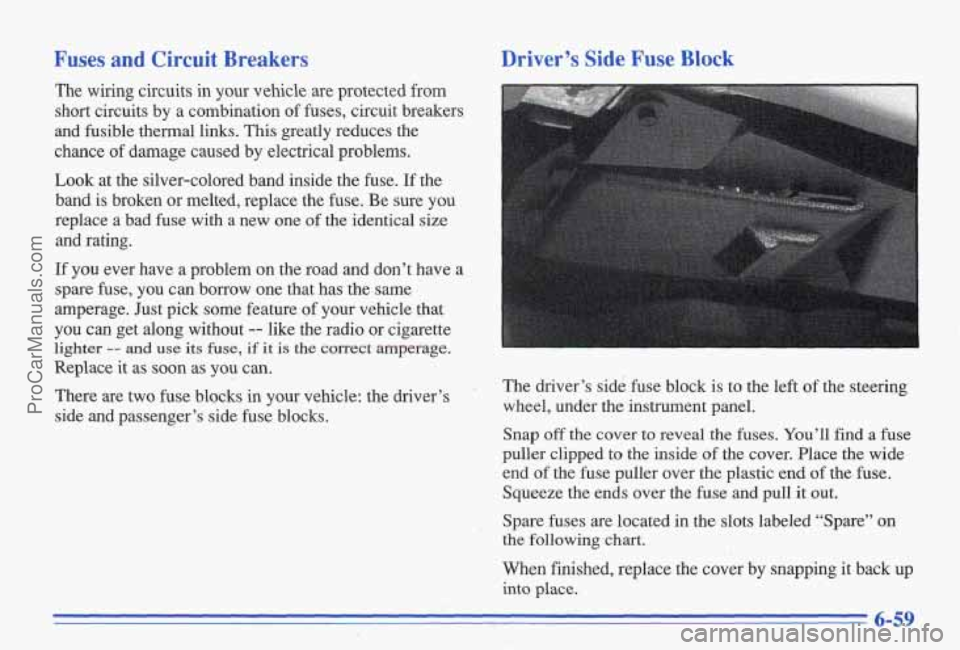
Driver’s Side Fuse Block
The driver’s side fuse block is to the left of the steering
wheel, under the instrument panel.
Snap off the cover to reveal the fuses. You’ll find a fuse
puller clipped to the inside of the cover. Place the wide
end of the fuse puller over the plastic end of the fuse.
Squeeze the ends over the fuse and pull it out.
Spare fuses are located in the slots labeled “Spare”
on
the following chart.
When finished, replace the cover by snapping it back
up
into place.
ProCarManuals.com
Page 306 of 387
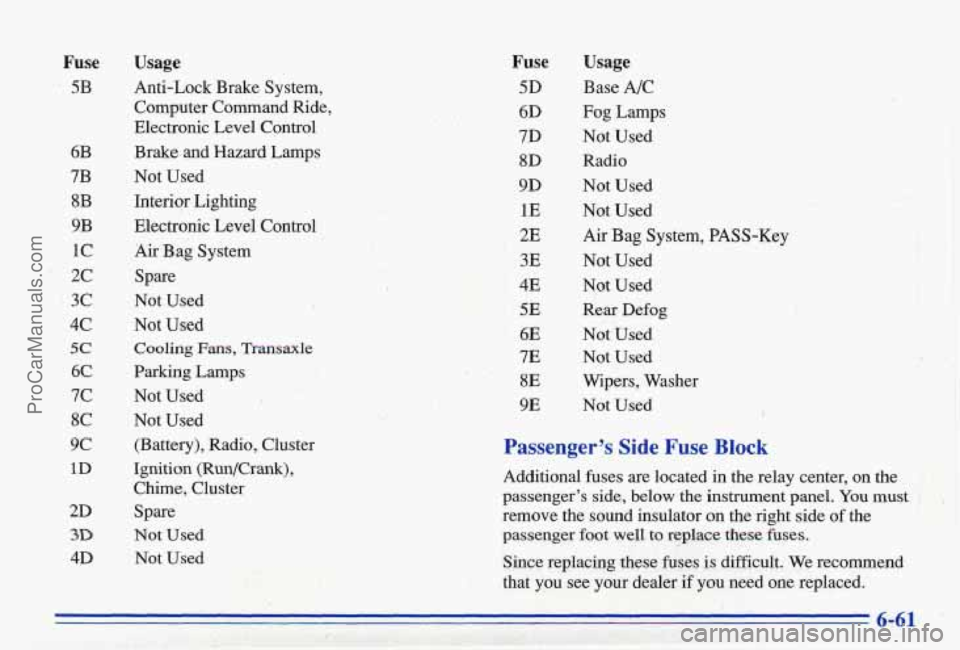
Fuse
5B
6B
7B 8B
9B
1c
2c
3c
4,c
5c
6C
7c
8C
9c
1D
2D
3D
4D
Usage
Anti-Lock Brake System, Computer Command Ride,
Electronic Level Control
Brake and Hazard Lamps
Not Used
Interior
I Lighting
Electronic Level Control
Air Bag System
Spare
Not Used
Not Used
Cooling Fans, Trmsmle
Parking Lamps
Not Used
Not Used (Battery), Radio, Cluster
Ignition (Run/Crank), Chime, Cluster
Spare
Not Used Not Used
Fuse
5D
6D
7D 8D
9D
1E
2E
3E
4E
5E
6E
7E
8E
9E
Usage
Base A/C
Fog Lamps
Not Used Radio
Not Used Not Used
Air Bag System, PASS-Key
Not Used
Not Used
Rear Defog
Not Used
Not Used
Wipers, Washer
Not Used
I
Passenger% Side Fuse Block
Additional fuses are located in the relay center, on the
passenger's side, below the instrument panel.
You must
.. : i',
.- . '! i . -." remove the sound insulator on the right side of the
>. passenger foot well to replace these fbses.
Since replacing these fuses is difficult. We recommend
that you see your dealer
if you need me replaced.
ProCarManuals.com
Page 376 of 387
Circuit Breakers and Fuses ................... 6-59
Cleaner.
Air .................. : ................. 6-17
Cleaning
Aluminum Wheels ............................ 6-54
Fabric
...................................... . 6-50
Glass ....................................... 6-52
Inside of Your Pontiac
......................... 6-49
Instrument Panel
.............................. 6-52
Leather
...................................... 6-5 1
Outside of Your Pontiac ........................ 6-53
Special Problems
............................. 6-50
Stains ...................................... 6-50
Tires ........................................6-54.
Vinyl ....................................... 6-51
Wheels .............. ...................... 6-54
Windshield and Wiper Blades
................... 6-52
Climate Control,
Standard ......................... -3 - 1
Clock, Setting the ................................. 3-9
Coinholder 2-49
.. Comfort Controls ................................ 3-1
Compact Disc Care
.............................. 3-27
Compact Disc Player ....................... 3 - 18, 3-20
Compact
Disc Player Errors ................... 3-19,3. -22
Compact Spare Tire ............................. 5-38
Compass, Electronic
............................ 2-8 1
Computer Command Ride ........................ 2-25
Console Storage
.................................. 2-49
Control
of a Vehicle .............................. 4-5
Convenience Net
............................... 2-52
Convex Outside Mirror .......................... 2-48
.. ....................................
Coolant ....................................... 6-22
Heater, Engine ............................... 2-20
Recovery Tank
............................... 5-19
Cooling System ................................ 5-17
Courtesy Transportation ........................... 8-7
Cruise Control
. : ............................... 2-37
Cupholders .................................... 2-49
Customer Assistance for Text Telephone Users
......... ,8-4
Customer Assistance Information
................... 8-1
Customer Satisfaction Procedure ..................... 8-2
Damage. Finish ............................... 6-54
Damage. Sheet Metal
............................ 6-54
Daytime Running
Lamps ......................... 2-42
Dead Battery
................................... 5-2
Defects. Reporting Safety
......................... 8-9
Defensive Drivin
................................ 4-1
Defogger. Rear Vfindow .......................... 3-8 .
Defogging ..................................... 3-8
Defrosting
..................................... 3-8
Delayed Illumination
............................ 2-44
Dimen8ions. Vehicle
............................ 6-66
Dolby B Noise Reduction .................. 3-14, 3-17
Ajar Message
................................ 2-79
Drive Position. Automatic Transaxle
................ 2-23
Driver Information Center
........................ 2-79
DIC.' .......................................... 2-79
Door
Locks ....................................... 2-3
Driver Position .................................. 1-10
9-3 .. ... .... ................ -. .;,. I: ! -- .. L ..__ ........ -~~ ProCarManuals.com
Page 378 of 387
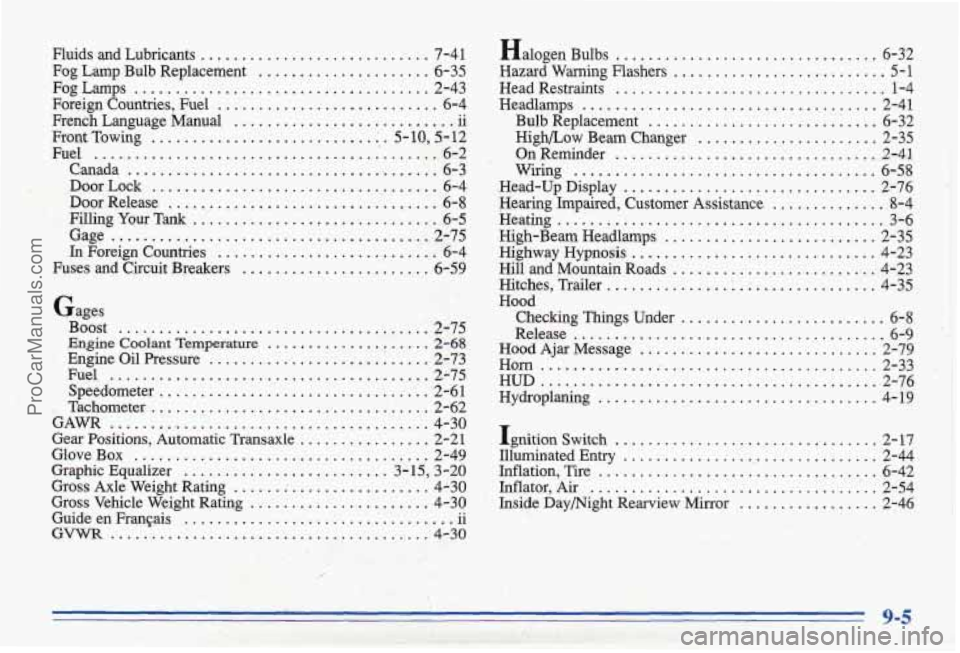
Fluids and Lubricants .......................... 7-41
Fog Lamp Bulb Replacement ..................... 6-35
Fog Lamps .................................... 2-43
Foreign Countries. Fuel ........................... 6-4
French Language Manual ........................... ii
FrontTowing
............................. 5-10, 5-12
Fuel ........................................... 6-2
Canada ....................................... 6-3
DoorLock ................................... 6-4
Door Release ................................. 6-8
Filling Your Tank .............................. 6-5
Gage ........................................ 2-75
In Foreign Countries ........................... 6-4
Fuses and Circuit Breakers ....................... 6-59
Gages
Boost ...................................... 2-75
&gjne Coolant Temperature .................... 2-68
Engine Oil Pressure ........................... 2-73
Fuel ....................................... 2-75
Speedometer .......................... ; ...... 2-61
. Tachometer .................................... 2-62
GAWR ........................................ 4-30
Gear Positions. Automatic Transaxle ................ 2-21
GloveBox .................................... 2-4 9
Graphic Equalizer ......................... 3-15, 3-20
Gross Axle Weight Rating ........................ 4-30
Gross Vehicle Weight Rating ...................... 4-30
Guide en Frarqais ................................. ii
GVWR ....................................... 4-30
Halogen Bulbs ......... ................ 6-32
Hazard Warning Flashers ........................... 5-1
Head Restraints .................................. 1-4
Headlamps .................................... 2-41
Bulb Replacement ............................ 6-32
High/Low Beam- Changer ...................... 2-35
On Reminder ................................ 2-41
Wiring ..................................... 6-58
Head-Up Display ............................... 2-76
High-Beam Headlamps ........................... 2-35
Hill and Mountain Roads .......................... 4-23
Checking Things Under ......................... 6-8
Hearing Impaired, Customer Assistance .............. 8-4
Heating ........................................ 3-6
Highway Hypnosis ............................... 4-23
Hitches. Trailer ................. ; ............... 4-35
Hood
Release
...................................... 6-9
Hood Ajar Message ............................. 2-79
Horn ......................... 1 ................. 2-33 .
HUD .......................................... 2-76
Hydroplaning .................................. 4-19
Ignition Switch ................................. 2-17
Illuminated Entry ................................. 2-44
Inflator. Air .................................... 2-54
Inflation. Tire .................................. 6-42
Inside Daymight Rearview Mirror ................. 2-46
_. 9.5'
ProCarManuals.com
Page 385 of 387
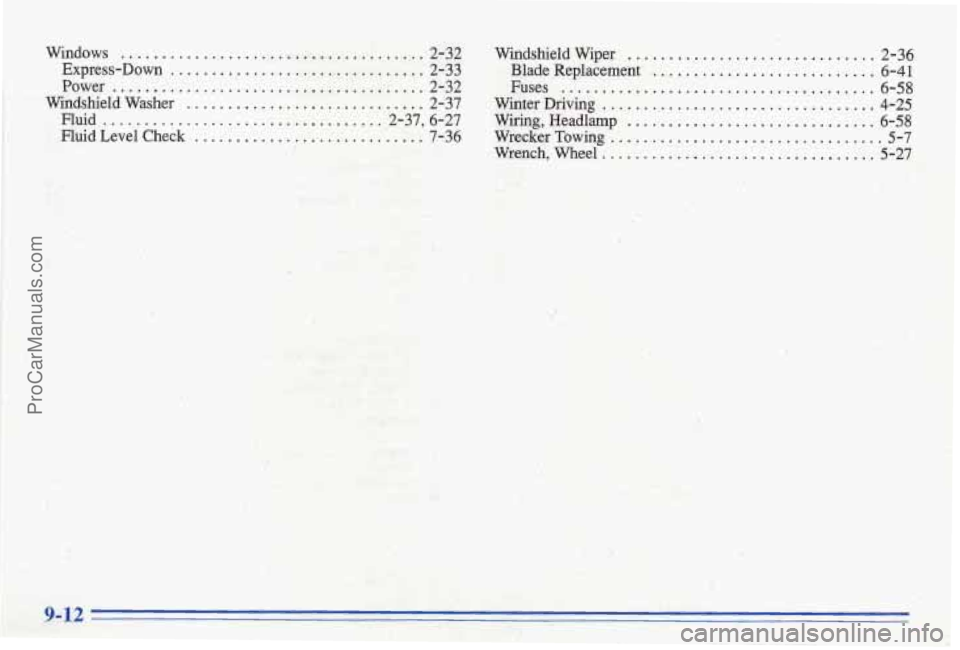
Windows ..................................... 2-32 Windshield Wiper, .............................. 2-36
.. Express-Down ............................... 2-33 Blade Replacement ............................ 6-41
Windshield Washer .............................. 2-37 Winter Driving ................................. 4-25
. Power ......,.......,.......................2-32 Fuses ....................................... 6-58
Fluid..................................-2-37,6-27 Wiring,Headlamp .............................. 6-58
Fluid Level Check .............................. 7-36 Wrecker Towing ................................. 5-7
Wrench,Wheel .................................5-27
9-12
ProCarManuals.com