instrument cluster PONTIAC BONNEVILLE 1996 Owners Manual
[x] Cancel search | Manufacturer: PONTIAC, Model Year: 1996, Model line: BONNEVILLE, Model: PONTIAC BONNEVILLE 1996Pages: 387, PDF Size: 18.71 MB
Page 95 of 387
To operate twilight sentinel, turn the control to MAX for
the three minute delay.
Turn it the other way to reduce
the delay. Turn the control to MIN to turn twilight
sentinel
off.
,. Also, it's possible that your headlamps my go out if
': ,_ .:'. * , . :' you drive from a dark area into a bright area like a
' lighted parking lot. If this happens, turn on your
headlamps with the regular headlamp switch.
Interior Lamps
Instrument Panel .Intensity/Brightness
Control
You can brighten or dim your instrument cluster lights
by
turning the headlamp switch. Turn the switch
clockwise to brighten the instrument cluster lights
and
displays. Turn the switch clockwise all the way t'o turn
on the interior courtesy lamps. Turn the switch
counterclockwise to dim the instrument cluster lights
and displays and to turn off the courtesy lamps.
Delayed Illumination
When you open the door, the interior lamps will come
on. When you
close the door with the ignition off, the
interior lamps will stay on
for 25 seconds or until the
ignition
is turned to an on position. Please note that locking the doors
will override the delayed illumination
feature and the lamps will
turn off right away.
Theater Dimming
This feature allows for a thee to five-second fade out of
the courtesy lamps instead of immediate turn off.
Exit Lighting
With this feature, the interior lamps will come on for
25 seconds after you remove the key from the ignition.
This will give you time to fhd the door pull handle or
lock switches.
Illuminated Entry (Option)
When you lift the handle of either front door, a Imp
will glow around the door lock. This will help you insert
the door key at night.
The lamps inside your vehicle will also go on. These
lamps will
go off after about 25 seconds, or when you
start
your engine. These lamps will also go on when
you press any button on the optional Remote Keyless
Entry transmitter.
If a door is left ajar, your interior lamps will turn off
after 10 minutes to save your battery.
ProCarManuals.com
Page 108 of 387
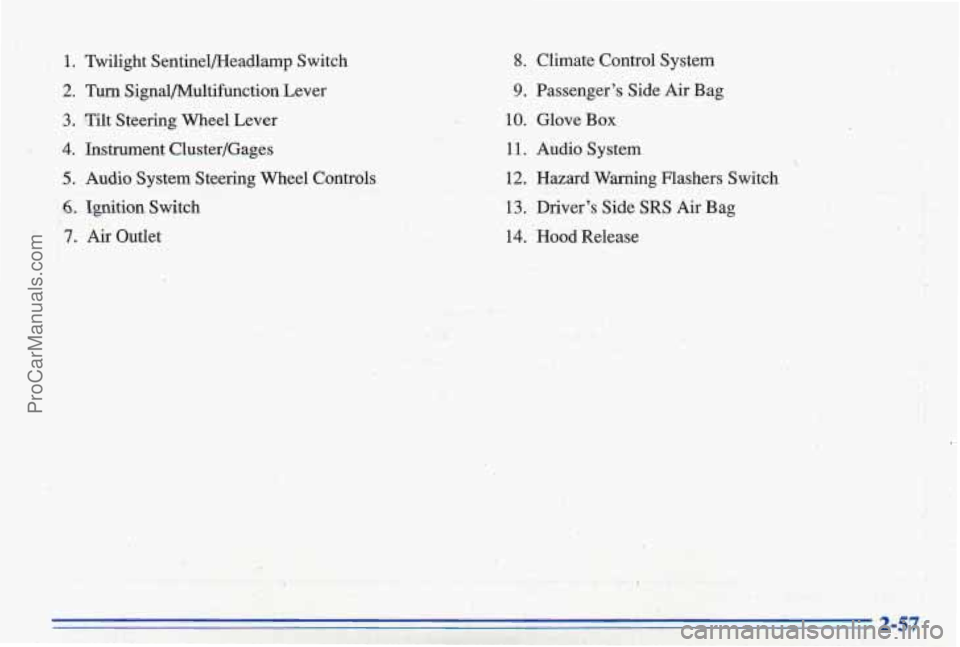
1. Twilight Sentinelmeadlamp Switch
2.
Turn Signal/Multifunction Lever
3. Tilt Steering Wheel Lever
I 2 ,,: '14. Instrument Cluster/Gages
c3; ;,5. Audio System Steering Wheel Controls
. ..
6. Ignition Switch
7. Air Outlet
8. Climate Control System
9. Passenger's Side Air Bag
10. Glove Box
11. Audio System
12. Hazard Warning Flashers Switch
.' -
13. Driver's Side SRS Air Bag
14. Hood Release
. .. .;: I . ,.< , , . I. . .. , , , ..
i: .
. I.
i
2-57
ProCarManuals.com
Page 109 of 387
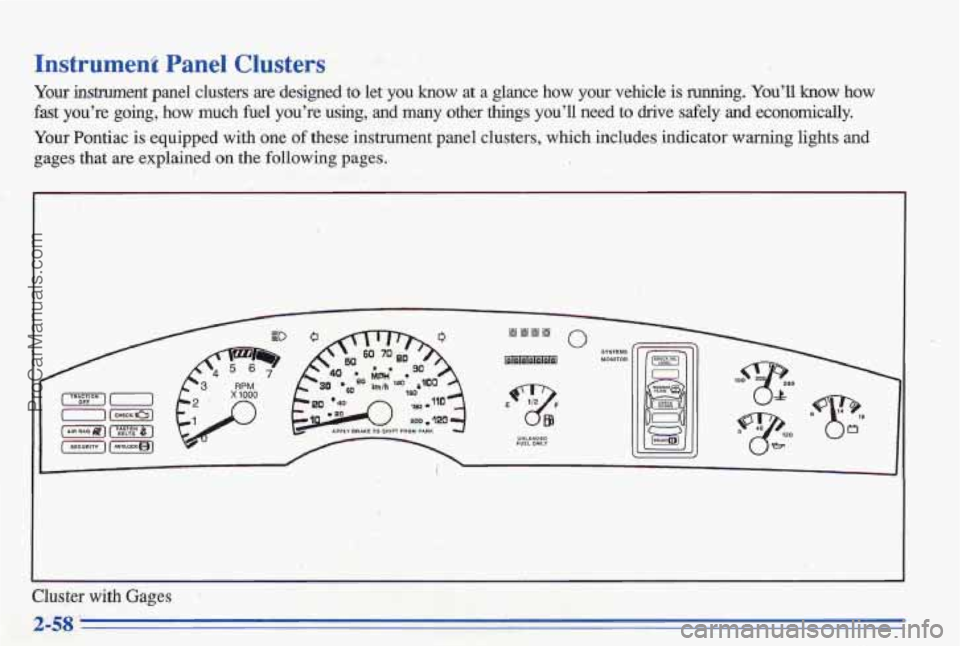
Instrument Panel Clusters
Your -ent panel clusters are designed to let you know at a glance how your vehicle is running. You’ll how how
fast you’re
going, how much fuel you’re using, and many other things you’ll need to drive safely and economically.
Your Pontiac
is equipped with one of these instrument panel clusters, which includes indicator warning\
lights and
gages that
are explained on the following pages.
m111
izlamam
0
FUEL ONLY UNLEIDEO 5%
Cluster with Gages
ProCarManuals.com
Page 127 of 387
Head-Up. Display (Opth)
If the HUD image is too bright, or too high in
.your field
of view, it may take you more time to
see things
you need to see when it's dark outside.
Be sure to keep
the HUD image dim and placed
low
in your field of view.
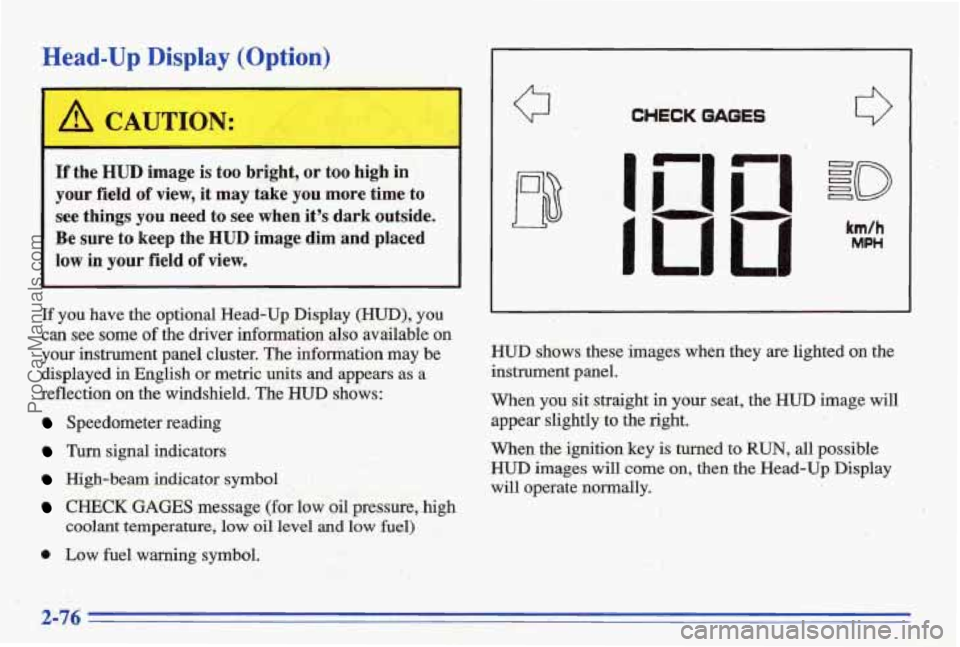
If you have the optional Head-Up Display (HUD), you
can see some
of the driver information also mailable on
your instrument panel cluster. The infomation may be
displayed in English or metric units and appears
as a
reflection on the wjndshield. The
HUD shows:
Speedometer reading
Turn signal indicators
High-beam indicator symbol
CHECK GAGES message (for law oil pressure, high
coolant temperature,
low oil level and low fuel)
0 Low fuel warning symbol.
Q CHECK GAGES
I
I
km/h
MPH
HWD shows these images when they are lighted on the
instrument
panel.
When you sit straight in your seat, the HUD image will
appear slightly to the right.
When
the ignition key is turned to RUN, all possible
HUD images will come on, then the Head-Up Display
will operate
normally,,
2-76
ProCarManuals.com
Page 129 of 387
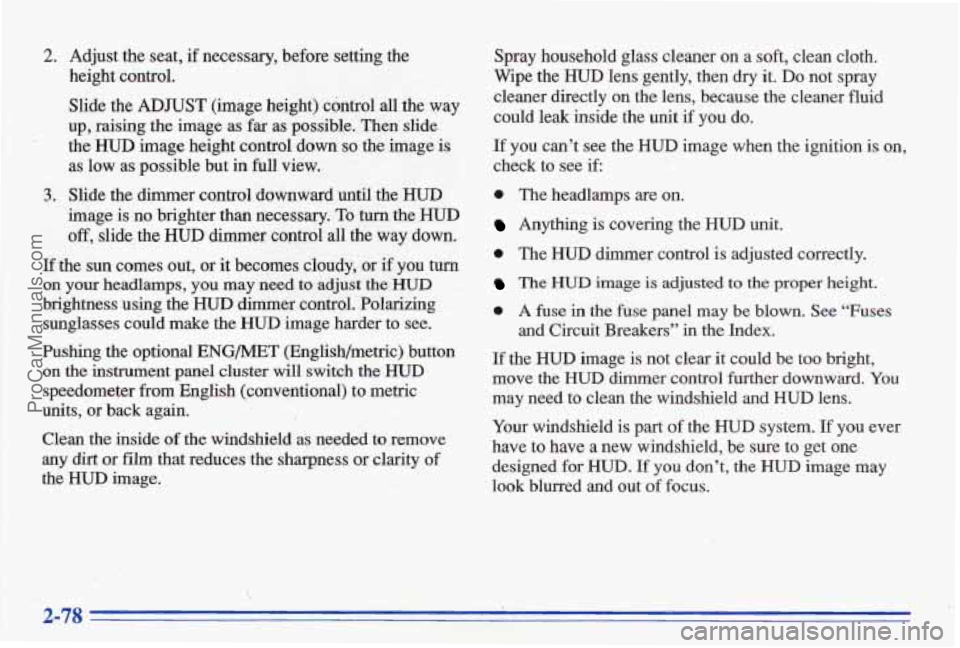
2. Adjust the seat, if necessary, b’efore setting the
height control.
Slide the
ADJUST (image height) cimtrol all the way
up,
raising the image as far ,as possible. Then slide
the HUD image height control down so the image is
as low as possible but in full view.
image
is no brighter than necessary. To turn the HUD
off, slide the HUB dimmer coptrol all the way down.
If the sun comes out, or it becomes cloudy, ur if you turn
on your headlamps, you may need to adjust them
brightness using the HUD ciirrmer co&ol. Polarizing
sunglasses could make
the HUD image harder to see.
Pushing $he uptional ENG/MET (English/metric) button
on the instrument panel cluster will switch the HUD
speedometer from English (conventional) to metric
units, or back again.
Clean the inside
of the windshield as needed to remove
any dirt or film -that reducesthe sharpness CJT clarity of
the HUD image.
3. Slide the dimmer control downward until the HUD
Spray household glass cleaner on a soft, clean cloth.
Wipe the
HUD lens gently, then dry it. Do not spray
cleaner directly on the lens, because the cleaner
fluid
could leak inside the unit if you do.
If you can’t see the HUD image when the ignition is on,
check
to see if:
0 The headlamps are on.
Anything is covering the HUD unit.
0 The HUD dimmer control is adjusted correctly.
The HUD image is adjusted to the proper height.
0 A fuse in the fuse panel may be blown. See “Fuses
and Circuit Breakas” in the Index.
If the F€WR image is not clear it could be too bright,
move the HUD dimmer control further downward. You
may need to clean the windshield and HUD lens.
Your windshield is part of the
HUD system. If you ever
have
to have a new windshield, be sure to get one
designed for WUD. If you don’t, the HUD image may
look blurred and out
of focus.
ProCarManuals.com
Page 306 of 387
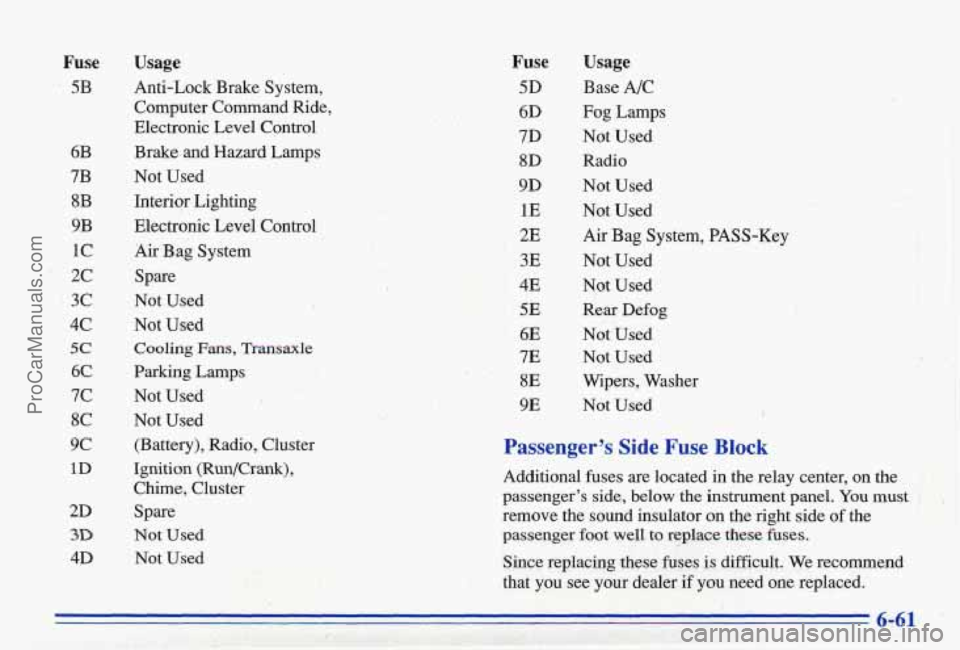
Fuse
5B
6B
7B 8B
9B
1c
2c
3c
4,c
5c
6C
7c
8C
9c
1D
2D
3D
4D
Usage
Anti-Lock Brake System, Computer Command Ride,
Electronic Level Control
Brake and Hazard Lamps
Not Used
Interior
I Lighting
Electronic Level Control
Air Bag System
Spare
Not Used
Not Used
Cooling Fans, Trmsmle
Parking Lamps
Not Used
Not Used (Battery), Radio, Cluster
Ignition (Run/Crank), Chime, Cluster
Spare
Not Used Not Used
Fuse
5D
6D
7D 8D
9D
1E
2E
3E
4E
5E
6E
7E
8E
9E
Usage
Base A/C
Fog Lamps
Not Used Radio
Not Used Not Used
Air Bag System, PASS-Key
Not Used
Not Used
Rear Defog
Not Used
Not Used
Wipers, Washer
Not Used
I
Passenger% Side Fuse Block
Additional fuses are located in the relay center, on the
passenger's side, below the instrument panel.
You must
.. : i',
.- . '! i . -." remove the sound insulator on the right side of the
>. passenger foot well to replace these fbses.
Since replacing these fuses is difficult. We recommend
that you see your dealer
if you need me replaced.
ProCarManuals.com
Page 379 of 387
Inspections Brake System
................................. 7-40
Exhaust Systems ............................. 7-40
Front-Wheel-Drive Axle Boot .................. 7-40
Front-Wheel-Drive Axle Seal ................... 7-40
Radiator and Heater Hose ...................... 7-40
Suspension ..................................... 7-40
Brightness Control ............................ 2-44
Cleaning .................................... 6-52
Cluster ..................................... 2-58
Steering .................................... 7-40
Throttle Linkage .............................. 7-40
Instrument Panel ............................... 2-56 .9
FuseBlock ................................... 6-59
InteriorLamps ................................. 2-4
Jack. Tire .....
Jump Starting ...
Key Lock Cylinders Service ..................... 7-37
Key Reminder Warning .......................... 2-1 8
Keys .......................................... 2-1
]Labels Certification ................................. 4-30
Certification/”ire ................................ 4-30
Service Parts Identification ..................... 6-57
Tire-Loading Information ....................... 4-30
Vehicle Identification Number ................... 6-57
Courtesy .................................... 2-44
Lamps ......................................... 2-41
...................................... 2-44
Monitor Message ............................. 2-80
ClnReminder ...........I....................,. 2-41
Leaving Your Vehicle ............................. 2-6
Leaving Your Vehicle with the Engine Running ....... 2-29
Light Sensor, Twilight Sentinel .......... ; ......... 2-43
Lighter ........................................ 2-53
Lights
i
Level Control, Electronic ......................... 4-31
Air Bag Readiness ........................ 1-17, 2-63
Anti-Lock Brake System Warning ............ 2-66, 4-6
Brake System Warning ......................... 2-65
Check Gages ................................... 2-74
Engine Oil Pressure Light ...................... 2-71
LOW Coolant Warning ......................... 2-68
Low Washer Fluid ............................ 2-74
Safety Belt Reminder .................. .’ ... 1-5, 2-63
Traction Control System Warning ............ 2-67. 4-8
Traction Off Warning ...................... 2-67, 4-8 Loading Your Vehicle ................ ..... 4-30
Anti-Lockout Feature .......................... 2-6
Automatic Door .. ; ............................. 2-4
. Battery Warning .............................. 2-64
Check Engine ................................. 2-69
Interior ..................................... 2-44
. Oil Level Warning ............ 8. ............... 2-72
Locks
Door ........................................ 2-3
FuelDoor .................................... 6-4
Key Lock Cylinder Service ...................... 7-37
PowerDoor ................................... 2-4 Rear Door Security ............................. 2-6
Steering Column Lock Check ................... 7-39
Tkunk ...................................... 2-11
Law Coolant Message .......................... .’2-79
. L .. .. I .. ....... . - .. ..._. .. , ProCarManuals.com