low oil pressure PONTIAC BONNEVILLE 1997 Owners Manual
[x] Cancel search | Manufacturer: PONTIAC, Model Year: 1997, Model line: BONNEVILLE, Model: PONTIAC BONNEVILLE 1997Pages: 405, PDF Size: 18.83 MB
Page 126 of 405
Oil Pressure Gage
0
h
120
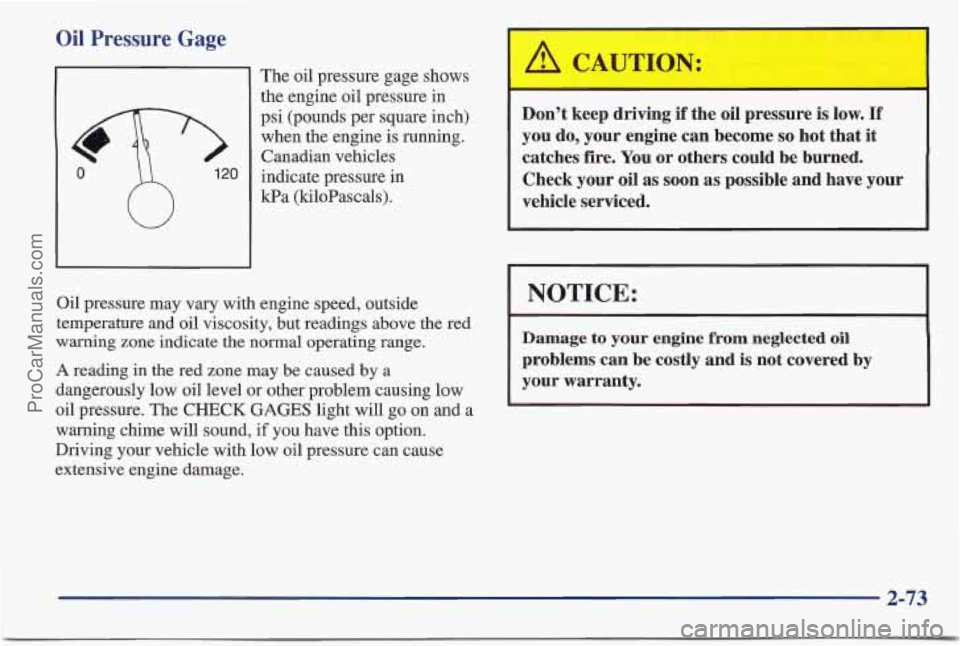
The oil pressure gage shows
the engine oil pressure in
psi (pounds per square inch)
when the engine is running.
Canadian vehicles
indicate pressure in
kPa (kiloPascals).
Oil pressure may vary with engine speed, outside
temperature and oil viscosity, but readings above the red
warning zone indicate
the normal operating range.
A reading in the red zone may be caused by a
dangerously low oil level or other problem causing low
oil pressure. The
CHECK GAGES light will go on and a
warning chime will sound, if you have this option.
Driving your vehicle with low oil pressure can cause
extensive engine damage.
A CAUTION:
Don’t keep driving if the oil pressure is low. If
you do, your engine can become so hot that it
catches fire. You
or others could be burned.
Check your oil as
soon ass possible and have your
vehicle serviced.
I NOTICE:
~~~ ~~ ~~
Damage to your engine from neglected oil
problems can be costly and is not covered by
your warranty.
1
2-73
ProCarManuals.com
Page 128 of 405
Check Gages Warning Light (Option)
1
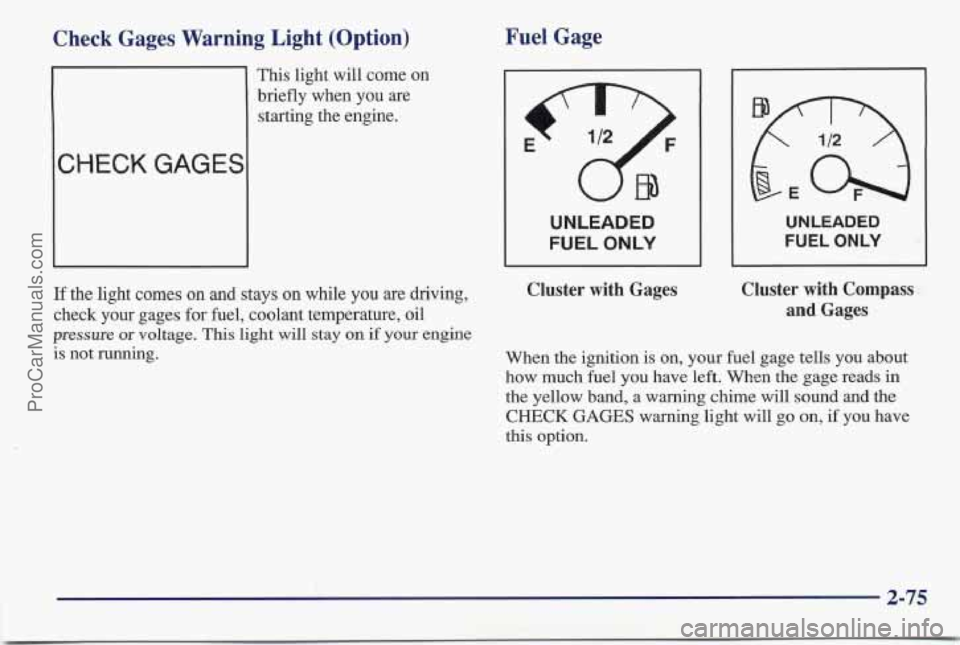
This light will come on
briefly when you are
starting the engine.
CHECK GAGES
Fuel Gage
UNLEADED
FUEL
ONLY
UNLEADED
FUEL ONLY
If the light comes on and stays on while you are driving,
check your gages
for fuel, coolant temperature, oil
pressure or voltage. This light will stay on if your engine
is not running.
Cluster with Gages Cluster with Compass
and Gages
When
the ignition is on, your fuel gage tells you about
how much fuel you have
left. When the gage reads in
the yellow band, a warning chime will sound and the
CHECK
GAGES warning light will go on, if you have
this option.
2-75
ProCarManuals.com
Page 130 of 405
Head-Up Display (Option)
If the HUD image is too bright, or too high in
your field of view, it may take you more time to
see things you need to see when it’s dark outside.
Be sure to keep the HUD image dim and placed
low in
your field of view.
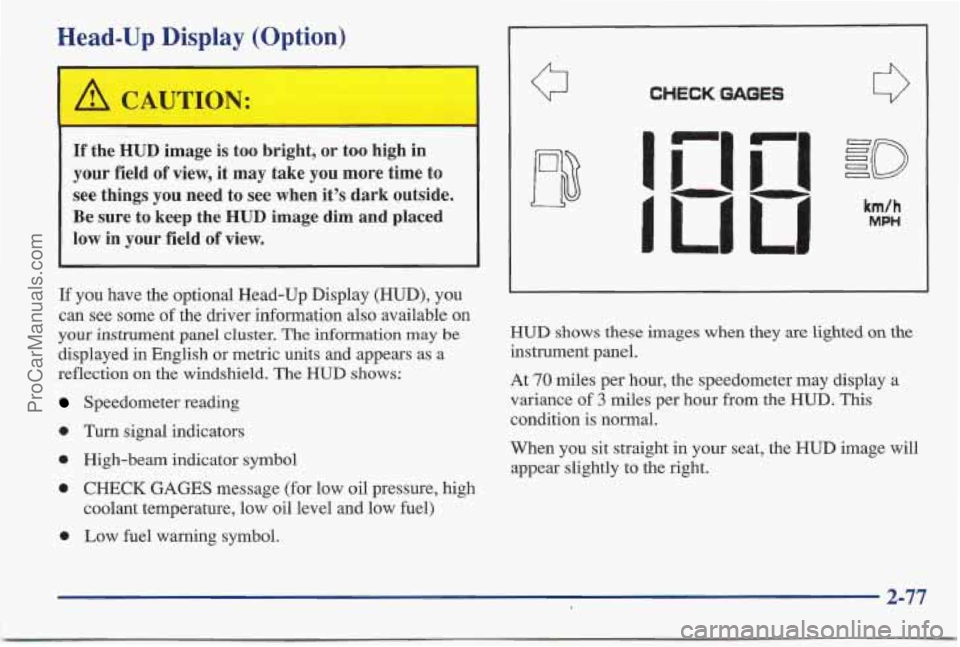
If you have the optional Head-Up Display (HUD), you
can see some of the driver information also available on
your instrument panel cluster. The information may be
displayed in English or metric units and appears as a
reflection on the windshield. The
HUD shows:
Speedometer reading
e Turn signal indicators
0 High-beam indicator symbol
0 CHECK GAGES message (for low oil pressure, high
0 Low fuel warning symbol.
coolant temperature, low oil level and
low fuel)
CHECK GAGES
HUD shows these images when they are lighted on the
instrument panel.
At
70 miles per hour, the speedometer may display a
variance of 3 miles per hour from the HUD. This
condition is normal.
When
you sit straight in your seat, the HUD image will
appear slightly to the right.
2-77
ProCarManuals.com
Page 133 of 405
Driver Information Centerloption
CHECK OIL LEVEL
WASHER FLUID
Law COOLANT
CHECK PAOEB
HOOD DOOR
TRUNK AJAR
I
MONITOR
LAMP I HI BEAM HEAD
PARK LAMP
TURN SIQNAL
BACK UP TAIL
BRAKE LAMP
TRIP
8 8 8 8.8
3
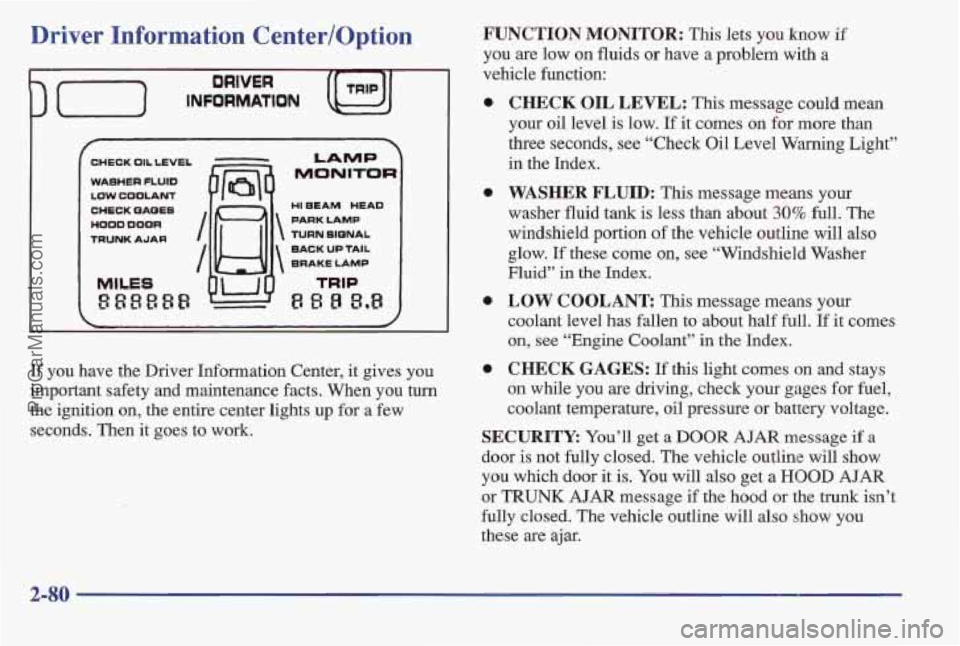
If you have the Driver Information Center, it gives you
important safety and maintenance facts. When you turn
the ignition on, the entire center lights up for a
few
seconds. Then it goes to work.
FUNCTION MONITOR: This lets you know if
you are low on fluids or have a problem with a
vehicle function:
a
a
CHECK OIL LEVEL: This message could mean
your oil level
is low. If it comes on for more than
three seconds, see “Check Oil Level Warning Light”
in the Index.
WASHER FLUID: This message means your
washer fluid tank is less than about 30% full. The
windshield portion
of the vehicle outline will also
glow. If these come on, see “Windshield Washer
Fluid”
in the Index.
LOW COOLANT This message means your
coolant level has fallen to about half full.
If it comes
on, see “Engine Coolant” in the Index.
CHECK GAGES: If this light comes on and stays
on while you are driving, check your gages for fuel,
coolant temperature, oil pressure or battery voltage.
SECURITY: You’ll get a DOOR AJAR message if a
door is not fully closled. The vehicle outline will show
you which door it is. You will also get a HOOD AJAR
or TRUNK AJAR message if the hood or the trunk isn’t
fully lclosed. The vehicle outline will also show you
these are ajar.
2-80
ProCarManuals.com
Page 196 of 405
The exit speed is usually posted.
Reduce your speed according to your speedometer, not
to your sense of motion. After driving for any distance
at higher speeds, you may tend to think you are going
slower than you actually are.
Before Leaving on a Long Trip
Make sure you’re ready. Try to be well rested. If you
must start when you’re not fresh
-- such as after a day’s
work
-- don’t plan to make too many miles that first part
of the journey. Wear comfortable clothing and shoes you
can easily drive in.
Is your vehicle ready for a long trip?
If you keep it
serviced and maintained, it’s ready to go.
If it needs
service, have
it done before starting out. Of course,
you’ll find experienced and able service experts
in
Pontiac dealerships all across North America. They’ll be
ready and willing
to help if you need it.
Here are some things you can check before a trip:
Windshield Washer Fluid: Is the reservoir full? Are
all windows clean inside and outside?
0 Wiper Blades: Are they in good shape?
Fuel, Engine Oil, Other Fluids: Have you checked
all levels?
Lamps: Are they all working? Are the lenses clean?
Tires: They are vitally important to a safe,
trouble-free trip.
Is the tread good enough for
long-distance driving? Are the tires all inflated to the
recommended pressure?
0 Weather Forecasts: What’s the weather outlook
along your route? Should you delay your trip a short
time to avoid a major storm system?
Maps: Do you have up-to-date maps?
4-23
ProCarManuals.com
Page 274 of 405
How to Check and Add Oil
Check oil only when the engine is cold. Allow the
engine to cool two to three hours after running.
If you remove the supercharger oil fill plug while
the engine
is hot, pressure may cause hot oil to
blow out
of the oil fill hole. You may be burned.
Do not remove the plug until the engine cools.
1. Clean the area around the oil fill plug before
removing it.
2. Remove the oil fill plug using a 3/16 inch
Allen wrench.
3. The oil level is correct when it just reaches the
bottom
of the threads of the inspection hole.
4. Replace the oil plug with the O-ring in place. Torque
to
88 lb-in (10 N-m).
Automatic Transaxle Fluid
When to Check and Change
A good time to check your autamatic transaxle fluid
level is when the engine
oil is changed.
Change both the fluid and filter every
50,000 miles
(83 000 km) if the vehicle is mainly driven under one
or more of these conditions:
0 In heavy city traffic where the outside temperature
regularly reaches
90 OF (32 O C) or higher.
In hilly or mountainous terrain.
When doing frequent trailer towing.
0 Uses such as found in taxi, police or delivery service.
If you do not use your vehicle under any
of these
conditions, the fluid and filter do not require changing.
See “Scheduled Maintenance Services”
in the Index.
6-21
ProCarManuals.com
Page 304 of 405
Cleaning the Inside of Your Pontiac
Use a vacuum cleaner often to get rid of dust and loose
dirt. Wipe vinyl or leather with a clean, damp cloth.
Your Pontiac dealer has two cleaners, a solvent-type
spot lifter and a foam-type powdered cleaner. They will clean normal spots and stains very well.
Do not use
them on vinyl
or leather.
Here are some cleaning tips:
1. Always read the instructions on the cleaner label.
2. Clean up stains as soon as you can -- before they set.
3. Use a clean cloth or sponge, and change to a clean area
often.
A soft brush may be used if stains are stubborn.
4. Use solvent-type cleaners in a well-ventilated area
5. If a ring forms after spot cleaning, clean the entire
only. If you
use them, don’t saturate the stained area.
area immediately or
it will set.
Using Foam-Type Cleaner on Fabric
1. Vacuum and brush the area to remove any loose dirt.
2. Always clean a whole trim panel or section. Mask
3. Mix Multi-Purpose Powdered Cleaner following the
surrounding trim along
stitch or welt lines.
directions
on the container label.
4.
5.
6.
7.
8.
9.
Use suds only and apply with a clean sponge. Don’t
saturate the material and don’t rub it roughly.
As soon as you’ve cleaned the section, use a sponge
to remove the suds.
Rinse the section with a clean, wet sponge.
Wipe off what’s left with a slightly damp paper towel
or cloth.
Dry it immediately with a blow dryer.
Wipe with a clean cloth.
Using Solvent-Type Cleaner on Fabric
First, see if you have to use solvent-type cleaner at all.
Some spots and stains will clean off better with just
water
and mild soap.
If you need to use a solvent:
1.
2.
3.
4.
Gently scrape excess soil from the trim material with
a clean, dull knife or scraper.
Use very little cleaner, light pressure and clean cloths
(preferably cheesecloth). Cleaning should start at the
outside of the stain, “feathering” toward the center.
Keep changing to a clean section
of the cloth.
When you clean a stain from fabric, immediately
dry the
area with a blow dryer to help prevent a cleaning ring.
6-51
ProCarManuals.com
Page 319 of 405
Capacities and Spc Ltions
The following approximate capacities are given in English and metric conversions. Please refer to “Recommended
Fluids and Lubricants’’ in the Index for more information.
Automatic Transaxle AT (Overdrive)
Pan Removal and Replacement ......... ........................................ 6.0 quarts (6.1 L)
After Complete Overhaul .......................................................... 11 quarts (10.4 L)
Cooling System ................................................................. 13 quarts (12.3 L)
Engine Crankcase ............................................................... 4.5 quarts (4.3L)
When draining or replacing torque conver,ter, more fluid may be needed.
.......
Oil change with filter change
FuelTank ........................... ................................ 18 gallons (68 L)
Tire Pressures ................................... See Tire-Loading Information label on the driver’s door.
Refrigerant (R=134a), Air Conditioning ....................... See refrigerant charge label under the hood.
WheelNutTorque ............................................................ 100 lb-ft (140 N-m)
NOTE: All capacities are approximate. When adding, be sure to fill to the appropriate level, as recommended in this manual.
Air Conditioning Refrigerants
Not all air conditioning refrigerants are the same. If the air conditioning system in your vehicle needs refrigerant, be
sure the proper refrigerant is used.
If you’re not sure, ask your Pontiac dealer.
6-66
ProCarManuals.com