change time PONTIAC BONNEVILLE 2003 Owners Manual
[x] Cancel search | Manufacturer: PONTIAC, Model Year: 2003, Model line: BONNEVILLE, Model: PONTIAC BONNEVILLE 2003Pages: 418, PDF Size: 20.24 MB
Page 3 of 418
GENERAL MOTORS, GM, the GM Emblem, PONTIAC,
the PONTIAC Emblem and the name BONNEVILLE
are registered trademarks of General Motors
Corporation.
This manual includes the latest information at the time it
was printed. We reserve the right
to make changes
after that time without further notice. For vehicles first
sold in Canada, substitute the name “General Motors of
Canada Limited” for Pontiac Division whenever it
appears in this manual.
Please keep this manual in your vehicle,
so it will be
there
if you ever need it when you’re on the road. If you
sell the vehicle, please leave this manual in it
so the
new owner can use it.
Litho
in USA.
Part No. 25735874 A First Edition
Canadian Owners
You can obtain a French copy of this manual from your
dealer or from:
Helm, Incorporated P.O. Box 07130
Detroit,
MI 48207
How to Use This Manual
Many people read their owner’s manual from beginning
to end when they first receive their new vehicle.
If
you do this, it will help you learn about the features and
controls for your vehicle. In this manual, you’ll find
that pictures and words work together to explain things.
Index
A good place to look for what you need is the Index in
back of the manual. It’s an alphabetical list
of what’s
in the manual, and the page number where you’ll find it.
@Copyright General Motors Corporation
06/19/02
All Rights Reserved
ii
Page 70 of 418
Remote Keyless Entry System
If equipped, the keyless entry system operates on a
radio frequency subject to Federal Communications
Commission (FCC) Rules and with Industry Canada.
This device complies with Part 15 of the FCC Rules.
Operation is subject to the following two conditions:
1. This device may not cause interference, and
2. This device must accept any interference received,
including interference that may cause undesired
operation of the device.
This device complies with RSS-210 of Industry Canada.
Operation is subject to the following two conditions:
1. This device may not cause interference, and
2. This device must accept any interference received,
including interference that may cause undesired
operation of the device. Changes
or modifications to this system by other than
an authorized service facility could void authorization to
use this equipment.
At times you may notice a decrease in range. This is
normal for any remote keyless entry system.
If the
transmitter does not work or
if you have to stand closer
to your vehicle for the transmitter to work, try this:
e
e
Check the distance. You may be too far from your
vehicle. You may need to stand closer during
rainy or snowy weather.
Check the location. Other vehicles or objects may
be blocking the signal. Take a few steps to the
left or right, hold the transmitter higher, and
try again.
Check to determine if battery replacement is
necessary. See
“Battery Replacement” under
Remote Keyless Entry System Operation on
page
2-6.
If you are still having trouble, see your dealer or a
q~Ia!ified technician for service.
2-5
Page 73 of 418
To change to another mode, do the following:
the ignition on throughout this procedure.
in LOCK through Step
4.
1. Keep all doors closed, the vehicle in PARK (P) and
2. Press and hold the driver’s power door lock switch
3. Press the button with the trunk symbol on the
transmitter. The transmitter will remain in its
current mode and the horn will chirp as feedback.
4. Press the button with the trunk symbol again. Each
time the transmitter’s trunk button is pressed, the
mode will advance by one, going from Mode
2 to 3
to 4, etc. and the horn will chirp as feedback.
5. Release the power door lock switch. The security
feedback will remain in the most recent mode
selected.
This procedure changes the mode for the transmitter
used
to change this setting. The procedure will need to
be repeated for the second transmitter.
To verify the mode selected, remove the key from the
ignition and close all
of the doors after you’ve exited the
vehicle. Press the lock button
on the transmitter to be
verified and confirm the appropriate feedback. Repeat with the unlock button.
Matching Transmitter(s) to Your
Vehicle
Each remote keyless entry transmitter is coded to
prevent another transmitter from unlocking your vehicle.
If a transmitter is lost or stolen, a replacement can
be purchased through your dealer. Remember
to bring
any remaining transmitters with you when you go
to
your dealer. When the dealer matches the replacement
transmitter
to your vehicle, any remaining transmitters
must also be matched. Once your dealer has coded the
new transmitter, the lost transmitter will not unlock
your vehicle. Each vehicle can have a maximum of four
transmitters matched
to it.
See your dealer
to match additional transmitters to your
vehicle.
2-8
Page 74 of 418
Battery Replacement
Under normal use, the battery in your remote keyless
entry transmitter should last about four years.
You can tell the battery is weak
if the transmitter won't
work at the normal range in any location.
If you have
to get close to your vehicle before the transmitter works,
it's probably time to change the battery.
Notice: When replacing the battery, use care not to
touch any of the circuitry. Static from your body
transferred to these surfaces may damage the
transmitter.
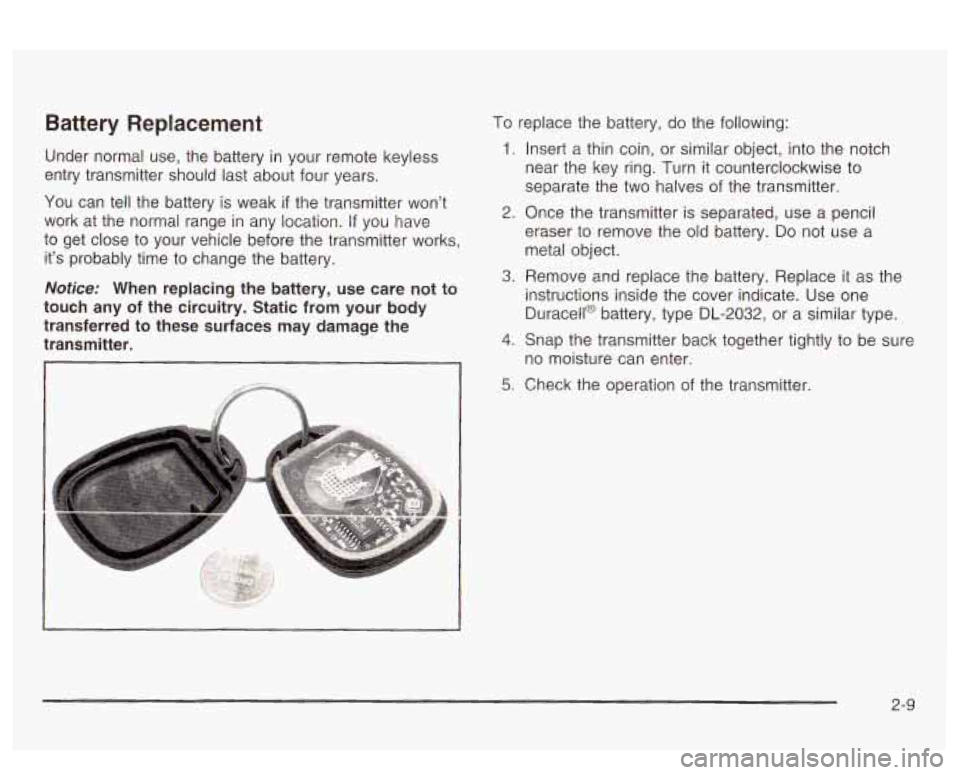
To replace the battery, do the following:
1. Insert a thin coin, or similar object, into the notch
near the key ring. Turn
it counterclockwise to
separate the two halves of the transmitter.
2. Once the transmitter is separated, use a pencil
eraser to remove the old battery.
Do not use a
metal object.
A. Remove and replace the battery. Replace it as the
instructions inside the cover indicate. Use one
Duracell@ battery, type DL-2032, or a similar type.
4. Snap the transmitter back together tightly to be sure
no moisture can enter.
5; Check the operation of the transmitter.
2-9
Page 77 of 418
Delayed Locking
This feature lets the driver delay the actual locking of
the vehicle. When the driver’s power door lock switch or
the remote keyless entry lock button is pressed, with
the key removed from the ignition and the driver’s door
open, a chime will sound three times to signal that
the delayed locking system
is active. When all doors
have been closed, the doors will lock automatically after
five seconds.
If any door is opened before this, the
five-second timer will reset itself once all the doors have
been closed again.
Pressing a power door lock switch or the remote
keyless entry lock button again will override this feature.
Personalization Programming
The delayed locking feature can be turned on or off.
If your vehicle is not equipped with remote keyless
entry, the delayed locking feature can be turned on
or
off by using the following procedure:
1. Keep all doors closed, the vehicle in PARK (P) and
the ignition on throughout this procedure.
2. Press and hold the driver’s power door lock switch
in LOCK through Step
4.
3. Cycle the parking lamp switch from off to on six
times. On the sixth cycle, the doors will unlock to
confirm that the feature has been turned on.
Your doors will remain locked
if delayed locking is
off. If the doors unlock, delayed locking is on.
switch once more.
A locking action will confirm
the new mode.
4. To change modes, cycle the parking lamp
5. Release the power door lock switch.
If your vehicle is equipped with the Driver Information
Center
(DIC), you must program this feature through the
DIC. See
DIC Vehicle Personalization on page 3-62.
2-1 2
Page 78 of 418
To turn the feature off, repeat the previous procedure.
If your vehicle is equipped with remote keyless
entry, your vehicle can be programmed to each driver’s
preference for each of the transmitters. Use the
following procedure to turn the feature
off using the
corresponding transmitter:
1. Keep all doors closed, the vehicle in PARK (P) and
the ignition on throughout this procedure.
2. Press and hold the power door lock switch in LOCK
throughout this procedure. All the doors will lock.
3. Press the button with the unlock symbol on the
transmitter. The lock delay is still on and all the
doors will unlock.
4. Press the button with the unlock symbol on the
transmitter again. Lock delay is now
off and all
the doors will lock.
5. Release the power door lock switch.
To turn this teature on, repear tne previous proceciure.
This procedure changes the mode for only the
transmitter used to change this setting. The procedure
will need to be repeated for the second transmitter.
Programmable Automatic
Door Locks
Close the doors and turn on the ignition. Every time you
move the shift lever out of PARK (P), all of the doors
will lock. And, every time you stop and move the
shift lever into PARK (P), the
doors will unlock. If
someone needs to get out while you’re not in PARK (P),
have that person use the manual door lock or the
power door lock switch. When the door
is closed again,
it will not lock automatically, Use the manual door
lock or the power door lock switch to lock the
door again.
Personalization Programming
You can program the automatic door lock feature to
change to the following modes:
Mode 0: No automatic door lock or unlock.
Mode 1: All doors automatically lock when shifted out
of PARK (P).
No automatic door unlock.
Mode 2: All doors automatically lock when shifted out
of PARK (P). Only the driver’s door automatically
unlocks when shifted into PARK (P).
Mode 3: All doors automatically lock when shifted out
of PARK (P). All doors automatically unlock when shifted
into PARK (P).
2-1 3
Page 79 of 418
Mode 4: All doors automatically lock when shifted out
of PARK
(P). Only the driver‘s door automatically
unlocks when the key is turned to
OFF (DIC equipped
vehicles only).
Mode 5: All doors automatically lock when shifted out
of PARK (P).
All doors automatically unlock when
the key is turned to
OFF (DIC equipped vehicles only).
If your vehicle is equipped with the Driver Information
Center (DIC), you must program this feature through the
DIC. See
DIC Vehicle Personalization on page 3-62.
If your vehicle is not equipped with remote keyless entry,
use the following procedure to change modes:
1.
2.
3.
4.
Keep all doors closed, the vehicle in PARK (P) and
the ignition on throughout this procedure.
Press and hold the driver’s power door lock switch
in LOCK through Step
3.
Cycle the shift lever, starting in PARK (P), out of
PARK (P) and then back into PARK
(P), to
advance by one mode for each cycle.
After the first cycle, you will hear a door locking
action, which identifies the current mode.
Release the power door lock switch. The automatic
door locks will remain in the most recent mode
selected.
If your vehicle is equipped with remote keyless entry,
use the following procedure to change modes:
1.
2.
3.
4.
5.
Keep all doors closed, the vehicle in PARK (P) and
the ignition on throughout this procedure.
Press and hold the driver’s power door lock switch
in LOCK through Step
4.
Press the button with the lock symbol on the
remote keyless entry transmitter. The automatic
door locks will remain in the current mode.
Press the button with the lock symbol on the
transmitter again. Each time the transmitter’s
lock button is pressed, the mode will advance by
one, going from
3 to 0 to 1, etc.
The door locks will cycle according to the mode
entered. (Mode
“0 has no feedback.)
Release the power door lock switch. The automatic
door locks will remain in the most recent mode
selected.
This procedure changes the mode for only the
transmitter used to change this setting. The procedure
will need to be repeated for the second transmitter.
2-1 4
Page 92 of 418
Notice: Holding your key in START for longer than
15 seconds at a time will cause your battery to
be drained much sooner. And the excessive heat
can damage your starter motor. Wait about
15
seconds between each try to help avoid draining
your battery
or damaging your starter.
2. If it doesn’t start within 10 seconds, hold your key in
START for about
10 seconds at a time until your
engine starts. Wait about 15 seconds between
each try.
stops), it could be flooded with too much gasoline.
Try pushing your accelerator pedal all the way to the
floor and holding it there as you hold the key
in
START for about three seconds. If the vehicle starts
briefly but then stops again, do the same thing.
This time keep the pedal down for five or six
seconds to clear the extra gasoline from the engine.
After waiting about 15 seconds, repeat the normal
starting procedure.
3. If your engine still won’t start (or starts but then
Notice: Your engine is designed to work with the
electronics
in your vehicle. If you add electrical
parts or accessories, you could change the way the
engine operates. Before adding electrical equipment,
check with your dealer. If you don’t, your engine might not perform properly.
Engine Coolant Heater
If your vehicle has this feature, in very cold weather,
0°F (-18°C) or colder, the engine coolant heater
can help. You’ll get easier starting and better fuel
economy during engine warm-up. Usually, the coolant
heater should be plugged in a minimum of four
hours prior to starting your vehicle. At temperatures
above
32°F (OOC), use of the coolant heater is not
required.
2-27
Page 103 of 418
Mirrors
Manual Rearview Mirror
When you are sitting in a comfortable driving position,
adjust the mirror
so you can see clearly behind your
vehicle. Grip the mirror in the center to move it up
or down and side to side. The dayhight adjustment
allows you
to adjust the mirror to avoid glare from any
headlamps behind you. Push the tab away from
you for daytime use; pull it toward you for night use.
Automatic Dimming Rearview Mirror
Your vehicle may have an automatic dimming rearview
mirror. Your vehicle’s mirror may also contain Onstar@
controls. See
OnStaP System on page 2-40 for
more information.
At night, when the glare is too high, the mirror will
gradually darken to reduce glare. This change may take
a few seconds. The mirror will return to its clear
daytime state when the glare is reduced.
Mirror Operation
AUTO: Press this button to turn on the automatic
dimming feature.
OFF: Press this button to turn off the automatic
dimming feature.
6 (On/Off): For mirrors equipped with OnStaP
controls, press this button to turn on the automatic
dimming feature. To turn
off automatic dimming, press
this button again.
The indicator light will be illuminated when this feature
is active.
Outside Power Mirrors
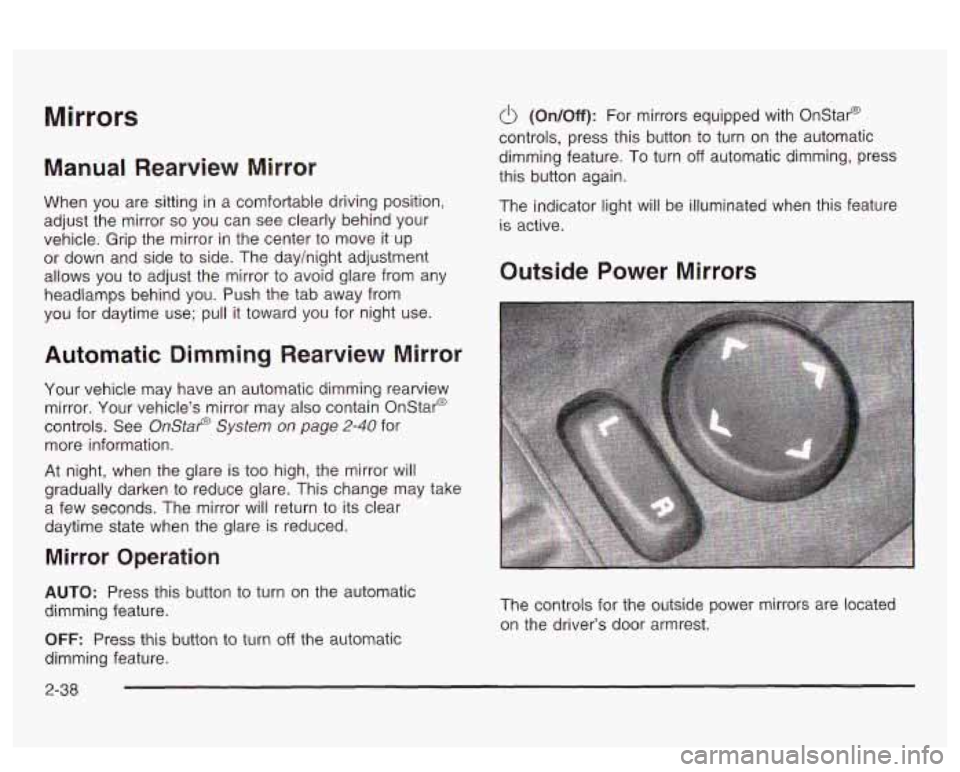
The controls for the outside power mirrors are located
on the driver’s door armrest.
2-38
Page 117 of 418
Section 3 Instrument Panel
Systems Monitor ............................................ 3.55
Driver Information Center (DIC) ....................... 3.57
DIC Controls and Displays
............................. 3.57
DIC Warnings and Messages
........................ -3-60
Driver Identifier DIC Display
........................... 3.61
DIC Vehicle Personalization
............................ 3.62
Center (SIC) ................................................ 3.68
Electronic Compass
...................................... 3.68
Audio System(s) ............................................. 3.71
Setting the Time
........................................... 3.71
Secondary Information
Radio with CD .............................................. 3.72
Radio with Cassette and CD
.......................... 3.82
Trunk-Mounted
CD Changer ........................... 3-94
Theft-Deterrent Feature
.................................. 3.98
Audio Steering Wheel Controls
....................... 3.98
Understanding Radio Reception
...................... 3.99
Care
of Your Cassette Tape Player ............... 3-100
Care of Your
CDs ....................................... 3.100
Care of Your CD Player ............................... 3.101
Diversity Antenna System
............................. 3.101
XM Satellite Radio Antenna System ............... 3.101
Chime Level Adjustment
............................... 3.101
3-2