manual radio set PONTIAC FIREBIRD 1996 Owners Manual
[x] Cancel search | Manufacturer: PONTIAC, Model Year: 1996, Model line: FIREBIRD, Model: PONTIAC FIREBIRD 1996Pages: 386, PDF Size: 19.18 MB
Page 54 of 386

Leaving Your Vehicle
If you are leaving the vehicle, take your keys, open your
door and set the locks from inside. Then get out and
close the door.
Remote Lock Control (Option)
3-Button Transmitter 4-Button Transmitter
If your Pontiac has this option, you can lock and
unlock your doors or unlock your hatch up to about
30 feet (9 m) using the key chain transmitter supplied
with your car. Your
Remote
Lock Control operates on a radio
frequency subject to Federal Communications
Commission (FCC) Rules.
This device complies with Part
15 of the FCC Rules.
Operation is subject to the following two conditions:
(1) This device may not cause harmful interference, and
(2) This device must accept any interference received,
including interference that may cause undesired
operation.
Should interference to this system occur, try this:
Check to determine if battery replacement is
necessary. See the instructions on battery
replacement.
vehicle. This product has a maximum range.
be blocking the signal.
Cheek the distance. You may be too far from your
Check the location. Other vehicles or objects may
See your Pontiac dealer or a qualified technician
Changes or modifications to this system by other than
an authorized service facility could void authorization to
use this.equipment.
for
service.
ProCarManuals.com
Page 65 of 386

Feature Customization (Option)
Your Pontiac’s locks and lighting systems can be
programmed with several, different features.. The
features you can program depend upon the options that
came with your vehicle. The following list tells you the
features that can be programmed. Listed next
to each
feature is the option you need to have on your vehicle in
order to be able to program that particular feature.
Exit Lighting (available for all)
Delayed Illumination (available for all)
Last Door Closed Locking
(if equipped with power
door locks)
Lockout Prevention
(if. equipped with power
door locks)
Remote Lock Control Verification (if equipped with
Vehicle and Content Theft-Deterrent System)
Theft-Deterrent Arming.
Method (if equipped with
Vehicle and Content Theft-Deterrent System)
Theft-Deterrent Arming Verification
(if equipped
with Vehicle and Content Theft-Deterrent System)
Driver’s Door Alarm Delay (if equipped with
Vehicle and Content Theft-Deterrent System)
Shock Sensor Enable
(if equipped with Vehicle and
Content Theft-Deterrent System) To
program features, your vehicle must be
in the
programming mode. Follow these steps:
1. Put your key in the ignition.
2. Turn the ignition to the RUN position to disarm the
3. Turn the ignition to the OFF position.
4. Remove the RADIO fuse. This fuse is in the main
Vehicle .and Content Theft-Deterrent System.
fuse block, located on the left side of your
instrument panel. See “Fuses and Circuit Breakers”
in the Index.
5. Put the ignirion in the ACC posmon.
You should hear a chime to veiify that the system is
in programming mode. If the chime sounds once,
you will be able to program Exit Lighting, Delayed
Illumination, Last Door Closed Locking and Lockout
Prevention only.
If the chime sounds twice and your
vehicle
is equipped with the Vehicle and Content
Theft-Deterrent System, you will also be able to set
Remote Lock Control Verification, Arming Method,
Arrning Verification, Driver’s Door Delay and Shock
Sensor Enable.
2-16
ProCarManuals.com
Page 69 of 386

Mode 3: Horn and LampsLamps (If you use the
transmitter to arm the system, your parking lamps will
flash and your horn will chirp twice
to verify that the
system is armed.
If you use either the power door lock
switch or passive arming, only your lamps will flash
for verification).
Mode 4: Lamps (When your vehicle arms, only your
parking lamps will flash for verification).
Driver’s Door Alarm Delay and Shock
Sensor Enable
Your vehicle comes with this feature set in Mode 4.
This means that if you open the driver’s door using
your key, the alarm will not
soand for eight seconds.
Also the sho’ck sensor, able
to detect sharp blows to
your vehicle is active. To change the factory setting, do
the following:
1.
2.
3.
Turn the parking lamps on and off.
Count the number of chimes you hear. The number of
chimes tells you which mode your vehicle is set for.
Turn the parking Imps on and off until you’hear the
number
of chimes that correspond to the mode
selection
you want.
Mode 1: Zero Del,ay and Shock Sensor Disabled (The
alarm will sound immediately if the driver’s door is
opened with your key and the shock sensor will not be
available
to measure sharp blows to your vehicle).
Mode 2: Eight Second Delay and Shock Sensor
Disabled (The alarm will sound eight seconds after the
driver’s door is opened with your key and the shock
sensor will not be available to measure sharp blows to
,
your vehicle).
Mode 3: Zero Delay and Shock Sensor Enabled (The
alarm will sound immediately after the driver’s door is
opened
with your key and the shock sensor will be
available to measure sharp blows to your vehicle).
Mode 4: Eight Second Delay and Shock Sensor Enabled
(The alarm will sound eight seconds’ after the driver’s
door is opened with your key and the shock sensor will
be available to measure sharp blows to your vehicle). :
Leaving Programming Mode
When programming is done, turn the ignition switch to
the
OW position and replace the RADIO fuse.
. ,,.
2-20
ProCarManuals.com
Page 143 of 386
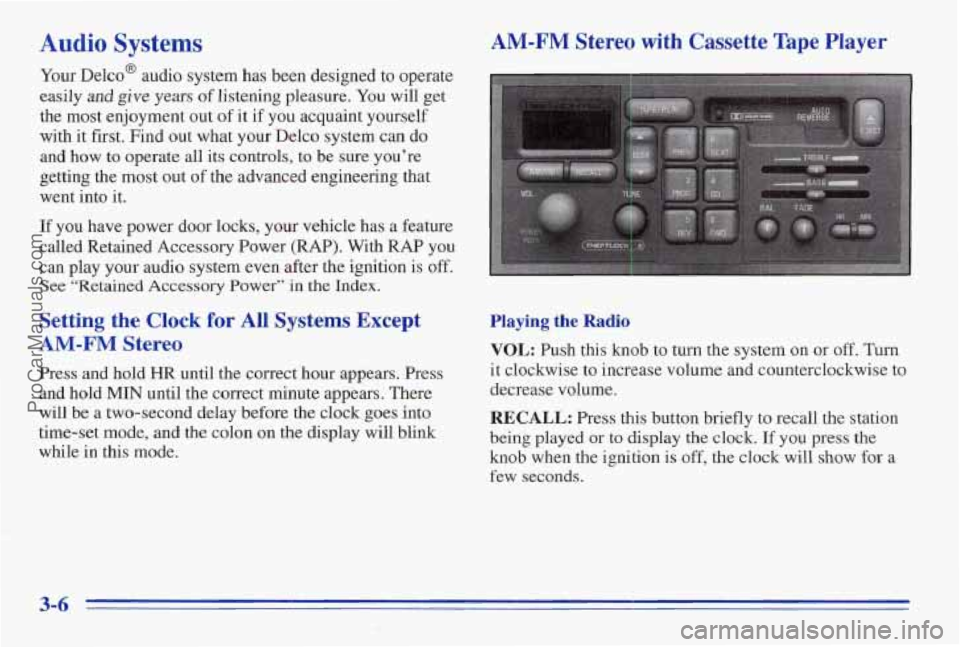
Audio Systems
Your Delco@ audio system has been designed to operate
easily and give years of listening pleasure. You will get
the most enjoyment out of it if you acquaint yourself
with
it first. Find out what your Delco system can do
and how to operate all its controls, to be sure you’re
getting the
most out of the advanced engineering that
went into it.
If you have power door locks, your vehicle has a feature
called Retained Accessory Power
(RAP). With RAP you
can play your audio system even after the ignition is
off.
See “Retained Accessory Power” in the Index.
Setting the Clock for All Systems Except
AM-FM Stereo
Press and hold HR until the correct hour appears. Press
and hold
MIN until the correct minute appears. There
will
be a two-second delay before the clock goes into
time-set mode, and the colon
on the display will blink
while in this mode.
AM-FM Stereo with Cassette Tape Player
Playing the Radio
VOL: Push this knob to turn the system on or off. Turn
it clockwise to increase volume and counterclockwise to
decrease volume.
RECALL: Press this button briefly to recall the station
being played or
to display the clock. If you press the
knob when the ignition is
off, the clock will show for a
few seconds.
3-6
ProCarManuals.com
Page 144 of 386
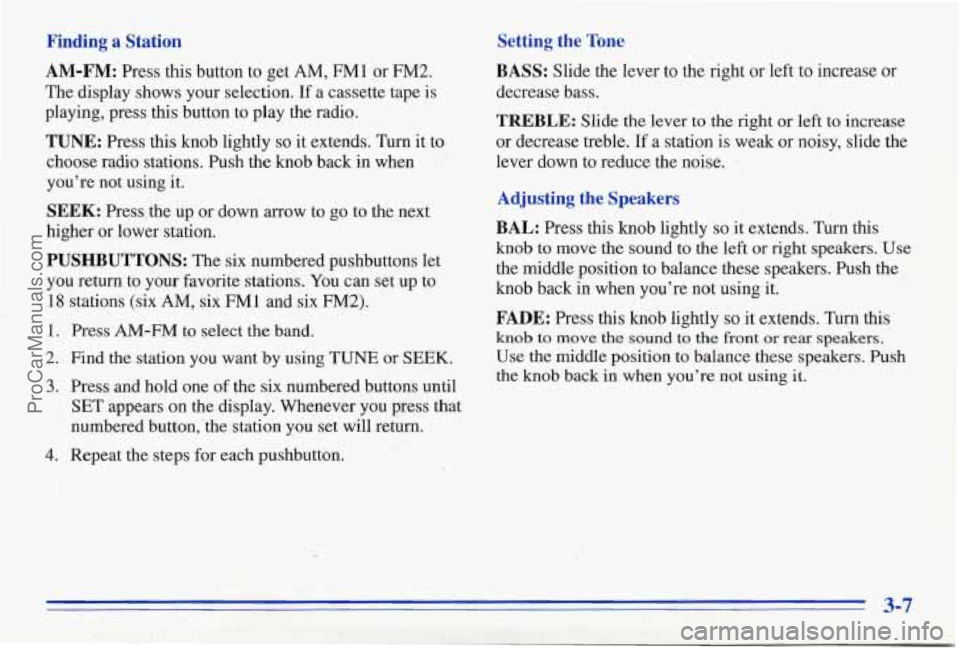
Finding a Station
AM-FM:
Press this button to get AM, €341 or FM2.
The display shows your selection.
If a cassette tape is
playing, press this button to play the radio.
TUNE: Press this knob lightly so it extends. Turn it, to
choose radio stations. Push the knob back in when
you’re nat using it.
SEEK: Press the up or down arrow to go to the next
higher or lower station.
PUSHBUTTONS: The six numbered pushbuttons let
you return to your favorite stations. You can set up to
18 stations (six AM,.six FM1 and six FM2).
Setting the Tone
1. Press AM-FM to select the band.
2. Find the station you want by using TUNE or SEEK.
3. Press and hold one of the six numbered buttons until
SET appears on the display. Whenever you press that
numbered button,’the station you set
will return.
4. Repeat the steps for each pushbutton.
BASS: Slide the lever to the right or left to increase or
decrease bass.
TREBLE: Slide the lever to the right or left to increase
or decrease treble.
If a station is weak or noisy, slide the
lever down to reduce the noise.
Adjusting the Speakers
BAL:
Press this knob lightly so it extends. Turn this
knob to move the sound to the left or right speakers. Use
the middle position to balance these speakers. Push the
knob back in when you’re not using it.
FADE: Press this knob lightly so it extends. Turn this
knob to move the sound to the front or rear speakers.
Use the middle position to balance these speakers. Push
the
knob back in when you’re not using it.
3-7
ProCarManuals.com
Page 145 of 386
Playing a Cassette Tape
Your tape player i,s built to work best with tapes that are
30 to 45 minutes long on each side. Tapes lohger than
that are
so thin they may not work'well in this player.
While the tape is playing, use the VOL, FADE, BAL,
TREBLE and BASS controls just as you do for the
radio. The display will show an arrow to show which
side
of the tape is playing. When the down indicator
~QW is lit, selections listed on the bottom side of the
cassette are playing. When the up arrow is lit, selections
listed
on the top side of the cassette are playing. The
tape player automatically begins playing the other side
when it reaches the end of the tape.
If
E and a number appear on the radio display, the tape
won't play because
of an error.
E10: The tape is tight and the player can't turn the
tape hubs. Remove the tape. Hold the tape with the
open end down and try to
9rn the right hub ,
counterclockwise with a pencil. Turn the tape over
and repeat.
If the hubs do not turn easily, your tape
may be damaged and should not be used in.the
player.
Try a new tape to make sure your player is
working properly.
0 Ell: The tape is broken. Try a new tape.
If any error occurs repeatedly or if an error can't be
corrected, please contact your dealer.
If your radm
displays an error number, write it down and provide it to
your dealer when reporting the problem.
PREV (1): Press this button or the SEEK down arrow to
search for thle previous selection on the tape. Your tape
, must have at least three seconds of silence between each
selection for PREV or
SEEK to work. The tape direction
arrow blinks during PREV or SEEK operation. Press
PREV or the SEEK down arrow to stop seqrching. The
sound is muted during PREV or SEEK operation.
NEXT (2): Press this button or the SEEK up arrow to
search for the next Selection
on the tape. If you hold the
button or press it more than once, the player will
continue moving forward through
the tape. Your tape
must have at least three seconds
of silence between each
selection for
NEXT or SEEK to work, The tape
direction
arrow blinks during NEXT or SEEK operation.
Press
PREV or the SEEK"up arrow to stop searching.
The sound is muted during NEXT or SEEK operation.
ProCarManuals.com
Page 146 of 386

PROG (3): Press this button to play the other side of
the tape.
00 (4): Press this button to reduce background noise.
Note that the double-D symbol will appear on the
display.
Dolby@ Noise Reduction is manufactured under
a
license from Dolby Laboratories Licensing Corporation.
Dolby and the double-D symbol
are trademarks of
Dolby Laboratories Licensing Corporation.
REV (5): Press this button to reverse the tape rapidly.
Press it again to return to playing speed. The radio will
play the last-selected station while the tape reverses.
You
may select stations during REV operation by using
SEEK or TUNE.
FWD (6): Press this button to advance quickly to
another part of the tape. Press the button again to return
to playing speed. The radio will play the last-selected
station while
the tape advances. You may select stations
during
FWD operation by using SEEK or TUNE.
AM-FM: Press this button to play the radio when a tape ~ '
is in the player.
TAPEPLAY; Press this button to change to the tape
function when the radio is
on. The tape symbol with an
arrow will appeq on the display when
the tape is active.
To return to playing the radio, press the
AM-FM buttm.
EJECT Press this button to remove the tape. The radio
will play. EJECT may be activated with either the
ignition or radio
off. Cassettes may be loaded with the
radio and ignition
off if this button is pressed first.
CLN: This message may appear on the display. If it
does, your cassette tape player needs to be cleaned.
It
will still play tapes, but you should clean it as soon as
possible to prevent damage to your tapes and player. See
"Care of Your Cassette Tape Player" in the Index. After
you clean the player, press and hold EJECT for five
seconds to reset
the CLN indicator. The radio will
display
--- to show the indicator was reset.
w ..
.-
3-9
ProCarManuals.com
Page 147 of 386
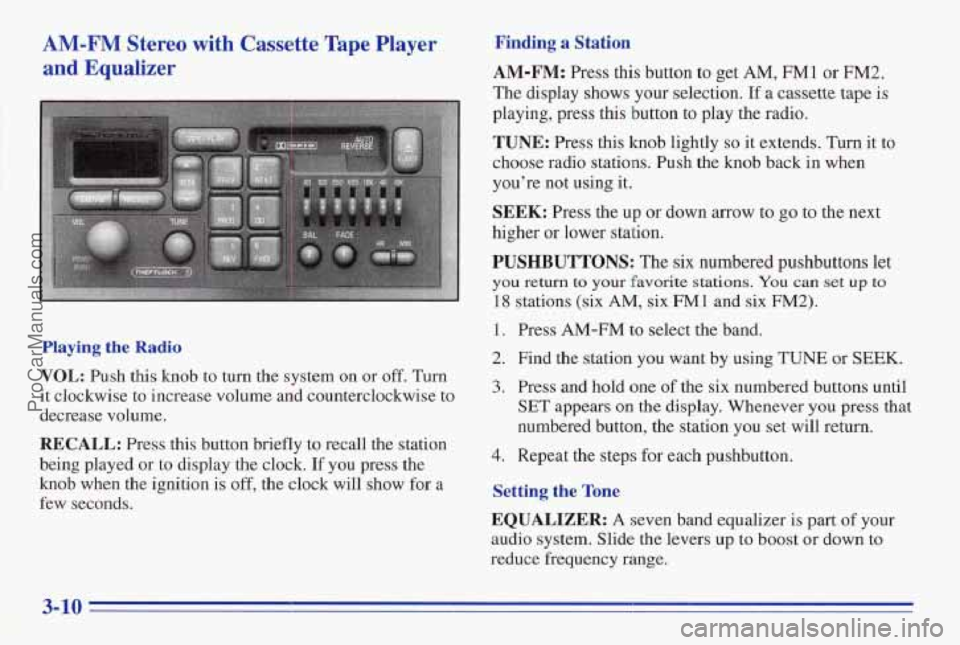
AM-FM Stereo with Cassette Tape Player
and Equalizer
Playing the Radio
VOL: Push this knob to turn the system on or off. Turn
it clockwise to increase volume and counterclockwise to
: 'decrease volume.
RECALL: Press this button briefly to recall the station
being played or to display the clock.
If you press the
knob when the ignition is off, the clock wiIl show for a
few seconds.
Finding a Station
AM-FM: Press this button to get AM, FM1 or FM2.
The display shows your selection. If a cassette tape is
playing, press this button to play the radio.
TUNE: 'Press this knob lightly so it extends. Turn it to
choose radio stations. Push the knob back in when
you're not using it.
SEEK: Press the up or down arrow to go to the next
higher or lower station.
PUSHBUTTONS: The six numbered pushbuttons let
you return to your favorite stations. You can set up to
18 stations (six AM, six FM1 and six FM2).
1. Press AM-FM to select the band.
2. Find the station you want by using
TUNE or SEEK.
3. Press and hold one of the six numbered buttons until
SET appears on the display. Whenever you press that
numbered button, the station you set will return.
4. Repeat the steps for each pushbutton.
Setting the Tone . .- I '.
EQUALIZER: A seven band equalizer is part of your
audio system. Slide the levers
up to boost or down to
reduce frequency range.
3-10
ProCarManuals.com
Page 148 of 386
Adjusting the Speakers
BAL:
Press this knob lightly so it extends. Turn it to
move the sound
to the left or right speakers. Use the
middle position to balance these speakers. Push the knob
back in when you’re not using it.
FADE: Press this knob lightly so it extends. Turn it to
move the sound
to the front or rear speakers. Use the
middle position to balance these speakers. Push the knob
back in when you’re not using it.
Playing a Cassette Tape
Your tape player is built to work best with tapes that are
30 to 45 minutes long on each side. Tapes longer than
that are
so thin they may not work well in this player.
While the tape is playing, use the VOLUME, FADE and
BAL c,ontrols just as you do for the radio. The display
will show an arrow
to show which side of the tape is
playing. When the down indicator arrow is lit, selections
listed on the bottom side of the cassette are playing.
When the up arrow is lit, selections listed on the top side
of the cassette are playing. The tape player
automatically begins playing
the other side when it
reaches
the end of the tape.
If E and a number appear on the radio display, the tape
won’t play because of an error.
0
0
ElO: The tape is tight and the player can’t turn the
tape hubs. Remove the tape. Hold the tape with the
open end down and try to
turn the right hub
counterclockwise with a pencil. Turn the tape over
and repeat. If the hubs do not turn easily, your tape
may be damaged and should not be used in the
player. Try a new tape to make sure your player is
working properly.
Ell: The tape is broken. Try a new tape.
If any error occurs repeatedly or if an error can’t be
corrected, please contact your dealer. If your radio
displays an error number, write it down and provide it to
your dealer when reporting the problem.
PREV (1): Press this button or the SEEK down arrow to
search for the previous selection on the tape. Your tape
must have at least three seconds
of silence between each
selection for PREV or SEEK to work. The tape direction
arrow blinks during PREV
or SEEK operation. Press
PREV or the
SEEK down arrow to stop searching. The
sound is muted during PREV or SEEK operation.
NEXT (2): Press this button or the SEEK up arrow to
search for
the next selection on the tape. If you hold the
button or press it more than once, the player will
continue moving forward through the tape. Your tape
must have
at least three seconds of silence between each
selection for NEXT or SEEK to work. The tape
3-11
ProCarManuals.com
Page 149 of 386

direction arrow blinks during NEXT or SEEK operation.
Press PREV or the
SEEK up arrow to stop searching.
The sound is muted during NEXT or SEEK operation.
PROG (3): Press this button to play the other side of
the tape.
(4): Press this button to reduce background noise.
Note that the double-D symbol will appear
on the
display.
Dolby Noise Reduction is manufactured under a license
from Dolby Laboratories Licensing Corporation. Dolby
and the double-D symbol
ark trademarks of Dolby
Laboratories Licensing Corp'oration.
REV (5): Press this button to'reverse the tape rapidly.
Press
it again to return to playing speed. The radio will
play the last-selected station while the tape reverses.
You may sel'ect stations during REV operation by using
SEEK or TUNE.
FWD (6): Press this button to advance quickly to
another part
of the tape. Press the button again to return
to playing speed. The radio will play
the last-selected
station while the tape advances.
You may select stations
during
FVJD operation by using SEEK or TUNE.
AM-FM: Press this button to play the radio when a tape
is
in the player.
WE/PLAX Press this button to change to the tape
function when the radio is on. The tape symbol with an
arrow will appear on the display when the tape is active.
To return to playing the radio, press the AM-FM button.
EJECT: Press this button to remove the tape. The radio
will play. EJECT may be activated with either the
ignition or radio
off. Cassettes may be loaded with the
radio
off if this button is pressed first.
CLN: This message may appear on the display. If it
does,
your cassette tape player needs to be cleaned. It
will still play tapes, but
you should clean it as soon as
possible to prevent damagt to. your tapes and player. See
"Care
of Your Cassette Tape Player" in the Index. After
you clean the player, press and hold EJECT for five
seconds to reset
the CLN indicator. The radio will
display
--- to show the indicator was reset.
3-12 ,
ProCarManuals.com