fuse PONTIAC FIREBIRD 1997 Owners Manual
[x] Cancel search | Manufacturer: PONTIAC, Model Year: 1997, Model line: FIREBIRD, Model: PONTIAC FIREBIRD 1997Pages: 410, PDF Size: 19.2 MB
Page 6 of 410

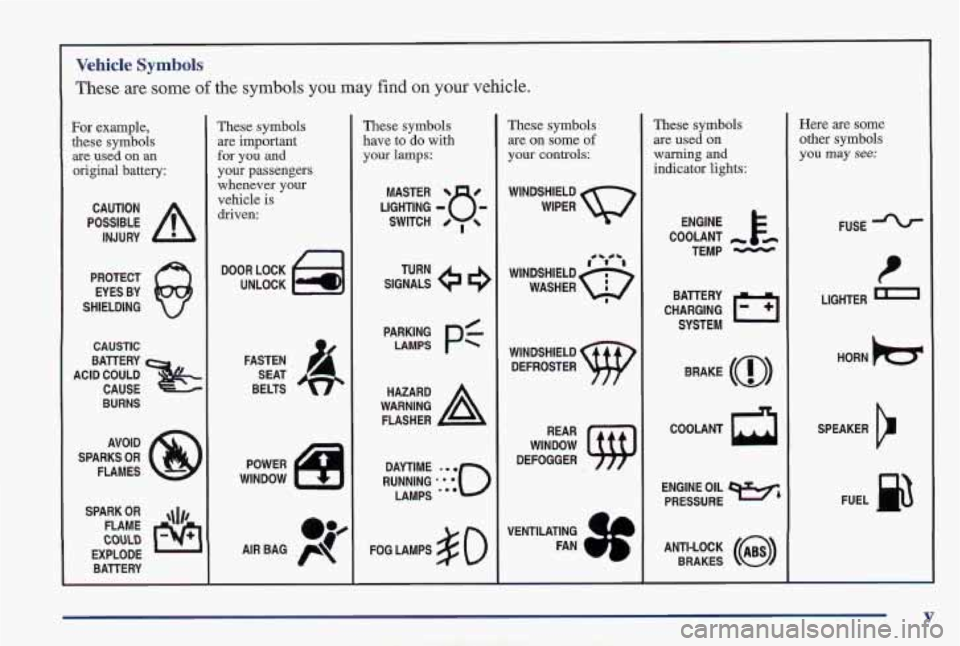
Vehicle Symbols
These are some of the symbols you may find on your vehicle.
For example,
these symbols
are used on an
original battery:
POSSIBLE A
CAUTION
INJURY
PROTECT EYES BY
SHIELDING
CAUSTIC
ACID COULD BATTERY
CAUSE
BURNS
AVOID
SPARKS
OR
FLAMES
FLAME
EXPLODE BATTERY
These symbols are important
for you and
your passengers
whenever your
vehicle
is
driven:
DOOR LOCK
UNLOCK
FASTEN SEAT
BELTS
.i)
AIR BAG p
These symbols
have to do with
your lamps:
SIGNALS 6
TURN
PARKING
PC LAMPS
FOG LAMPS
$0
These symbols
are on some
of
your controls:
WINDSHIELD
DEFROSTER
WINDOW
DEFOGGER
VENTILATING FAN
These symbols are used on
warning and
indicator lights:
COOLANT -
TEMP -
CHARGING BATTERY
SYSTEM
BRAKE
(0)
COOLANT a
ENGINE OIL w,
PRESSURE
ANTI-LOCK
(@)
BRAKES
Here are some
other symbols
you
may see:
FUSE
LIGHTER
1
HORN )cT
SPEAKER
b
FUEL p3
Page 9 of 410

Seats and Seat Controls
This section tells you about the seats -- how to adjust
them and also about reclining front s’eatbacks, seatback
latches and the folding rear seatback.
M-rual Front +at
You can lose control of the vehicle if you try to
adjust a manual driver’s seat while the vehicle is
moving. The sudden movement could startle and
confuse you,
or make you push a pedal when you
don’t want to. Adjust the driver’s
seat only when
the vehicle is not moving,
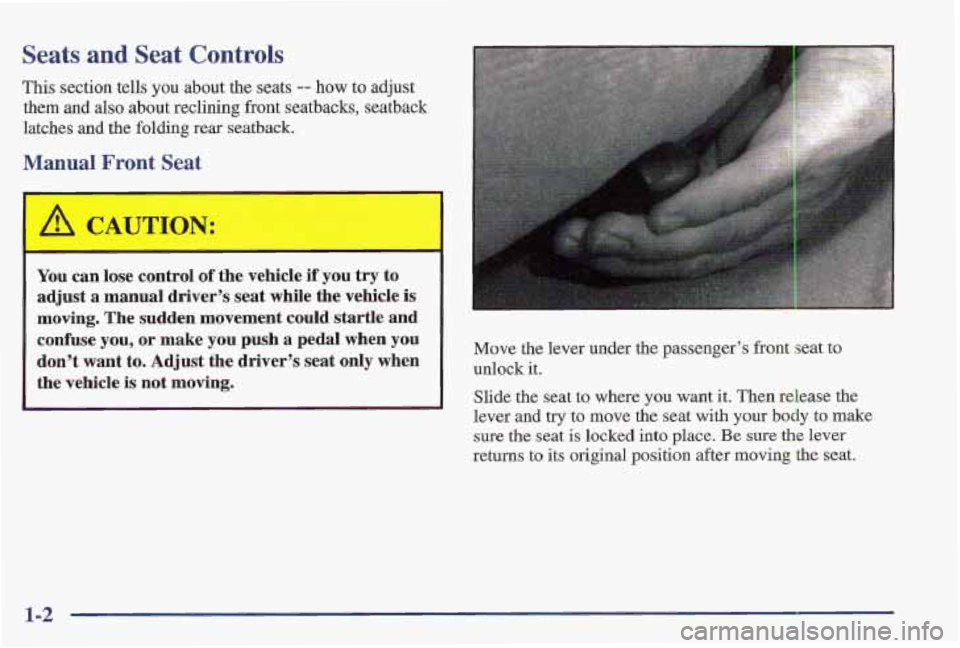
Move the lever under the passenger’s front seat to
unlock it,
Slide the seat to where you want it. Then release the
lever and
try to move the seat with your body to make
sure the seat is locked into place. Be sure the lever
returns
to its original position after moving the seat.
Page 58 of 410

Have each transmitter you intend to match ready for the
next steps. To match transmitters to your vehicle:
1. Turn the ignition switch to the RUN position then to
the
OFF position. This will disarm the Vehicle and
Content Theft-Deterrent System (if your vehicle has
this option).
2. Remove the RADIO fuse. This fuse is located in the
main fuse block, located on the left side of your
instrument panel. See “Fuses and Circuit Breakers”
in the Index.
3. Turn the ignition switch from the OFF to the RUN
position three times quickly (within five seconds).
The vehicle will respond by locking the doors,
unlocking the driver’s doors and releasing the hatch.
Your transmitter is now ready to match your vehicle.
4. Press and hold the LOCK and UNLOCK buttons on
the first transmitter for 15 seconds. The vehicle will
respond as in Step
3.
5. Repeat Step 4 for the remaining transmitters.
6. When you have finished matching all of your
7. Check that all transmitters work by pressing their buttons.
transmitters,
replace the
RADIO fuse.
If the transmitters don’t work, or if you’d rather not
match the transmitters yourself,
see your Pontiac dealer.
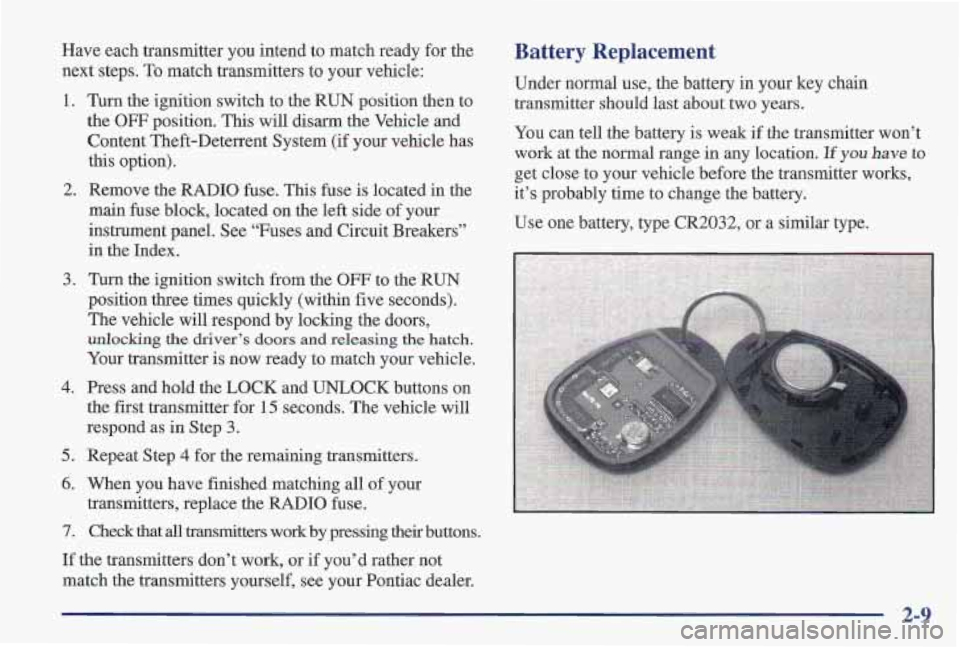
Battery Replacement
Under normal use, the battery in your key chain
transmitter should last about two years.
You can tell the battery is weak if the transmitter won’t
work at the normal range in any location.
If you have to
get close to your vehicle before the transmitter works,
it’s probably time to change the battery.
Use one battery, type
CR2032, or a similar type.
2-9
Page 66 of 410

Clean and dry the key. Wait about three minutes and try
again. The SECURITY light may remain on during this
time. If the starter still won’t work, and the key appears
to be clean and dry, wait about three minutes and try
another ignition key. At this time, you may also want to
check the fuses (see “Fuses and Circuit Breakers” in the
Index). If the starter won’t work with the other key, your
vehicle needs service.
If your vehicle do’es start, the first
ignition key may be faulty. See your Pontiac dealer or a
locksmith who can service the PASS-Key
11.
If you accidentally use a key that has a damaged or
missing resistor pellet, the starter won’t work, and the
SECURITY light will flash. But you don’t have to wait
three minutes before trying another ignition key.
See your Pontiac dealer or
a locksmith who can service
the PASS-Key
I1 to have a new key made.
If you’re ever driving and the SECUFUTY light comes on and
stays on, you will be able to restart your engine if you
turn it
off. Your PASS-Key II system, however, is not working
properly and must be serviced by your Pontiac dealer. Your
vehicle is not protected by the PASS-Key
II system.
If
you lose or damage a PASS-Key I1 ignition key, see
your Pontiac dealer or a locksmith who can service
PASS-Key
I1 to have a new key made. In an emergency,
call the Pontiac Roadside Assistance Program at
1-800-ROADSIm or 1-800-762-3743.
Feature Customization (If Equipped)
Your Pontiac’s locks and lighting systems can be
programmed with several different features. The
features you can program depend upon the options that
came with your vehicle. The following list
tells you the
features that can be programmed. Listed next to each
feature is the option you need to have
on your vehicle in
order to be able to program that particular feature.
0
0
0
0
0
0
0
0
0
Exit Lighting (available for all)
Delayed Illumination (available for all)
Last Door Closed Locking (if equipped with power
door locks)
Lockout Prevention
(if equipped with power door locks)
Remote Lock Control Verification (if equipped with
Vehicle and Content Theft-Deterrent System)
Theft-Deterrent Arming Method
(if equipped with
Vehicle and Content Theft-Deterrent System)
Theft-Deterrent Arming Verification
(if equipped
with Vehicle and Content Theft-Deterrent System)
Driver’s Door Alarm Delay (if equipped with
Vehicle and Content Theft-Deterrent System)
Shock Sensor Enable (if equipped with Vehicle and
Content Theft-Deterrent System)
Page 67 of 410

To program features, your vehicle must be in the
programming mode. Follow these steps:
1.
2.
3.
4.
5.
Put your key in the ignition.
Turn the ignition to the
RUN pos’ition to disarm the
Vehicle and Content Theft-Deterrent System.
Turn the ignition
to the OFF position.
Remove the RADIO
fuse. This fuse is in the main
fuse block, located on the left side of your
instrument panel. See “Fuses and Circuit Breakers”
in the Index.
Put the ignition in the
ACC position:
You should hear
a chime to verify that the system is
in programming mode.
If the chime sounds once,
you will be able
to program Exit Lighting, Delayed
Illumination, Last Door Closed Locking and Lockout
Prevention only.
If the chime sounds twice and your
vehicle is equipped with the Vehicle and Content
Theft-Deterrent System,
you will also be able to set
Remote
Lock Control Verification, Arming Method,
Arming Verification, Driver’s Door Delay and Shock
Sensor Enable.
Exit Lighting and Delayed Illumination
Exit Lighting: Your interior lights will come on for
up to
25 seconds when the key is removed from the
ignition switch.
Delayed Illumination: Your interior lights will stay
on
for up to 25 seconds when entering your vehicle and up
to five seconds when leaving your vehicle.
Your vehicle comes with both features enabled (Mode
4).
To change the factory setting, do the following:
1. Turn the courtesy lamps on by turning the instrument
panel brightness control knob all the way up.
2. Count the number of chimes you hear. The number of
chimes tells you which mode your vehicle is set for.
3. Turn the courtesy lamp switch to off.
4. Turn the courtesy lamp switch from on to off until
you hear the number of chimes that correspond to the
mode selection
you want.
Mode 1: Both Off
Mode 2: Delayed Illumination Only
Mode 3: Exit Lighting Only
Mode 4: Both On
2-18
Page 71 of 410

Driver’s Door Alarm Delay and Shock
Sensor Enable
Your vehicle comes with this feature set in Mode 4.
This means that if you open the driver’s door using
your key, the alarm will not sound
for eight seconds.
Also the shock sensor, able
to detect sharp blows to
your vehicle, is active.
To change the factory setting, do
the following:
1. Turn the parking lamps
on and off,
2. Count the number of chimes you hear. The number
of chimes tells you which mode your vehicle is
set for.
3. Turn the parking lamps on and off until you hear the
number of chimes that correspond to the mode
selection you want.
Mode 1: Zero Delay and Shock Sensor Disabled (The
alarm will sound immediately
if the driver’s door is
opened with your
key and the shock sensor will not be
available to measure sharp blows to your vehicle).
Mode 2: Eight Second Delay and Shock Sensor
Disabled (The alarm will sound eight seconds after the
driver’s door is opened with your key and the shock
sensor will not be available to measure sharp blows to
your vehicle),
Mode 3: Zero Relay and Shock Sensor Enabled (The
alum will sound immediately after the driver’s door is
opened with your key and the
shock sensor will be
available
to measure sharp blows to your vehicle).
Mode 4: Eight Second Delay and Shock Sensor Enabled
(The alarm will
sound eight seconds after the driver’s
door is
opened with your key and the shock sensor will
be available to measure sharp
blows to your vehicle).
Leaving Programming Mode
When programming is done, turn the ignition switch to
the
OFF position and replace the RADIO fuse.
2-22
Page 94 of 410

Turn Signal and Lane Change Indicator
The turn signal has two upward (for right) and two
downward (for left) positions. These positions allow you
to signal a turn or a lane change.
To signal a turn, move the,lever all the way up or down.
When the turn
is finished, the lever will return
automatically.
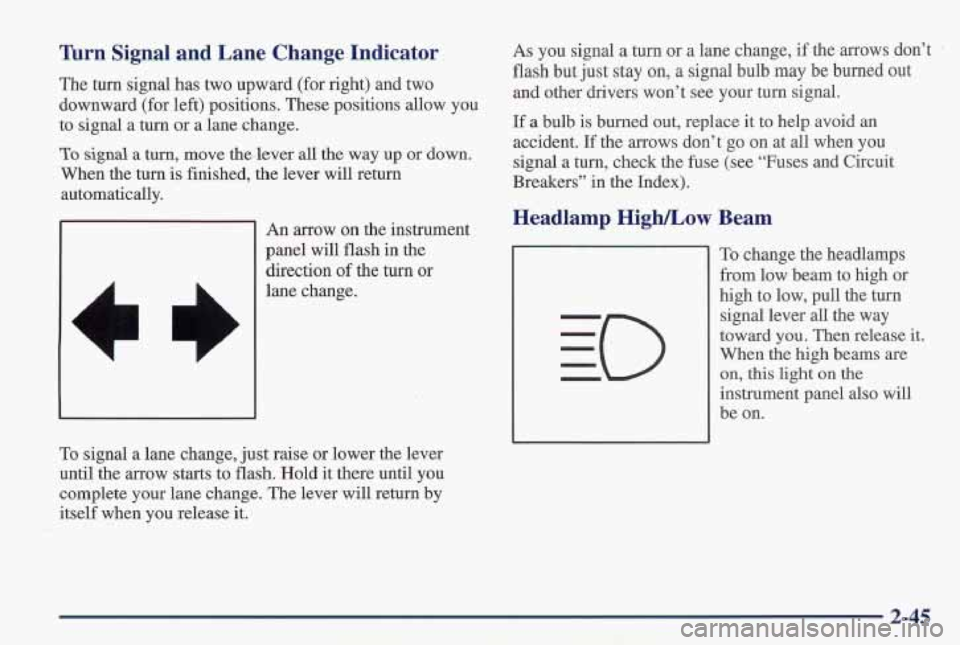
An arrow
on the instrument
panel will flash in the
direction of the turn
or
lane change.
To signal a lane change, just raise or lower the lever
until the arrow starts to flash. Hold it there until you
complete your lane change. The lever will return by
itself when you release
it.
As you signal a turn or a lane change, if the arrows don’t
flash but just stay on,
a signal bulb may be burned out
and other drivers won’t see your turn signal.
If a bulb is burned out, replace it to help avoid an
accident. If the arrows don’t go on at all when you
signal a turn, check the
fuse (see “Fuses and Circuit
Breakers” in the Index).
Headlamp High/Low Beam
To change the headlamps
from low beam to high or
high to low, pull the turn
signal lever all the way
toward
you. Then release it.
When the high beams are
on, this light
on the
instrument panel also will
be on.
2-45
Page 109 of 410

Sun Visors
I NOTICE:
Don? hold a cigarette lighter in with your hand
while it is heating.
If you do, it won9t be able to
back away
from the heating element when it’s
ready. That can make it overheat, damaging the
lighter and the heating element.
If you plug accessories into your cigarette lighter, such
as heating devices or air ~ompressors, these accessories
should have a rated current of less than 15 amps.
Exceeding this limit will result in a blown fuse.
To block out glare, YOU can swing down the visors. You
can also swing them to the side. The elastic bands on
your visor provide extra storage for maps or papers.
Covered Visor Vanity Mirror
Full down the sun visor and lift the cover to expose the
vanity mirror.
2-60
Page 248 of 410

You can be injured and your vehicle could be
damaged if you try to
do service work on a
vehicle without knowing enough about it.
Be sure you have sufficient knowledge,
experience, the proper replacement parts
and tools before you attempt any vehicle
maintenance task.
Be sure to use the proper nuts, bolts and
other fasteners. “English” and (‘metric”
fasteners can be easily confused.
If you use
the wrong fasteners, parts can later break
or fall off. You could be hurt.
Adding Equipment to the Outside of
Your Vehicle
Things you might add to the outside of your vehicle can
affect the airflow around it. This may cause wind noise
and affect windshield washer performance. Check with
your Pontiac dealer before adding equipment
to the
outside
of your vehicle.
Fuel
The 8th digit of your vehicle identification number
(VIN) shows the code letter for your engine. You will
find the
VIN at the. top left of your instrument panel.
(See “Vehicle Identification Number” in the Index.)
If you have the 3800 engine (VIN Code K), use regular
unleaded gasoline rated at
87 octane or higher.
If you have the 5.7L engine (VIN Code I?), use premium
unleaded gasoline rated at
91 octane or higher for best
performance. You may use middle grade or regular
unleaded gasolines, but your vehicle may not accelerate
as well.
Page 314 of 410

Headlamps
The headlamp wiring is protected by a circuit breaker.
An electrical overload will cause the lamps to go on and
off, or in some cases to remain off. If this happens, have
your headlamp wiring checked right away.
Fuses and Circuit Breakers
Windshield Wipers
The windshield wiper motor is protected by a circuit
breaker and a fuse.
If the motor overheats due to h'eavy
snow, etc., the wiper will stop until the motor cools.
If
the overload is caused by some electrical problem and
not snow, etc., be sure to get it fixed.
Power Windows and Other Power Options
Circuit breakers protect the power windows and other
power accessories. When the current load
is too heavy,
the circuit breaker opens and closes, protecting the
circuit until the problem is fixed or goes away. The
wiring circuits in your vehicle are protected from
short circuits by a combination of fuses, circuit breakers
and fusible thermal links in the wiring itself. This greatly
reduces the chance
of fires caused by electrical problems.
There are two fuse centers
on your vehicle. One is in the
left side
of your instrument panel.