warning PONTIAC G3 2010 Owners Manual
[x] Cancel search | Manufacturer: PONTIAC, Model Year: 2010, Model line: G3, Model: PONTIAC G3 2010Pages: 368, PDF Size: 3.94 MB
Page 1 of 368
2010 Pontiac G3 Owner ManualM
In Brief. . . . . . . . . . . . . . . . . . . . . . . . . . . . . . . . . . . . . . . . . . . . 1-1
Instrument Panel . . . . . . . . . . . . . . . . . . . . . . . . . . . . . . . . . 1-2
Initial Drive Information . . . . . . . . . . . . . . . . . . . . . . . . . . . 1-3
Vehicle Features . . . . . . . . . . . . . . . . . . . . . . . . . . . . . . . . 1-16
Performance and Maintenance . . . . . . . . . . . . . . . . . . 1-20
Seats and Restraint System . . . . . . . . . . . . . . . . . . . . . . 2-1
Head Restraints . . . . . . . . . . . . . . . . . . . . . . . . . . . . . . . . . . 2-2
Front Seats . . . . . . . . . . . . . . . . . . . . . . . . . . . . . . . . . . . . . . . 2-4
Rear Seats . . . . . . . . . . . . . . . . . . . . . . . . . . . . . . . . . . . . . . . 2-8
Safety Belts . . . . . . . . . . . . . . . . . . . . . . . . . . . . . . . . . . . . . 2-15
Child Restraints . . . . . . . . . . . . . . . . . . . . . . . . . . . . . . . . . 2-33
Airbag System . . . . . . . . . . . . . . . . . . . . . . . . . . . . . . . . . . 2-57
Restraint System Check . . . . . . . . . . . . . . . . . . . . . . . . . 2-72
Features and Controls . . . . . . . . . . . . . . . . . . . . . . . . . . . . 3-1
Keys . . . . . . . . . . . . . . . . . . . . . . . . . . . . . . . . . . . . . . . . . . . . . 3-2
Doors and Locks . . . . . . . . . . . . . . . . . . . . . . . . . . . . . . . . . 3-6
Windows . . . . . . . . . . . . . . . . . . . . . . . . . . . . . . . . . . . . . . . . 3-12 Theft-Deterrent Systems . . . . . . . . . . . . . . . . . . . . . . . . 3-14
Starting and Operating Your Vehicle . . . . . . . . . . . . . 3-17
Mirrors . . . . . . . . . . . . . . . . . . . . . . . . . . . . . . . . . . . . . . . . . . 3-34
Storage Areas . . . . . . . . . . . . . . . . . . . . . . . . . . . . . . . . . . . 3-36
Sunroof . . . . . . . . . . . . . . . . . . . . . . . . . . . . . . . . . . . . . . . . . 3-37
Instrument Panel . . . . . . . . . . . . . . . . . . . . . . . . . . . . . . . . . 4-1
Instrument Panel Overview . . . . . . . . . . . . . . . . . . . . . . . 4-3
Climate Controls . . . . . . . . . . . . . . . . . . . . . . . . . . . . . . . . 4-15
Warning Lights, Gages, and Indicators . . . . . . . . . . 4-20
Audio System(s) . . . . . . . . . . . . . . . . . . . . . . . . . . . . . . . . 4-36
Driving Your Vehicle . . . . . . . . . . . . . . . . . . . . . . . . . . . . . . 5-1
Your Driving, the Road, and the Vehicle . . . . . . . . . . 5-2
Towing . . . . . . . . . . . . . . . . . . . . . . . . . . . . . . . . . . . . . . . . . . 5-25
Service and Appearance Care . . . . . . . . . . . . . . . . . . . 6-1
Service . . . . . . . . . . . . . . . . . . . . . . . . . . . . . . . . . . . . . . . . . . . 6-3
Fuel . . . . . . . . . . . . . . . . . . . . . . . . . . . . . . . . . . . . . . . . . . . . . . 6-5
Checking Things Under the Hood . . . . . . . . . . . . . . . 6-11
Page 4 of 368
Safety Warnings and Symbols
Warning messages found on vehicle labels and in this
manual describe hazards and what to do to avoid or
reduce them.
Dangerindicates a hazard with a high level of risk
which will result in serious injury or death.
Warning orCaution indicates a hazard that could result
in injury or death.
{WARNING:
These mean there is something that could hurt
you or other people.
Notice: This means there is something that could
result in property or vehicle damage. This would not
be covered by the vehicle's warranty.
A circle with a slash
through it is a safety
symbol which means
“Do Not,” “Do not do
this,” or“Do not let this
happen.”
Vehicle Symbols
The vehicle has components and labels that use
symbols instead of text. Symbols are shown along with
the text describing the operation or information relating
to a specific component, control, message, gage,
or indicator.
M: This symbol is shown when you need to see your
owner manual for additional instructions or information.
*: This symbol is shown when you need to see a
service manual for additional instructions or information.
Vehicle Symbol Chart
Here are some additional symbols that may be found on
the vehicle and what they mean. For more information
on the symbol, refer to the index.
9: Airbag Readiness Light
#:Air Conditioning
!:Antilock Brake System (ABS)
g:Audio Steering Wheel Controls or OnStar®
$: Brake System Warning Light
":Charging System
I:Cruise Control
B: Engine Coolant Temperature
O:Exterior Lamps
iv
Page 9 of 368
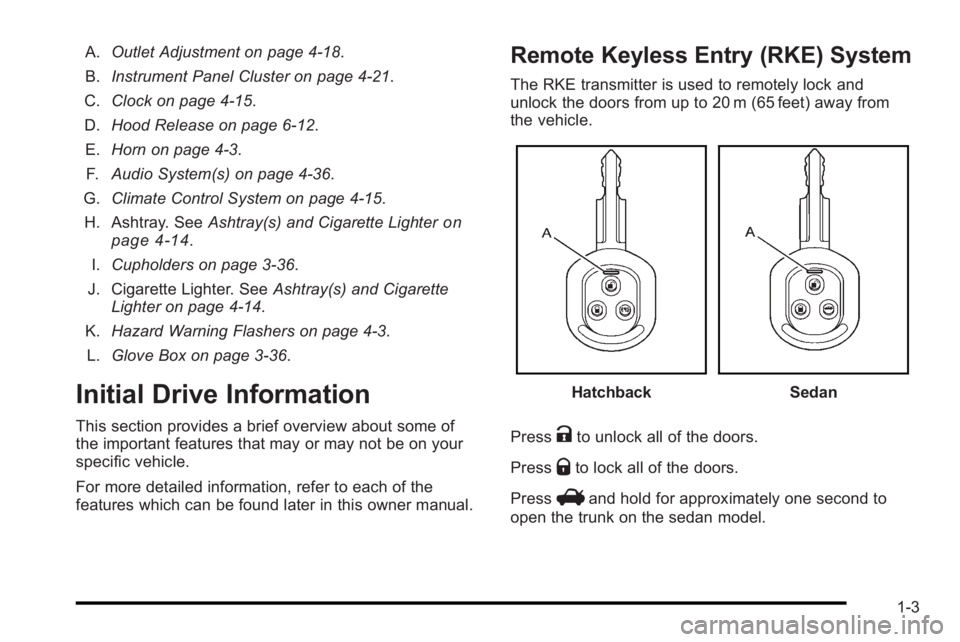
A.Outlet Adjustment on page 4‑18.
B. Instrument Panel Cluster on page 4‑21.
C. Clock on page 4‑15.
D. Hood Release on page 6‑12.
E. Horn on page 4‑3.
F. Audio System(s) on page 4‑36.
G. Climate Control System on page 4‑15.
H. Ashtray. See Ashtray(s) and Cigarette Lighter
on
page 4‑14.
I. Cupholders on page 3‑36.
J. Cigarette Lighter. See Ashtray(s) and Cigarette
Lighter on page 4‑14.
K. Hazard Warning Flashers on page 4‑3.
L. Glove Box on page 3‑36.
Initial Drive Information
This section provides a brief overview about some of
the important features that may or may not be on your
specific vehicle.
For more detailed information, refer to each of the
features which can be found later in this owner manual.
Remote Keyless Entry (RKE) System
The RKE transmitter is used to remotely lock and
unlock the doors from up to 20 m (65 feet) away from
the vehicle.
HatchbackSedan
Press
Kto unlock all of the doors.
Press
Qto lock all of the doors.
Press
Vand hold for approximately one second to
open the trunk on the sedan model.
1-3
Page 26 of 368
To fully open the sunroof, press and hold the passenger
side switch. The sunshade will open with the sunroof.
To close, press the driver side switch. Manually close
the sunshade.
For more information seeSunroof on page 3‑37.
Performance and Maintenance
Tire Pressure Monitor
This vehicle may have a Tire Pressure Monitor
System (TPMS).
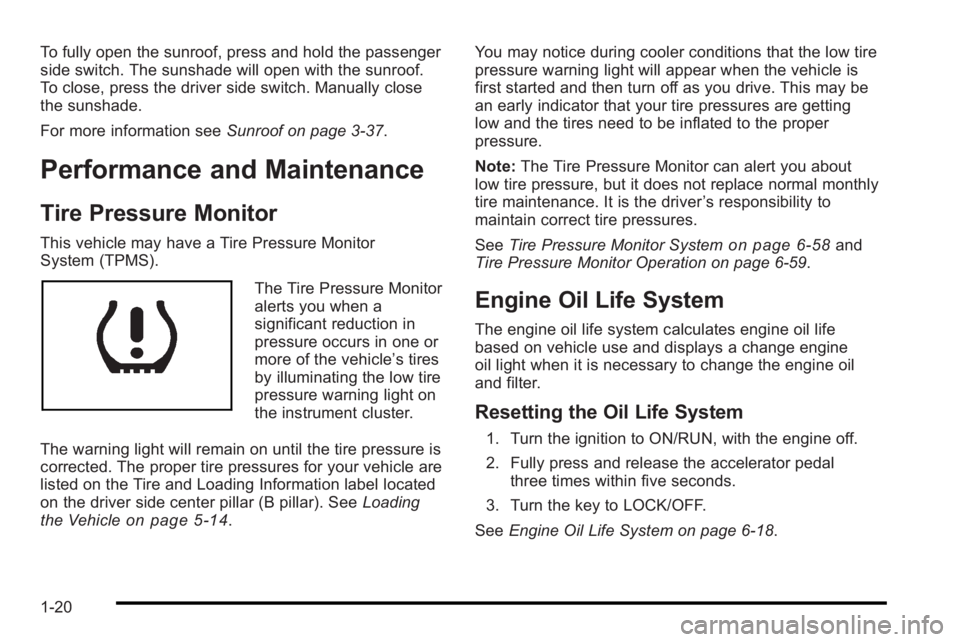
The Tire Pressure Monitor
alerts you when a
significant reduction in
pressure occurs in one or
more of the vehicle’s tires
by illuminating the low tire
pressure warning light on
the instrument cluster.
The warning light will remain on until the tire pressure is
corrected. The proper tire pressures for your vehicle are
listed on the Tire and Loading Information label located
on the driver side center pillar (B pillar). See Loading
the Vehicle
on page 5‑14. You may notice during cooler conditions that the low tire
pressure warning light will appear when the vehicle is
first started and then turn off as you drive. This may be
an early indicator that your tire pressures are getting
low and the tires need to be inflated to the proper
pressure.
Note:
The Tire Pressure Monitor can alert you about
low tire pressure, but it does not replace normal monthly
tire maintenance. It is the driver ’s responsibility to
maintain correct tire pressures.
See Tire Pressure Monitor System
on page 6‑58and
Tire Pressure Monitor Operation on page 6‑59.
Engine Oil Life System
The engine oil life system calculates engine oil life
based on vehicle use and displays a change engine
oil light when it is necessary to change the engine oil
and filter.
Resetting the Oil Life System
1. Turn the ignition to ON/RUN, with the engine off.
2. Fully press and release the accelerator pedal three times within five seconds.
3. Turn the key to LOCK/OFF.
See Engine Oil Life System on page 6‑18.
1-20
Page 32 of 368
Head Restraints
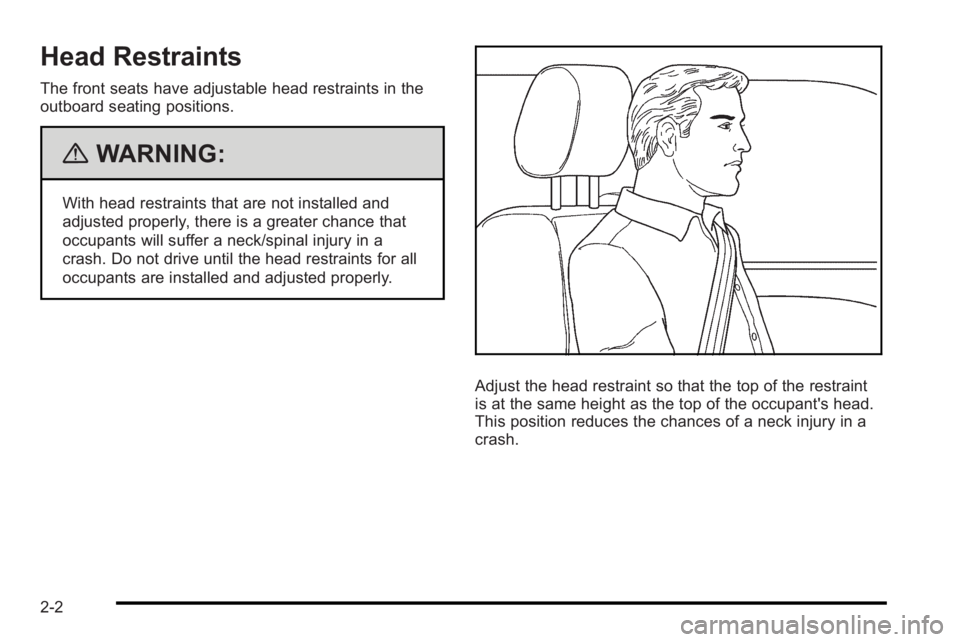
The front seats have adjustable head restraints in the
outboard seating positions.
{WARNING:
With head restraints that are not installed and
adjusted properly, there is a greater chance that
occupants will suffer a neck/spinal injury in a
crash. Do not drive until the head restraints for all
occupants are installed and adjusted properly.
Adjust the head restraint so that the top of the restraint
is at the same height as the top of the occupant's head.
This position reduces the chances of a neck injury in a
crash.
2-2
Page 34 of 368
Front Seats
Manual Seats
{WARNING:
You can lose control of the vehicle if you try to
adjust a manual driver's seat while the vehicle is
moving. The sudden movement could startle and
confuse you, or make you push a pedal when you
do not want to. Adjust the driver's seat only when
the vehicle is not moving.
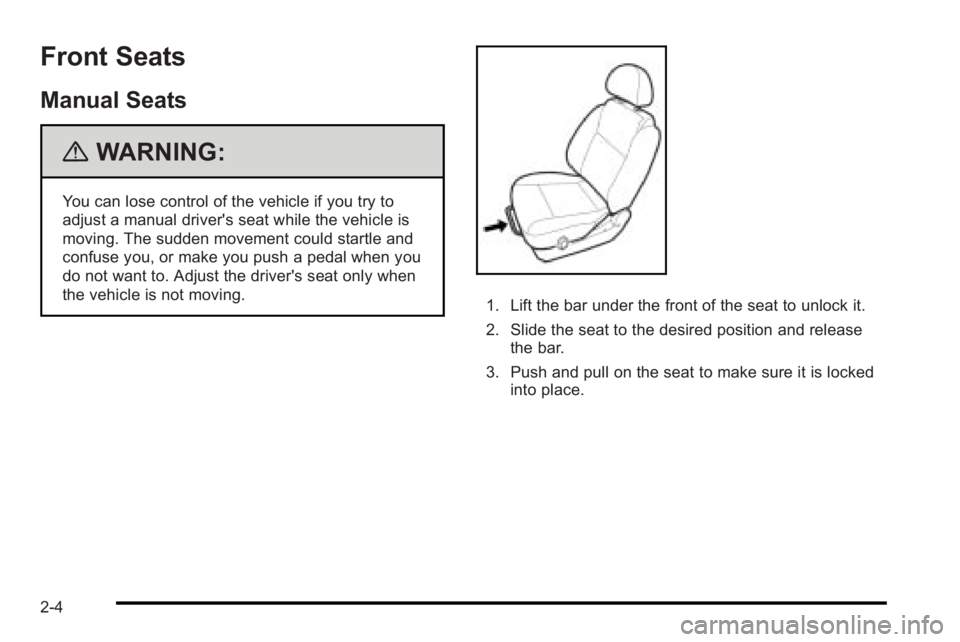
1. Lift the bar under the front of the seat to unlock it.
2. Slide the seat to the desired position and releasethe bar.
3. Push and pull on the seat to make sure it is locked into place.
2-4
Page 36 of 368

Reclining Seatbacks
{WARNING:
You can lose control of the vehicle if you try to
adjust a manual driver's seat while the vehicle is
moving. The sudden movement could startle and
confuse you, or make you push a pedal when you
do not want to. Adjust the driver's seat only when
the vehicle is not moving.
{WARNING:
If either seatback is not locked, it could move
forward in a sudden stop or crash. That could
cause injury to the person sitting there. Always
push and pull on the seatbacks to be sure they
are locked.
The seats have manual reclining seatbacks. The lever
is located on the outboard side of the seats.
To recline the seatback: 1. Lift the recline lever.
2. Move the seatback to the desired position, then release the lever to lock the seatback in place.
3. Push and pull on the seatback to make sure it is locked in place.
To return the seatback to an upright position: 1. Lift the lever fully without applying pressure to the seatback and the seatback will return to the upright
position.
2. Push and pull on the seatback to make sure it is locked.
2-6
Page 37 of 368
{WARNING:
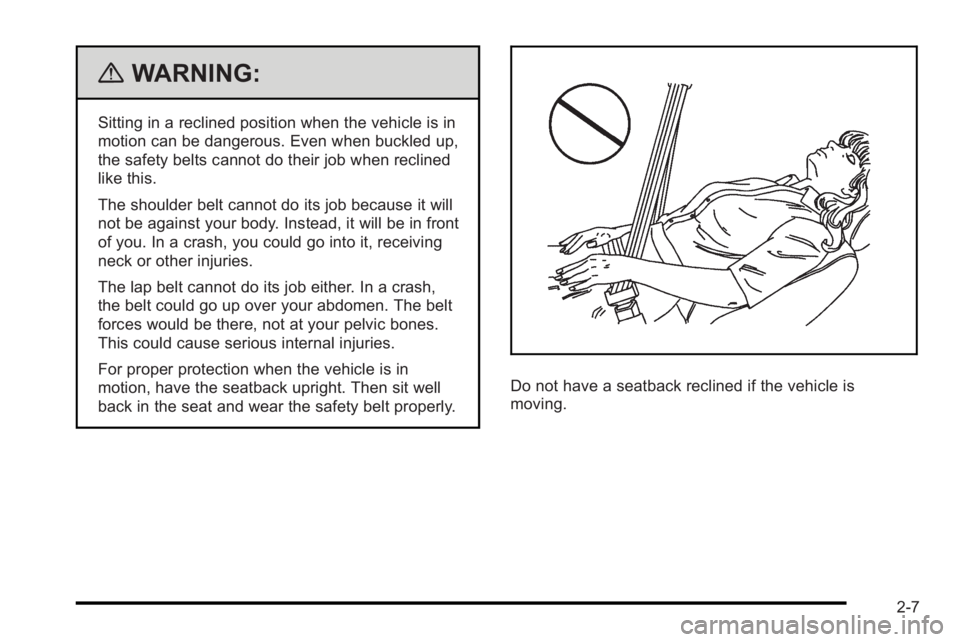
Sitting in a reclined position when the vehicle is in
motion can be dangerous. Even when buckled up,
the safety belts cannot do their job when reclined
like this.
The shoulder belt cannot do its job because it will
not be against your body. Instead, it will be in front
of you. In a crash, you could go into it, receiving
neck or other injuries.
The lap belt cannot do its job either. In a crash,
the belt could go up over your abdomen. The belt
forces would be there, not at your pelvic bones.
This could cause serious internal injuries.
For proper protection when the vehicle is in
motion, have the seatback upright. Then sit well
back in the seat and wear the safety belt properly.
Do not have a seatback reclined if the vehicle is
moving.
2-7
Page 40 of 368
Unfolding the Seatbacks
To return the seatback to the upright position:1. Hook the safety belts into the safety belt guide.
2. Lift the seatback up and push it to its original position.
{WARNING:
If either seatback is not locked, it could move
forward in a sudden stop or crash. That could
cause injury to the person sitting there. Always
push and pull on the seatbacks to be sure they
are locked.
3. Push down and rearward firmly on the top of the seatbacks until it latches securely in the fully
upright position.
4. To reattach the center seat safety belt to the mini buckle, pull it from the retractor.
5. Push the latch plate at the end of the safety belt strap into the mini-buckle until the mechanism
clicks. Make sure the strap is not twisted. The
sliding latch plate will face the front of the vehicle.
{WARNING:
A safety belt that is improperly routed, not
properly attached, or twisted will not provide the
protection needed in a crash. The person wearing
the belt could be seriously injured. After raising
the rear seatback, always check to be sure that
the safety belts are properly routed and attached,
and are not twisted.
6. Insert the safety belt strap back into the safety belt guide.
Rear Seat Operation (Hatchback)
Folding the Rear Seats
The rear seats can be folded to increase cargo space.
To fold the rear seats:
1. Lower the head restraints completely.
2. Unlatch the center safety belt by pressing the red button on the buckle.
2-10
Page 44 of 368
{WARNING:
A safety belt that is improperly routed, not
properly attached, or twisted will not provide the
protection needed in a crash. The person wearing
the belt could be seriously injured. After raising
the rear seatback, always check to be sure that
the safety belts are properly routed and attached,
and are not twisted.
5. Lift the seatbacks up and push them back to their original latched positions.
6. Unhook the safety belts in the outboard seating positions from the retaining clips. 7. Return the safety belt buckles and the center seat
safety belt to their original position between the
rear seatback and the seat cushion. Make sure
the straps of the safety belt and buckles are not
twisted.
8. To reattach the center seat safety belt to the mini buckle, pull it from the retractor.
{WARNING:
If either seatback is not locked, it could move
forward in a sudden stop or crash. That could
cause injury to the person sitting there. Always
push and pull on the seatbacks to be sure they
are locked.
9. Push down and rearward firmly on the top of the seatbacks until they latch securely in the fully
upright position.
2-14