display PONTIAC G3 2010 Owners Manual
[x] Cancel search | Manufacturer: PONTIAC, Model Year: 2010, Model line: G3, Model: PONTIAC G3 2010Pages: 368, PDF Size: 3.94 MB
Page 23 of 368
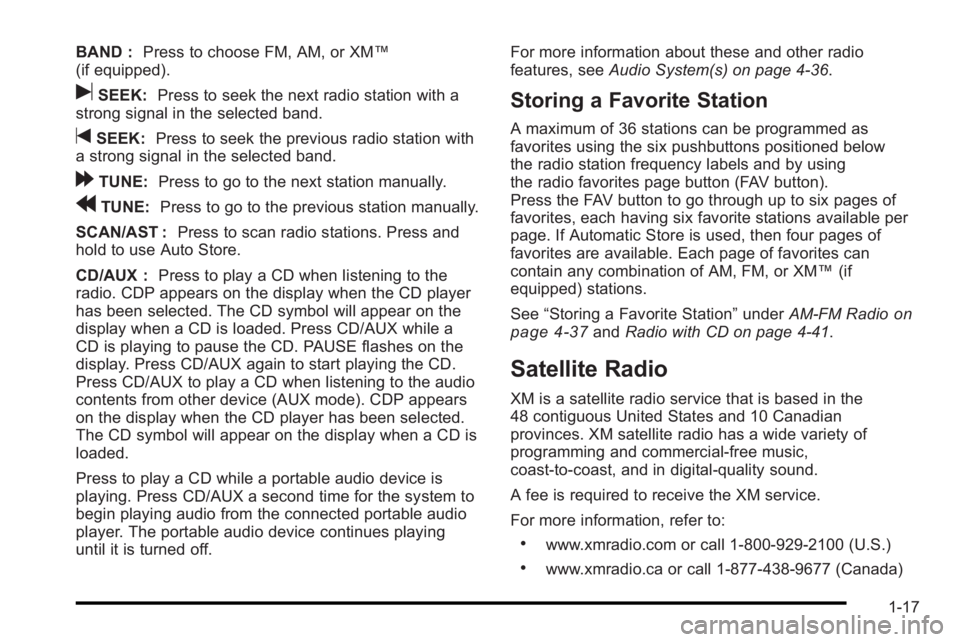
BAND :Press to choose FM, AM, or XM™
(if equipped).
uSEEK: Press to seek the next radio station with a
strong signal in the selected band.
tSEEK: Press to seek the previous radio station with
a strong signal in the selected band.
[TUNE: Press to go to the next station manually.
rTUNE: Press to go to the previous station manually.
SCAN/AST : Press to scan radio stations. Press and
hold to use Auto Store.
CD/AUX : Press to play a CD when listening to the
radio. CDP appears on the display when the CD player
has been selected. The CD symbol will appear on the
display when a CD is loaded. Press CD/AUX while a
CD is playing to pause the CD. PAUSE flashes on the
display. Press CD/AUX again to start playing the CD.
Press CD/AUX to play a CD when listening to the audio
contents from other device (AUX mode). CDP appears
on the display when the CD player has been selected.
The CD symbol will appear on the display when a CD is
loaded.
Press to play a CD while a portable audio device is
playing. Press CD/AUX a second time for the system to
begin playing audio from the connected portable audio
player. The portable audio device continues playing
until it is turned off. For more information about these and other radio
features, see
Audio System(s) on page 4‑36.
Storing a Favorite Station
A maximum of 36 stations can be programmed as
favorites using the six pushbuttons positioned below
the radio station frequency labels and by using
the radio favorites page button (FAV button).
Press the FAV button to go through up to six pages of
favorites, each having six favorite stations available per
page. If Automatic Store is used, then four pages of
favorites are available. Each page of favorites can
contain any combination of AM, FM, or XM™ (if
equipped) stations.
See “Storing a Favorite Station” underAM-FM Radio
on
page 4‑37and Radio with CD on page 4‑41.
Satellite Radio
XM is a satellite radio service that is based in the
48 contiguous United States and 10 Canadian
provinces. XM satellite radio has a wide variety of
programming and commercial-free music,
coast-to-coast, and in digital-quality sound.
A fee is required to receive the XM service.
For more information, refer to:
.www.xmradio.com or call 1-800-929-2100 (U.S.)
.www.xmradio.ca or call 1-877-438-9677 (Canada)
1-17
Page 26 of 368
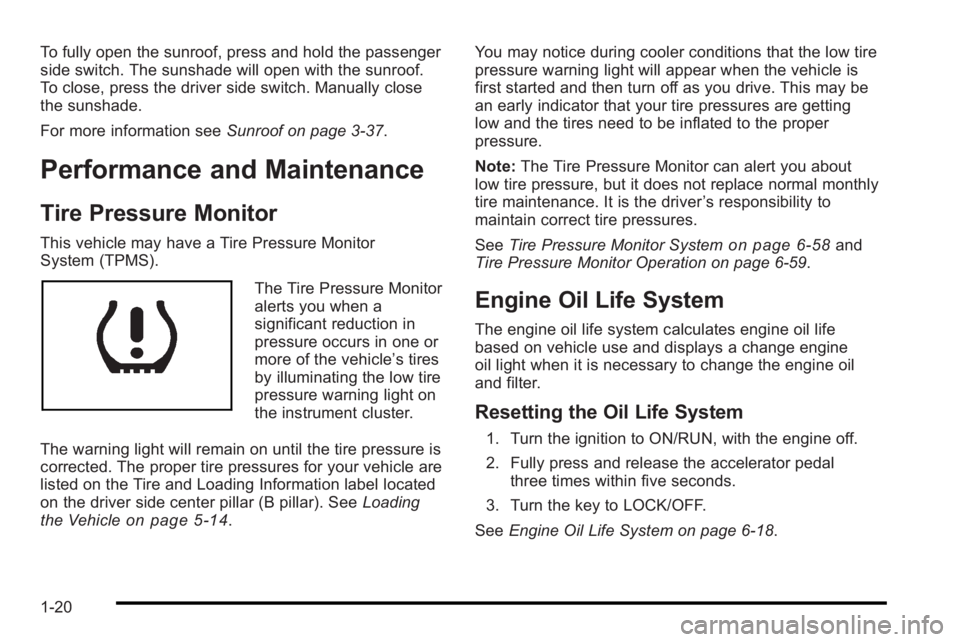
To fully open the sunroof, press and hold the passenger
side switch. The sunshade will open with the sunroof.
To close, press the driver side switch. Manually close
the sunshade.
For more information seeSunroof on page 3‑37.
Performance and Maintenance
Tire Pressure Monitor
This vehicle may have a Tire Pressure Monitor
System (TPMS).
The Tire Pressure Monitor
alerts you when a
significant reduction in
pressure occurs in one or
more of the vehicle’s tires
by illuminating the low tire
pressure warning light on
the instrument cluster.
The warning light will remain on until the tire pressure is
corrected. The proper tire pressures for your vehicle are
listed on the Tire and Loading Information label located
on the driver side center pillar (B pillar). See Loading
the Vehicle
on page 5‑14. You may notice during cooler conditions that the low tire
pressure warning light will appear when the vehicle is
first started and then turn off as you drive. This may be
an early indicator that your tire pressures are getting
low and the tires need to be inflated to the proper
pressure.
Note:
The Tire Pressure Monitor can alert you about
low tire pressure, but it does not replace normal monthly
tire maintenance. It is the driver ’s responsibility to
maintain correct tire pressures.
See Tire Pressure Monitor System
on page 6‑58and
Tire Pressure Monitor Operation on page 6‑59.
Engine Oil Life System
The engine oil life system calculates engine oil life
based on vehicle use and displays a change engine
oil light when it is necessary to change the engine oil
and filter.
Resetting the Oil Life System
1. Turn the ignition to ON/RUN, with the engine off.
2. Fully press and release the accelerator pedal three times within five seconds.
3. Turn the key to LOCK/OFF.
See Engine Oil Life System on page 6‑18.
1-20
Page 122 of 368
Ignition Positions
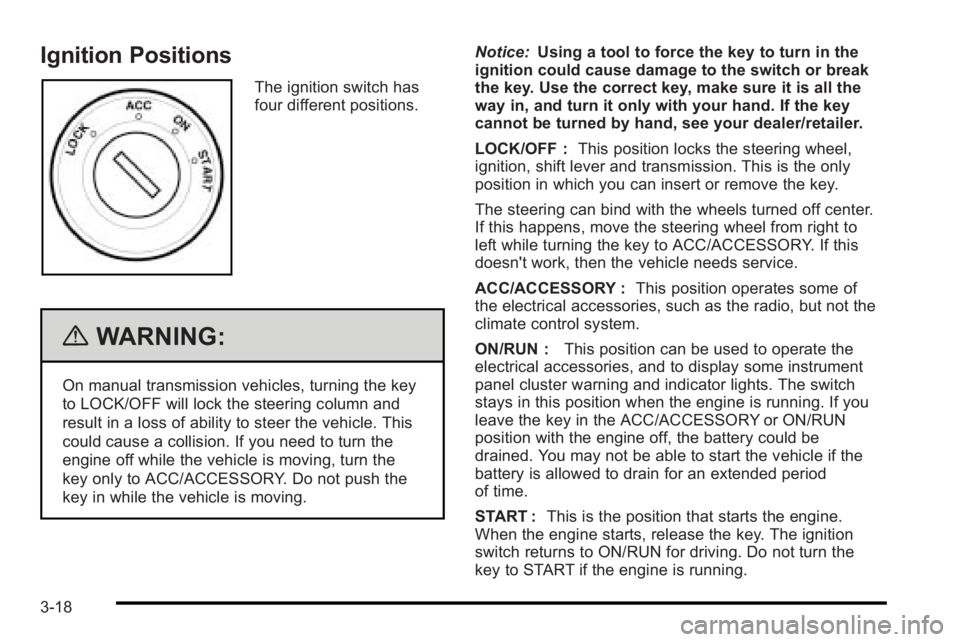
The ignition switch has
four different positions.
{WARNING:
On manual transmission vehicles, turning the key
to LOCK/OFF will lock the steering column and
result in a loss of ability to steer the vehicle. This
could cause a collision. If you need to turn the
engine off while the vehicle is moving, turn the
key only to ACC/ACCESSORY. Do not push the
key in while the vehicle is moving.Notice:
Using a tool to force the key to turn in the
ignition could cause damage to the switch or break
the key. Use the correct key, make sure it is all the
way in, and turn it only with your hand. If the key
cannot be turned by hand, see your dealer/retailer.
LOCK/OFF : This position locks the steering wheel,
ignition, shift lever and transmission. This is the only
position in which you can insert or remove the key.
The steering can bind with the wheels turned off center.
If this happens, move the steering wheel from right to
left while turning the key to ACC/ACCESSORY. If this
doesn't work, then the vehicle needs service.
ACC/ACCESSORY : This position operates some of
the electrical accessories, such as the radio, but not the
climate control system.
ON/RUN : This position can be used to operate the
electrical accessories, and to display some instrument
panel cluster warning and indicator lights. The switch
stays in this position when the engine is running. If you
leave the key in the ACC/ACCESSORY or ON/RUN
position with the engine off, the battery could be
drained. You may not be able to start the vehicle if the
battery is allowed to drain for an extended period
of time.
START : This is the position that starts the engine.
When the engine starts, release the key. The ignition
switch returns to ON/RUN for driving. Do not turn the
key to START if the engine is running.
3-18
Page 157 of 368
Clock
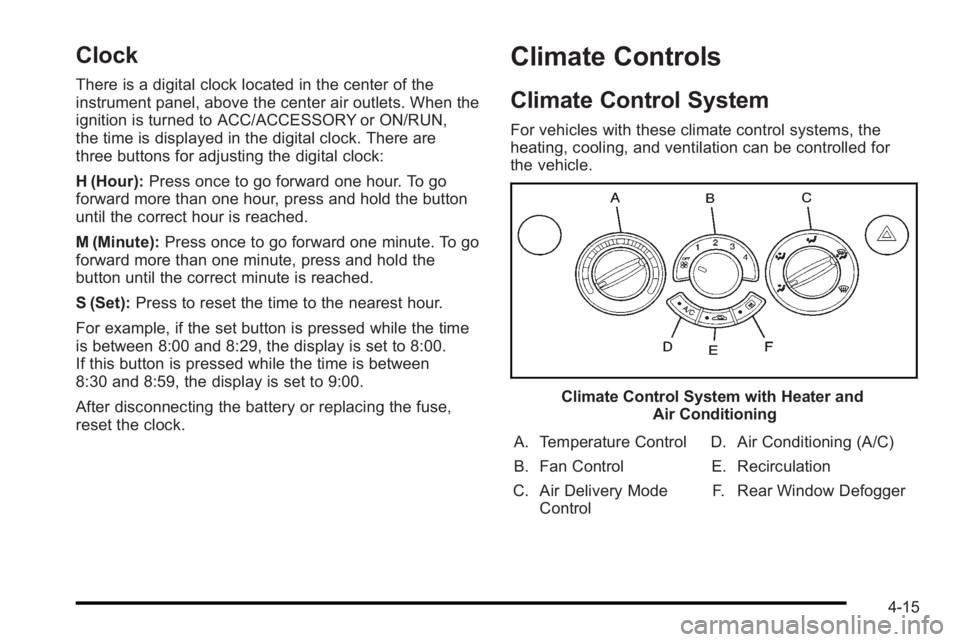
There is a digital clock located in the center of the
instrument panel, above the center air outlets. When the
ignition is turned to ACC/ACCESSORY or ON/RUN,
the time is displayed in the digital clock. There are
three buttons for adjusting the digital clock:
H (Hour):Press once to go forward one hour. To go
forward more than one hour, press and hold the button
until the correct hour is reached.
M (Minute): Press once to go forward one minute. To go
forward more than one minute, press and hold the
button until the correct minute is reached.
S (Set): Press to reset the time to the nearest hour.
For example, if the set button is pressed while the time
is between 8:00 and 8:29, the display is set to 8:00.
If this button is pressed while the time is between
8:30 and 8:59, the display is set to 9:00.
After disconnecting the battery or replacing the fuse,
reset the clock.
Climate Controls
Climate Control System
For vehicles with these climate control systems, the
heating, cooling, and ventilation can be controlled for
the vehicle.
Climate Control System with Heater and Air Conditioning
A. Temperature Control
B. Fan Control
C. Air Delivery Mode Control D. Air Conditioning (A/C)
E. Recirculation F. Rear Window Defogger
4-15
Page 164 of 368
Speedometer and Odometer
The speedometer shows the vehicle's speed in both
kilometers per hour (km/h) and miles per hour (mph).
The odometer shows how far the vehicle has been
driven, in either kilometers (used in Canada) or miles
(used in the United States).
Trip Odometer
The trip odometer can record the number of miles, used
in the United States, or kilometers, used in Canada,
traveled for up to two trips.
Cycle between the odometer and trip odometers A
and B by pressing the reset button located in the lower
right area of the speedometer. Press the reset button to
tell how many miles or kilometers have been recorded
on either Trip A or Trip B since the trip odometer was
last set back to zero.
To reset each trip odometer to zero, press and hold the
reset button. The reset button resets only the trip
odometer that is being displayed. Each trip odometer
must be reset individually.
Tachometer
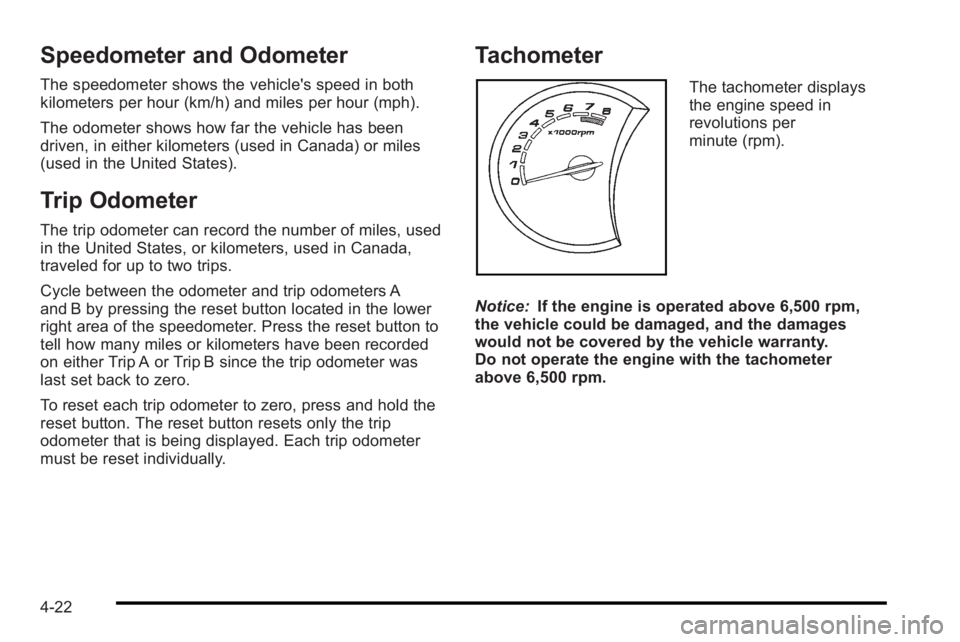
The tachometer displays
the engine speed in
revolutions per
minute (rpm).
Notice: If the engine is operated above 6,500 rpm,
the vehicle could be damaged, and the damages
would not be covered by the vehicle warranty.
Do not operate the engine with the tachometer
above 6,500 rpm.
4-22
Page 179 of 368
AM-FM Radio
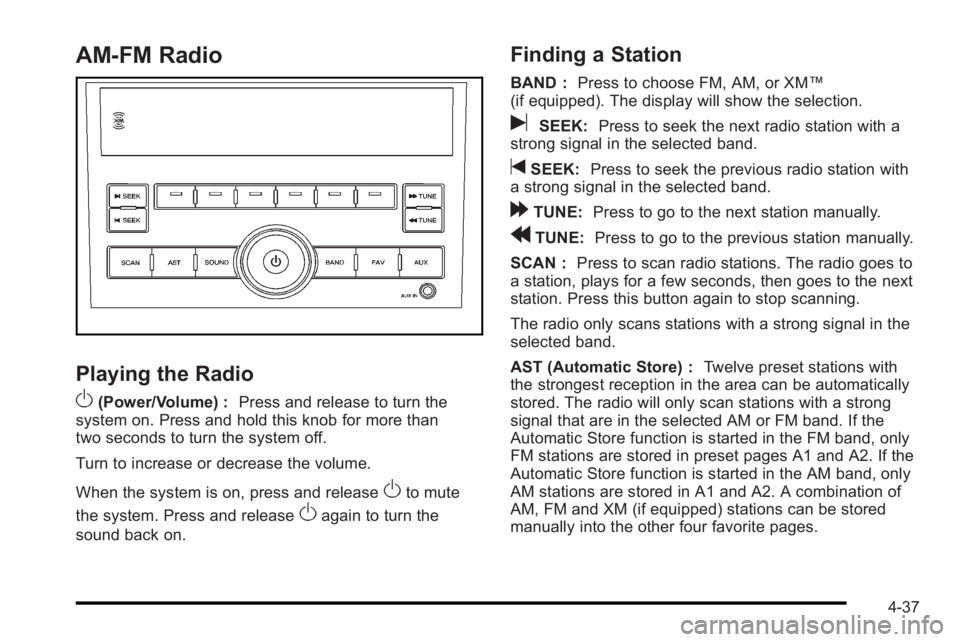
Playing the Radio
O
(Power/Volume) :Press and release to turn the
system on. Press and hold this knob for more than
two seconds to turn the system off.
Turn to increase or decrease the volume.
When the system is on, press and release
Oto mute
the system. Press and release
Oagain to turn the
sound back on.
Finding a Station
BAND : Press to choose FM, AM, or XM™
(if equipped). The display will show the selection.
uSEEK: Press to seek the next radio station with a
strong signal in the selected band.
tSEEK: Press to seek the previous radio station with
a strong signal in the selected band.
[TUNE: Press to go to the next station manually.
rTUNE: Press to go to the previous station manually.
SCAN : Press to scan radio stations. The radio goes to
a station, plays for a few seconds, then goes to the next
station. Press this button again to stop scanning.
The radio only scans stations with a strong signal in the
selected band.
AST (Automatic Store) : Twelve preset stations with
the strongest reception in the area can be automatically
stored. The radio will only scan stations with a strong
signal that are in the selected AM or FM band. If the
Automatic Store function is started in the FM band, only
FM stations are stored in preset pages A1 and A2. If the
Automatic Store function is started in the AM band, only
AM stations are stored in A1 and A2. A combination of
AM, FM and XM (if equipped) stations can be stored
manually into the other four favorite pages.
4-37
Page 180 of 368
To use Automatic Store:1. Press and hold AST to use Auto Store mode.
2. Press the pushbutton below the ON tab on the radio display.
3. Automatic Store searches for radio stations with a strong signal and automatically set presets A1 and
A2 with new stations.
4. After all stations are set, press the pushbutton below the arrow tab on the radio display to return
to the main radio screen
To reset the automatically stored radio stations, press
and hold AST. Then press the pushbutton below the
RESE tab on the radio display. If no stations are stored
on preset pages A1 and A2, the RESE option does not
appear in the radio display. When the Automatic Store
function is used, any stations that were previously set
will be deleted and replaced with new stations.
Storing a Radio Station
Drivers are encouraged to set up radio station favorites
while the vehicle is in P (Park). Tune to favorite stations
using the pushbuttons, favorites button, and steering
wheel controls. See Defensive Driving on page 5‑2.
A maximum of 36 stations can be programmed as
favorites using the six pushbuttons positioned below the
radio station frequency labels and by using the radio
favorites page button (FAV button). Press the FAV button to go through up to six pages of favorites,
each having six favorite stations available per page.
If Automatic Store is used, then four pages of favorites
are available. Each page of favorites can contain any
combination of AM, FM, or XM™
(if equipped) stations.
To store a station as a favorite:
1. Tune in the desired station.
2. Press and release the FAV button to display the page where the station is to be stored.
3. Press and hold one of the six numbered pushbuttons until a beep sounds. When the
pushbutton is pressed and released, the station
that was set will return.
4. Repeat the Steps 1 through 3 for each radio station to be stored as a favorite.
To setup the number of favorites pages: 1. Press and hold FAV until the radio setup menu displays.
2. Select the desired number of favorites pages by pressing the pushbutton located below the
displayed page numbers.
3. Press FAV to return to the original main radio screen showing the radio station frequency tabs
and to begin the process of programming favorites
for the chosen amount of numbered pages.
4-38
Page 181 of 368
Setting the Tone (Bass/Mid/Treble)
SOUND (Bass/Mid/Treble) :Press to adjust the bass,
midrange, or treble.
Adjusting the Bass
To adjust the bass:
1. Press SOUND.
2. Press the pushbutton below the Bass tab on the display.
3. Turn
Oto adjust the setting.
4. The settings are saved after five seconds.
Adjusting the Midrange
To adjust the midrange: 1. Press SOUND.
2. Press the pushbutton below the Mid tab on the display.
3. Turn
Oto adjust the setting.
4. The settings are saved after five seconds.
Adjusting the Treble
To adjust the treble: 1. Press SOUND.
2. Press the pushbutton below the Treb tab on the display.
3. Turn
Oto adjust the setting.
4. The settings are saved after five seconds.
Adjusting the Speakers (Balance/Fade)
SOUND (Balance/Fade) : Press to adjust the balance
or fade.
Adjusting the Balance
To adjust the balance:
1. Press SOUND.
2. Press the pushbutton below the Bal tab on the display.
3. Turn
Oto adjust the setting.
4. The settings are saved after five seconds.
4-39
Page 182 of 368
Adjusting the Fade
To adjust the fade:1. Press SOUND.
2. Press the pushbutton below the Fad tab on the display.
3. Turn
Oto adjust the setting.
4. The settings are saved after five seconds.
Setting the EQ
SOUND (Equalization) : Press to select an
equalization setting.
Setting the EQ
To set the EQ:
1. Press SOUND.
2. Press the pushbutton below the P.EQ tab on the display. The Pop, Rock, Ctry, Voice, Jazz, Clas
tabs appear on the display.
3. Press the pushbutton below the desired selection to set the EQ. Pressing the same pushbutton again
cancels the EQ setting.
XM Satellite Radio Service
XM is a satellite radio service that is based in the
48 contiguous United States and 10 Canadian
provinces. XM Satellite Radio has a wide variety
of programming and commercial-free music,
coast-to-coast, and in digital-quality sound. A service
fee is required to receive the XM service. For more
information, contact XM at www.xmradio.com or call
1-800-929-2100 in the U.S. and www.xmradio.ca or
call 1-877-438-9677 in Canada.
Radio Messages for XM Only
See XM Radio Messageson page 4‑51later in this
section for further detail.
Using the Auxiliary Input Jack
The radio system has a 3.5 mm (1/8 in) auxiliary input
jack located on the lower right side of the faceplate.
This is not an audio output; do not plug headphones
into the 3.5 mm (1/8 in) auxiliary input jack. An external
audio device such as an iPod
®, laptop computer,
MP3 player, CD changer, etc. can be connected to the
3.5 mm (1/8 in) auxiliary input jack for use as another
audio source.
4-40
Page 183 of 368
Drivers are encouraged to set up any auxiliary device
while the vehicle is in P (Park). SeeDefensive Driving
on page 5‑2for more information on driver distraction.
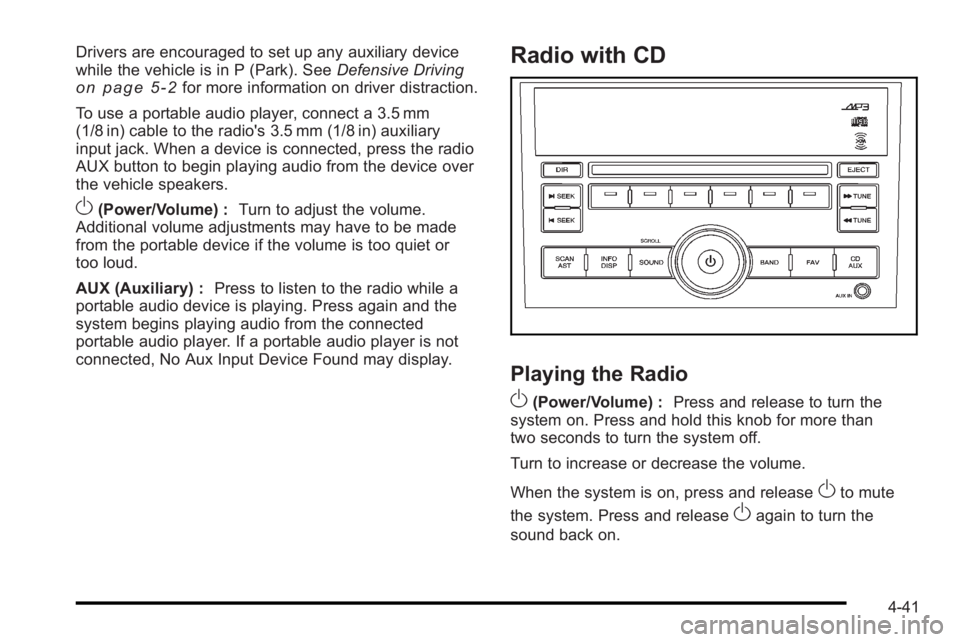
To use a portable audio player, connect a 3.5 mm
(1/8 in) cable to the radio's 3.5 mm (1/8 in) auxiliary
input jack. When a device is connected, press the radio
AUX button to begin playing audio from the device over
the vehicle speakers.
O(Power/Volume) : Turn to adjust the volume.
Additional volume adjustments may have to be made
from the portable device if the volume is too quiet or
too loud.
AUX (Auxiliary) : Press to listen to the radio while a
portable audio device is playing. Press again and the
system begins playing audio from the connected
portable audio player. If a portable audio player is not
connected, No Aux Input Device Found may display.
Radio with CD
Playing the Radio
O
(Power/Volume) : Press and release to turn the
system on. Press and hold this knob for more than
two seconds to turn the system off.
Turn to increase or decrease the volume.
When the system is on, press and release
Oto mute
the system. Press and release
Oagain to turn the
sound back on.
4-41