drain PONTIAC G5 2008 Owners Manual
[x] Cancel search | Manufacturer: PONTIAC, Model Year: 2008, Model line: G5, Model: PONTIAC G5 2008Pages: 388, PDF Size: 2.22 MB
Page 94 of 388
R(ON/RUN):This is the position the switch returns to
after you start your engine and release the switch.
The switch stays in the ON/RUN position when
the engine is running. But even when the ignition is not
running, you can use ON/RUN to operate your
electrical accessories and to display some warning and
indicator lights.
The battery could be drained if you leave the key in the
ACC/ACCESSORY or ON/RUN position with the
engine off. You may not be able to start your vehicle if
the battery is allowed to drain for an extended period
of time.
/(START):This position starts the engine. When the
engine starts, release the key. The ignition switch
will return to ON/RUN for normal driving.
A warning tone will sound if you open the driver’s door
while in LOCK/OFF or ACC/ACCESSORY, when
the key has not been removed from the ignition.
Key In the Ignition
Never leave your vehicle with the keys inside, as it is an
easy target for joy riders or thieves. If you leave the
key in the ignition and park your vehicle, a chime
will sound, when you open the driver’s door. Always
remember to remove your key from the ignition and take
it with you. This will lock your ignition and transmission.
Also, always remember to lock the doors.
The battery could be drained if you leave the key in the
ignition while your vehicle is parked. You may not be
able to start your vehicle after it has been parked for an
extended period of time.
2-22
Page 97 of 388
Starting Procedure
1. With your foot off the accelerator pedal, turn the
ignition key to START. When the engine starts,
let go of the key. The idle speed will go down as
your engine gets warm. Do not race the engine
immediately after starting it. Operate the engine and
transmission gently to allow the oil to warm up
and lubricate all moving parts.
Your vehicle has a Computer-Controlled Cranking
System. This feature assists in starting the
engine and protects components. If the ignition key
is turned to the START position, and then
released when the engine begins cranking, the
engine will continue cranking for a few seconds or
until the vehicle starts. If the engine does not
start and the key is held in START for many
seconds, cranking will be stopped after 15 seconds
to prevent cranking motor damage. To prevent
gear damage, this system also prevents cranking if
the engine is already running. Engine cranking
can be stopped by turning the ignition switch
to ACC/ACCESSORY or LOCK/OFF.
Notice:Cranking the engine for long periods of
time, by returning the key to the START position
immediately after cranking has ended, can overheat
and damage the cranking motor, and drain the
battery. Wait at least 15 seconds between each try,
to let the cranking motor cool down.2. If the engine does not start after 5-10 seconds,
especially in very cold weather (below 0°F or
−18°C), it could be �ooded with too much gasoline.
Try pushing the accelerator pedal all the way to
the �oor and holding it there as you hold the key in
START for up to a maximum of 15 seconds.
Wait at least 15 seconds between each try, to allow
the cranking motor to cool down. When the
engine starts, let go of the key and accelerator. If
the vehicle starts brie�y but then stops again, do the
same thing. This clears the extra gasoline from
the engine. Do not race the engine immediately
after starting it. Operate the engine and
transmission gently until the oil warms up and
lubricates all moving parts.
Notice:The engine is designed to work with the
electronics in your vehicle. If you add electrical
parts or accessories, you could change the way the
engine operates. Before adding electrical equipment,
check with your dealer/retailer. If you do not, your
engine might not perform properly. Any resulting
damage would not be covered by your vehicle’s
warranty.
2-25
Page 134 of 388
Battery Run-Down Protection
Your vehicle has a battery saver feature designed to
protect the vehicle’s battery.
When any interior lamp is left on and the ignition is
turned off, the battery rundown protection system
automatically turns the lamp off after 20 minutes.
This prevents draining of the battery.
Accessory Power Outlet(s)
Accessory power outlets can be used to connect
electrical equipment such as a cellular phone or
CB radio.
The accessory power outlet is located in the center
console, rearward of the shift lever.
To use the accessory power outlet, remove the cover.
When not in use, always cover the accessory power
outlet with the protective cap.
Notice:Leaving electrical equipment on for
extended periods will drain the battery. Always turn
off electrical equipment when not in use and do
not plug in equipment that exceeds the maximum
amperage rating of 20 amperes.Certain electrical accessories may not be compatible
with the accessory power outlet and could result
in blown vehicle or adapter fuses. If you experience a
problem, see your dealer/retailer for additional
information on the accessory power outlet.
Notice:Adding any electrical equipment to your
vehicle may damage it or keep other components
from working as they should. The repairs would not
be covered by your warranty. Do not use equipment
exceeding maximum amperage rating of 20 amperes.
Check with your dealer/retailer before adding
electrical equipment.
When adding electrical equipment, be sure to follow the
installation instructions included with the equipment.
Notice:Improper use of the power outlet can cause
damage not covered by your warranty. Do not
hang any type of accessory or accessory bracket
from the plug because the power outlets are
designed for accessory power plugs only.
3-18
Page 166 of 388
DIC Vehicle Personalization
Your vehicle has personalization capabilities that allow
you to program certain features to a preferred setting.
All of the features listed may not be available on
your vehicle. Only the features available will be
displayed on the DIC.
The default settings for the features were set when your
vehicle left the factory, but may have been changed
from their default state since that time.
To change feature settings, use the following procedure:
Entering Personalization Menu
1. Turn the ignition on while the vehicle is stopped.
To avoid excessive drain on the battery, it is
recommended that the headlamps are turned off.
2. Press and hold the information and reset buttons at
the same time for one second, then release to enter
the personalization menu.
If the vehicle speed is greater than 2 mph (3 km/h),
only the UNITS menu will be accessible.
3. Press the information button to scroll through the
available personalization menu modes.
Press the reset button to scroll through the available
settings for each mode.If you do not make a selection within ten seconds,
the display will go back to the previous information
displayed.
Personalization Menu Modes
OIL LIFE RESET
When this feature is displayed, you can reset the engine
oil life system. To reset the system, seeEngine Oil Life
System on page 5-16. See “OIL LIFE” underDIC
Operation and Displays on page 3-42for more
information.
UNITS
This feature allows you to select the units of
measurement in which the DIC will display the vehicle
information. When UNITS appears on the display, press
and hold the reset button for at least one second to
scroll through the available settings:
ENGLISH (default in United States):All information
will be displayed in English units.
METRIC (default in Canada):All information will be
displayed in metric units.
To select a setting and move on to the next feature,
press the information button while the desired setting is
displayed on the DIC.
3-50
Page 225 of 388
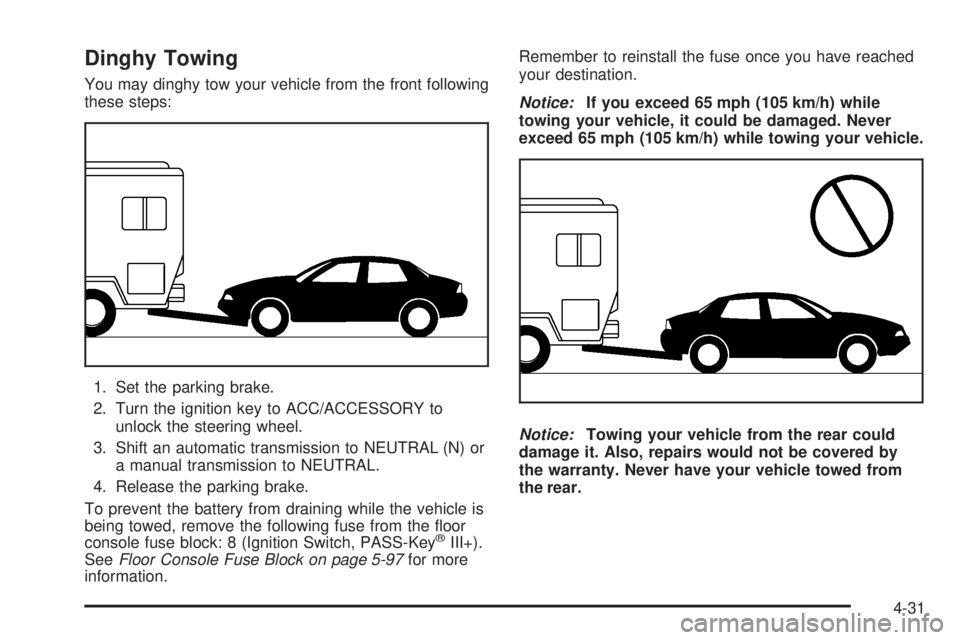
Dinghy Towing
You may dinghy tow your vehicle from the front following
these steps:
1. Set the parking brake.
2. Turn the ignition key to ACC/ACCESSORY to
unlock the steering wheel.
3. Shift an automatic transmission to NEUTRAL (N) or
a manual transmission to NEUTRAL.
4. Release the parking brake.
To prevent the battery from draining while the vehicle is
being towed, remove the following fuse from the �oor
console fuse block: 8 (Ignition Switch, PASS-Key
®III+).
SeeFloor Console Fuse Block on page 5-97for more
information.Remember to reinstall the fuse once you have reached
your destination.
Notice:If you exceed 65 mph (105 km/h) while
towing your vehicle, it could be damaged. Never
exceed 65 mph (105 km/h) while towing your vehicle.
‘
Notice:Towing your vehicle from the rear could
damage it. Also, repairs would not be covered by
the warranty. Never have your vehicle towed from
the rear.
4-31
Page 247 of 388
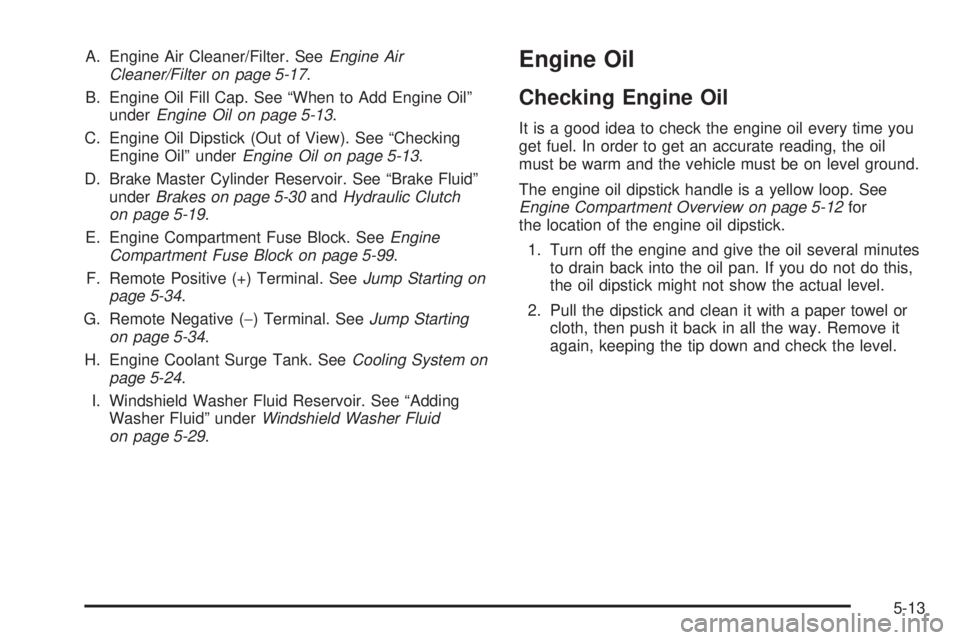
A. Engine Air Cleaner/Filter. SeeEngine Air
Cleaner/Filter on page 5-17.
B. Engine Oil Fill Cap. See “When to Add Engine Oil”
underEngine Oil on page 5-13.
C. Engine Oil Dipstick (Out of View). See “Checking
Engine Oil” underEngine Oil on page 5-13.
D. Brake Master Cylinder Reservoir. See “Brake Fluid”
underBrakes on page 5-30andHydraulic Clutch
on page 5-19.
E. Engine Compartment Fuse Block. SeeEngine
Compartment Fuse Block on page 5-99.
F. Remote Positive (+) Terminal. SeeJump Starting on
page 5-34.
G. Remote Negative (−) Terminal. SeeJump Starting
on page 5-34.
H. Engine Coolant Surge Tank. SeeCooling System on
page 5-24.
I. Windshield Washer Fluid Reservoir. See “Adding
Washer Fluid” underWindshield Washer Fluid
on page 5-29.Engine Oil
Checking Engine Oil
It is a good idea to check the engine oil every time you
get fuel. In order to get an accurate reading, the oil
must be warm and the vehicle must be on level ground.
The engine oil dipstick handle is a yellow loop. See
Engine Compartment Overview on page 5-12for
the location of the engine oil dipstick.
1. Turn off the engine and give the oil several minutes
to drain back into the oil pan. If you do not do this,
the oil dipstick might not show the actual level.
2. Pull the dipstick and clean it with a paper towel or
cloth, then push it back in all the way. Remove it
again, keeping the tip down and check the level.
5-13
Page 251 of 388
3. Press the information button to scroll through the
available personalization menu modes until the
DIC display shows OIL-LIFE RESET.
4. Press and hold the reset button until the DIC
display shows ACKNOWLEDGED. This will tell you
the system has been reset.
5. Turn the key to LOCK/OFF.
If the CHANGE OIL SOON message comes back on
when you start your vehicle, the engine oil life system
has not reset. Repeat the reset procedure.
What to Do with Used Oil
Used engine oil contains certain elements that can be
unhealthy for your skin and could even cause cancer.
Do not let used oil stay on your skin for very long. Clean
your skin and nails with soap and water, or a good hand
cleaner. Wash or properly dispose of clothing or rags
containing used engine oil. See the manufacturer’s
warnings about the use and disposal of oil products.
Used oil can be a threat to the environment. If you
change your own oil, be sure to drain all the oil from the
�lter before disposal. Never dispose of oil by putting it
in the trash, pouring it on the ground, into sewers, or into
streams or bodies of water. Instead, recycle it by taking
it to a place that collects used oil. If you have a problem
properly disposing of used oil, ask your dealer/retailer,
a service station, or a local recycling center for help.
Engine Air Cleaner/Filter
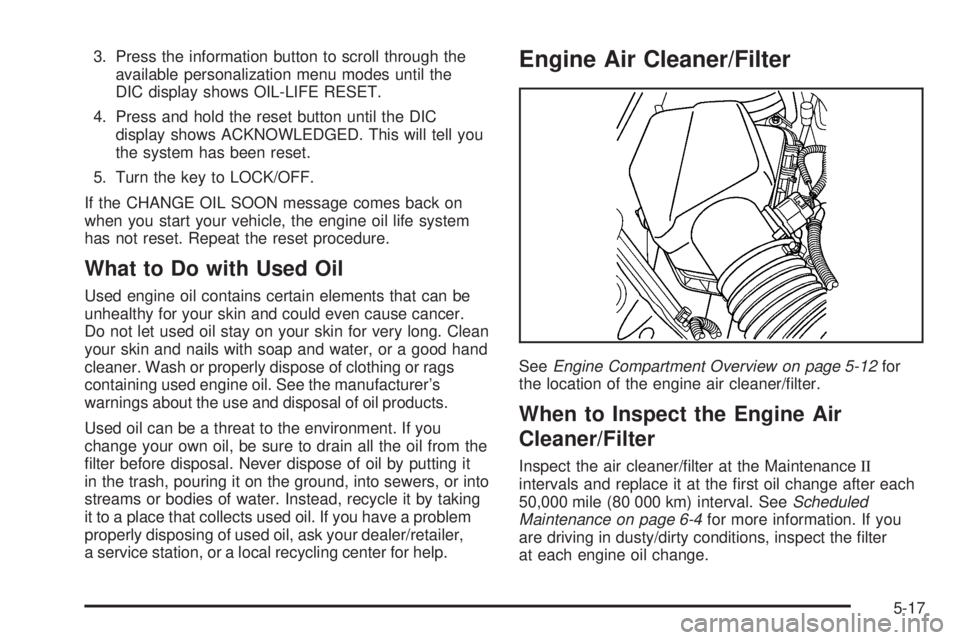
SeeEngine Compartment Overview on page 5-12for
the location of the engine air cleaner/�lter.
When to Inspect the Engine Air
Cleaner/Filter
Inspect the air cleaner/�lter at the MaintenanceII
intervals and replace it at the �rst oil change after each
50,000 mile (80 000 km) interval. SeeScheduled
Maintenance on page 6-4for more information. If you
are driving in dusty/dirty conditions, inspect the �lter
at each engine oil change.
5-17
Page 330 of 388
Electrical System
Add-On Electrical Equipment
Notice:Do not add anything electrical to your
vehicle unless you check with your dealer/retailer
�rst. Some electrical equipment can damage your
vehicle and the damage would not be covered by
your warranty. Some add-on electrical equipment can
keep other components from working as they should.
Add-on equipment can drain your vehicle’s battery, even
if your vehicle is not operating.
Your vehicle has an airbag system. Before attempting to
add anything electrical to your vehicle, seeServicing
Your Airbag-Equipped Vehicle on page 1-64.
Headlamp Wiring
The headlamp wiring is protected by fuses. Should your
headlamps fail to function, have your headlamp
system checked right away.
Windshield Wiper Fuses
The windshield wiper motor is protected by a circuit
breaker and a fuse. If the motor overheats due to heavy
snow, etc., the wiper will stop until the motor cools.
If the overload is caused by some electrical problem,
have it �xed.
Power Windows and Other Power
Options
Fuses in the fuse block protect the power windows.
When the current load is too heavy, the fuse opens
protecting the circuit until the problem is �xed.
5-96
Page 337 of 388
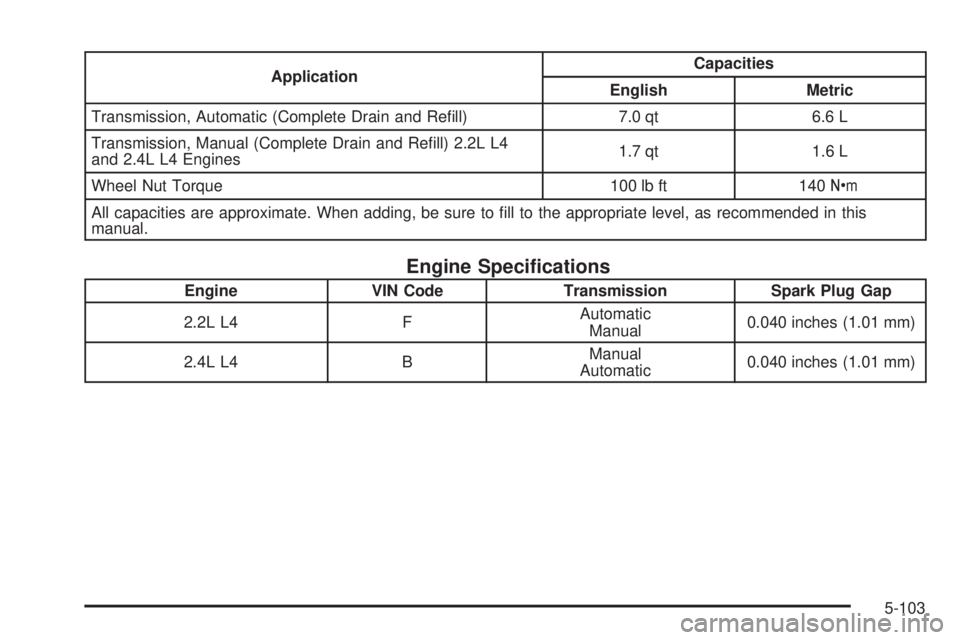
ApplicationCapacities
English Metric
Transmission, Automatic (Complete Drain and Re�ll) 7.0 qt 6.6 L
Transmission, Manual (Complete Drain and Re�ll) 2.2L L4
and 2.4L L4 Engines1.7 qt 1.6 L
Wheel Nut Torque 100 lb ft 140Y
All capacities are approximate. When adding, be sure to �ll to the appropriate level, as recommended in this
manual.
Engine Speci�cations
Engine VIN Code Transmission Spark Plug Gap
2.2L L4 FAutomatic
Manual0.040 inches (1.01 mm)
2.4L L4 BManual
Automatic0.040 inches (1.01 mm)
5-103
Page 346 of 388

(i)Drain, flush, and refill cooling system. This service
can be complex; you should have your dealer/retailer
perform this service. See Engine Coolant on page 5-19
for what to use. Inspect hoses. Clean radiator,
condenser, pressure cap, and filler neck. Pressure test
the cooling system and pressure cap.
(j)A fluid loss in any vehicle system could indicate a
problem. Have the system inspected and repaired and
the fluid level checked. Add fluid if needed.
(k)If you drive regularly under dusty conditions, inspect
the filter at each engine oil change.
(l)If you drive regularly under dusty conditions, the filter
may require replacement more often.
(m)Visually inspect belt for fraying, excessive cracks, or
obvious damage. Replace belt if necessary.Owner Checks and Services
These owner checks and services should be performed
at the intervals speci�ed to help ensure the safety,
dependability, and emission control performance of your
vehicle. Your dealer/retailer can assist you with these
checks and services.
Be sure any necessary repairs are completed at once.
Whenever any �uids or lubricants are added to your
vehicle, make sure they are the proper ones, as shown
inRecommended Fluids and Lubricants on page 6-12.
At Each Fuel Fill
It is important to perform these underhood checks at
each fuel fill.
Engine Oil Level Check
Notice:It is important to check the engine oil
regularly and keep it at the proper level. Failure to
keep the engine oil at the proper level can cause
damage to the engine not covered by your warranty.
Check the engine oil level and add the proper oil if
necessary. SeeEngine Oil on page 5-13.
6-8