steering PONTIAC G5 2010 Owner's Manual
[x] Cancel search | Manufacturer: PONTIAC, Model Year: 2010, Model line: G5, Model: PONTIAC G5 2010Pages: 422, PDF Size: 2.22 MB
Page 143 of 422
Instrument Panel Overview
Hazard Warning Flashers
|(Hazard Warning Flasher):Press this button
located on the instrument panel, to make the front and
rear turn signal lamps flash on and off. This warns
others that you are having trouble.
Press
|again to turn the flashers off.
Horn
To sound the horn, press the center pad on the steering
wheel.
Tilt Wheel
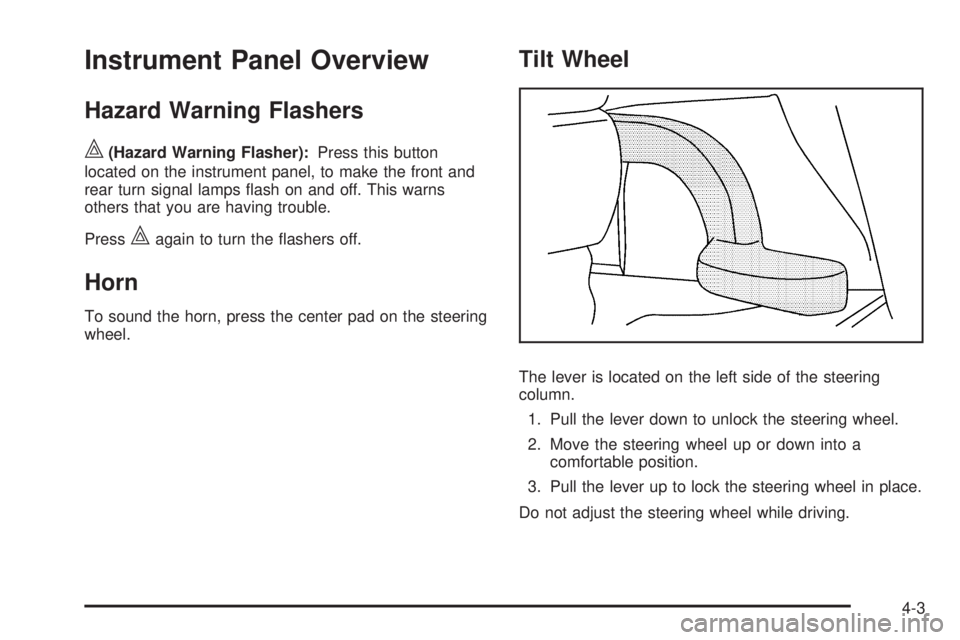
The lever is located on the left side of the steering
column.
1. Pull the lever down to unlock the steering wheel.
2. Move the steering wheel up or down into a comfortable position.
3. Pull the lever up to lock the steering wheel in place.
Do not adjust the steering wheel while driving.
4-3
Page 144 of 422

Turn Signal/Multifunction Lever
The lever on the left side of the steering column
operates the following:
G:Turn and Lane-Change Signals
53:Headlamp High/Low-Beam Changer
O:Exterior Lamp Control
Flash-to-Pass.
Information for these features is on the pages following.
Turn and Lane-Change Signals
An arrow on the instrument
panel cluster flashes in the
direction of the turn or lane
change.
Move the lever all the way up or down to signal a turn.
Raise or lower the lever until the arrow starts to flash
to signal a lane change. Hold it there until the lane
change is complete.
The lever returns to its starting position when it is
released.
If after signaling a turn or a lane change the arrows
flash rapidly or do not come on, a signal bulb could be
burned out.
Have the bulbs replaced. If the bulb is not burned out,
check the fuse. See Fuses and Circuit Breakers on
page 6-103.
4-4
Page 145 of 422
Headlamp High/Low-Beam Changer
To change the headlamps from low beam to high
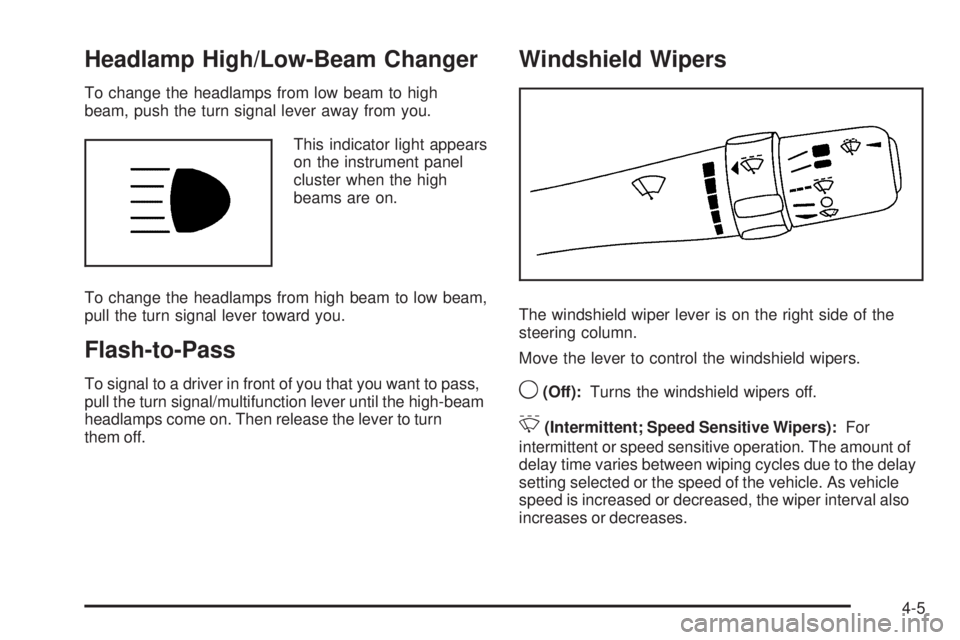
beam, push the turn signal lever away from you.This indicator light appears
on the instrument panel
cluster when the high
beams are on.
To change the headlamps from high beam to low beam,
pull the turn signal lever toward you.
Flash-to-Pass
To signal to a driver in front of you that you want to pass,
pull the turn signal/multifunction lever until the high-beam
headlamps come on. Then release the lever to turn
them off.
Windshield Wipers
The windshield wiper lever is on the right side of the
steering column.
Move the lever to control the windshield wipers.
9(Off): Turns the windshield wipers off.
&(Intermittent; Speed Sensitive Wipers): For
intermittent or speed sensitive operation. The amount of
delay time varies between wiping cycles due to the delay
setting selected or the speed of the vehicle. As vehicle
speed is increased or decreased, the wiper interval also
increases or decreases.
4-5
Page 147 of 422
Cruise Control
With cruise control, a speed of about 40 km/h (25 mph)
or more can be maintained without keeping your foot
on the accelerator. Cruise control does not work
at speeds below 40 km/h (25 mph).
The brake must be applied at least one time, after the
vehicle has been started, before cruise control will
function.
{WARNING:
Cruise control can be dangerous where you
cannot drive safely at a steady speed. So, do not
use the cruise control on winding roads or in
heavy traffic.
Cruise control can be dangerous on slippery roads.
On such roads, fast changes in tire traction can
cause excessive wheel slip, and you could lose
control. Do not use cruise control on slippery roads.
Setting Cruise Control
{WARNING:
If you leave your cruise control on when you are not
using cruise, you might hit a button and go into
cruise when you do not want to. You could be
startled and even lose control. Keep the cruise
control switch off until you want to use cruise
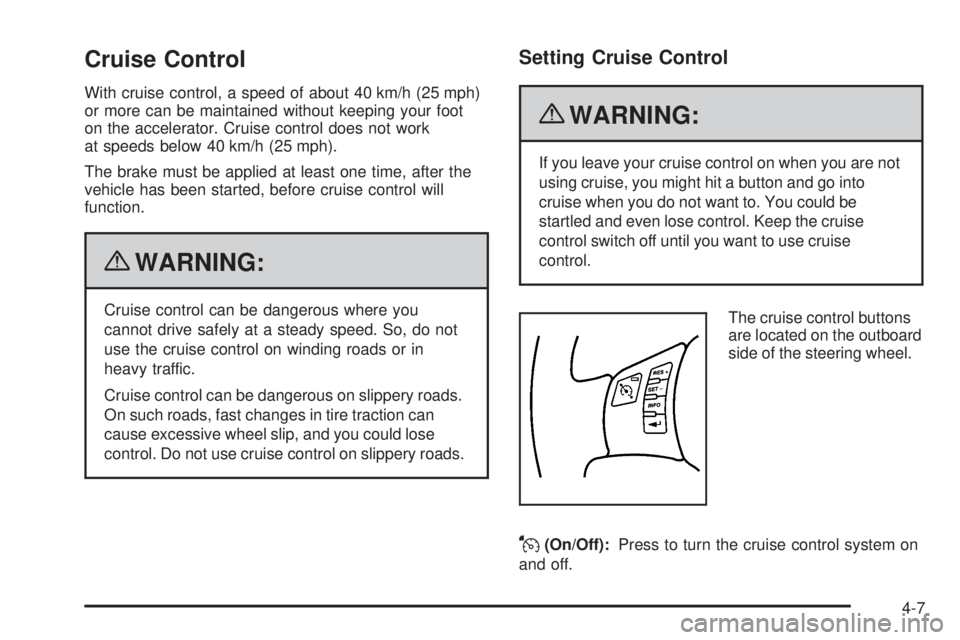
control.The cruise control buttons
are located on the outboard
side of the steering wheel.
J(On/Off):Press to turn the cruise control system on
and off.
4-7
Page 149 of 422
Passing Another Vehicle While Using
Cruise Control
Use the accelerator pedal to increase the vehicle’s
speed. When you take your foot off the pedal, the
vehicle will slow down to the cruise control speed
you set earlier.
Using Cruise Control on Hills
How well the cruise control will work on hills depends
upon the vehicle speed, load, and the steepness of the
hills. When going up steep hills, you might have to step
on the accelerator pedal to maintain the vehicle’s speed.
When going downhill, you might have to brake or shift to
a lower gear to keep the vehicle’s speed down. Applying
the brake will turn off the cruise control.
Ending Cruise Control
There are two ways to end cruise control:
•Step lightly on the brake pedal or the clutch pedal if
the vehicle has a manual transmission. This will
only end the current cruise control session.
•PressJto turn the system completely off.
Erasing Speed Memory
The cruise control set speed memory is erased when
the cruise control or the ignition is turned off.
Headlamps
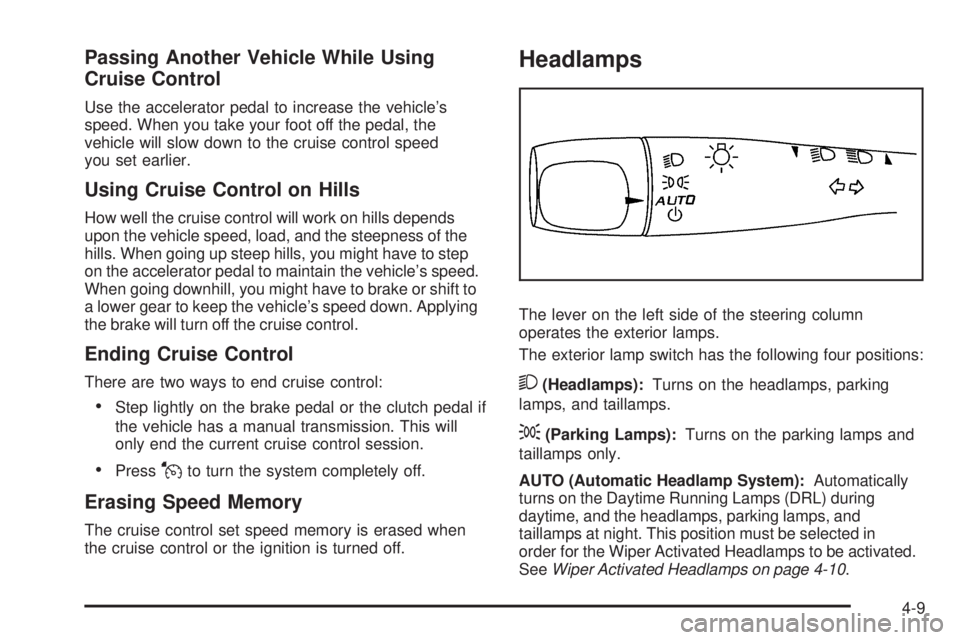
The lever on the left side of the steering column
operates the exterior lamps.
The exterior lamp switch has the following four positions:
2(Headlamps):Turns on the headlamps, parking
lamps, and taillamps.
;(Parking Lamps): Turns on the parking lamps and
taillamps only.
AUTO (Automatic Headlamp System): Automatically
turns on the Daytime Running Lamps (DRL) during
daytime, and the headlamps, parking lamps, and
taillamps at night. This position must be selected in
order for the Wiper Activated Headlamps to be activated.
See Wiper Activated Headlamps on page 4-10 .
4-9
Page 151 of 422

Fog Lamps
For vehicles with fog lamps, the button is located on the
instrument panel, to the left of the steering wheel.
The ignition must be on to use the fog lamps.
#:Press to turn the fog lamps on off. An indicator
light on the button comes on when the fog lamps are on.
The parking lamps automatically turn on and off when
the fog lamps are turned on and off.
The fog lamps will turn off while the high-beam
headlamps are turned on.
Some localities have laws that require the headlamps to
be on along with the fog lamps.
Instrument Panel Brightness
The control for this feature
is located on the instrument
panel to the left of the
steering wheel.
Turn the knob clockwise to brighten the lights or
counterclockwise to dim them.
Dome Lamp
The vehicle may have a dome lamp.
Move the lever to the following positions:
9(Off): Turns the lamp off, even when a door is
opened.
1(Door): Turns the lamp on whenever a door is
opened.
+(On): Turns the dome lamp on.
4-11
Page 175 of 422

Here are four things that some owners ask about.
None of these show a problem with the fuel gage:
•At the service station, the gas pump shuts off before
the gage reads full.
•It takes a little more or less fuel to fill up than the
gage indicated. For example, the gage may have
indicated the tank was half full, but it actually took a
little more or less than half the tank’s capacity to
fill the tank.
•The gage moves a little while turning a corner or
speeding up.
•The gage does not go back to empty when the
ignition is turned off.
For the fuel tank capacity, see Capacities and
Speci�cations on page 6-109 .
Driver Information Center (DIC)
Your vehicle has a Driver Information Center (DIC).
The DIC display gives you the status of many of your
vehicle’s systems. The DIC is also used to display
driver personalization menu modes and warning/status
messages. All messages will appear in the DIC display,
located at the bottom of the instrument panel cluster.
The DIC buttons are
located on the left side
of the steering wheel.
INFO (Information): Press this button to scroll through
the vehicle information mode displays.
r(Reset): Press this button to reset some vehicle
information mode displays, select a personalization menu
mode setting, or acknowledge a warning message.
4-35
Page 181 of 422

LOW TRACTION
If your vehicle has the Enhanced Traction System (ETS)
or Traction Control System (TCS), this message displays
and the ETS light or the ESC/TCS light on the instrument
panel cluster flashes when the system is actively limiting
wheel spin. Slippery road conditions may exist if this
message is displayed, so adjust your driving accordingly.
This message stays on for a few seconds after the
system stops limiting wheel spin. SeeEnhanced Traction
System (ETS) on page 5-11 orTraction Control System
(TCS) on page 5-8 andEnhanced Traction System (ETS)
Indicator/Warning Light on page 4-27 orElectronic
Stability Control (ESC)/Traction Control System (TCS)
Indicator/Warning Light on page 4-28 for more
information.
PARKING BRAKE
This message displays if the parking brake is left
engaged. See Parking Brake on page 3-29 for more
information.
POWER STEERING
This message displays if a problem has been detected
with the electric power steering. Have your vehicle
serviced by your dealer/retailer immediately.
SERVICE AIR BAG
This message displays when there is a problem with
the airbag system. Have your vehicle serviced by your
dealer/retailer immediately.
SERVICE ESC (ELECTRONIC STABILITY
CONTROL)
If your vehicle has Electronic Stability Control (ESC), this
message displays and a chime sounds if there has been
a problem detected with ESC. The ESC/TCS light also
appears on the instrument panel cluster. This light stays
on solid as long as the detected problem remains
present. When this message displays, the system is not
working. Adjust your driving accordingly. See Electronic
Stability Control (ESC) on page 5-6 andElectronic
Stability Control (ESC)/Traction Control System (TCS)
Indicator/Warning Light on page 4-28 for more
information.
If this message turns on while you are driving, pull off the
road as soon as possible and stop carefully. Try resetting
the system by turning the ignition off and then back on.
If this message still stays on or turns back on again while
you are driving, your vehicle needs service. Have the
ESC inspected by your dealer/retailer as soon as
possible.
4-41
Page 194 of 422
Storing Radio Stations
Depending on which radio the vehicle has, radio
stations are stored as either favorites or presets.
Storing a Radio Station as a Favorite
Radio that have a FAV button store radio stations as
favorites.
Drivers are encouraged to set up radio station favorites
while the vehicle is in P (Park). Tune to favorite stations
using the softkeys, favorites button, and steering wheel
controls. SeeDefensive Driving on page 5-2 .
FAV (Favorites): A maximum of 36 stations can be
stored as favorites using the six softkeys located below
the radio station frequency tabs and by using the radio
favorites page button (FAV button). Press FAV to go
through up to six pages of favorites, each having six
favorite stations available per page. Each page of
favorites can contain any combination of AM, FM,
or XM stations. The current balance/fade and tone
settings are also stored with the favorite stations. To store a station as a favorite:
1. Tune to the desired radio station and set the balance/fade and tone settings to the desired levels.
2. Press FAV to display the page where to store the station.
3. Press and hold one of the six softkeys until a beep sounds.
4. Repeat the steps for each radio station to be stored as a favorite.
To setup the number of favorites pages: 1. Press MENU to display the radio setup menu.
2. Press the softkey located below the FAV 1-6 tab.
3. Select the desired number of favorites pages by pressing the softkey located below the displayed
page numbers.
4. Press FAV, or let the menu time out, to return to the original main radio screen showing the radio
station frequency tabs and to begin programming
favorites.
4-54
Page 212 of 422
Bluetooth Controls
Use the buttons located on the steering wheel to
operate the in-vehicle Bluetooth system. SeeAudio
Steering Wheel Controls on page 4-82 for more
information.
b g(Push To Talk): Press to answer incoming calls,
to confirm system information, and to start speech
recognition.
c x(Phone On Hook): Press to end a call, reject a
call, or to cancel an operation.
Pairing
A Bluetooth enabled cell phone must be paired to the
in-vehicle Bluetooth system first and then connected to
the vehicle before it can be used. See the cell phone
manufacturers user guide for Bluetooth functions before
pairing the cell phone. If a Bluetooth phone is not
connected, calls will be made using OnStar
®Hands-Free
Calling, if available. Refer to the OnStar owner’s guide for
more information. Pairing Information:
•Up to five cell phones can be paired to the in-vehicle
Bluetooth system.
•The pairing process is disabled when the vehicle is
moving.
•The in-vehicle Bluetooth system automatically links
with the first available paired cell phone in the
order the phone was paired.
•Only one paired cell phone can be connected to the
in-vehicle Bluetooth system at a time.
•Pairing should only need to be completed once,
unless changes to the pairing information have
been made or the phone is deleted.
To link to a different paired phone, see Linking to a
Different Phone later in this section.
4-72