display PONTIAC G5 2010 Owners Manual
[x] Cancel search | Manufacturer: PONTIAC, Model Year: 2010, Model line: G5, Model: PONTIAC G5 2010Pages: 422, PDF Size: 2.22 MB
Page 21 of 422
f:Select radio stations.
©¨:Seek or scan stations.
4:Press4to display additional text information related
to the current FM-RDS or XM station; or CD, MP3,
WMA song. Song title information will be displayed on
the top line of the display while the artist information will
be displayed on the bottom line, it the information is
available during XM, CD, MP3, or WMA playback. When
information is not available, “No Info” displays.
For more information about these and other radio
features, see Radio(s) on page 4-51 .
Storing a Favorite Station
Depending on which radio the vehicle has, radio
stations are stored as either favorites or presets.
For radios with a FAV button, a maximum of 36 stations
can be stored as favorites using the six softkeys
located below the radio station frequency tabs and by
using the radio FAV button. Press FAV to go through up
to six pages of favorites, each having six favorite
stations available per page. Each page of favorites can
contain any combination of AM, FM, or XM stations. For radios without a FAV button, up to 18 stations
(six FM1, six FM2, and six AM), can be programmed on
the six numbered buttons.
For more information, see
Radio(s) on page 4-51.
Setting the Clock
To set the time and date for the Radio with CD (MP3)
and USB port or the Radio with CD (MP3) player:
1. Turn the ignition key to ACC/ACCESSORY or ON/RUN.
2. Press
Oto turn the radio on.
3. Press
Hand the HR, MIN, MM, DD, YYYY (hour,
minute, month, day, and year) displays.
4. Press the softkey located below any one of the tabs that you want to change.
5. Increase or decrease the time or date by turning
f
clockwise or counterclockwise.
For detailed instructions on setting the clock for your
specific audio system, see Setting the Clock on
page 4-50.
1-15
Page 24 of 422

Cruise Control
The cruise control buttons
are located on the left side
of the steering wheel.
J:On/Off.
RES+: Press to resume or accelerate speed.
SET−: Press to set or decrease speed.
For more information, see Cruise Control on page 4-7 .
Power Outlets
Accessory power outlets can be used to connect
electrical equipment, such as a cellular phone.
The accessory power outlet is located in the center
console, rearward of the shift lever.
To use the accessory power outlet, remove the cover.
SeeAccessory Power Outlet(s) on page 4-13 and
Ashtray(s) and Cigarette Lighter on page 4-14
(If Equipped).
Performance and Maintenance
Traction Control System (TCS)
The traction control system limits wheel spin. The
system turns on automatically every time the vehicle is
started.
•To turn off traction control, press and releasedon
the instrument panel.
Filluminates and the
appropriate DIC message displays. See DIC
Warnings and Messages on page 4-38 .
•Press and release the button again to turn on
traction control.
For more information, see Traction Control System
(TCS) on page 5-8.
1-18
Page 25 of 422

Electronic Stability Control (ESC)
The Electronic Stability Control system assists with
directional control of the vehicle in difficult driving
conditions. The system turns on automatically every
time the vehicle is started.
•To turn off both traction control and Electronic
Stability Control, press and hold
duntilF
illuminates and the appropriate DIC message
displays. SeeDIC Warnings and Messages on
page 4-38.
•Press and release the button again to turn on both
systems.
For more information, see Electronic Stability Control
(ESC) on page 5-6.
Tire Pressure Monitor
This vehicle may have a Tire Pressure Monitor
System (TPMS).
The Tire Pressure Monitor
alerts you when a
significant reduction in
pressure occurs in one or
more of the vehicle’s tires
by illuminating the low tire
pressure warning light on
the instrument cluster.
The warning light will remain on until the tire pressure is
corrected. The proper tire pressures for your vehicle
are listed on the Tire and Loading Information label
located on the driver side center pillar (B pillar). See
Loading the Vehicle on page 5-24 .
1-19
Page 26 of 422
You may notice during cooler conditions that the low tire
pressure warning light will appear when the vehicle is
first started and then turn off as you drive. This may be
an early indicator that your tire pressures are getting
low and the tires need to be inflated to the proper
pressure.
Note:The Tire Pressure Monitor can alert you about
low tire pressure, but it does not replace normal monthly
tire maintenance. It is the driver’s responsibility to
maintain correct tire pressures.
See Tire Pressure Monitor System on page 6-56 and
Tire Pressure Monitor Operation on page 6-58 .
Tire Sealant and Compressor Kit
This vehicle may come with a jack and spare tire or a
tire sealant and compressor kit. The kit can be used
to seal small punctures in the tread area of the tire.
SeeTire Sealant and Compressor Kit on page 6-72 for
complete operating information.
Engine Oil Life System
The engine oil life system calculates engine oil life
based on vehicle use and displays a DIC message when
it is necessary to change the engine oil and filter. The
oil life system should be reset to 100% only following an
oil change.
Resetting the Oil Life System
1. Turn the ignition to ON/RUN, with the engine off.
2. Press the DIC information and reset buttons at the same time to enter the personalization menu.
3. Press the information button until the DIC display shows OIL-LIFE RESET.
4. Press and hold the reset button until the DIC display shows ACKNOWLEDGED.
5. Turn the key to LOCK/OFF.
See Engine Oil Life System on page 6-16 .
1-20
Page 107 of 422
Programming Transmitters to the
Vehicle
Only RKE transmitters programmed to the vehicle will
work. If a transmitter is lost or stolen, a replacement can
be purchased and programmed through your
dealer/retailer. When the replacement transmitter is
programmed to the vehicle, all remaining transmitters
must also be programmed. Any lost or stolen
transmitters no longer work once the new transmitter is
programmed. Each vehicle can have up to four
transmitters programmed to it.
Battery Replacement
Replace the battery if the KEY FOB BATT LOW
message displays in the DIC. See “KEY FOB BATT
LOW” underDIC Warnings and Messages on page 4-38 .
Notice: When replacing the battery, do not touch
any of the circuitry on the transmitter. Static
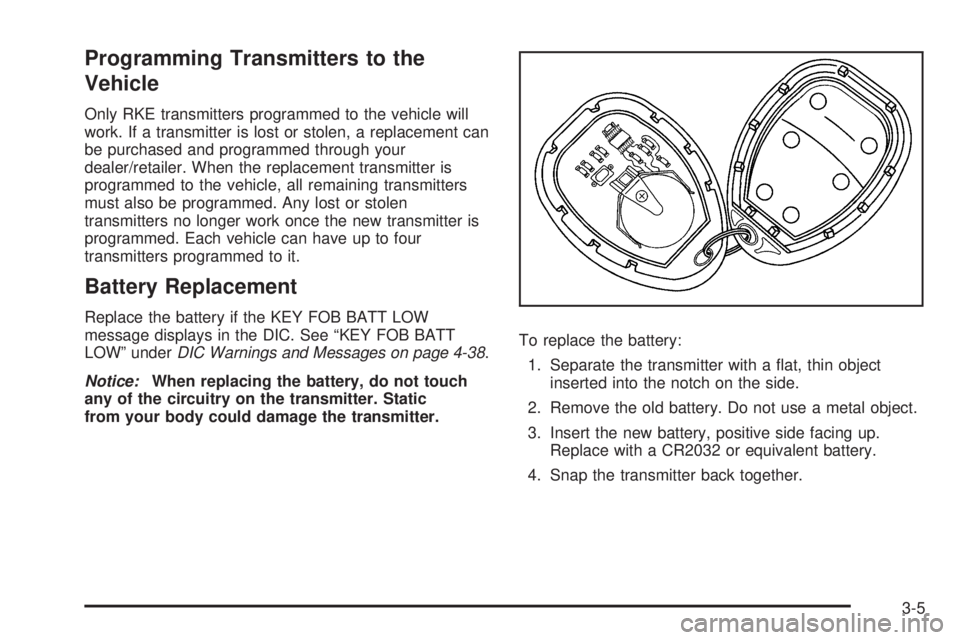
from your body could damage the transmitter. To replace the battery:
1. Separate the transmitter with a flat, thin object inserted into the notch on the side.
2. Remove the old battery. Do not use a metal object.
3. Insert the new battery, positive side facing up. Replace with a CR2032 or equivalent battery.
4. Snap the transmitter back together.
3-5
Page 122 of 422
On vehicles with an automatic transmission, the shift
lever must be in P (Park) to turn the ignition switch
to LOCK/OFF.
On vehicles with a manual transmission, the ignition
switch can be turned to LOCK/OFF in any shift
lever position.
The steering can bind with the wheel turned off center.
If this happens, move it from right to left while turning
the key to ACC/ACCESSORY. If this does not
work, then the vehicle needs service.
{WARNING:
If you have a manual transmission removing the
key from the ignition switch will lock the steering
column and result in a loss of ability to steer the
vehicle. This could cause a collision. If you need
to turn the engine off while the vehicle is moving,
turn the key to ACC/ACCESSORY.ACC (ACC/ACCESSORY):
This position operates
some of the electrical accessories. It unlocks the
steering wheel and ignition.
R(ON/RUN): This is the position in which you can
operate the electrical accessories and to display some
instrument panel cluster warning and indicator lights.
The switch stays in this position when the engine
is running.
If you leave the key in the ACC/ACCESSORY or
ON/RUN position with the engine off, the battery could
be drained. You may not be able to start the vehicle
if the battery is allowed to drain for an extended period
of time.
/(START): This position starts the engine. When the
engine starts, release the key. The ignition switch will
return to ON/RUN for driving.
A warning tone will sound when the driver door is
opened, the ignition is in LOCK/OFF or
ACC/ACCESSORY and the key is in the ignition.
3-20
Page 142 of 422
Electronic Stability Control (ESC)/TractionControl System (TCS) Indicator/Warning
Light ....................................................... .4-28
Engine Coolant Temperature Warning Light ......4-29
Tire Pressure Light ...................................... .4-29
Malfunction Indicator Lamp .............................4-30
Oil Pressure Light ........................................ .4-33
Security Light .............................................. .4-33
Fog Lamp Light ........................................... .4-34
Highbeam On Light ...................................... .4-34
Fuel Gage .................................................. .4-34
Driver Information Center (DIC) .......................4-35
DIC Operation and Displays ...........................4-36
DIC Warnings and Messages .........................4-38
DIC Vehicle Personalization ............................4-43Audio System(s)
............................................ .4-49
Setting the Clock ......................................... .4-50
Radio(s) ..................................................... .4-51
Using an MP3 ............................................. .4-63
XM Radio Messages .................................... .4-70
Bluetooth
®.................................................. .4-71
Theft-Deterrent Feature ................................. .4-81
Audio Steering Wheel Controls .......................4-82
Radio Reception .......................................... .4-83
Fixed Mast Antenna ..................................... .4-84
XM™ Satellite Radio Antenna System .............4-84
Section 4 Instrument Panel
4-2
Page 152 of 422
Entry/Exit Lighting
The lamps inside the vehicle will go on when any door is
opened. These lamps fade out about 20 seconds after all
of the doors have been closed or when the ignition is
turned to ON/RUN. These lamps will also go on when
pressing the trunk release, unlock symbol, or the horn
symbol button on the Remote Keyless Entry System
(RKE) Transmitter.
After the key is removed from the ignition, the lamps
inside the vehicle stay on for about 20 seconds to
provide an illuminated exit.
Mirror Reading Lamps
The vehicle may have reading lamps on the rearview
mirror. Press the button near each lamp to turn the
reading lamps on and off.
Electric Power Management
This vehicle has Electric Power Management (EPM),
an advanced control system. It estimates the battery’s
temperature and state of charge and then adjusts
the voltage for best performance and extended life
of the battery.When the battery’s state of charge is low, the voltage is
raised slightly to quickly put the charge back in. When the
state of charge is high, the voltage is lowered slightly to
prevent overcharging. If the vehicle has a voltmeter gage
or voltage display on the Driver Information Center (DIC),
you may see the voltage move up or down. This is
normal. If there is a problem, an alert will be displayed.
The battery can be discharged at idle if the electrical
loads are very high. This is true for all vehicles. This is
because the generator (alternator) may not be spinning
fast enough at idle to produce all the power that is
needed for very high electrical loads.
A high electrical load occurs when several of the following
loads are on: headlamps, high beams, fog lamps, rear
window defogger, climate control fan at high speed,
heated seats, engine cooling fans, trailer loads, and
loads plugged into accessory power outlets.
EPM works to prevent excessive discharge of the battery.
It does this by balancing the generator’s output and the
vehicle’s electrical needs. It can increase engine idle
speed to generate more power, whenever needed.
It can temporarily reduce the power demands of some
accessories.
Normally, these actions occur in steps or levels, without
being noticeable. In rare cases at the highest levels
of corrective action, this action may be noticeable to
the driver.
4-12
Page 161 of 422

Speedometer and Odometer
The speedometer shows the speed in both kilometers
per hour (km/h) and miles per hour (mph).
The vehicle’s odometer works together with the Driver
Information Center (DIC). Trip A and Trip B can be
set on the odometer. See “Trip Information” underDIC
Operation and Displays on page 4-36 .
The vehicle does not have to be running to check the
odometer mileage. Simply open the driver’s door and the
mileage briefly displays.
If the vehicle ever needs a new odometer installed,
the new one will be set to the correct total mileage of the
old odometer.
Tachometer
The tachometer displays
the engine speed
in revolutions per
minute (rpm).
Notice: If the engine is operated while the
tachometer is in the shaded warning area, the
vehicle could be damaged, and the damages would
not be covered by the vehicle warranty. Do not
operate the engine with the tachometer in the
shaded warning area.
4-21
Page 168 of 422
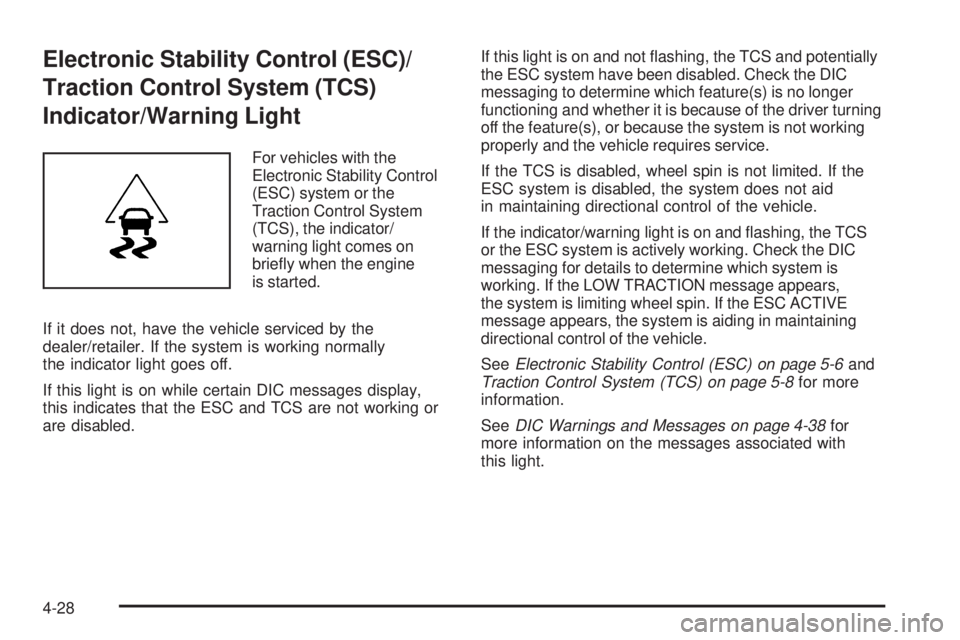
Electronic Stability Control (ESC)/
Traction Control System (TCS)
Indicator/Warning Light
For vehicles with the
Electronic Stability Control
(ESC) system or the
Traction Control System
(TCS), the indicator/
warning light comes on
briefly when the engine
is started.
If it does not, have the vehicle serviced by the
dealer/retailer. If the system is working normally
the indicator light goes off.
If this light is on while certain DIC messages display,
this indicates that the ESC and TCS are not working or
are disabled. If this light is on and not flashing, the TCS and potentially
the ESC system have been disabled. Check the DIC
messaging to determine which feature(s) is no longer
functioning and whether it is because of the driver turning
off the feature(s), or because the system is not working
properly and the vehicle requires service.
If the TCS is disabled, wheel spin is not limited. If the
ESC system is disabled, the system does not aid
in maintaining directional control of the vehicle.
If the indicator/warning light is on and flashing, the TCS
or the ESC system is actively working. Check the DIC
messaging for details to determine which system is
working. If the LOW TRACTION message appears,
the system is limiting wheel spin. If the ESC ACTIVE
message appears, the system is aiding in maintaining
directional control of the vehicle.
See
Electronic Stability Control (ESC) on page 5-6 and
Traction Control System (TCS) on page 5-8 for more
information.
See DIC Warnings and Messages on page 4-38 for
more information on the messages associated with
this light.
4-28