key PONTIAC G5 2010 Owners Manual
[x] Cancel search | Manufacturer: PONTIAC, Model Year: 2010, Model line: G5, Model: PONTIAC G5 2010Pages: 422, PDF Size: 2.22 MB
Page 1 of 422
In Brief........................................................... 1-1
Instrument Panel ........................................ 1-2
Initial Drive Information ............................... 1-4
Vehicle Features ...................................... 1-14
Performance and Maintenance ...................1-18
Seats and Restraint System ............................. 2-1
Front Seats ............................................... 2-2
Rear Seats ............................................... 2-9
Safety Belts ............................................. 2-11
Child Restraints ....................................... 2-32
Airbag System ......................................... 2-55
Restraint System Check ............................2-71
Features and Controls ..................................... 3-1
Keys ........................................................ 3-2
Doors and Locks ....................................... 3-8
Windows ................................................. 3-13
Theft-Deterrent Systems ............................3-15
Starting and Operating Your Vehicle ...........3-19 Mirrors
.................................................... 3-35
Storage Areas ......................................... 3-36
Sunroof .................................................. 3-37
Instrument Panel ............................................. 4-1
Instrument Panel Overview .......................... 4-3
Climate Controls ...................................... 4-14
Warning Lights, Gages, and Indicators ........4-19
Driver Information Center (DIC) ..................4-35
Audio System(s) ....................................... 4-49
Driving Your Vehicle ....................................... 5-1
Your Driving, the Road, and the Vehicle ....... 5-2
Towing ................................................... 5-30
Service and Appearance Care .......................... 6-1
Service ..................................................... 6-3
Fuel ......................................................... 6-5
Checking Things Under the Hood ...............6-10
Headlamp Aiming ..................................... 6-38
Bulb Replacement .................................... 6-41
2010 Pontiac G5 Owner ManualM
Page 7 of 422
Instrument Panel............................................. .1-2
Initial Drive Information ....................................1-4
Remote Keyless Entry (RKE) System ................1-4
Remote Vehicle Start ..................................... .1-4
Door Locks ................................................... .1-5
Trunk Release .............................................. .1-6
Windows ...................................................... .1-6
Seat Adjustment ............................................ .1-6
Head Restraint Adjustment ...............................1-9
Safety Belt ................................................... .1-9
Sensing System for Passenger Airbag ...............1-9
Mirror Adjustment ........................................ .1-10
Steering Wheel Adjustment ............................1-11
Interior Lighting ........................................... .1-11
Exterior Lighting .......................................... .1-12
Windshield Wiper/Washer ...............................1-13
Climate Controls .......................................... .1-14Vehicle Features
............................................ .1-14
Radio(s) ..................................................... .1-14
Satellite Radio ............................................. .1-16
Portable Audio Devices (Auxiliary Input or USB Port) ............................................... .1-16
Steering Wheel Controls ................................1-17
Bluetooth
®.................................................. .1-17
Cruise Control ............................................. .1-18
Power Outlets ............................................. .1-18
Performance and Maintenance .........................1-18
Traction Control System (TCS) .......................1-18
Electronic Stability Control (ESC) ....................1-19
Tire Pressure Monitor ................................... .1-19
Tire Sealant and Compressor Kit ....................1-20
Engine Oil Life System ................................. .1-20
Driving for Better Fuel Economy .....................1-21
Roadside Assistance Program ........................1-21
OnStar
®..................................................... .1-22
Section 1 In Brief
1-1
Page 10 of 422
Initial Drive Information
This section provides a brief overview about some of
the important features that may or may not be on your
specific vehicle.
For more detailed information, refer to each of the
features which can be found later in this owner manual.
Remote Keyless Entry (RKE)
System
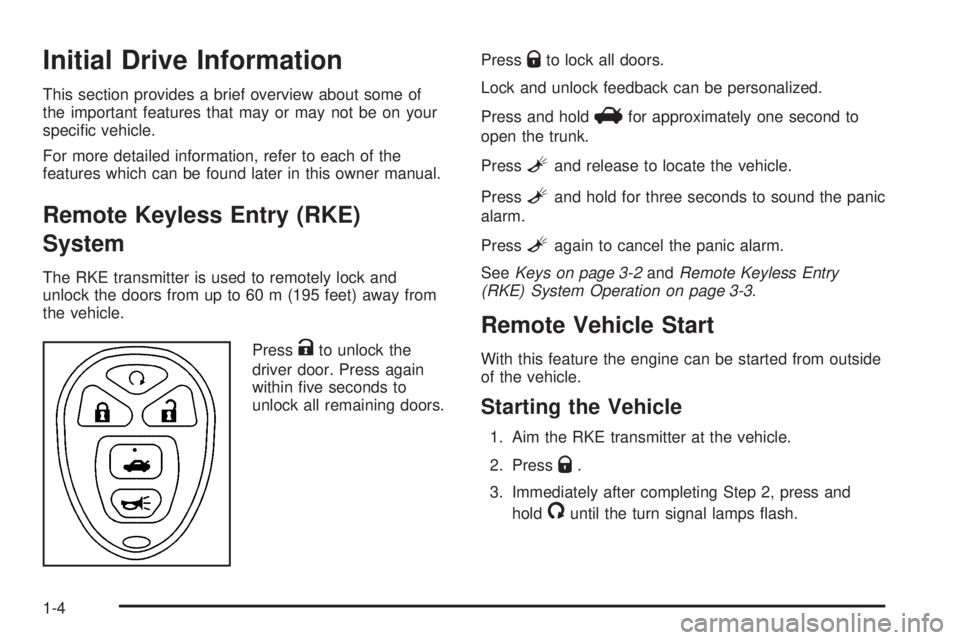
The RKE transmitter is used to remotely lock and
unlock the doors from up to 60 m (195 feet) away from
the vehicle.Press
Kto unlock the
driver door. Press again
within five seconds to
unlock all remaining doors. Press
Qto lock all doors.
Lock and unlock feedback can be personalized.
Press and hold
Vfor approximately one second to
open the trunk.
Press
Land release to locate the vehicle.
Press
Land hold for three seconds to sound the panic
alarm.
Press
Lagain to cancel the panic alarm.
See Keys on page 3-2 andRemote Keyless Entry
(RKE) System Operation on page 3-3 .
Remote Vehicle Start
With this feature the engine can be started from outside
of the vehicle.
Starting the Vehicle
1. Aim the RKE transmitter at the vehicle.
2. Press
Q.
3. Immediately after completing Step 2, press and hold
/until the turn signal lamps flash.
1-4
Page 11 of 422
When the vehicle starts, the parking lamps will turn on
and remain on as long as the engine is running.
The doors will be locked and the climate control system
may come on.
The engine will continue to run for 10 minutes. Repeat
the steps for a 10-minute time extension. Remote
start can be extended only once.
Canceling a Remote Start
To cancel a remote start:
•Aim the RKE transmitter at the vehicle and press
and hold
/until the parking lamps turn off.
•Turn on the hazard warning flashers.
•Turn the ignition switch to ON/RUN and then back
to LOCK/OFF.
See Remote Vehicle Start on page 3-6 .
Door Locks
To lock the driver door from outside the vehicle, turn the
key clockwise. Turn it counterclockwise to unlock.
The Remote Keyless Entry (RKE) transmitter can also
be used to lock or unlock the doors.
From the inside, use the manual lock knobs on each
door or use the power door locks.
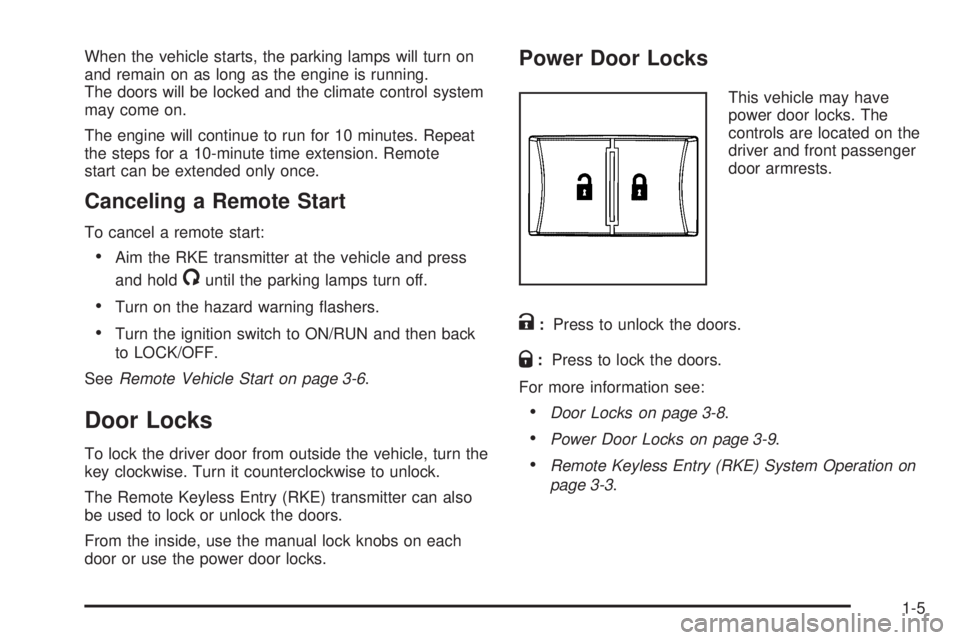
Power Door Locks
This vehicle may have
power door locks. The
controls are located on the
driver and front passenger
door armrests.
K:Press to unlock the doors.
Q:Press to lock the doors.
For more information see:
•Door Locks on page 3-8 .
•Power Door Locks on page 3-9 .
•Remote Keyless Entry (RKE) System Operation on
page 3-3.
1-5
Page 12 of 422

Trunk Release
In addition to the trunk release button on the Remote
Keyless Entry (RKE) transmitter, the trunk can be
opened from inside the vehicle by pressing the remote
trunk release button. This button is located inside
the driver storage compartment, on the left side of the
instrument panel.
SeeTrunk on page 3-11.
Windows
Power Windows
For vehicles with power
windows, the switches on
the driver door armrest
control each window. The
switch on each passenger
door controls only that
doors window.
Press the front of the switch to open the window and pull
the switch up to close it.
See Power Windows on page 3-14 .
Seat Adjustment
Manual Seats
1. Lift the bar to unlock
the seat.
2. Slide the seat to the desired position and
release the bar.
Try to move the seat to be sure it is locked in place.
See Manual Seats on page 2-2 .
1-6
Page 21 of 422
f:Select radio stations.
©¨:Seek or scan stations.
4:Press4to display additional text information related
to the current FM-RDS or XM station; or CD, MP3,
WMA song. Song title information will be displayed on
the top line of the display while the artist information will
be displayed on the bottom line, it the information is
available during XM, CD, MP3, or WMA playback. When
information is not available, “No Info” displays.
For more information about these and other radio
features, see Radio(s) on page 4-51 .
Storing a Favorite Station
Depending on which radio the vehicle has, radio
stations are stored as either favorites or presets.
For radios with a FAV button, a maximum of 36 stations
can be stored as favorites using the six softkeys
located below the radio station frequency tabs and by
using the radio FAV button. Press FAV to go through up
to six pages of favorites, each having six favorite
stations available per page. Each page of favorites can
contain any combination of AM, FM, or XM stations. For radios without a FAV button, up to 18 stations
(six FM1, six FM2, and six AM), can be programmed on
the six numbered buttons.
For more information, see
Radio(s) on page 4-51.
Setting the Clock
To set the time and date for the Radio with CD (MP3)
and USB port or the Radio with CD (MP3) player:
1. Turn the ignition key to ACC/ACCESSORY or ON/RUN.
2. Press
Oto turn the radio on.
3. Press
Hand the HR, MIN, MM, DD, YYYY (hour,
minute, month, day, and year) displays.
4. Press the softkey located below any one of the tabs that you want to change.
5. Increase or decrease the time or date by turning
f
clockwise or counterclockwise.
For detailed instructions on setting the clock for your
specific audio system, see Setting the Clock on
page 4-50.
1-15
Page 26 of 422
You may notice during cooler conditions that the low tire
pressure warning light will appear when the vehicle is
first started and then turn off as you drive. This may be
an early indicator that your tire pressures are getting
low and the tires need to be inflated to the proper
pressure.
Note:The Tire Pressure Monitor can alert you about
low tire pressure, but it does not replace normal monthly
tire maintenance. It is the driver’s responsibility to
maintain correct tire pressures.
See Tire Pressure Monitor System on page 6-56 and
Tire Pressure Monitor Operation on page 6-58 .
Tire Sealant and Compressor Kit
This vehicle may come with a jack and spare tire or a
tire sealant and compressor kit. The kit can be used
to seal small punctures in the tread area of the tire.
SeeTire Sealant and Compressor Kit on page 6-72 for
complete operating information.
Engine Oil Life System
The engine oil life system calculates engine oil life
based on vehicle use and displays a DIC message when
it is necessary to change the engine oil and filter. The
oil life system should be reset to 100% only following an
oil change.
Resetting the Oil Life System
1. Turn the ignition to ON/RUN, with the engine off.
2. Press the DIC information and reset buttons at the same time to enter the personalization menu.
3. Press the information button until the DIC display shows OIL-LIFE RESET.
4. Press and hold the reset button until the DIC display shows ACKNOWLEDGED.
5. Turn the key to LOCK/OFF.
See Engine Oil Life System on page 6-16 .
1-20
Page 61 of 422

Safety Belt Use During Pregnancy
Safety belts work for everyone, including pregnant
women. Like all occupants, they are more likely to be
seriously injured if they do not wear safety belts.
A pregnant woman should wear a lap-shoulder belt, and
the lap portion should be worn as low as possible,
below the rounding, throughout the pregnancy.
The best way to protect the fetus is to protect the
mother. When a safety belt is worn properly, it is more
likely that the fetus will not be hurt in a crash. For
pregnant women, as for anyone, the key to making
safety belts effective is wearing them properly.
Safety Belt Extender
If the vehicle’s safety belt will fasten around you, you
should use it.
But if a safety belt is not long enough, your
dealer/retailer will order you an extender. When you go
in to order it, take the heaviest coat you will wear,
so the extender will be long enough for you. To help
avoid personal injury, do not let someone else use
it, and use it only for the seat it is made to fit. The
extender has been designed for adults. Never use it for
securing child seats. To wear it, attach it to the
regular safety belt. For more information, see the
instruction sheet that comes with the extender.
2-31
Page 103 of 422
Keys.............................................................. .3-2
Remote Keyless Entry (RKE) System ................3-3
Remote Keyless Entry (RKE) System Operation .................................................. .3-3
Remote Vehicle Start ..................................... .3-6
Doors and Locks ............................................ .3-8
Door Locks ................................................... .3-8
Power Door Locks ......................................... .3-9
Delayed Locking ............................................ .3-9
Automatic Door Lock ...................................... .3-9
Programmable Automatic Door Unlock .............3-10
Rear Door Security Locks (Sedan) ..................3-10
Lockout Protection ....................................... .3-11
Trunk ......................................................... .3-11
Windows ....................................................... .3-13
Manual Windows ......................................... .3-13
Power Windows ........................................... .3-14
Sun Visors .................................................. .3-15
Theft-Deterrent Systems ..................................3-15
Content Theft-Deterrent .................................3-15
PASS-Key
®III+ Electronic Immobilizer .............3-17
PASS-Key®III+ Electronic Immobilizer
Operation ................................................ .3-17
Starting and Operating Your Vehicle ................3-19
New Vehicle Break-In ................................... .3-19
Ignition Positions ......................................... .3-19
Retained Accessory Power (RAP) ...................3-22Starting the Engine
...................................... .3-22
Engine Coolant Heater ................................. .3-23
Automatic Transmission Operation ...................3-24
Manual Transmission Operation ......................3-27
Parking Brake ............................................. .3-29
Shifting Into Park (Automatic Transmission) ............................3-30
Shifting Out of Park (Automatic Transmission) ............................3-31
Parking the Vehicle (Manual Transmission) ...............................3-32
Parking Over Things That Burn .......................3-32
Engine Exhaust ........................................... .3-33
Running the Vehicle While Parked ..................3-34
Mirrors .......................................................... .3-35
Manual Rearview Mirror .................................3-35
Outside Remote Control Mirror .......................3-35
Outside Power Mirrors .................................. .3-35
Outside Convex Mirror .................................. .3-36
Storage Areas ............................................... .3-36
Glove Box .................................................. .3-36
Cupholders ................................................. .3-36
Center Console Storage .................................3-36
Driver Storage Compartment ..........................3-36
Convenience Net ......................................... .3-36
Sunroof ........................................................ .3-37
Section 3 Features and Controls
3-1
Page 104 of 422
Keys
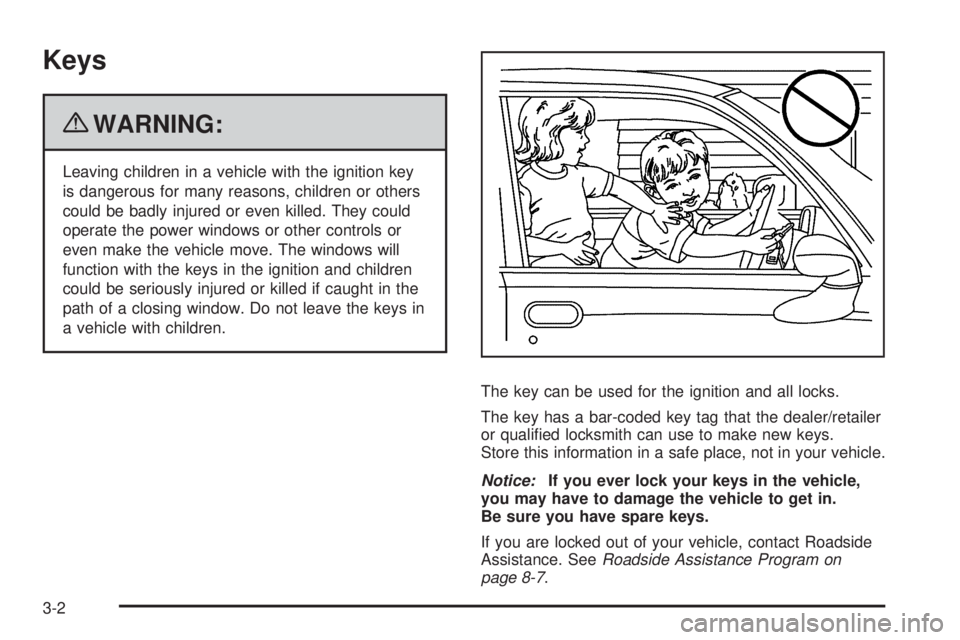
{WARNING:
Leaving children in a vehicle with the ignition key
is dangerous for many reasons, children or others
could be badly injured or even killed. They could
operate the power windows or other controls or
even make the vehicle move. The windows will
function with the keys in the ignition and children
could be seriously injured or killed if caught in the
path of a closing window. Do not leave the keys in
a vehicle with children.The key can be used for the ignition and all locks.
The key has a bar-coded key tag that the dealer/retailer
or qualified locksmith can use to make new keys.
Store this information in a safe place, not in your vehicle.
Notice:If you ever lock your keys in the vehicle,
you may have to damage the vehicle to get in.
Be sure you have spare keys.
If you are locked out of your vehicle, contact Roadside
Assistance. See Roadside Assistance Program on
page 8-7.
3-2