service PONTIAC GRAND-AM 1995 Owner's Guide
[x] Cancel search | Manufacturer: PONTIAC, Model Year: 1995, Model line: GRAND-AM, Model: PONTIAC GRAND-AM 1995Pages: 354, PDF Size: 17.81 MB
Page 229 of 354
Air Filter Replacement
1. Remove the screws on the housing cover and pull the
cover back.
2. Remove the air cleaner filter.
3. Install the replacement air cleaner filter and replace
the cover.
4. Tighten screws on the air filter cover.
Automatic Transaxle Fluid
When to Check and Change
A good time to check your automatic transaxle fluid
level is when the engine oil
is changed. Refer to the
Maintenance Schedule to determine when to change
your fluid. See “Scheduled Maintenance Services” in the
Index.
How to Check
Because this operation can be a little difficult, you may
choose to have this done at your Pontiac dealer Service
Department.
If you do it yourself, be sure to follow all the instructions
here, or you could get
a false reading on the dipstick.
Too much or too little fluid can damage your
transaxle.
Too much can mean that some of the
fluid could come out and fall on hot engine parts
or exhaust system parts, starting a fire. Be sure to
get an accurate reading if
you check your
transaxle fluid.
Wait at least 30 minutes before checking the transaxle
fluid level if you have been driving:
0 When outside temperatures are above 90°F (32” C).
0 At high speed for quite a while.
0 In heavy traffic -- especially in hot weather.
While pulling a trailer.
6-18
ProCarManuals.com
Page 231 of 354
How to Add Fluid Manual Transaxle Fluid
Refer to the Maintenance Schedule to determine what
kind of transaxle fluid to use. See “Recommended
Fluids and Lubricants” in the Index.
If the fluid level is low, add only enough of the proper
fluid to bring the level into
the cross-hatched area on
the dipstick.
1. Pull out the dipstick.
2. Using a long-neck funnel, add enough fluid at the
dipstick hole to bring it to the proper 1evel.It doesn’t
take much fluid, generally less than a pint (OSL).
Dun ’t overjill. We recommend you use only fluid
labeled DEXRON@-111, because fluid with that label
is made especially for your automatic transaxle.
Damage caused by fluid other than DEXRON@-III
is not covered by your new vehicle warranty.
0 After adding fluid, recheck the fluid level as
When the correct fluid level is obtained, push the
described under “How to Check.”
dipstick back in all the way.
When to Check
A good time to have it checked is when the engine oil is
changed. However, the fluid in your manual transaxle
doesn’t require changing.
How to Check
Because this operation can be a little difficult, you may
choose to have this done at your Pontiac dealer Service
Department.
If you do it yourself, be sure to follow all the instructions
here, or you could get a false reading on the dipstick.
r NOTICE:
Too much or too little fluid can damage your
transaxle.
Too much can mean that some of the
fluid could come out and fall on hot engine parts
or exhaust system parts, starting
a fire. Be sure to
get an accurate reading if you check your
transaxle fluid.
6-20
ProCarManuals.com
Page 233 of 354
Hydraulic Clutch Refer to the Maintenance Schedule to determine how often you should check the fluid level in your clutch
The hydraulic clutch linkage in your vehicle is master cylinder reservoir and for the proper fluid. See
self-adjusting. The clutch master cylinder reservoir is “Owner Checks and Services” and “Recommended
filled with hydraulic clutch fluid. Fluids and Lubricants” in the Index.
It isn’t a good idea to “top off’ your clutch fluid. Adding
fluid won’t correct a leak. How to Check
A fluid loss in this system could indicate a problem.
Have the system inspected and repaired.
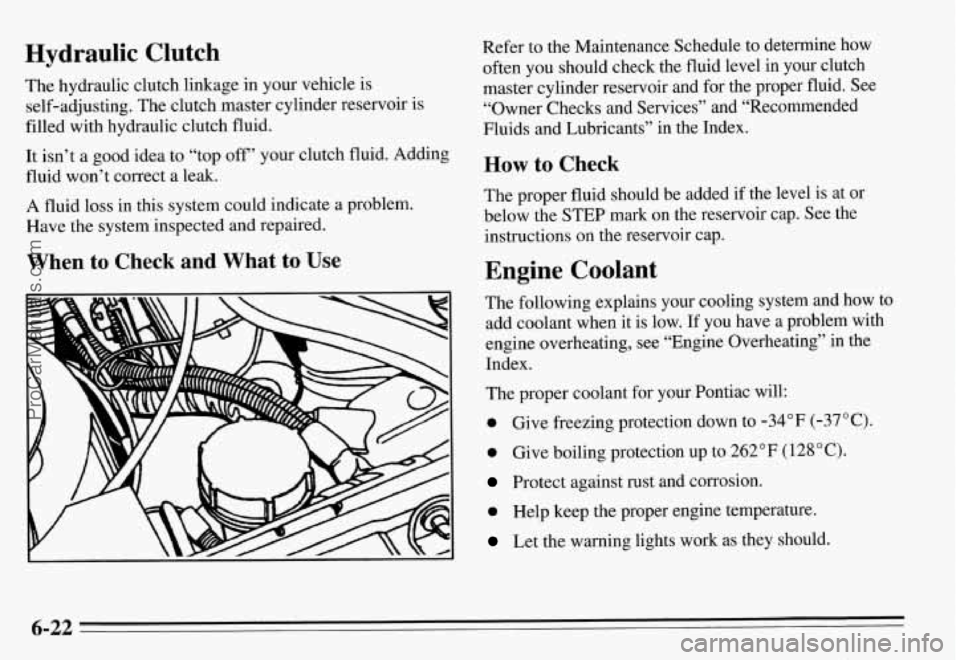
When to Check and What to Use
The proper fluid should be added if the level is at or
below the STEP mark on the reservoir cap. See the
instructions on the reservoir cap.
Engine Coolant
The following explains your cooling system and how to
add coolant when it is low. If you have a problem with
engine overheating, see “Engine Overheating” in the
Index.
The proper coolant for your Pontiac will:
0 Give freezing protection down to -34°F (-37°C).
0 Give boiling protection up to 262 OF ( 128 O C).
Protect against rust and corrosion.
0 Help keep the proper engine temperature.
Let the warning lights work as they should.
6-22
ProCarManuals.com
Page 248 of 354

Tire Inspection and Rotation
Tires should be inspected every 6,000 to 8,000 miles
(1 0 000 to 13 000 km) for any signs of unusual wear. If
unusual wear is present, rotate your tires as soon as
possible
and check wheel alignment. Also check for
damaged tires or wheels. See “When it’s Time for New
Tires”
and “Wheel Replacement” later in this section for
more information.
The purpose of regular rotation is to achieve more uniform
wear for all tires on the vehicle. The first rotation is the
most important.
See “Scheduled Maintenance Services” in
the Index for scheduled rotation intervals.
When rotating your tires, always use the correct rotation
pattern shown here.
Don’t include the compact spare tire in your tire
rotation.
After the tires have been rotated, adjust the front and
rear inflation pressures as shown on the Tire-Loading
Information label. Make certain that all wheel nuts are
properly tightened. See “Wheel Nut Torque” in the
Index.
6-37
ProCarManuals.com
Page 249 of 354

When it’s Time for New Tires
One way to tell when it’s
time for new tires is
to
check the treadwear
indicators, which will appear when your tires have
only
1/16 inch (1.6 mm) or
less of tread remaining.
You need a new tire if
0 You can see the indicators at three or more places
around the tire.
0 YOU can see cord or fabric showing through the tire’s
rubber.
The tread or sidewall is cracked, cut or snagged deep
enough to show cord or fabric.
The tire has a bump, bulge or split.
The tire has a puncture, cut, or other damage that
can’t be repaired well because of the size or location
of the damage.
Buying New Tires
To find out what kind and size of tires you need, look at
the Tire-Loading Information label.
The tires installed on your vehicle when it was new had
a Tire Performance Criteria Specification (TPC Spec)
number on each tire’s sidewall. When you get new tires,
get ones with that same TPC Spec number. That way,
your vehicle will continue to have tires that are designed
to give proper endurance, handling, speed rating,
traction, ride and other things during normal service on your vehicle. If your tires have an all-season tread
design, the TPC number will be followed by an
“MS”
(for mud and snow).
If you ever replace your tires with those not having a
TPC Spec number, make sure they are the same size,
load range, speed rating and construction type (bias,
bias-belted or radial) as your original tires.
6-38
ProCarManuals.com
Page 250 of 354
I
It’s all right to drive with your compact spar
though.
It was developed for use on Your vehicl
The following information relates to the system
developed by the- United
States National Highway
Traffic Safety Administration which grades tires by
treadwear, traction
md temperature performance. (This
applies-only to vehicles sold in the United States-)
Treadwear
The treadwear grade is a comparative rating based on
the wear rate of the tire when tested under controlled
conditions on a specified government test course. For
example, a tire graded
150 would wear one and a half
(1 1/2) times as well on the government course as a tire
graded
100. The relative performance of tires depends
upon the actual conditions of their use, however, and
may depart significantly from the norm due to variations
in driving habits, service practices and differences in
road characteristics and climate.
Traction - A, B, C
The traction grades, from highest to lowest are: A, B, and
C. They represent the tire’s ability to stop on wet
pavement as measured under controlled conditions on specified government test surfaces of asphalt and concrete.
A tire marked C may have poor traction performance.
Warning: The traction grade assigned to this tire is based
on braking (straight-ahead) traction tests and does not
include cornering (turning) traction.
6-39
ProCarManuals.com
Page 260 of 354

Tires
To clean your tires, use a stiff brush with a tire cleaner.
When applying a tire dressing always take care to wipe
off any overspray or splash from painted surfaces.
Petroleum-based products may damage the paint finish.
Sheet Metal Damage
If your vehicle is damaged and requires sheet metal
repair or replacement, make sure the body repair shop
applies anti-corrosion material to the parts repaired or
replaced to restore corrosion protection.
Finish Damage
Any stone chips, fractures or deep scratches in the finish
should be repaired right away. Bare metal will corrode
quickly and may develop into a major repair expense.
Minor chips and scratches can be repaired with touch-up
materials available from your dealer or other service
outlets. Larger areas of finish damage can be corrected
in your dealer’s body and paint shop.
Underbody Maintenance
Chemicals used for ice and snow removal and dust
control can collect on the underbody. If these are not
removed, accelerated corrosion (rust) can occur on the
underbody parts such as fuel lines, frame, floor pan, and
exhaust system even though they have corrosion
protection.
At least every spring, flush these materials from the
underbody with plain water. Clean any areas where mud
and other debris can collect. Dirt packed in closed areas
of the frame should be loosened before being flushed.
Your dealer or an underbody vehicle washing system
can do this for you.
Chemical Paint Spotting
Some weather and atmospheric conditions can create a
chemical fallout. Airborne pollutants can fall upon and
attack painted surfaces on your vehicle. This damage
can take two forms: blotchy, ringlet-shaped
discolorations, and small irregular dark spots etched into
the paint surface.
Although no defect in the paint job causes this, Pontiac
will repair, at no charge to the owner, the surfaces
of
new vehicles damaged by this fallout condition within
12 months or 12,000 miles (20 000 km) of purchase,
whichever comes first.
6-49
ProCarManuals.com
Page 262 of 354

Vehicle Identification Number (VIN)
1.
SAMPLE4UXSM072675
I
ENGINE ,/ 1k5 ASSEMBLY
CODE MODEL YEAR PLANT
This is the legal identifier for your Pontiac. It appears on
a plate in the front corner of the instrument panel, on the
driver’s side. You can see it if you
look through the
windshield from outside your vehicle. The VIN also
appears on the Vehicle Certification and Service Parts
labels and the certificates of title and registration.
Engine Identification
The eighth character in your VIN is the engine code.
This code will help you identify your engine,
specifications, and replacement parts.
Service Parts Identification Label
You’ll find this label on your spare tire cover. It’s very
helpful if you ever need to order parts.
On this label is:
your VIN,
the model designation,
paint information, and
a list of all production options and special
Be sure that this label is not removed from the vehicle.
equipment.
Add-on Electrical Equipment
NOTICE:
Don’t add anything electrical to your Pontiac
unless you check with your dealer first. Some
electrical equipment can damage your vehicle
and the damage wouldn’t be covered by your
warranty. Some add-on electrical equipment can
keep other components from working
as they
should.
Your vehicle has an air bag system. Before attempting to
add anything electrical to your Pontiac,
see “Servicing
Your Air Bag-Equipped Pontiac” in the Index.
6-51
ProCarManuals.com
Page 267 of 354

Replacement Bulbs
Back Up Lamps ............................ 2057
Front Parking/Turn Signal Lamps
........... 2057 NA
License Plate Lamp
......................... 194
Center High-Mounted Stoplamp
............... 912
OUTSIDE LAMPS BULB
Halogen Headlamps
LowBeam ............................... 9006
High Beam ............................... 9005
Side Marker Lamps
Front ................................. 194NA
Rear
...................................... 24
TrunkLamp
................................ 906
Stop/Tail/Turn Signal Lamps .................. 2057
Fog Lamps ................................. 885
INSIDE LAMPS BULB
Ashtray .................................... 161
Without Sunroof ........................... 168
With Sunroof
............................ 214-2
Rear Reading Lamps
......................... 168
Underdash Lamp
............................ 194
Heater
& AK Control ........................ 161
High-Beam Indicator
......................... 161
Front Reading Lamps
Indicator Lamps
Charge. Oil. Fasten Safety Belts. ABS. Upshift. Low
Coolant. Brake.
Turn Signals. Malfunction Indicator
Lamp (Service Engine Soon). Check Gages
..... 161
Glovebox Lamp ............................. 161
6-56
ProCarManuals.com
Page 270 of 354

Section 7 Maintenance Schedule
IMPORTANT:
KEEP ENGINE OIL
AT THE PROPER
LEVEL AND CHANGE AS
RECOMMENDED
This section covers the maintenance required for your
Pontiac. Your vehicle needs these services to retain its
safety, dependability and emission control performance. ~~
1
Protection I
Have you purchased the GM Protection Plan? The Plan
supplements
your new vehicle warranties. See your
Pontiac dealer for details.
Introduction
Your Vehicle and the Environment
Proper vehicle maintenance not only helps to keep your
vehicle in good working condition, but also helps the
environment. All recommended maintenance procedures
are important. Improper vehicle maintenance or the
removal
of important components can significantly
affect the quality of the air we breathe. Improper fluid
levels or even the wrong tire inflation can increase the
level of emissions from your vehicle.
To help protect our
environment, and to help keep your vehicle
in good
condition, please maintain your vehicle properly.
7-1
ProCarManuals.com