change time PONTIAC GRAND-AM 1996 Owners Manual
[x] Cancel search | Manufacturer: PONTIAC, Model Year: 1996, Model line: GRAND-AM, Model: PONTIAC GRAND-AM 1996Pages: 356, PDF Size: 17.17 MB
Page 4 of 356
GENERAL MOTORS, GM and the GM Emblem,
PONTIAC, the PONTIAC Emblem
and the name
@and Am are registered trademarks of General
Motors Corporation.
This
manual includes the latest infomation at the time it
was printed. We reserve the right to make changes in the
product after
that time without further notice. For
vehicles first sold in Canada, substitute the name
“General Motors of Canada Limited” fur Pontiac
Division whenever
it appears in this manual.
Please keep this manual in your Pontiac, so it will be
there
if you ever need it when you’re on the road. If you
sell the vehicle, please leave this manual in it so the new
owner can use it.
-. ‘X
Litho in U.S.A.
Part No. 102731.97 B First Edition
7-
FASij CERTIFIED
!.
WE SUPPORT
VOLUNTARY TECHNICIAN CERTIFICATION THROUGH
National Institute for AUTOMOTIVE SERVICE EXCELLENCE
We support voluntary
technician certification.
For Canadian Owners Who Prefer a
French Language Manual:
Aux propriktaires canadiens: Vous pouvez vous
procurer un exemplaire de ce guide en frangais chez
votre concessionaire ou
au:
DGN Marketing Services Ltd.
1500 Bonhill Rd.
Mississauga, Ontario
L5T 1C7
‘Copyright General Motors Corporation 1995
All Rights Reserved
ii
ProCarManuals.com
Page 62 of 356
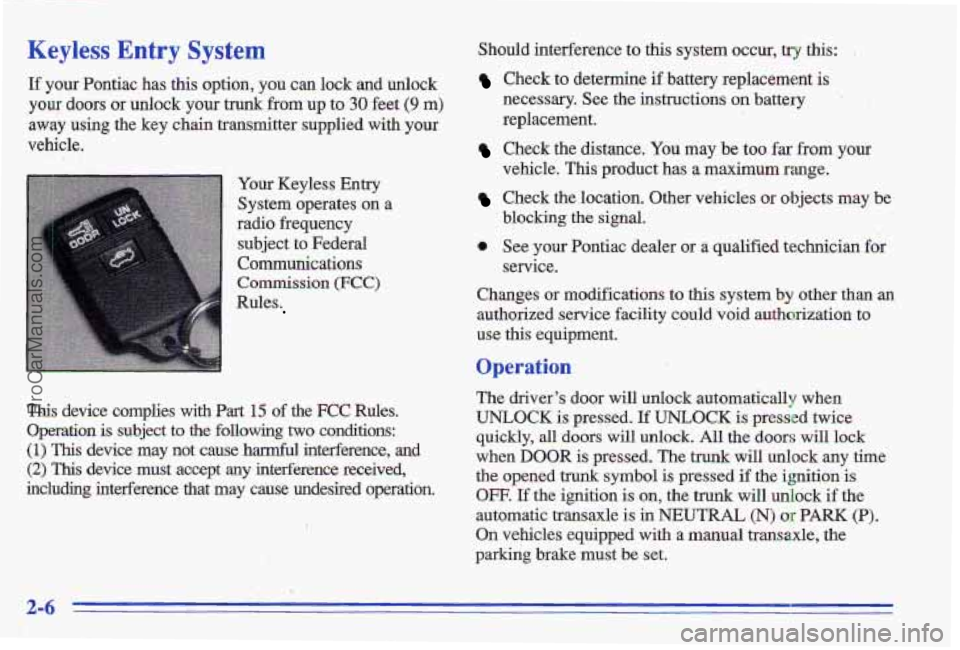
Keyless Entry System Should interference to this system occur, try this:
If your Pontiac has this option, you can lock and unlock Check to determine if battery replacement is
your doors or unlock your trunk from up to 38 feet (9 m) necessary. See the instructions on battery
away
using the key chain transmitter supplied with your replacement.
vehicle.
Check the distance. You may be too far from your
Your Keyless Entry
System operates on a
radio frequency subject to Federal
Communications
Commission (FCC)
Rules
This device complies with Part 15 of the FCC Rules.
Operation is subject to the following two conditions:
(1) This device may not cause harmful intederence, and
(2) This device must accept any interference received,
including interference that may cause undesired operation. vehicle.
This product has a maximum range.
Check the location. Other vehicles or objects may be
blocking the signal.
0 See
your Pontiac dealer OF a qualified twhnicim for
service.
Changes or modifications to this system
by other than an
authorized service facility could void authorization to
use this equipment,
Operation
The driver's door will unlock automatically when
UNLOCK is pressed. If UNLOCK is pressed twice
quickly, all
doors will unlock. All the doors will lock
when
DOOR is pressed, The trunk will unlock any time
the opened trunk symbol is pressed if the ignition is
OFF. If the ignition is on, the trunk will unlock if the
automatic tramaxle
is in NEUTRAL (N) or PARK (P).
On vehicles equipped with a manual transaxle, the
parking brake must be set.
ProCarManuals.com
Page 63 of 356
Matching Transmitter(s) To Your Vehicle
Each key chain transmitter is coded to prevent another
transmitter from unlocking your vehicle.
If a transmitter
is lost or stolen, a replacement can be purchased
through
your dealer. Remember to bring any remaining
transmitters with you when you
go to your. dealer. When
the dealer matches the replacement transmitter to your
vehicle, any remaining transmitters must also be
matched. Once the new trans’mitter is coded, the lost
transmitter
will not unlock your vehicle. Each vehicle
can have only two transmitters matched
to it.
Batterv Retdacement
Under norma we, the batteries in your key chain
transmitter should last about two years.
You can tell the batteries are weak if the transmitter
won’t work at the normal range in any location.
If you
have to get close to your vehicle before the transmitter
works, it’s probably time to change the batteries.
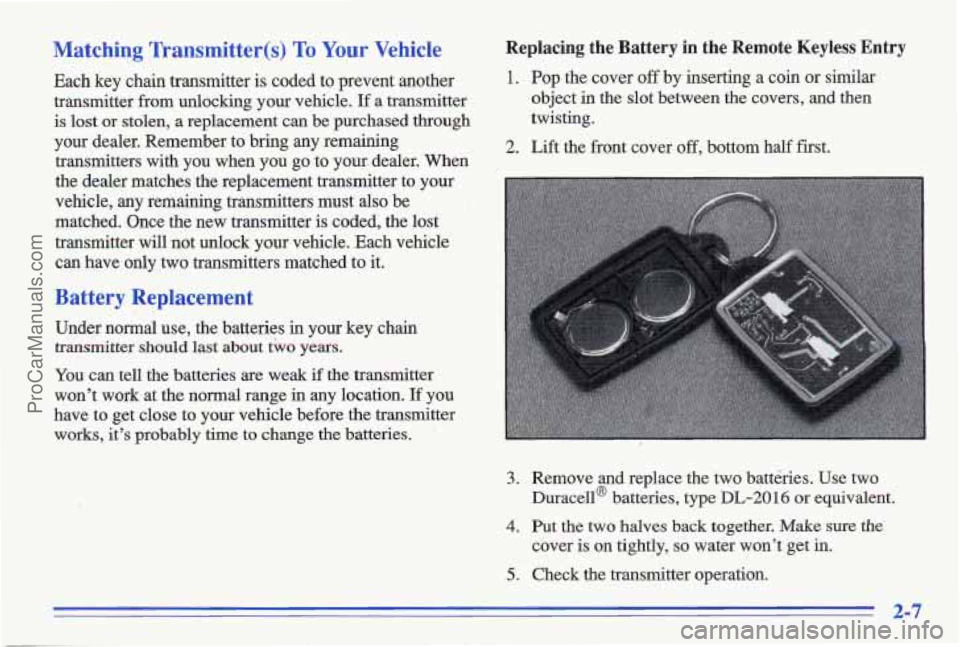
Replacing the Battery in the Remote Keyless Entry
1. Pop the cover off by inserting a coin or similar
object in the slot between the covers, and then
twisting.
2. Lift the front cover off, bottom half first.
3. Remove and replace the two batteries. Use two
4. Put the two halves back together. Make sure the
5. Check the transmitter operation.
Duracell@
batteries, type DL-2016 or equivalent.
cover is on tightly,
so water won’t get in.
ProCarManuals.com
Page 70 of 356
Starting Your 2.4 Liter Engine
1. Without pushing the accelerator pedal, turn your
ignition key to
START. When the engine starts, let
go
of the key. The idle speed will go down as your
engine gets
warm.
NOTICE:
H’olding your key in START for longer than
15 seconds at a time will cause your battery to be
drained much sooner. And the excessive heat can
damage your starter motor.
2. If it doesn’t start right away, and if the weather is
very cold (below
-20°F or -29”C), push the
accelerator pedal about one-quarter of the way down
while
you turn the key to START. Do this until the
engine
starts. As soon as it does, let go of the key.
stops), it could be flooded with too much gasoline.
Try pushing your acc,elerator pedal all the way to the
3. If your engine still won’t start (or starts but then floor
and holding it there as you hold the key in
START for about three seconds. This clears the extra
gasoline
from the engine. If the vehcle starts briefly
but then
stops again, do the same thing, but this time
keep the pedal about one-quarter
of the way down
for five or
six seconds.
NOTICE:
Your engine is designed to work with the
electronics in your vehicle.
If you add electrical
parts or accessories,
you could change the way
the engine operates. Before adding electrical
equipment, check with your dealer.
If you don’t,
your engine might not perform properly.
If you ever have to have your vehicle towed, see
the part of this manual that tells how to do it
without damaging
your vehicle. See “Towing
Your Vehicle” in the Index.
2-14
ProCarManuals.com
Page 71 of 356
Starting Your 3.1 Liter Engine
1. Without pushing the accelerator pedal, turn your
ignition key to START. When the engine starts, let
go of the key. The idle speed will go down as your
engine gets warm.
NOTICE:
Holding your key in START for longer than
15 seconds at a time will cause your battery to be
drained much sooner. And the excessive heat can
damage your starter motor.
2. If your engine won’t start (or starts but then stops),
it could be flooded with too much gasoline.
Try
pushing your accelerator pedal all the way to the
floor and holding it there as you hold the key in
START for up to 15 seconds, This clears the extra
gasoline from the engine.
NOTICE:
Your engine is designed to work with the
electronics in your vehicle.
If you add electrical
parts or accessories, you could change the way
the engine operates. Before adding electrical
equipment, check with your dealer.
If you don’t,
your engine might not perform properly.
If you ever have to have your vehicle towed, see
the part of this manual that tells how to do it
without damaging your vehicle. See “Towing
Your Vehicle” in the Index.
ProCarManuals.com
Page 88 of 356
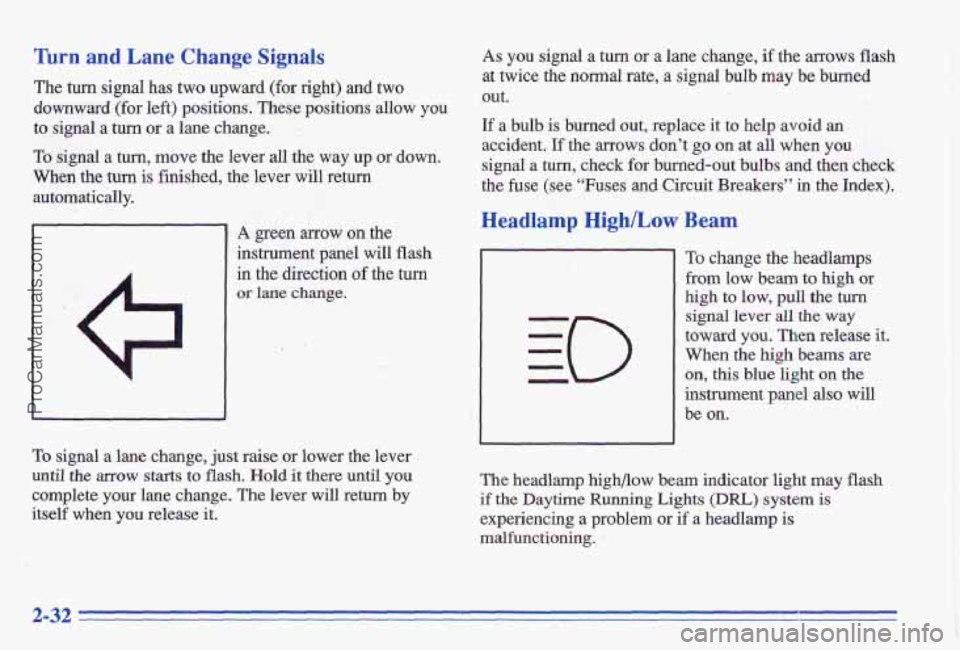
Turn and Lane Change Signals
The turn signal has two upward (for right) and two
downward (for left) positions. These positions allow you
to signal a turn or a lane change.
To signal a %urn, move the lever all the way up or down.
When the
turn is finished, the lever will return
automatically.
Q
A green arrow on the
instrument panel
will flash
in the direction of the turn
or lane change.
To signal a lane change; just raise or lower the lever
until the mow starts to flash. Hold it there until you
complete your lane change. The lever will return by
itself when
you release it.
As you signal a turn or a lane change, if the arrows flash
at twice the normal rate, a signal bulb may be burned
out.
If a bulb is burned,out, replace it to help avoid an
accident. If the arrows don't go on at all when you
signal
a turn, check for burned-out bulbs and then check
the fuse (see
"Fuses and Circuit Breakers" in the Index).
Headlamp High/Low Beam
To change the headlamps
from low
bearn to high or
high to
low, pull the turn
signal lever all
the way
toward you. Then release it.
When the high beams are
on, this blue light on the
instrument panel also will
be on.
The headlamp highfiow beam indicator light may flash
if the Daytime Running Lights (Dm) system is
experiencing a problem or if a headlamp is
malfunctioning. ~
2-32
ProCarManuals.com
Page 96 of 356
Lamps On Reminder
If you open the driver's door while leaving the lamps on
and the ignition off, you will hear a warning chime.
Daytime Running Lamps
Daytime Running Lamps (DRL) caw make it easier for
others to see the front of
your vehicle during the day.
DRL caw be helpful in many different driving
conditions, but they
can be especially helpful in the
short periods after dawn
and before sunset.
The
DRL system will make your high-beam headlamps
come
on at reduced brightness when:
The ignition is on,
, The headlamp switch is OFF,
The light sensor sees daytime light, and
0 The parking brake is released (manual transaxle), or
0 The shift lever is not in PARK (P) or NEUTRAL (N)
When the DRL are on, only your high-beam headlamps
will
be on. The taillmps, sidemarker and other lamps
won't be on. Your instrument panel wonY be lit up
either. (automatic transaxle). When
it's dark enough outside,
your headlamps will
come on at full brightness.
The other lamps that come
on with your headlamps will also come on. A light
sensor ,on top of the instrument panel turns the
headlamps oh and the DRL ,system off. Be sure the light
sensor isn't covered. When it's bright enough outside,
the regular
lamps will go off and your high-bem
headlamps will change
to the reduced brightness of the
DRL.
To idle your vehicle with the DRL off, set the parking
brake on
a manual transaxle or put the vehicle in
PARK (P) or NEUTRAL (N) on an automatic transaxle,
while the ignition is in the OFF or LOCK position. Then
start the vehicle, The DRL will stay off until you release
the
parking brake on a manual transaxle or shift out of
PARK (P) or NEUTaAL (N) on an automatic transaxle.
As with any vehicle,
you should turn on the regular
headlamp system when you need
it.
ProCarManuals.com
Page 124 of 356
Fan Knob
‘The left controlknob sets the fin speed. To select thle
force
of air you want, turn the knob. The fan is always
runhing unless the mode control is moved to OFF.
Temperature Knob
The center control knob regulates the temperature of the
air coming through the system. ,
Mode Knob
The right control knob changes the functions of your
system.
2 VENT Use when outside temperatures are mild,
and little heating or cooling is needed, Airflow is
through the instrument panel outlets. Set the center
control
hob to the temperature desired.
9 BI-LEVEL: Use on cool, but sunny days.
This setting
brings in the outside air, but directs it in
two
ways. Cooler air is directed to the upper portion of
your body through the instrument panel outlets; slightly
wanner
air is directed through the heater ducts and
defroster vents. At times, this‘temperature difference
may be more apparent than others,
d HEATER: This setting brings heated air through
the he’ater ducts and some through the windshield
defroster vents.
If you have the optional engine coolant heater (engine
block heater)
and use it during cold weather, 0°F
(- 18 O C) or lower, your heating system will more quickly
provide heat be’cause the engine coolant is already
warmed. See “Engine Coolant Heater” in
the Index.
9 BLEND: This setting divides airflow equally
between the heater ducts
and the windshield defroster ’
vents.
DEFROST
This setting directs air though the
windshield gefroster vents located on top of the
instrument panel,
3-2
ProCarManuals.com
Page 125 of 356
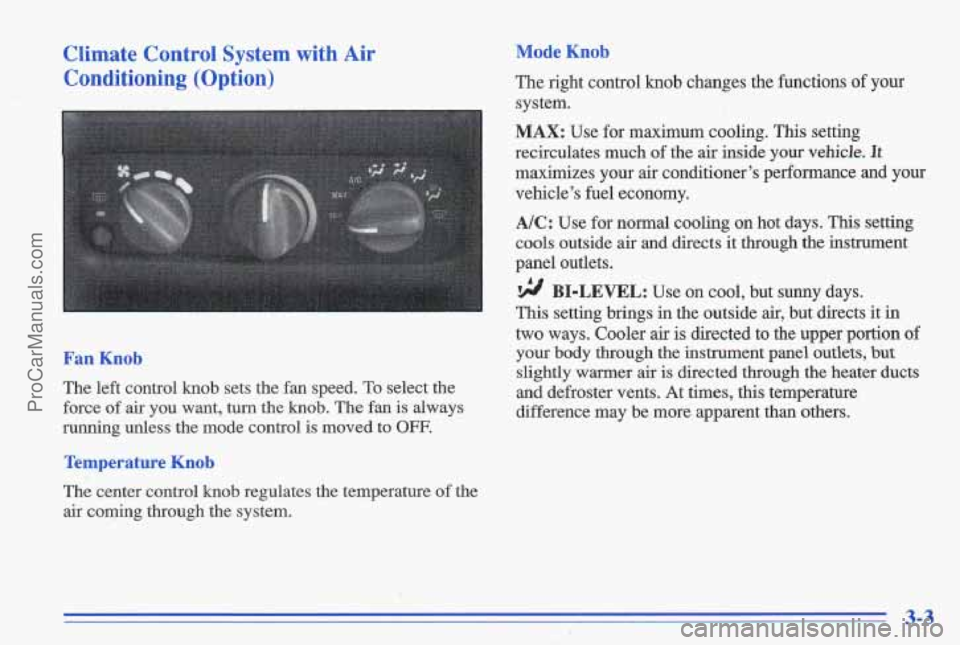
Climate Control System with Air Conditioning (Option)
< _.-
1 !
Mode Knob
The right control knob changes the functions of your
system.
MAX: Use for maximum cooling. This setting
recirculates much
of the air inside your vehicle. It
maximizes your air conditioner’s performance and your
vehicle’s fuel economy.
A/C: Use for normal cooling on hot days. This setting
cools outside air and directs it through the instrument
panel outlets.
BI-LEVEL: Use on cool, but sunny days.
This setting brings in the outside air, but directs it in
two ways. Cooler air
is directed to the upper portion of
Fan Knob your body through the instrument panel outlets, but
slightly warmer air is directed through the heater ducts
The left control
knob sets the fan speed. To select the and defroster vents. At times, this temperature
force of air
you want, turn the knob. The fan is always difference may be more apparent than others.
running unless the mode control is moved to
OFF.
Temperature Knob
The center control knob regulates the temperature of the
air coming through the system.
3-3
ProCarManuals.com
Page 140 of 356
Adjusting the Speakers
BAL: Press this knob lightly so it extends. Turn it to
move the sound to the left or right speakers. The middle
position is
a detent and balances the speakers. Push the
knob back
in when you’re not using it,
FADE: Press this knob lightly so it extends. Turn it to
move the sound to the front or rear speakers. The middle
position
is a detent and balances the speakers. Push the
knob back in when you’re not using it.
Playing a Compact Disc
The integral CD player can play ,8 cm “single”
mini-’discs. Full-size compact discs
and mini-discs are
loaded
in the same manner.
Insert a disc partway into the slot, label side
up. The
. _. player will pull it in. If the ignition is on, but the radio is
’ ,- off, the disc will begin playing. If you want to insert a
.. I
I: disc when the ignition is off, first press EJECT.
If E and a number appear on the display, the disc won’t
play because
of an error.
E20: Focus Error
E21: Tracking Error
E22: Motor Error
E23: Communication Ehor
If E appears on the display and the disc comes back out,
it could be that:
You are driving on a very rough road. (The disc
0 The disc is upside down.
It is dirty, scratched or wet.
It is very humid. (If so, wait about an hour and try
If any error occurs repeatedly or if an error cannot be
corrected, write down
the error message and provide it
when you have it serviced.
RECALL: Press this button to see what track is playing.
Press it again within five seconds to see how long it has
been playing (elapsed
time), The track number also
appears when the disc is inserted, the volume is changed
or when
a new track starts playing.
PREV (1): Press this button os the SEEK down arrow
to
go to the start of the current track if more than
eight seconds have played. If you hold the button or
press it more than once, the player will continue moving
back through the disc.
should play when the
road gets smoother.)
again.)
3-18
ProCarManuals.com