wiring PONTIAC GRAND AM 1998 Owners Manual
[x] Cancel search | Manufacturer: PONTIAC, Model Year: 1998, Model line: GRAND AM, Model: PONTIAC GRAND AM 1998Pages: 370, PDF Size: 16.11 MB
Page 72 of 370
Trunk Remote Trunk Release
To unlock the trunk from the outside, insert the key and
turn the trunk lock cylinder.
1 A CAUTION:
It can be dangerous to drive with the trunk lid
open because carbon monoxide
(CO) gas can
come into your vehicle.
You can’t see or smell
CO. It can cause unconsciousness and even death.
If you must drive with the trunk lid open or if
electrical wiring or other cable connections must
pass through the seal between the body and the
trunk lid:
Make sure all windows are shut.
lbrn the fan on your heating or cooling
system
to its highest speed with the setting on
VENT. That will force outside air into your
vehicle. See “Comfort Controls” in the Index.
instrument panel, open them all the way.
0 If you have air outlets on or under the
See “Engine Exhaust” in the Index.
a
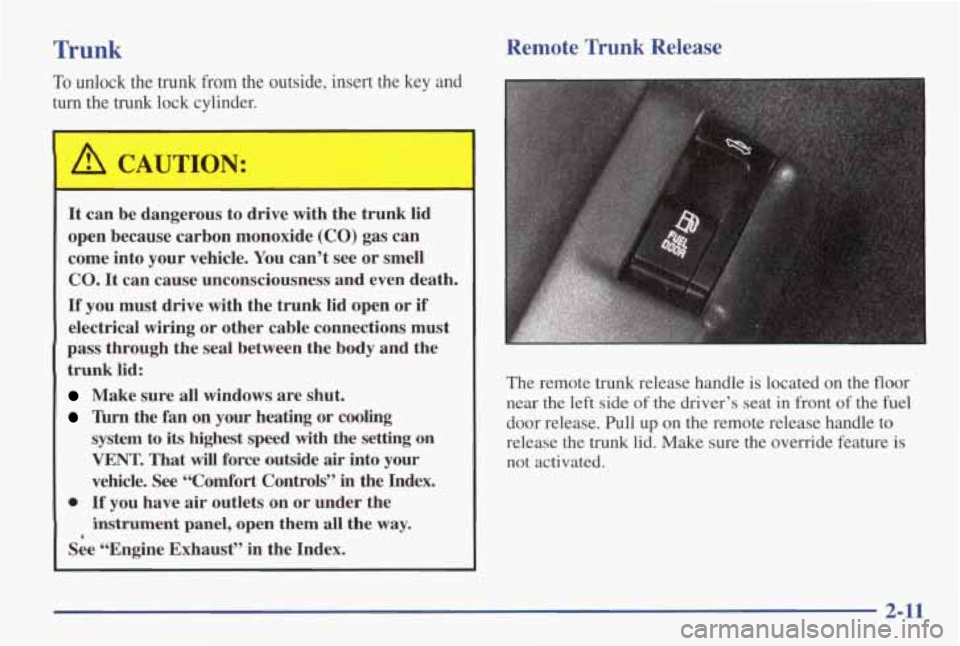
The remote trunk release handle is located on the floor
near the
left side of the driver’s seat in front of the fuel
door release. Pull up on the remote release handle
to
release the trunk lid. Make sure the override feature is
not activated.
2-11
Page 118 of 370
Safety Belt Reminder Light
When the key is turned to RUN or START, a chime will
come on for about eight seconds to remind people to
fasten their safety belts, unless the driver’s safety belt is
already buckled.
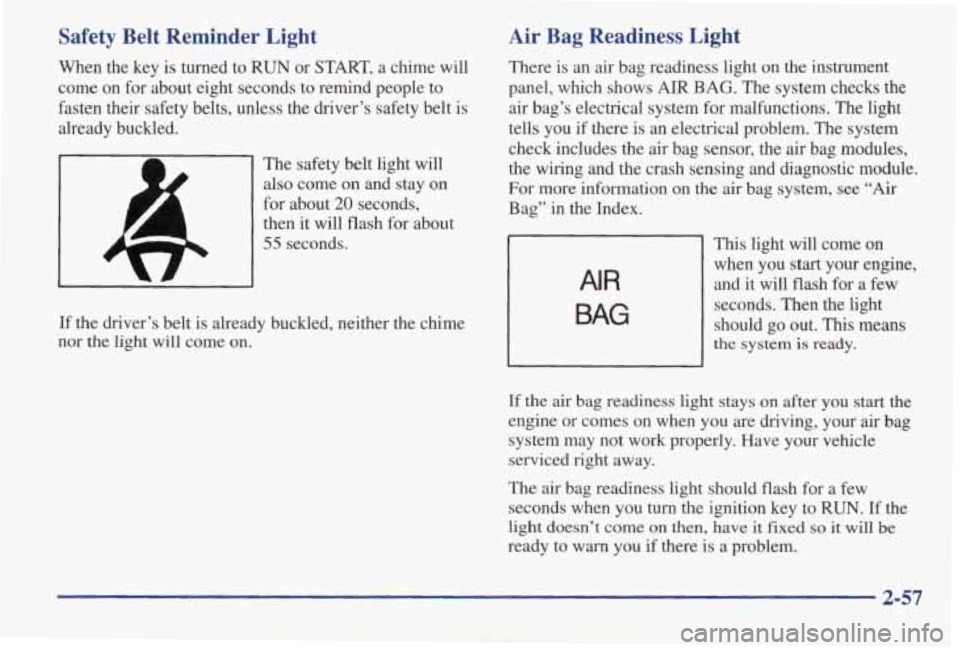
The safety belt light will
also come
on and stay on
for about 20 seconds,
then it will flash for about
55 seconds.
If the driver’s belt is already buckled, neither the chime
nor
the light will come on.
AIR
Air Bag Readiness Light
There is an air bag readiness light on the instrument
panel, which shows AIR
BAG. The system checks the
air bag’s electrical system for malfunctions. The light
tells you if there is an electrical problem. The system
check includes the air bag sensor, the air bag modules,
the wiring and the crash sensing and diagnostic module.
For more information on the
air bag system, see “Air
Bag” in the Index.
This light will come on
when you start your engine,
and it will flash for a few
seconds. Then the light
should go out. This means
the system is ready.
If the air bag readiness light stays on after you start the
engine or comes on when you are driving, your
air bag
system may not work properly. Have your vehicle
serviced right away.
The
air bag readiness light should flash for a few
seconds when you turn the ignition key to RUN.
If the
light doesn’t come on then, have it fixed so it will be
ready to warn you if there is a problem.
BAG
2-57
Page 197 of 370
Making Turns
NOTICE:
~ ~~______
Making very sharp turns while trailering could
cause the trailer to come in contact with the
vehicle.
Your vehicle could be damaged. Avoid
making very sharp turns while trailering.
When you’re turning with a trailer, make wider turns than
normal. Do this so your trailer won’t strike soft shoulders,
curbs, road signs, trees or other objects. Avoid jerky or
sudden maneuvers. Signal well in advance.
’Ibm Signals When Towing a Trailer
When you tow a trailer, your vehicle may need a
different
turn signal flasher andor extra wiring. Check
with your Pontiac dealer. The green arrows on your
instrument panel will flash whenever you signal
a turn
or lane change. Properly hooked up, the trailer lamps
will also flash, telling other drivers you’re about to
turn,
change lanes or stop.
When towing
a trailer, the green arrows on your
instrument panel will flash for turns even if the bulbs on
the trailer are burned out. Thus, you may think drivers
behind you are seeing your signal when they are not.
It’s important to check occasionally to be sure the trailer
bulbs are
still working.
4-40
Page 271 of 370
I
I
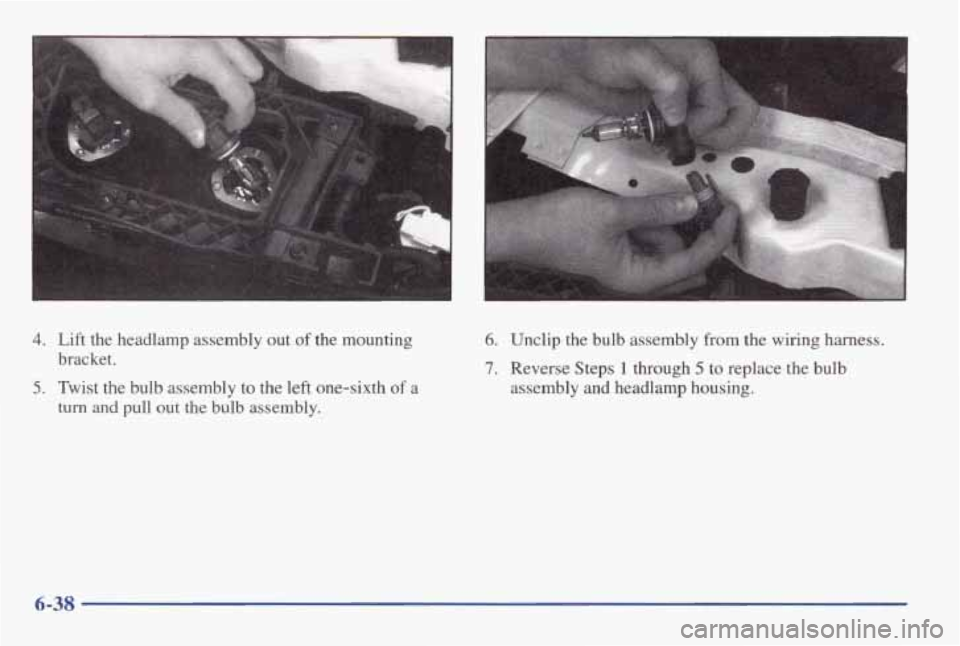
4. Lift the headlamp assembly out of the mounting
bracket.
5. Twist the bulb assembly to the left one-sixth of a
turn and pull out the bulb assembly.
6. Unclip the bulb assembly from the wiring harness.
7. Reverse Steps 1 through 5 to replace the bulb
assembly and headlamp housing.
6-38
Page 292 of 370
Electrical System
Add-on Electrical Equipment
I NOTICE:
Don’t add anything electrical to your vehicle
unless you check with your dealer first. Some
electrical equipment can damage your vehicle
and the damage wouldn’t be covered by your
warranty. Some add-on electrical equipment
can keep other components from working as
they should.
Your vehicle has an air bag system. Before attempting to
add anything electrical to your vehicle, see “Servicing
Your Air Bag-Equipped Vehicle” in the Index.
Headlamp Wiring
The headlamp wiring is protected by a circuit breaker
located
in the instrument panel fuse block. An electrical
overload
will cause the headlamps to go on and off, or in
some cases to remain off. If this happens, have your
headlamp system checked right away.
Windshield Wipers
The windshield wiper motor is protected by a circuit
breaker and a fuse. If the motor overheats due to heavy
snow, etc., the wiper will stop until the motor cools.
If
the overload is caused by some electrical problem, have
it fixed.
Power Windows and Other Power Options
Circuit breakers in the fuse panel protect the power windows and other power accessories. When the current
load is too heavy, the circuit breaker opens and closes,
protecting the circuit until the problem is fixed.
6-59
Page 293 of 370
Fuses and Circuit Breakers
The wiring circuits in your vehicle are protected from
short circuits by a combination of fuses, circuit breakers
and fusible links. This greatly reduces the chance
of
damage caused by electrical problems.
Look at the silver-colored band inside the fuse. If the
band is broken or melted, replace the fuse.
Be sure to
replace a bad fuse
with a new one of the identical size
and rating.
If
you ever have a problem on the road and don’t have a
spare fuse,
you can “borrow” one that has the same
amperage. Just pick
a feature of your vehicle that you
can get along without
-- like the radio or cigarette
lighter
-- and use its fuse, if it is the correct amperage.
Replace it as
soon as you can.
There
are two fuse blocks in your vehicle: the
instrument panel fuse block and the engine compartment
fuse block.
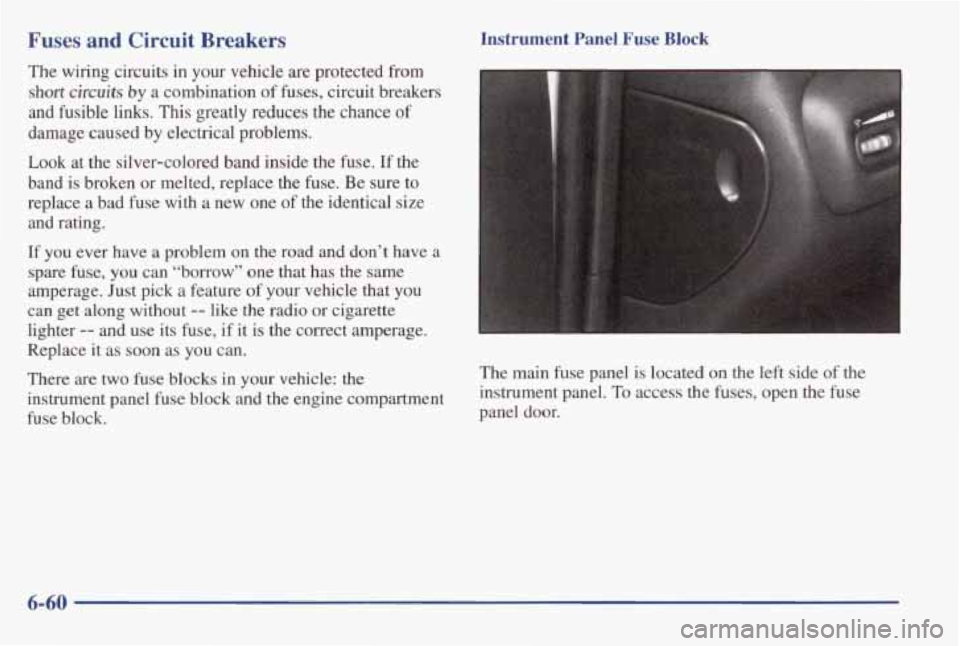
Instrument Panel Fuse Block
The main fuse panel is located on the left side of the
instrument panel.
To access the fuses, open the fuse
panel door.
6-60
Page 362 of 370
Gear Positions. Automatic Transaxle ................ 2-21
Gear Positions. Manual Transaxle
.................. 2-25
Glove Box
.................................... 2-48
Graphic Equalizer
.............................. 3-12
Gross Axle Weight Rating
........................ 4-33
Gross Vehicle Weight Rating
...................... 4-33
Guide en Franpis
11
GVWR ....................................... 4-33
.. .................................
Halogen Bulbs ................................ 6-36
Hazard Warning Flashers 5-2
Head Restraints
................................. 1-5
Bulb Replacement ............................ 6-37
High/Low Beam Changer
...................... 2-35
On Reminder
................................ 2-42
Hearing Impaired. Customer Assistance
.............. 8-5
Heating ........................................ 3-4
High-Beam Headlamps
.......................... 2-35
Highway Hypnosis
.............................. 4-24
HillandMountainRoads
......................... 4-24
Hitches. Trailer
.............. .......... 4-38
Hood
Checking Things Under
......................... 6-8
Release
...................................... 6-8
Horn
......................................... 2-33
Hydraulic Clutch
............................... 6-24
Hydraulic Clutch Fluid
........................... 6-24
Hydraulic Clutch System Check ................... 7-3 1
Hydroplaning .................................. 4-20
Y ..........................
Headlamps .................................... 2-42
Wiring
..................................... 6-59
Prop ....................................... 6-10 Ignition
Switch
................................ 2-14
Illuminated Entry
............................... 2-45
Inflation. Tire
.................................. 6-42
Inside Daymight Rearview Mirror
................. 2-47
Inspections Brakesystem
................................ 7-35
Caliperffiuckle Maintenance
................... 7-35
Engine Cooling System
........................ 7-34
Exhaust Systems ............................. 7-34
Front-Wheel-Drive Axle Boot
.......... .... 7-34
Front-Wheel-Drive Axle Seal
................... 7-34
Radiator and Heater Hose
...................... 7-34
Steering
.................................... 7-34
Suspension
.................................. 7-34
Throttle Linkage
.............................. 7-34
Instrument Panel
............................... 2-52
Brightness Control
............................ 2-44
Cleaning
.................................... 6-53
Cluster
..................................... 2-54
FuseBlock .................................. 6-60
Interior Lamps
................................. 2-44
Jack. Tire .................................. 5-24
Jump Starting
................................. 5-3
Key Lock Cylinders Service
..................... 7-31
Key Release Button
............................. 2-16
Keyless Entry System
............................ 2-7
Keys
.......................................... 2-2
9-5
Page 368 of 370
Transaxle Automatic
................................... 6-20
Manual ..................................... 6-23
Transmitters, Keyless Entry ........................ 2-7
Transportation, Courtesy .......................... 8-8
Trip Odometer ................. . . 2-55
Trunk Lock
....................................... 2-11
Security Override ............................. 2-12
T& Lamp ................................... 2-46
"Y Users ............................. ... 8-5
Turn Signal and Lane Change Signals ............... 2-35
Turn SignaVMultifunction Lever ................... 2-34
Turn Signals When Towing a Trailer ................ 4-40
underbody Flushing Service ..................... 7-33
Underbody Maintenance ......................... 6-56
Up Shift Light ................................. 2-26
variable Effort Steering ....................... 4-10
Vehicle
Control
...................................... 4-6
Damagewarnings .............................. iv
Dimensions
................................. 6-66
Identification Number ......................... 6-58
Loading .................................... 4-33
Storage ..................................... 6-36
Ventilationsystem ............................... 3-6
Visor Vanity Mirrors ............................ 2-50
Visors, Sun .................................... 2-50
warning Devices ...............
Warning Lights. Gages and Indicators
Warranty Information
.............
Washer Fluid. Windshield .........
Washing Your Vehicle ............
Weatherstrips ...................
Wheel Alignment
...................
Nut Torque ...................
Replacement ..................
Used Replacement .............
Wrench ......................
Windows ......................
Auto-Down ..................
Lock Out Switch ..............
Power .......................
Windshield Washer ..............
Fluid ........................
................ 5-2
............... 2-56
............... 8-10
............... 6-30
............... 6-54
............. 6-54
............... 6-48
.......... 5.30. 6.65
............... 6-48
............... 6-49
............... 5-24
............... 2-33
............... 2-33
............... 2-33
............... 2-33
............... 2-37
........... 2.31. 6.30
FluidLevelCheck ............................ 7-30
Windshield Wiper .............................. 2-36
Blade Replacement ........................... 6-41
Winter Driving ................................. 4-26
Wiper Blade Check ............................. 7-31
Wiper Blade, Cleaning ........................... 6-53
Wiring, Headlamp .............................. 6-59
WreckerTowing ................................. 5-8
Wrench, Wheel ................................. 5-24
Fuses ...................................... 6-59
9-11