brake PONTIAC GRAND AM 2003 Owners Manual
[x] Cancel search | Manufacturer: PONTIAC, Model Year: 2003, Model line: GRAND AM, Model: PONTIAC GRAND AM 2003Pages: 354, PDF Size: 16.3 MB
Page 6 of 354
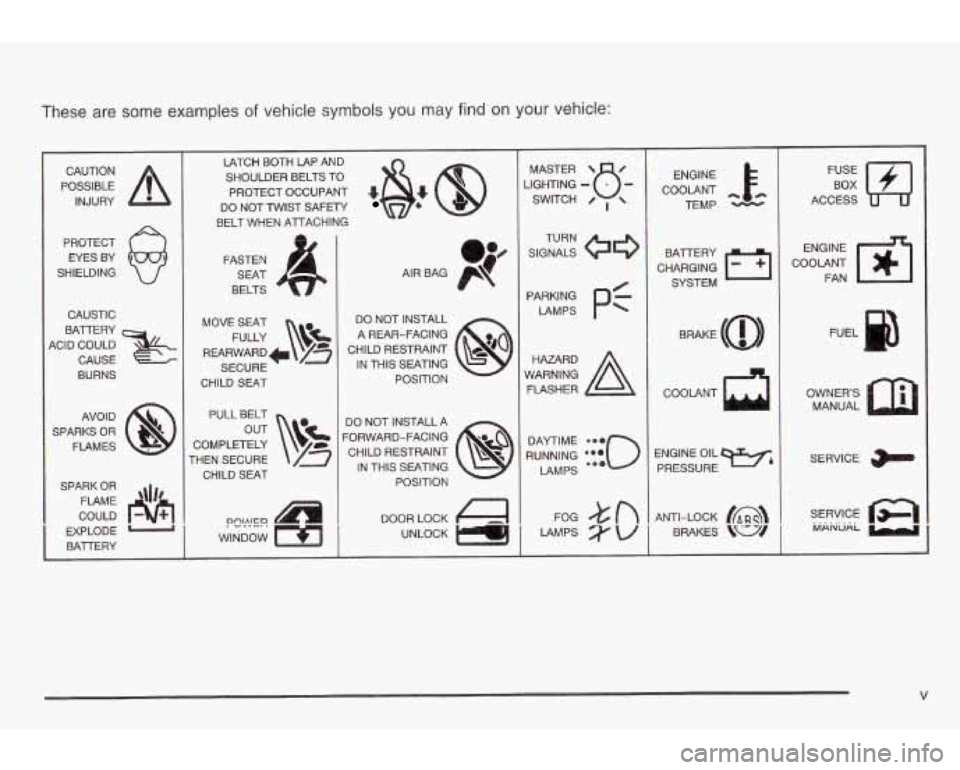
These are some examples of vehicle symbols you may find on your vehicle:
POSSIBLE A
CAUTION
INJURY
PROTECT EYES BY
SHIELDING
CAUSTIC
BATTERY
4CID COULD CAUSE
BURNS
AVOID
SPARKS
OR
FLAMES
SPARK
OR
FLAME 'lb'
COULD
EXPLODE
-
BATTERY
1
I
LATCH BOTH LAP AND
SHOULDER BELTS TO
PROTECT OCCUPANT
4
DO NOT TWIST SAFETY
BELT WHEN ATTACHING
FASTEN SEAT
BELTS
MOVE SEAT FULLY
\!&
REARWARD+ /z
SECURE
CHILD SEAT
PULL BELT
COMPLETELY
-HEN SECURE
CHILD SEAT
?"!"!E?
WINDOW DO
NOT INSTALL
A REAR-FACING
CHILD RESTRAINT IN THIS SEATING
POSITION
DO NOT INSTALL A
FORWARD-FACING CHILD RESTRAINT IN THIS SEATING POSITION
DOOR LOCK UNLOCK LIGHTING
-
PARKING PC
LAMPS
FOG n LAMPS w
ENGINE
COOLANT TEMP
CHARGING
1-1
BAlTERY SYSTEM
COOLANT
a
ENGINE OIL
PRESSURE
Wb
ANTI-LOCK fm)
BRAKES \u/
FJ
ACCESS
ENGINE
COOLANT FAN
FUEL
OWNER'S MANUAL
SERVICE
SERVICE
iviAi\iuWi
V
Page 70 of 354
Section 2 Features and Controls
Keys .............................................................. -2-2
Remote Keyless Entry System
......................... 2.3
Remote Keyless Entry System Operation
.......... -2-4
Qoors and Locks ............................................. 2-7
Door Locks
.................................................... 2-7
Power Door Locks
.......................................... 2-8
Delayed Locking
............................................. 2-8
Programmable Automatic Door Locks
................ 2-8
Rear Door Security Locks
.............................. 2-10
Lockout Protection
........................................ 2-11
Leaving Your Vehicle
.................................... 2-1 1
Trunk .......................................................... 2-12
Windows
........................................................ 2-15
Manual Windows
.......................................... 2-15
Power Windows
............................................ 2-16
Sun Visors
................................................... 2-16
Theft-Deterrent Systems
.................................. 2-17
Passlock@
@ ................................................. 2-17
Starting and Operating Your Vehicle
................ 2-18
New Vehicle Break-In
.................................... 2-18
Ignition Positions
.......................................... 2-18 Starting
Your Engine
..................................... 2.19
Engine Coolant Heater
.................................. 2.22
Automatic Transaxle Operation
....................... 2.24
Manual Parking
Shifting
Shifting Parking Parking Transaxle Operation
.......................... -2-27
Brake
.............................................. 2.29
Into Park (P)
..................................... 2.30
Out
of Park (P) ................................. 2.32
Your VehiclelKey Removal
.................. 2.32
Over Things That Burn
....................... 2-33
Engine Exhaust
............................................ 2-33
Running Your Engine While You Are Parked
.... 2-34
Mirrors
........................................................... 2-35
Manual Rearview Mirror
................................. 2.35
Outside Remote Control Mirror
....................... 2.35
Outside Power Mirrors
................................... 2.36
Outside Convex Mirror
................................... 2.36
Storage Areas
................................................ 2.37
Glove Box
................................................... 2.37
Center Console Storage Area
......................... 2.37
n . .-L.IA.. f. UUpl IUIUGI (3) L.UI 137 ................................................
Sunroof ......................................................... 2-38
2-
1
Page 74 of 354

gf (Unlock): The driver's door will unlock
automatically when this button on the transmitter is
pressed. If the button
is pressed again within five
seconds, all remaining doors will unlock. The interior
lamps will stay on for
10 seconds or until the ignition is
turned on. The parking lamps will flash twice to
indicate unlocking has occurred.
(Remote Trunk Release): The trunk will unlock
when the vehicle symbol on the transmitter is pressed,
as long as the trunk lockout is not engaged. You
can open the trunk with the transmitter when the vehicle
speed is less than
2 mph (3 km/h), when the parking
brake is engaged, or when the ignition is
off. The interior
lamps will come on for
10 seconds or until the ignition
switch is turned to
ON.
& (Horn): The horn will sound and the headlamps
and the parking lamps will flash for up to two minutes
when the horn symbol on the transmitter is pressed. The
interior lamps will come on and remain on while the
horn is sounding and the lamps are flashing. The horn
and lamps can be turned
off by pressing the horn
symbol button again or by turning the ignition to
ON.
Programmable Horn Chirp
When you use the remote keyless entry transmitter to
lock the doors or use the delayed locking feature
the parking lamps will flash and the horn will chirp.
The programmable horn chirp can be disabled by
pressing and holding either of the door lock switches in
the unlock position for
10 seconds with the ignition
ON and all of the doors closed. When you hear the horn
chirp, programming is complete.
To reactivate the horn chirp feature, repeat the above
procedure.
Matching Transmitter(s) to Your
Vehicle
Each remote keyless entry transmitter is coded to
prevent another transmitter from unlocking your vehicle.
If a transmitter is lost or stolen, a replacement can
be purchased through your dealer. Remember to bring
your dealer. When the dealer matches the replacement
transmitter to your vehicle, any remaining transmitters
must also be matched. Once your dealer has coded the
new transmitter, the lost transmitter will not unlock
your vehicle. Each vehicle can have a maximum of four
transmitters matched to it.
-n rnrn-ininm tmncmittnrc with \In1 I wh@n \In[ 1 nn 10 ully IUIII~ll'llly La-, lY I,,,.. .,.- ..., , I-- I--' J-
2-5
Page 79 of 354
Before your vehicle was shipped from the factory it was
programmed in Mode
1. To determine the current
mode or
to change to a different mode, do the following:
1. Put an automatic transaxle in PARK (P) or a
manual transaxle
in REVERSE (R) with the parking
brake engaged and turn the ignition to
ON.
2. Press and hold LOCK on the power door lock
switch for
10 seconds. Release the switch when
you hear the chime.
3. Count the number of chimes you hear. The number
of chimes tells you which mode your vehicle is in.
You can change the mode by pressing and
holding LOCK on the power door lock switch (two
chimes for Mode
2, three chimes for Mode 3
and four chimes for Mode 4).
that matches the mode you want.
4. Repeat Step 2 until you hear the number of chimes
The mode you selected is now set.
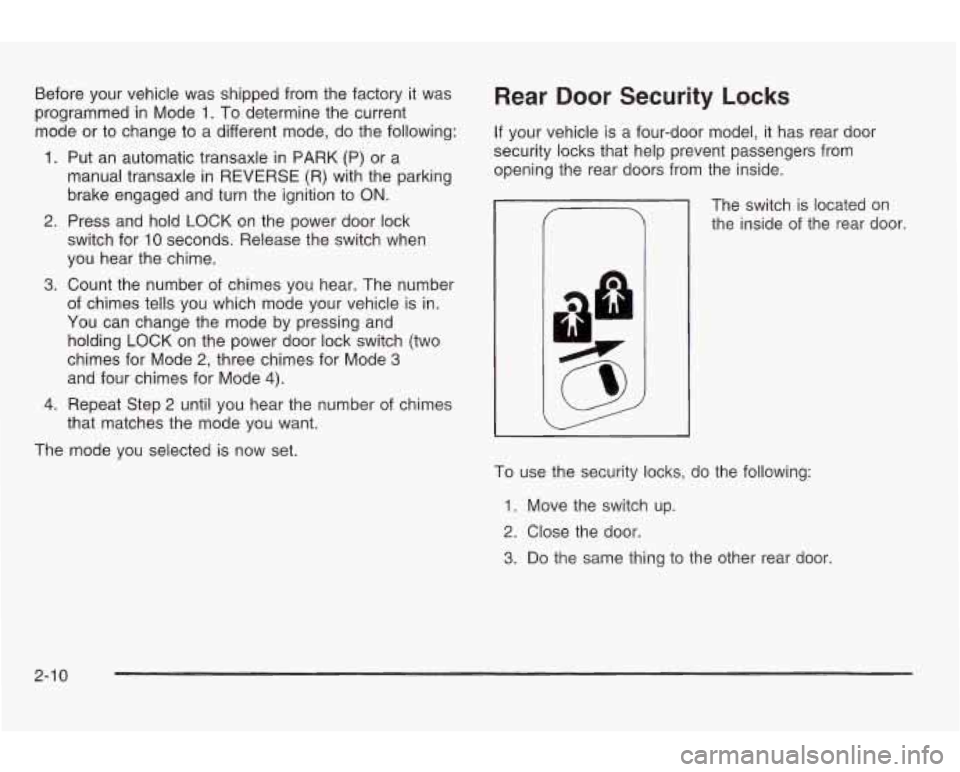
Rear Door Security Locks
If your vehicle is a four-door model, it has rear door
security locks that help prevent passengers from
opening the rear doors from
the inside.
The switch is located
on
the inside of the rear door.
To use the security locks, do the following:
1. Move the switch up.
2. Close the door.
3. Do the same thing to the other rear door.
2-1 0
Page 82 of 354
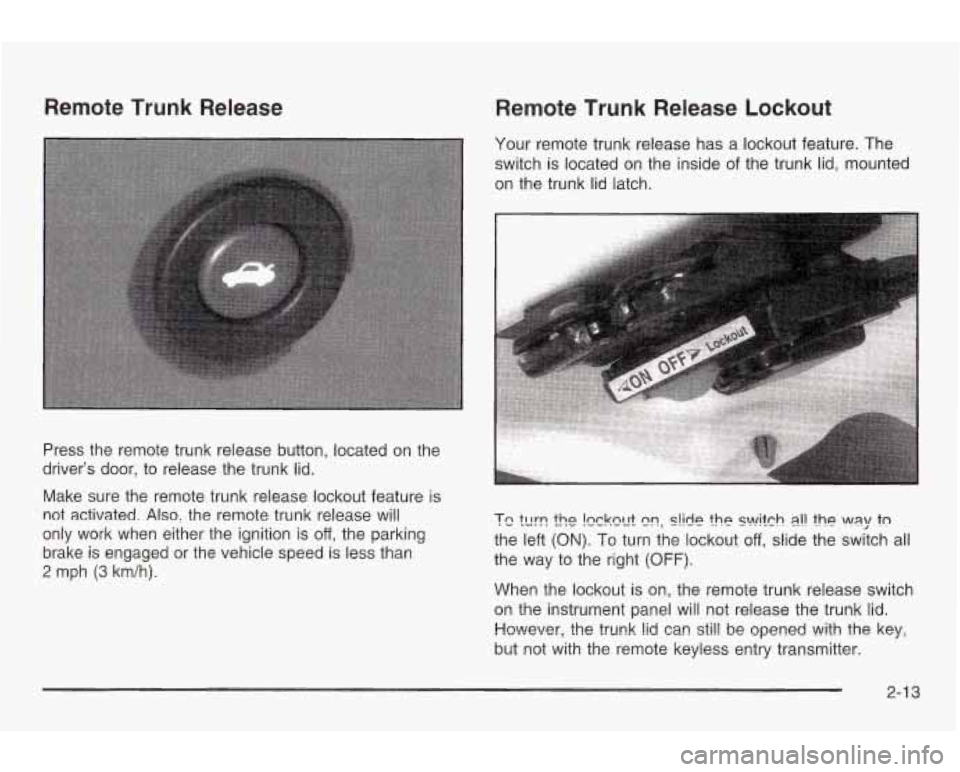
Remote Trunk Release
Remote Trunk Release Lockout
Your remote trunk release has a lockout feature. The
switch is located on the inside of the trunk lid, mounted
on the trunk lid latch.
Press the remote trunk release button, located on the
driver’s door, to release the trunk lid.
Make sure the remote trunk release lockout feature is
not activated.
Also, the remote trunk release will
only work when either the ignition is
off, the parking
brake is engaged or the vehicle speed is less than
2 mph (3 km/h).
T5 k!T the !ccknnt nn, S!kk ?he s?nli?nh e!! the way tn
the left (ON). To turn the lockout off, slide the switch all
the way to the right
(OFF).
When the lockout is on, the remote trunk release switch
on the instrument panel
will not release the trunk lid.
Hcwever, the trunk lid can stil! he opened with the keyj
but not with the remote keyless entry transmitter.
2-1 3
Page 87 of 354
Starting and Operating Your
Vehicle
New Vehicle Break-In
Notice: Your vehicle doesn’t need an elaborate
“break-in.” But it will perform better in the long run
if you follow these guidelines:
Don’t drive at any one speed - fast or
slow
- for the first 500 miles (805 km).
Don’t make full-throttle starts.
Avoid making hard stops for the first 200 miles
(322 km) or so. During this time your new
brake linings aren’t yet broken in. Hard stops
with new linings can mean premature wear and
earlier replacement. Follow this breaking-in
guideline every time you get new brake linings.
Don’t tow a trailer during break-in. See “Towing
a Trailer” in the Index for more information.
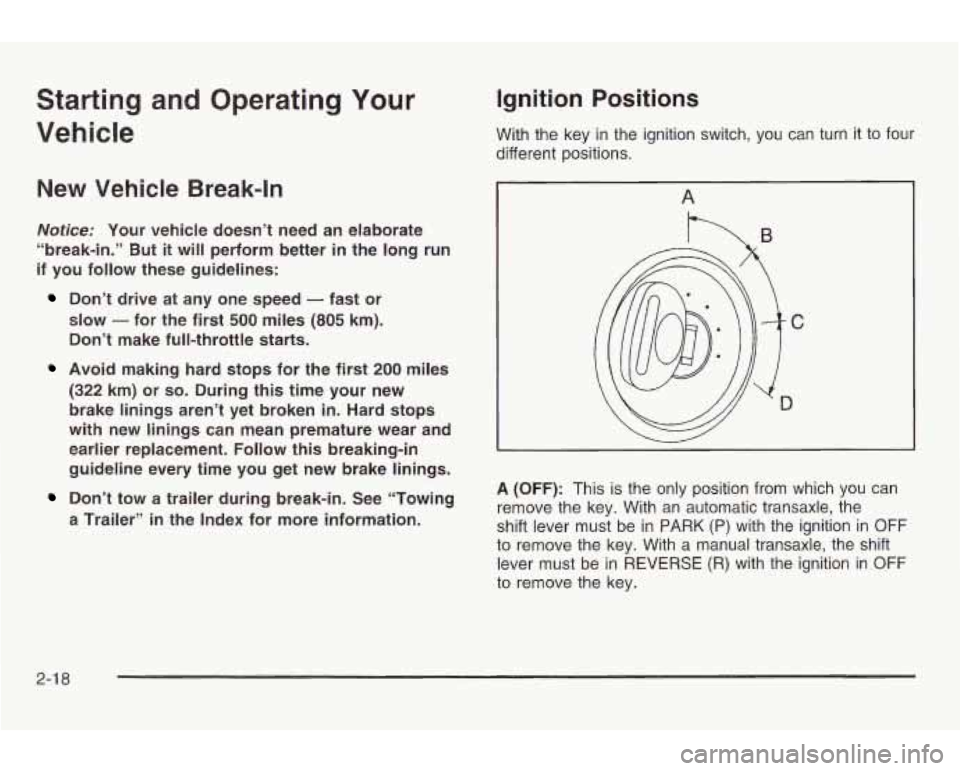
Ignition Positions
With the key in the ignition switch, you can turn it to four
different positions.
I A
A (OFF): This is the only position from which you can
remove the key. With an automatic transaxle, the
shift lever
must be in PARK (P) with the ignition in OFF
to remove the key. With a manual transaxle, the shift
lever must be in REVERSE (R) with the ignition
in OFF
to remove the key.
2-1 8
Page 89 of 354
Manual Transaxle
The gear selector should be in neutral and the parking
brake engaged. Hold the clutch pedal
to the floor
and start the engine. Your vehicle won’t start
if the clutch
pedal is not all the way down
- that’s a safety feature.
Starting Your 2.2L L4 ECOTECTM
Engine
1. With your foot off the accelerator pedal, turn your
ignition key
to START. When the engine starts, let
go of the key. The idle speed will
go down as
your engine gets warm.
Notice: Holding your key in START for longer than
15 seconds at a time will cause your battery to
be drained much sooner. And the excessive heat
can damage your starter motor. Wait about
15 seconds between each try to help avoid draining
your battery or damaging your starter.
2. If it doesn’t start, wait about 15 seconds and try
again to start the engine by turning the ignition
key to START. Wait about
15 seconds between
each
try.
When your engine has run about 10 seconds to
warm up, your vehicle is ready to be driven. Don’t
“race” your engine when it’s cold.
If the weather is below freezing (32°F or OOC), let
the engine run for a few minutes
to warm up.
3. If your engine still won’t start (or starts but then
stops),
it could be flooded with too much gasoline.
Try pushing your accelerator pedal all the way
to the
floor and holding
it there as you hold the key in
START for about three seconds. If the vehicle starts
briefly but then stops again, do the same thing,
but this time keep the pedal down for five or
six seconds. This clears the extra gasoline from
the engine.
Notice: Your engine is designed to work with the
electronics in your vehicle.
If you add electrical
parts or accessories, you could change the way
the
engine operates. Before adding electrical equipment,
check with your dealer.
If you don’t, your engine
might not perform properly.
2-20
Page 93 of 354
Automatic Transaxle Operation
2
1
I
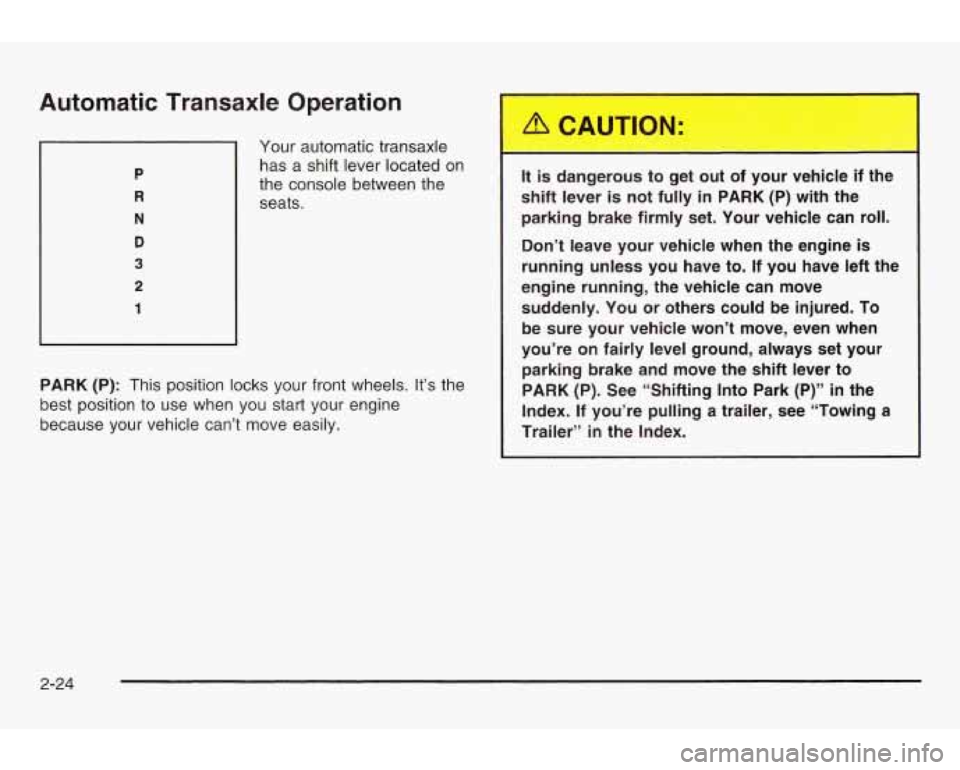
Your automatic transaxle has a shift lever located on
the console between the
seats.
PARK (P): This position locks your front wheels. It’s the
best position
to use when you start your engine
because your vehicle can’t move easily.
It is dangerous to get out of your vehicle if the
shift lever
is not fully in PARK (P) with the
parking brake firmly set. Your vehicle can roll.
Don’t leave your vehicle when the engine is
running unless you have to. If you have left the
engine running, the vehicle can move suddenly. You or others could
be injured. To
be sure your vehicle won’t move, even when
you’re on fairly level ground, always set your parking brake and move the shift lever to PARK
(P). See “Shifting Into Park (P)” in the
Index. If you’re pulling a trailer, see “Towing a
Traileryy
in the Index.
2-24
Page 94 of 354
Ensure the shift lever is fully in PARK (P) before starting
the engine. Your vehicle has an automatic transaxle
shift lock control system. You have to apply your regular
brake before you can shift from PARK (P) when the
ignition key is in
ON. If you cannot shift out of PARK (P),
ease pressure on the shift lever and push the shift
lever all the way into PARK (P) as you maintain brake
application. Then move the shift lever into the gear
you wish. Press the shift lever button before moving the
shift lever. See
Shifting Out of Park (P) on page 2-32
later in this section.
REVERSE (R): Use this gear
to back up.
Notice: Shifting to REVERSE (R) while your vehicle
is moving forward could damage your transaxle.
Shift to REVERSE (R) only after your vehicle
is stopped.
To rock your vehicle back and forth to get out of snow,
ice or sand without damaging your transaxle, see
If
You Are Stuck: In Sand, Mud, Ice or Snow on
page 4-3 1.
NEUTRAL (N): In this position, your engine doesn’t
connect with the wheels.
To restart when you’re already
moving, use NEUTRAL (N) only. Also, use
NEUTRAL (N) when your vehicle is being towed.
Shifting into
a drive gear while your engine is
“racing” (running at high speed) is dangerous. Unless your foot is firmly on the brake pedal,
your vehicle could move very rapidly. You could lose control and
hit people or objects.
Don’t shift into a drive gear while your engine
is racing.
~~
Notice: Damage to your transaxle caused by
shifting into a drive gear with the engine racing
isn’t
covered by your warranty.
2-25
Page 95 of 354

AUTOMATIC OVERDRIVE (D): This position is for
normal driving.
If you need more power for passing, and
you’re:
Going less than 35 mph (55 km/h), push your
Going about 35 mph (55 km/h) or more, push the
You’ll shift down to the next gear and have more power.
accelerator pedal about halfway
down.
accelerator all the way down.
Notice: If your vehicle seems to start up rather
slowly, or if
it seems not to shift gears as you go
faster, something may be wrong with a transaxle system sensor.
If you drive very far that way, your
vehicle can be damaged.
So, if this happens,
have your vehicle serviced right away. Until then,
you can use SECOND
(2) when you are driving less
than
35 mph (55 km/h) and AUTOMATIC
OVERDRIVE (D) for higher speeds. THIRD
(3): This position is also used
for normal driving.
However, it offers more power and lower fuel economy
than AUTOMATIC OVERDRIVE (D). Here are some
times you might choose THIRD
(3) instead of
AUTOMATIC OVERDRIVE (D):
When driving on hilly, winding roads.
0 When towing a trailer, so there is less shifting
between gears.
When going down a steep hill.
SECOND
(2): This position gives you more power but
lower fuel economy. You can use SECOND
(2) on
hills. It can help control your speed as you go down
steep mountain roads, but then you would also want to
use your brakes
off and on.
Notice: Don’t drive in SECOND (2) for more than
25 miles (40 km), or at speeds over 55 mph
(90 km/h), or you can damage your transaxle. Use
THIRD
(3) or AUTOMATIC OVERDRIVE (D) as
much as possible. Don’t shift into SECOND (2)
unless you are going slower than 65 mph (105 km/h)
or you can damage your engine.
2-26