change wheel PONTIAC GRAND AM 2005 Owners Manual
[x] Cancel search | Manufacturer: PONTIAC, Model Year: 2005, Model line: GRAND AM, Model: PONTIAC GRAND AM 2005Pages: 334, PDF Size: 2.27 MB
Page 95 of 334
Instrument Panel Overview...............................3-4
Hazard Warning Flashers................................3-6
Other Warning Devices...................................3-7
Horn.............................................................3-7
Tilt Wheel.....................................................3-7
Turn Signal/Multifunction Lever.........................3-8
Turn and Lane-Change Signals........................3-8
Headlamp High/Low-Beam Changer..................3-9
Flash-to-Pass.................................................3-9
Windshield Washer.........................................3-9
Windshield Wiper Lever.................................3-10
Cruise Control..............................................3-11
Headlamps..................................................3-14
Headlamps Off in PARK (P)...........................3-14
Delayed Headlamps......................................3-15
Daytime Running Lamps (DRL).......................3-15
Automatic Headlamp System..........................3-15
Fog Lamps..................................................3-16
Instrument Panel Brightness...........................3-17
Dome Lamp.................................................3-17
Entry/Exit Lighting.........................................3-17
Trunk Lamp.................................................3-18
Battery Run-Down Protection..........................3-18
Ashtrays and Cigarette Lighter........................3-18Climate Controls............................................3-19
Climate Control System.................................3-19
Outlet Adjustment.........................................3-21
Warning Lights, Gages, and Indicators............3-22
Instrument Panel Cluster................................3-22
Speedometer and Odometer...........................3-24
Trip Odometer..............................................3-24
Tachometer.................................................3-24
Safety Belt Reminder Light.............................3-25
Airbag Readiness Light..................................3-25
Charging System Light..................................3-26
Brake System Warning Light..........................3-27
Anti-Lock Brake System Warning Light.............3-28
Enhanced Traction System Warning Light.........3-28
Enhanced Traction System Active Light............3-29
Engine Coolant Temperature Gage..................3-29
Low Coolant Warning Light............................3-30
Malfunction Indicator Lamp.............................3-30
Oil Pressure Light.........................................3-34
Change Engine Oil Light................................3-34
Security Light...............................................3-35
Highbeam On Light.......................................3-35
Low Washer Fluid Warning Light.....................3-35
Service Vehicle Soon Light............................3-35
Fuel Gage...................................................3-36
Section 3 Instrument Panel
3-1
Page 105 of 334

Cruise Control
The cruise control buttons are located on the bottom of
the steering wheel.
With cruise control, you can maintain a speed of about
25 mph (40 km/h) or more without keeping your foot
on the accelerator. This can really help on long
trips. Cruise control does not work at speeds below
25 mph (40 km/h).
The cruise control will turn off if any of the following
occur:
•The brakes are applied,
•the automatic transaxle is shifted to NEUTRAL (N),
•the parking brake is applied, or
•the brake system warning light is on.
{CAUTION:
Cruise control can be dangerous where you
cannot drive safely at a steady speed. So, do
not use your cruise control on winding roads
or in heavy traffic.
Cruise control can be dangerous on slippery
roads. On such roads, fast changes in tire
traction can cause needless wheel spinning,
and you could lose control. Do not use cruise
control on slippery roads.
Your vehicle may have Enhanced Traction
System (ETS). SeeEnhanced Traction System (ETS)
on page 4-8. If your vehicle is in cruise control while the
ETS begins to limit wheel spin, the cruise control will
automatically disengage. When road conditions
allow you to safely use it again, you may turn the cruise
control back on.
3-11
Page 110 of 334

The DRL and automatic headlamp systems will only be
affected when the light sensor sees a change in
lighting lasting longer than this delay.
If you start your vehicle in a dark garage, the automatic
headlamp system will come on immediately. Once
you leave the garage, it will take approximately
one minute for the automatic headlamp system to
change to DRL if it is light outside. During that delay,
your instrument panel cluster may not be as bright
as usual. Make sure your instrument panel brightness
control is in the full bright position. See “Instrument
Panel Brightness Control” underInstrument Panel
Brightness on page 3-17.
To idle your vehicle with the automatic headlamp
system off, set the parking brake while the ignition is off.
Then start the vehicle. The automatic headlamp
system will stay off until you release the parking brake.
As with any vehicle, you should turn on the regular
headlamps when you need them.Fog Lamps
The button to turn your fog
lamps on and off is located
on the instrument panel,
to the left of the steering
wheel, beside the
instrument panel
brightness thumbwheel.
When using the fog lamps, the ignition must be on as
well as the parking lamps or the low-beam headlamps.
Press the button to turn the fog lamps on and off.
An indicator light on the button will glow while the fog
lamps are on. The fog lamps will turn off while the
high-beam headlamps are turned on.
3-16
Page 171 of 334
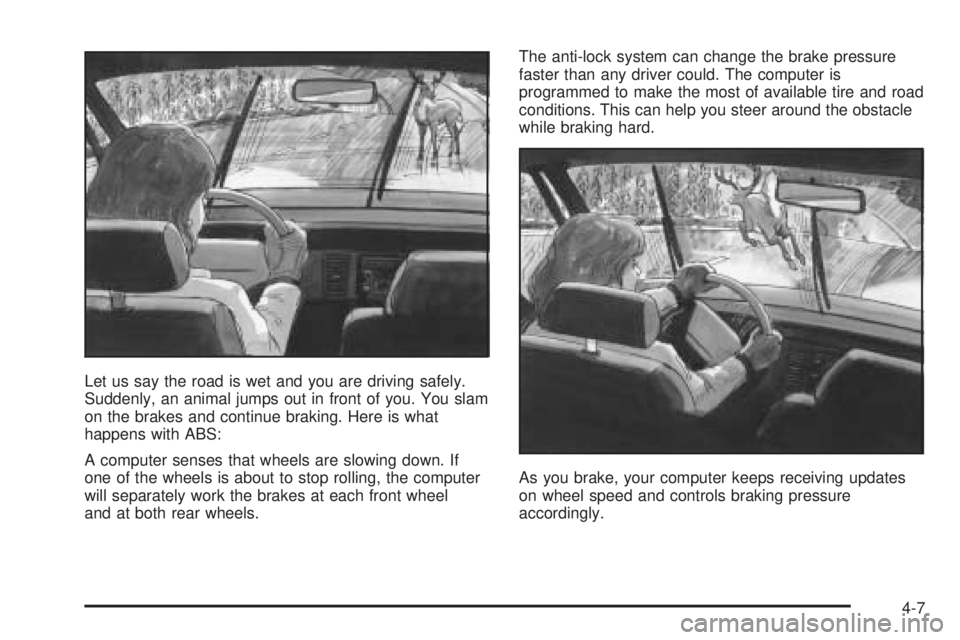
Let us say the road is wet and you are driving safely.
Suddenly, an animal jumps out in front of you. You slam
on the brakes and continue braking. Here is what
happens with ABS:
A computer senses that wheels are slowing down. If
one of the wheels is about to stop rolling, the computer
will separately work the brakes at each front wheel
and at both rear wheels.The anti-lock system can change the brake pressure
faster than any driver could. The computer is
programmed to make the most of available tire and road
conditions. This can help you steer around the obstacle
while braking hard.
As you brake, your computer keeps receiving updates
on wheel speed and controls braking pressure
accordingly.
4-7
Page 172 of 334
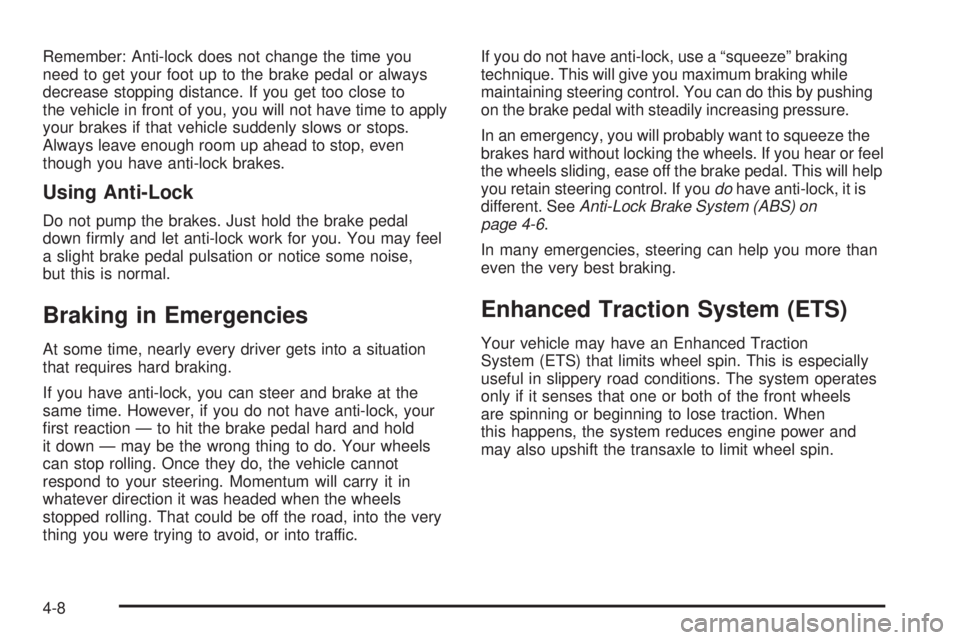
Remember: Anti-lock does not change the time you
need to get your foot up to the brake pedal or always
decrease stopping distance. If you get too close to
the vehicle in front of you, you will not have time to apply
your brakes if that vehicle suddenly slows or stops.
Always leave enough room up ahead to stop, even
though you have anti-lock brakes.
Using Anti-Lock
Do not pump the brakes. Just hold the brake pedal
down firmly and let anti-lock work for you. You may feel
a slight brake pedal pulsation or notice some noise,
but this is normal.
Braking in Emergencies
At some time, nearly every driver gets into a situation
that requires hard braking.
If you have anti-lock, you can steer and brake at the
same time. However, if you do not have anti-lock, your
first reaction — to hit the brake pedal hard and hold
it down — may be the wrong thing to do. Your wheels
can stop rolling. Once they do, the vehicle cannot
respond to your steering. Momentum will carry it in
whatever direction it was headed when the wheels
stopped rolling. That could be off the road, into the very
thing you were trying to avoid, or into traffic.If you do not have anti-lock, use a “squeeze” braking
technique. This will give you maximum braking while
maintaining steering control. You can do this by pushing
on the brake pedal with steadily increasing pressure.
In an emergency, you will probably want to squeeze the
brakes hard without locking the wheels. If you hear or feel
the wheels sliding, ease off the brake pedal. This will help
you retain steering control. If youdohave anti-lock, it is
different. SeeAnti-Lock Brake System (ABS) on
page 4-6.
In many emergencies, steering can help you more than
even the very best braking.
Enhanced Traction System (ETS)
Your vehicle may have an Enhanced Traction
System (ETS) that limits wheel spin. This is especially
useful in slippery road conditions. The system operates
only if it senses that one or both of the front wheels
are spinning or beginning to lose traction. When
this happens, the system reduces engine power and
may also upshift the transaxle to limit wheel spin.
4-8
Page 174 of 334
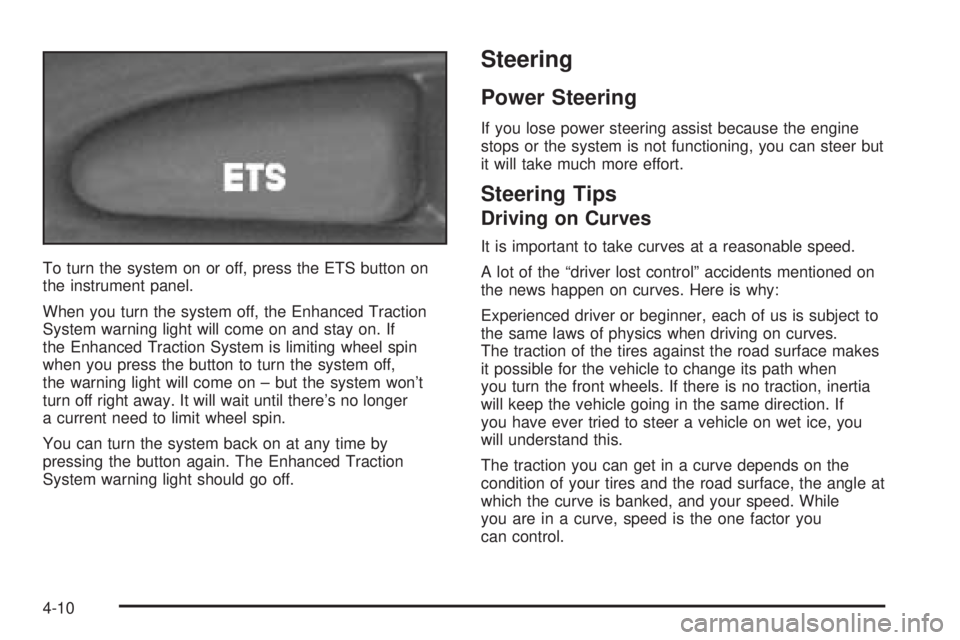
To turn the system on or off, press the ETS button on
the instrument panel.
When you turn the system off, the Enhanced Traction
System warning light will come on and stay on. If
the Enhanced Traction System is limiting wheel spin
when you press the button to turn the system off,
the warning light will come on – but the system won’t
turn off right away. It will wait until there’s no longer
a current need to limit wheel spin.
You can turn the system back on at any time by
pressing the button again. The Enhanced Traction
System warning light should go off.
Steering
Power Steering
If you lose power steering assist because the engine
stops or the system is not functioning, you can steer but
it will take much more effort.
Steering Tips
Driving on Curves
It is important to take curves at a reasonable speed.
A lot of the “driver lost control” accidents mentioned on
the news happen on curves. Here is why:
Experienced driver or beginner, each of us is subject to
the same laws of physics when driving on curves.
The traction of the tires against the road surface makes
it possible for the vehicle to change its path when
you turn the front wheels. If there is no traction, inertia
will keep the vehicle going in the same direction. If
you have ever tried to steer a vehicle on wet ice, you
will understand this.
The traction you can get in a curve depends on the
condition of your tires and the road surface, the angle at
which the curve is banked, and your speed. While
you are in a curve, speed is the one factor you
can control.
4-10
Page 178 of 334
•Check your mirrors, glance over your shoulder, and
start your left lane change signal before moving out
of the right lane to pass. When you are far enough
ahead of the passed vehicle to see its front in your
inside mirror, activate your right lane change signal
and move back into the right lane. Remember that
your right outside mirror is convex. The vehicle you
just passed may seem to be farther away from you
than it really is.
•Try not to pass more than one vehicle at a time on
two-lane roads. Reconsider before passing the next
vehicle.
•Do not overtake a slowly moving vehicle too rapidly.
Even though the brake lamps are not flashing, it may
be slowing down or starting to turn.
•If you are being passed, make it easy for the
following driver to get ahead of you. Perhaps you can
ease a little to the right.
Loss of Control
Let us review what driving experts say about what
happens when the three control systems — brakes,
steering, and acceleration — do not have enough friction
where the tires meet the road to do what the driver
has asked.
In any emergency, do not give up. Keep trying to steer
and constantly seek an escape route or area of less
danger.
Skidding
In a skid, a driver can lose control of the vehicle.
Defensive drivers avoid most skids by taking reasonable
care suited to existing conditions, and by not overdriving
those conditions. But skids are always possible.
The three types of skids correspond to your vehicle’s
three control systems. In the braking skid, your wheels
are not rolling. In the steering or cornering skid, too much
speed or steering in a curve causes tires to slip and lose
cornering force. And in the acceleration skid, too much
throttle causes the driving wheels to spin.
4-14
Page 179 of 334
A cornering skid is best handled by easing your foot off
the accelerator pedal.
If you have the Enhanced Traction System, remember:
It helps to avoid only the acceleration skid. If you do
not have the Enhanced Traction System, or if the system
is off, then an acceleration skid is also best handled
by easing your foot off the accelerator pedal.
If your vehicle starts to slide, ease your foot off the
accelerator pedal and quickly steer the way you want
the vehicle to go. If you start steering quickly enough,
your vehicle may straighten out. Always be ready
for a second skid if it occurs.
Of course, traction is reduced when water, snow, ice,
gravel, or other material is on the road. For safety, you
will want to slow down and adjust your driving to
these conditions. It is important to slow down on slippery
surfaces because stopping distance will be longer and
vehicle control more limited.While driving on a surface with reduced traction, try
your best to avoid sudden steering, acceleration,
or braking, including engine braking by shifting to a
lower gear. Any sudden changes could cause the tires
to slide. You may not realize the surface is slippery
until your vehicle is skidding. Learn to recognize warning
clues — such as enough water, ice, or packed snow
on the road to make a mirrored surface — and
slow down when you have any doubt.
If you have the anti-lock braking system, remember: It
helps avoid only the braking skid. If you do not have
anti-lock, then in a braking skid, where the wheels are
no longer rolling, release enough pressure on the brakes
to get the wheels rolling again. This restores steering
control. Push the brake pedal down steadily when
you have to stop suddenly. As long as the wheels are
rolling, you will have steering control.
4-15
Page 194 of 334
Rocking Your Vehicle to Get It Out
First, turn your steering wheel left and right. That
will clear the area around your front wheels. Then shift
back and forth between REVERSE (R) and a forward
gear, spinning the wheels as little as possible. Release
the accelerator pedal while you shift, and press
lightly on the accelerator pedal when the transaxle is in
gear. By slowly spinning your wheels in the forward
and reverse directions, you will cause a rocking motion
that may free your vehicle. If that does not get you
out after a few tries, you may need to be towed out. If
you do need to be towed out, seeTowing Your
Vehicle on page 4-35.
Loading Your Vehicle
It is very important to know how much weight your
vehicle can carry. This weight is called the vehicle
capacity weight and includes the weight of all occupants,
cargo and all nonfactory-installed options. Two labels
on your vehicle show how much weight it may properly
carry, the Tire and Loading Information label and the
Certification label.
{CAUTION:
Do not load your vehicle any heavier than the
Gross Vehicle Weight Rating (GVWR), or either
the maximum front or rear Gross Axle Weight
Rating (GAWR). If you do, parts on your
vehicle can break, and it can change the way
your vehicle handles. These could cause you
to lose control and crash. Also, overloading
can shorten the life of your vehicle.
4-30
Page 202 of 334
Dolly Towing
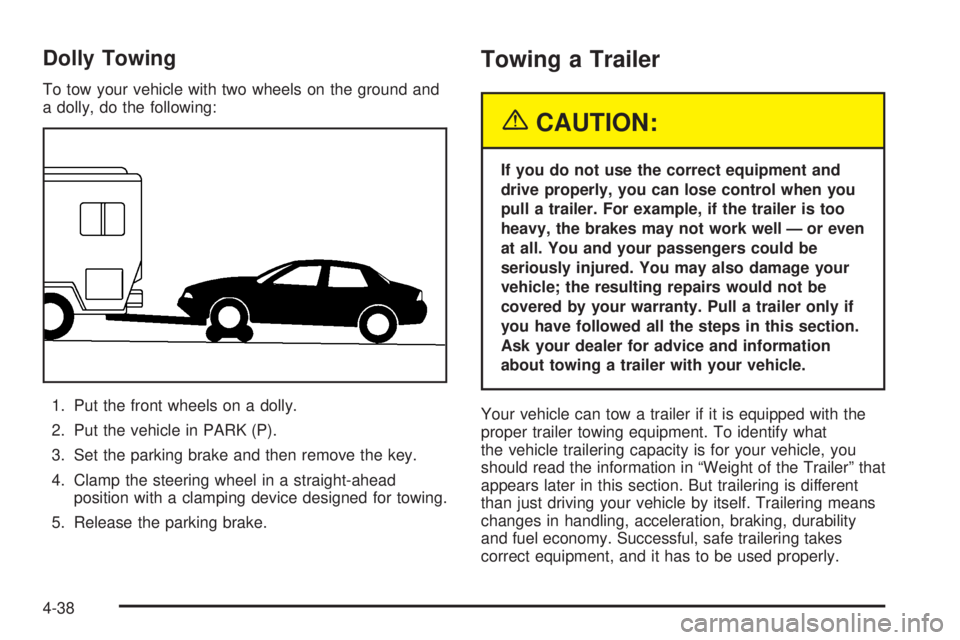
To tow your vehicle with two wheels on the ground and
a dolly, do the following:
1. Put the front wheels on a dolly.
2. Put the vehicle in PARK (P).
3. Set the parking brake and then remove the key.
4. Clamp the steering wheel in a straight-ahead
position with a clamping device designed for towing.
5. Release the parking brake.
Towing a Trailer
{CAUTION:
If you do not use the correct equipment and
drive properly, you can lose control when you
pull a trailer. For example, if the trailer is too
heavy, the brakes may not work well — or even
at all. You and your passengers could be
seriously injured. You may also damage your
vehicle; the resulting repairs would not be
covered by your warranty. Pull a trailer only if
you have followed all the steps in this section.
Ask your dealer for advice and information
about towing a trailer with your vehicle.
Your vehicle can tow a trailer if it is equipped with the
proper trailer towing equipment. To identify what
the vehicle trailering capacity is for your vehicle, you
should read the information in “Weight of the Trailer” that
appears later in this section. But trailering is different
than just driving your vehicle by itself. Trailering means
changes in handling, acceleration, braking, durability
and fuel economy. Successful, safe trailering takes
correct equipment, and it has to be used properly.
4-38