light PONTIAC GRAND PRIX 1998 Owners Manual
[x] Cancel search | Manufacturer: PONTIAC, Model Year: 1998, Model line: GRAND PRIX, Model: PONTIAC GRAND PRIX 1998Pages: 402, PDF Size: 17.96 MB
Page 6 of 402
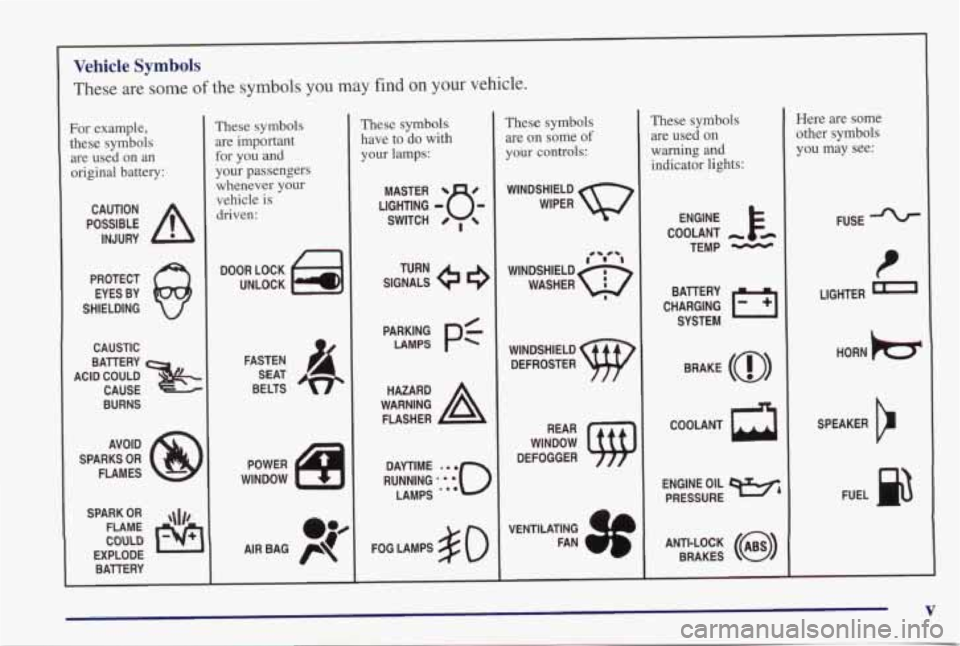
Vehicle Symbols
These are some of the symbols you may find on your vehicle.
For example,
these symbols are used on an
original battery:
POSSIBLE A
CAUTION
INJURY
PROTECT EYES BY
SHIELDING
CAUSTIC
I
BURNS I
AVOID
SPARKS
OR
FLAMES
SPARK
OR ,\I/,
COULD
FLAME
EXPLODE BAllERY
These symbols are important for you and
your passengers
whenever your
vehicle is
driven:
n
UNLOCK Fol
FASTEN
SEAT
BELTS
op
AIR BAG p
These symbols
have to do with
your lamps:
SIGNALS 6
TURN
PARKING
p$ LAMPS
FOG LAMPS
$0
These symbols are
on some of
your controls:
WINDSHIELD
WIPER
WINDSHIELD DEFROSTER
VENTILATING
1
These symbols are used on
warning and
indicator lights:
COOLANT
TEMP
-
CHARGING I-1
BAllERY
SYSTEM
BRAKE
(0)
h
ENGINE OIL
PRESSURE
Here are some
other symbols
you may see:
FUSE
LIGHTER
m
HORN tcr
SPEAKER
b
FUEL e3
V
Page 16 of 402
Your vehicle has a light
that comes
on as a reminder
to buckle up. (See “Safety
Belt Reminder Light” in
the Index.)
In most states and Canadian provinces, the law says to
wear safety belts. Here’s why:
They work.
You never know if you’ll be in a crash. If you do have a
crash, you don’t know
if it will be a bad one.
A few crashes are mild, and some crashes can be so
serious that even buckled up a person wouldn’t survive.
But most crashes are in between.
In many of them,
people who buckle up can survive and sometimes walk
away. Without belts they could have been badly hurt or killed.
After more than
30 years of safety belts in vehicles,
the facts are clear. In most crashes buckling up does
matter
... a lot!
Why Safety Belts Work
When you ride in or on anything, you go as fast as
it goes.
. ‘a
A
1
Take the simplest vehicle. Suppose it’s just a seat
on wheels.
1-9
Page 21 of 402
Driver Position
This part describes the driver’s restraint system.
Lap-Shoulder Belt
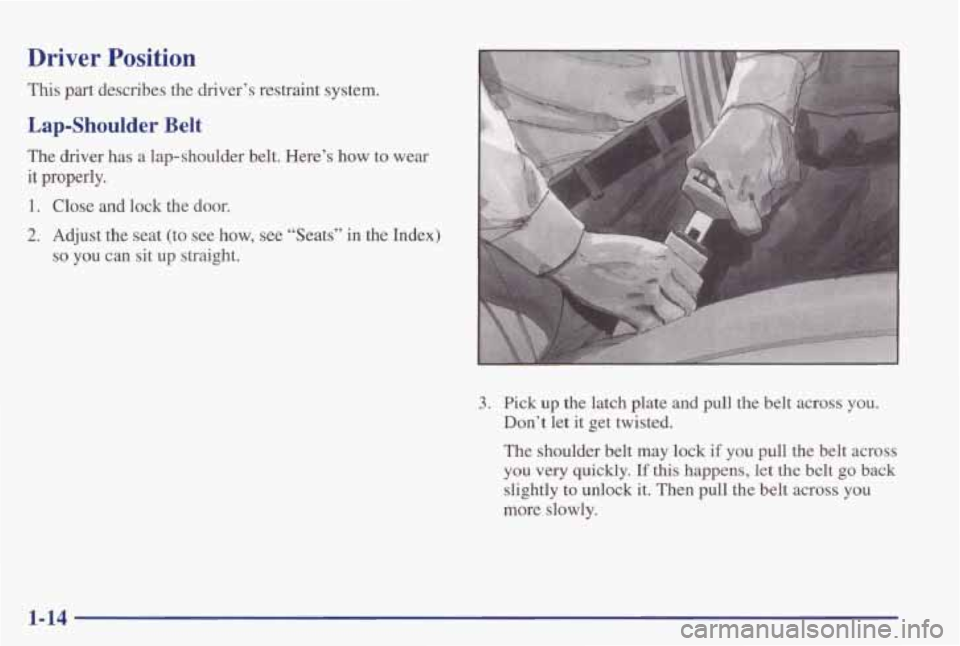
The driver has a lap-shoulder belt. Here’s how to wear
it properly.
1. Close and lock the door.
2. Adjust the seat (to see how, see “Seats” in the Index)
so you can sit up straight.
3. Pick up the latch plate and pull the belt across you.
Don’t let it get twisted.
The shoulder belt may lock
if you pull the belt across
you very quickly. If this happens, let the belt go back
slightly to unlock it. Then pull the belt across you
more slowly.
1-14
Page 30 of 402
A CAUTION:
Air bags inflate with great force, faster than the
blink
of an eye. If you’re too close to an inflating
air bag, it could seriously injure you. This is true
even with reduced-force frontal air bags. Safety
belts help keep you in position before and during
a crash.
Always wear your safety belt, even with
reduced-force air bags. The driver should sit as
far back as possible while still maintaining
control of the vehicle.
/I CAUTION:
Children who are up against, or very close to, an
air bag when it inflates can be seriously injured
or killed. This is true even though your vehicle
has reduced-force frontal
air bags. Air bags plus
lap-shoulder belts offer the best protection for
adults, but not for young children and infants.
CAUTION: (Continued)
CAUTION: (Continued)
Neither the vehicle’s safety belt system nor its
airbag system is designed for them. Young
children and infants need the protection
that a
child restraint system can provide. Always secure
children properly in your vehicle.
To read how,
see the part of this manual called “Children” and
see the caution labels on the sunvisors and the
right front passenger’s safety belt.
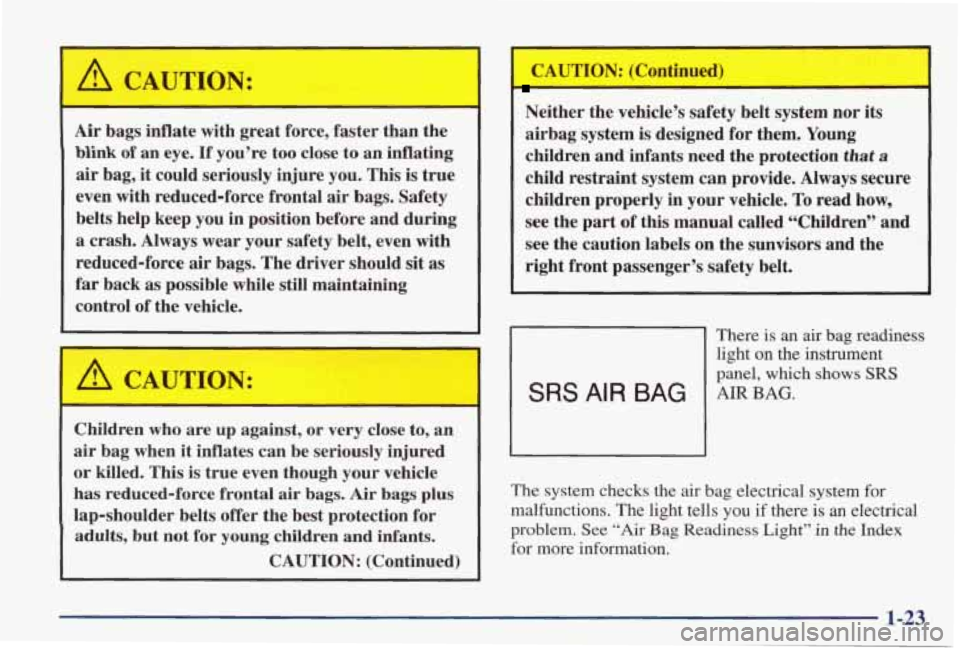
There is an air bag readiness
light on the instrument
panel, which shows
SRS
SRS AIR BAG AIRBAG.
The system checks the air bag electrical system for
malfunctions. The light tells you
if there is an electrical
problem. See “Air
Bag Readiness Light” in the Index
for more information.
1-23
Page 37 of 402
Rear Seat Passengers
It’s very important for rear seat passengers to buckle up!
Accident statistics show that unbelted people in the rear
seat are hurt more often in crashes than those who are
wearing safety belts.
Rear passengers who aren’t safety belted can be thrown out
of the vehicle in a crash. And they can strike others
in the vehicle who are wearing safety belts.
Rear Seat Outside Passenger Positions
Lap-Shoulder Belt
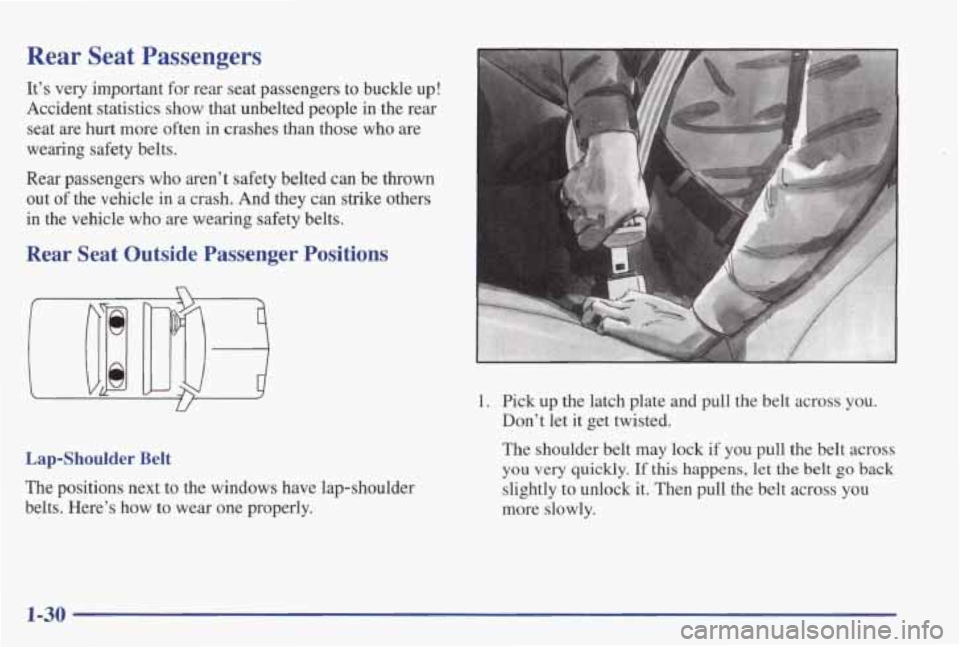
The positions next to the windows have lap-shoulder
belts. Here’s how to wear one properly.
1. Pick up the latch plate and pull the belt across you.
Don’t let it get twisted.
The shoulder belt
may lock if you pull the belt across
you very quickly. If this happens, let the belt go back
slightly to unlock it. Then pull the belt across you
more slowly.
1-30
Page 50 of 402
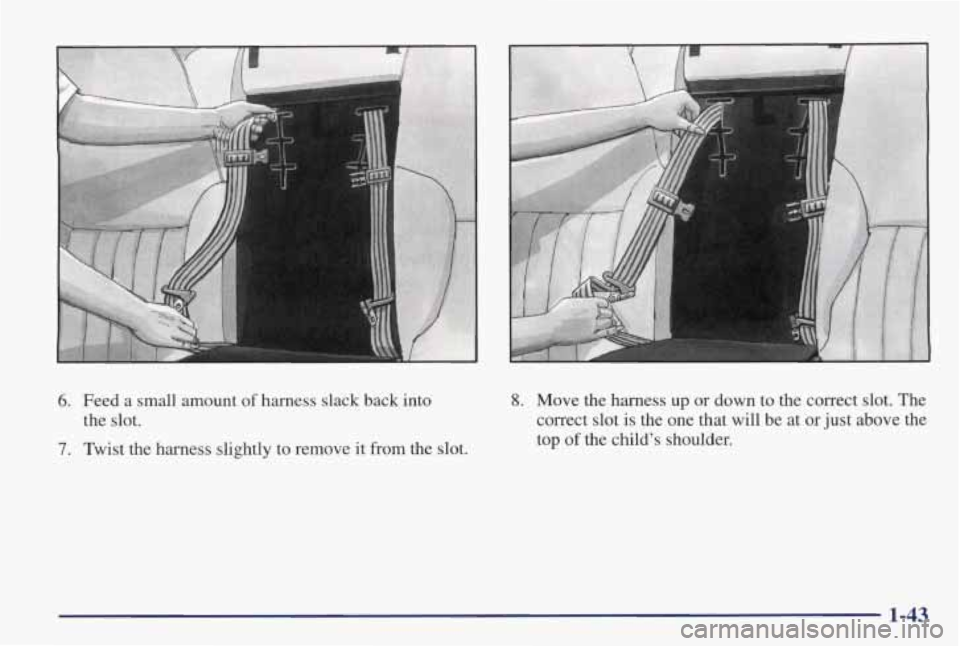
6. Feed a small amount of harness slack back into
the slot.
7. Twist the harness slightly to remove it from the slot.
F
8. Move the harness up or down to the correct slot. The
correct slot
is the one that will be at or just above the
top
of the child’s shoulder.
1-43
Page 51 of 402
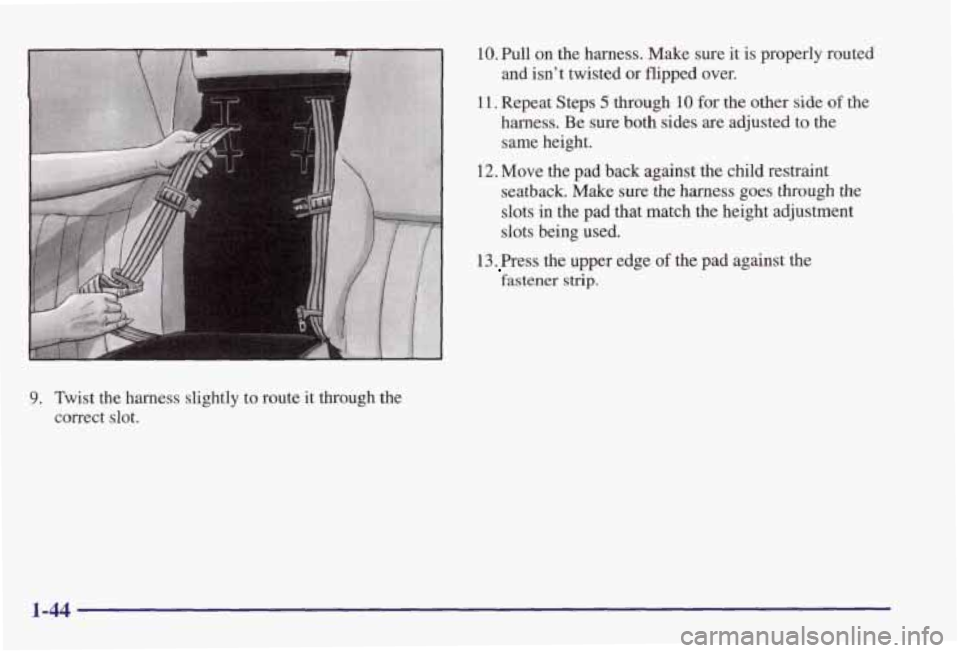
9. Twist the harness slightly to route it through the
correct slot.
10. Pull on the harness. Make sure it is properly routed
and isn’t twisted
or flipped over.
11. Repeat Steps 5 through 10 for the other side o€ the
harness. Be sure both sides are adjusted to the
same height.
12. Move the pad back against the child restraint
seatback. Make sure the harness goes through the
slots in the pad that match the height adjustment
slots being
used.
13 Press the upper edge of the pad against the
fastener strip.
1-44
Page 75 of 402
But if a safety belt isn’t long enough to fasten, your
dealer will order you
an extender. It’s free. When you go
in to order it, take the heaviest coat you will wear, so the
extender will be long enough for you. The extender will
be just for you, and just for the seat in your vehicle that
you choose. Don’t let someone else use it, and use it
only for
the seat it is made to fit. To wear it, just attach it
to the regular safety belt.
Checking Your Restraint Systems
Now and then, make sure the safety belt reminder light
and all your belts, buckles, latch plates, retractors
and
anchorages are working properly. If your vehicle has a
built-in child restraint, also periodically make sure the
harness straps, latch plates, buckle, clip, retractors and
anchorages are working properly. Look for
any other
loose or damaged safety belt and built-in child restraint
system parts. If you see anything that might keep a
safety belt
or built-in child restraint system from doing
its job, have it repaired.
Torn or frayed safety belts may not protect you in a
crash. They can rip apart under impact forces. If
a belt is
torn or frayed, get a new one right away.
If your vehicle has the built-in child restraint, torn or
frayed harness straps can rip apart under impact forces
just like tom or frayed safety belts can. They may not protect
a child in a crash. If a harness
strap is tom or
frayed, get a new harness right away.
Also look
for any opened or broken air bag covers, and
have them repaired
or replaced. (The air bag system
does not need regular maintenance.)
Replacing Restraint System Parts
After
a Crash
If you’ve had a crash, do you need new safety belts or
built-in child restraint parts?
After
a very minor collision, nothing may be necessary.
But if the safety belts or built-in child restraint harness
straps were stretched,
as they would be if worn during a
more severe crash, then
you need new safety belts or
harness straps.
If safety belts or built-in child restraint harness straps
are cut or damaged, replace them. Collision damage also
may mean you will need to have safety belt, built-in
child restraint or seat
parts repaired or replaced. New
parts and repairs may be necessary even if the safety belt
or built-in child
restraint wasn’t being used at the time
of the collision.
If an air bag inflates, you’ll need to replace air bag
system
parts. See the part on the air bag system earlier
in this section.
1-68
Page 76 of 402
Section 2 Features and Controls
Here you can learn about the many standard and optional features on your vehicle, and inform\
ation on starting,
shifting and braking.
Also explained are the instrument panel and the warning systems that\
tell you if everything is
working properly
-- and what to do if you have a problem.
2-2
2-4
2-7
2-
12
2-13
2-14
2- 16
2-16
2-
17
2-20
2-2
1
2-26 2-27 2-30
Keys
Door Locks
Remote Keyless Entry System (If Equipped)
TrUnk
Theft
Content Theft-Deterrent (If Equipped)
New Vehicle “Break-In”
Ignition Positions
Starting Your Engine
Engine Coolant Heater
(If Equipped)
Automatic Transaxle Operation
Parking Brake Shifting Into PARK (P)
Shifting Out of PARK (P)
2-3 1
2-3 1
2-32
2-33
2-34
2-40
2-42
2-45
2-52
2-54
2-59
2-60
2-64
Parking Over Things That Burn
Engine Exhaust
Running Your Engine While You’re Parked
Power Windows
Turn SignaVMultifunction Lever
Exterior Lamps
Interior Lamps
Locks and Lighting Choices
Mirrors
Storage Compartments Sunroof
(If Equipped)
The Instrument Panel
-- Your
Information System
Warning Lights, Gages and Indicators
2-1
Page 81 of 402
To turn this feature on or off, see “Locks and Lighting
Choices” in the Index.
Last Door Closed Locking
The Last Door Closed Locking feature makes it more
convenient for you to use your power door locks
to lock
all the doors when leaving your vehicle. When any door is
open, the first time you attempt to lock
the doors using the
power door lock switch or remote remote keyless entry
transmitter will result
in three chimes to signal that Last
Door Closed Locking feature is being used.
All doors can
be opened for any reason for five seconds from the time
the last door has been closed. Five seconds
after the last
door
is closed, all doors will lock. You can lock the doors
immediately by using the power door lock switch or the
remote keyless
entry transmitter.
The Last Door Closed Locking feature will not occur
and doors will not be locked as a result of this feature
when the ignition switch is in RUN or ACCESSORY.
The Last Door Closed Locking feature is not enabled
from the factory.
To turn the Last Door Closed Locking feature on or off,
see “Locks and Lighting Choices” in the Index.
Automatic Door Locks
All of the doors will lock automatically when you move
your shift lever out of PARK
(P). All doors will unlock
automatically when the ignition is turned
off while the
shift lever is in PARK
(P). If you prefer to have your
doors unlocked automatically at
any time, see “Locks
and Lighting Choices” in the Index.
If someone needs to get in or out
of the vehicle after the
doors have been automatically locked, then place the
shift lever into PARK
(P). Unlock all doors by using the
power door lock switch or unlock just the door you want
by using the inside lever. If you have programmed your
automatic door locks (see “Locks and Lighting Choices’’\
in the Index) to unlock the doors when the shift lever is
shifted into PARK (P), then the doors will be
automatically unlocked
for you. The doors will
automatically lock when
you move your shift lever out
of PARK (P) with the ignition on.
If you don’t want the doors to unlock automatically
when you turn the ignition
off, see “Locks and Lighting
Choices” in the Index.
2-6