PONTIAC GRAND PRIX 1999 Owner's Manual
GRAND PRIX 1999
PONTIAC
PONTIAC
https://www.carmanualsonline.info/img/50/40847/w960_40847-0.png
PONTIAC GRAND PRIX 1999 Owner's Manual
Page 246 of 376
yellowblue
5-24
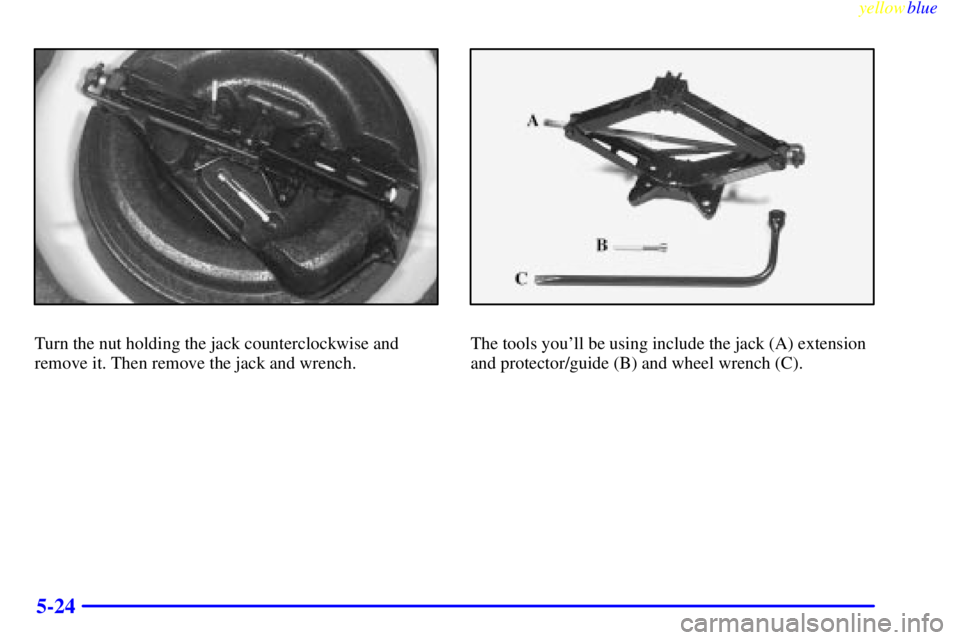
Turn the nut holding the jack counterclockwise and
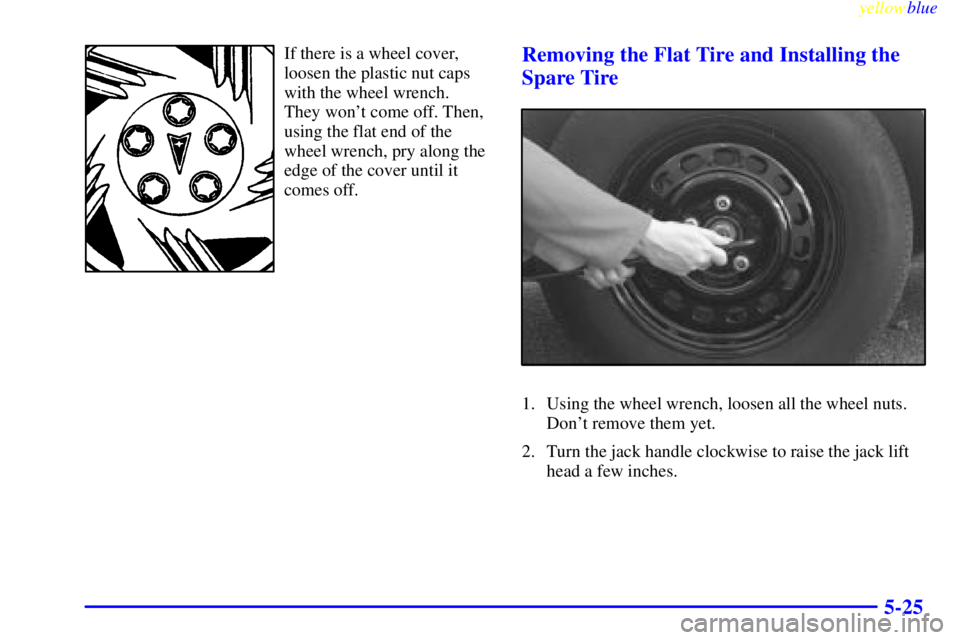
remove it. Then remove the jack and wrench.The tools you'll be using include the jack (A) extension
and protector/guide (B) and wheel wrench (C).
Page 247 of 376
yellowblue
5-25
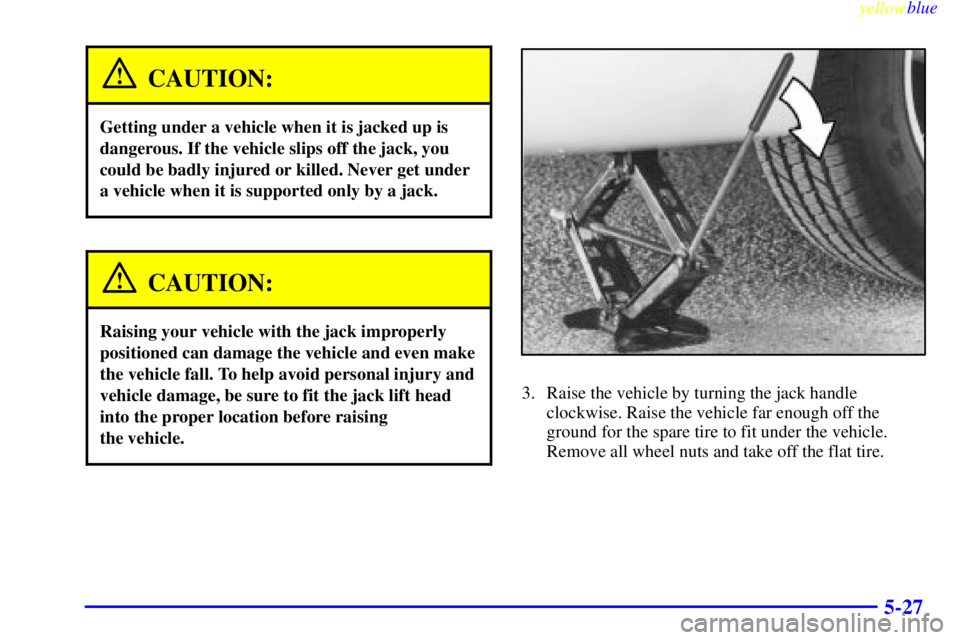
If there is a wheel cover,
loosen the plastic nut caps
with the wheel wrench.
They won't come off. Then,
using the flat end of the
wheel wrench, pry along the
edge of the cover until it
comes off.Removing the Flat Tire and Installing the
Spare Tire
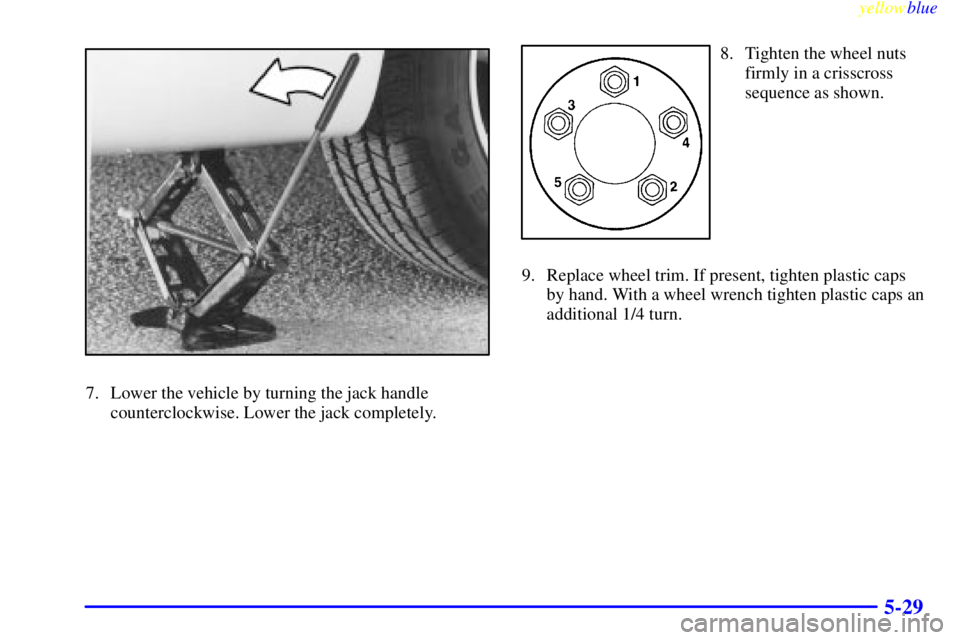
1. Using the wheel wrench, loosen all the wheel nuts.
Don't remove them yet.
2. Turn the jack handle clockwise to raise the jack lift
head a few inches.
Page 249 of 376
yellowblue
5-27
CAUTION:
Getting under a vehicle when it is jacked up is
dangerous. If the vehicle slips off the jack, you
could be badly injured or killed. Never get under
a vehicle when it is supported only by a jack.
CAUTION:
Raising your vehicle with the jack improperly
positioned can damage the vehicle and even make
the vehicle fall. To help avoid personal injury and
vehicle damage, be sure to fit the jack lift head
into the proper location before raising
the vehicle.
3. Raise the vehicle by turning the jack handle
clockwise. Raise the vehicle far enough off the
ground for the spare tire to fit under the vehicle.
Remove all wheel nuts and take off the flat tire.
Page 251 of 376
yellowblue
5-29
7. Lower the vehicle by turning the jack handle
counterclockwise. Lower the jack completely.
8. Tighten the wheel nuts
firmly in a crisscross
sequence as shown.
9. Replace wheel trim. If present, tighten plastic caps
by hand. With a wheel wrench tighten plastic caps an
additional 1/4 turn.
Page 262 of 376
yellowblue
6-6
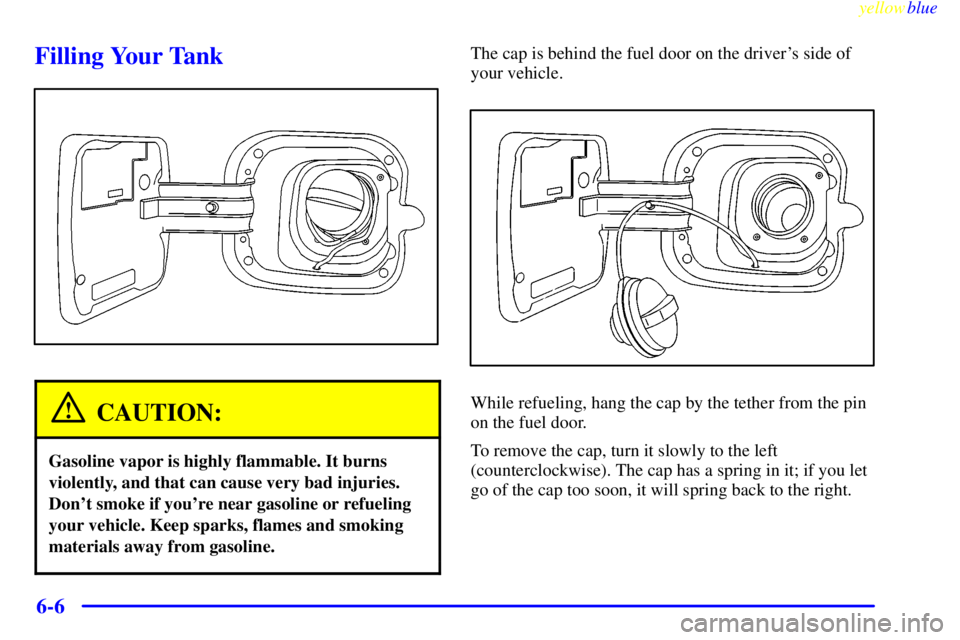
Filling Your Tank
CAUTION:
Gasoline vapor is highly flammable. It burns
violently, and that can cause very bad injuries.
Don't smoke if you're near gasoline or refueling
your vehicle. Keep sparks, flames and smoking
materials away from gasoline.
The cap is behind the fuel door on the driver's side of
your vehicle.
While refueling, hang the cap by the tether from the pin
on the fuel door.
To remove the cap, turn it slowly to the left
(counterclockwise). The cap has a spring in it; if you let
go of the cap too soon, it will spring back to the right.
Page 263 of 376
yellowblue
6-7
CAUTION:
If you get gasoline on yourself and then
something ignites it, you could be badly burned.
Gasoline can spray out on you if you open the
fuel filler cap too quickly. This spray can happen
if your tank is nearly full, and is more likely in
hot weather. Open the fuel filler cap slowly and
wait for any ªhissº noise to stop. Then unscrew
the cap all the way.
Be careful not to spill gasoline. Clean gasoline from
painted surfaces as soon as possible. See ªCleaning the
Outside of Your Vehicleº in the Index.
When you put the cap back on, turn it to the right
(clockwise) until you hear a clicking sound. Make sure
you fully install the cap. The diagnostic system can
determine if the fuel cap has been left off or improperly
installed. This would allow fuel to evaporate into the
atmosphere. See ªMalfunction Indicator Lampº in
the Index.
NOTICE:
If you need a new cap, be sure to get the right
type. Your dealer can get one for you. If you get
the wrong type, it may not fit properly. This may
cause your malfunction indicator lamp to light
and your fuel tank and emissions system may be
damaged. See ªMalfunction Indicator Lampº in
the Index.
Page 293 of 376
yellowblue
6-37
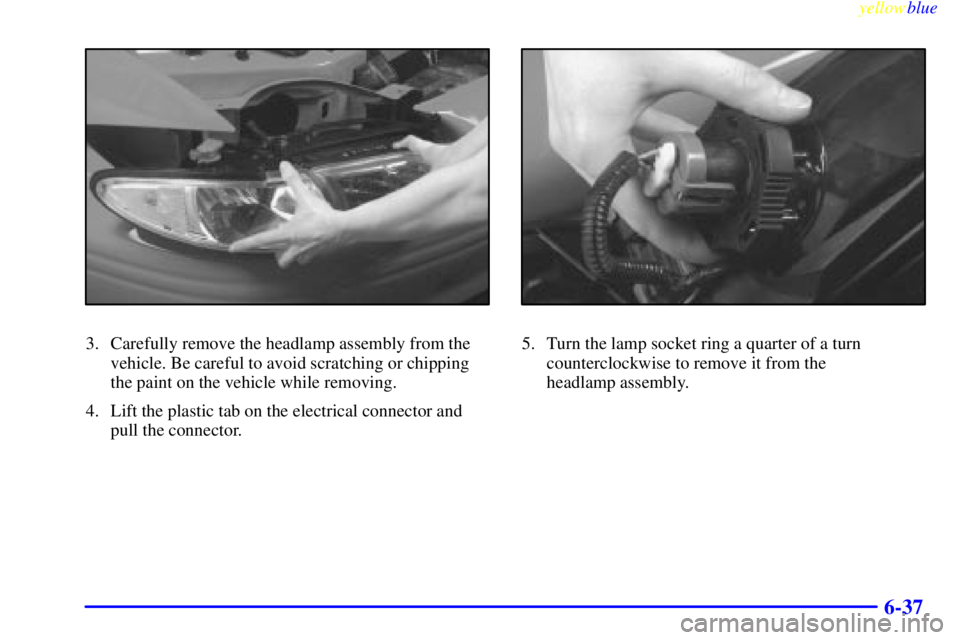
3. Carefully remove the headlamp assembly from the
vehicle. Be careful to avoid scratching or chipping
the paint on the vehicle while removing.
4. Lift the plastic tab on the electrical connector and
pull the connector.5. Turn the lamp socket ring a quarter of a turn
counterclockwise to remove it from the
headlamp assembly.
Page 294 of 376
yellowblue
6-38
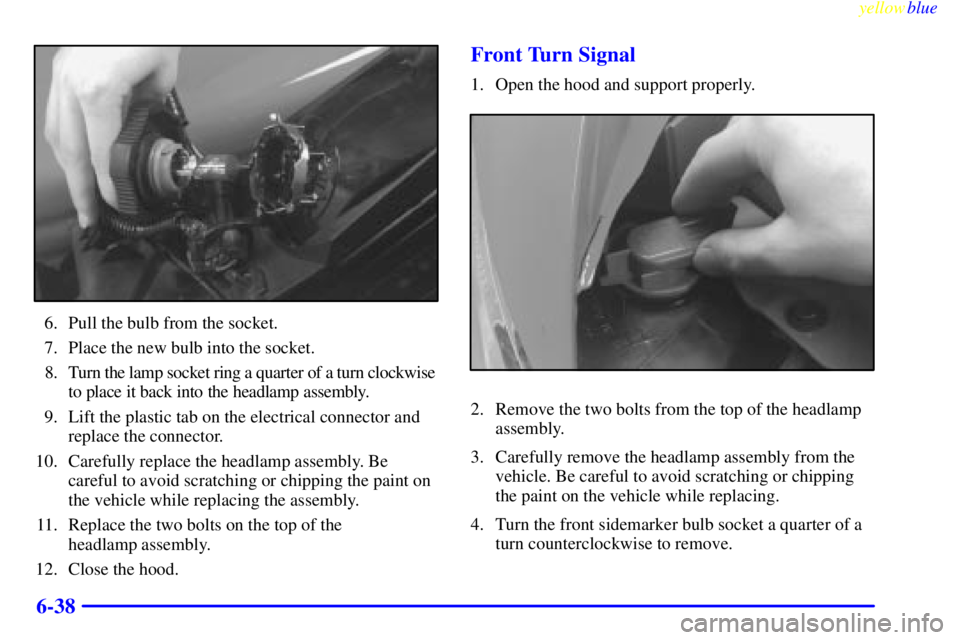
6. Pull the bulb from the socket.
7. Place the new bulb into the socket.
8. Turn the lamp socket ring a quarter of a turn clockwise
to place it back into the headlamp assembly.
9. Lift the plastic tab on the electrical connector and
replace the connector.
10. Carefully replace the headlamp assembly. Be
careful to avoid scratching or chipping the paint on
the vehicle while replacing the assembly.
11. Replace the two bolts on the top of the
headlamp assembly.
12. Close the hood.
Front Turn Signal
1. Open the hood and support properly.
2. Remove the two bolts from the top of the headlamp
assembly.
3. Carefully remove the headlamp assembly from the
vehicle. Be careful to avoid scratching or chipping
the paint on the vehicle while replacing.
4. Turn the front sidemarker bulb socket a quarter of a
turn counterclockwise to remove.
Page 295 of 376
yellowblue
6-39
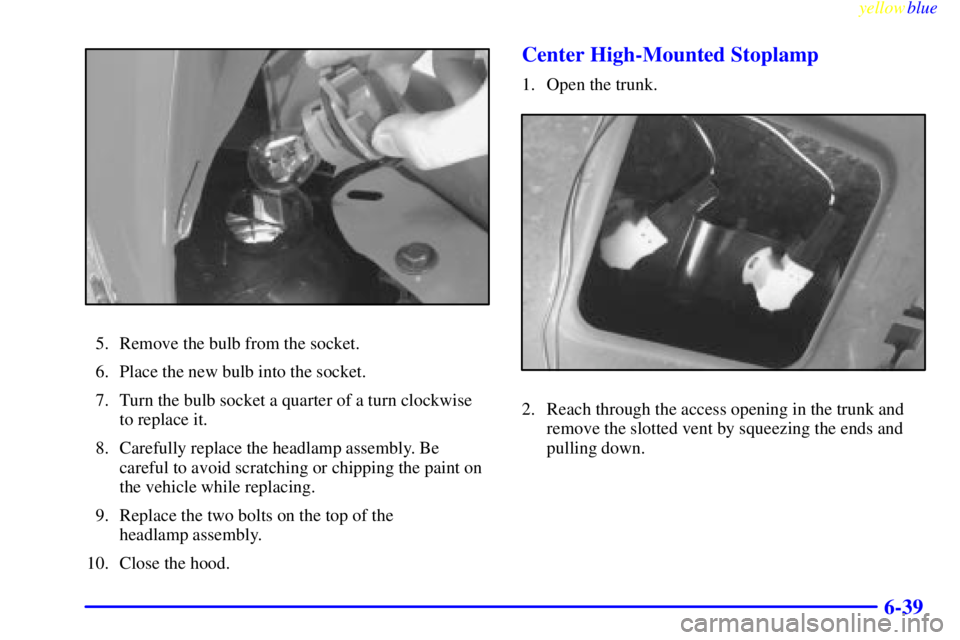
5. Remove the bulb from the socket.
6. Place the new bulb into the socket.
7. Turn the bulb socket a quarter of a turn clockwise
to replace it.
8. Carefully replace the headlamp assembly. Be
careful to avoid scratching or chipping the paint on
the vehicle while replacing.
9. Replace the two bolts on the top of the
headlamp assembly.
10. Close the hood.
Center High-Mounted Stoplamp
1. Open the trunk.
2. Reach through the access opening in the trunk and
remove the slotted vent by squeezing the ends and
pulling down.
Page 296 of 376
yellowblue
6-40
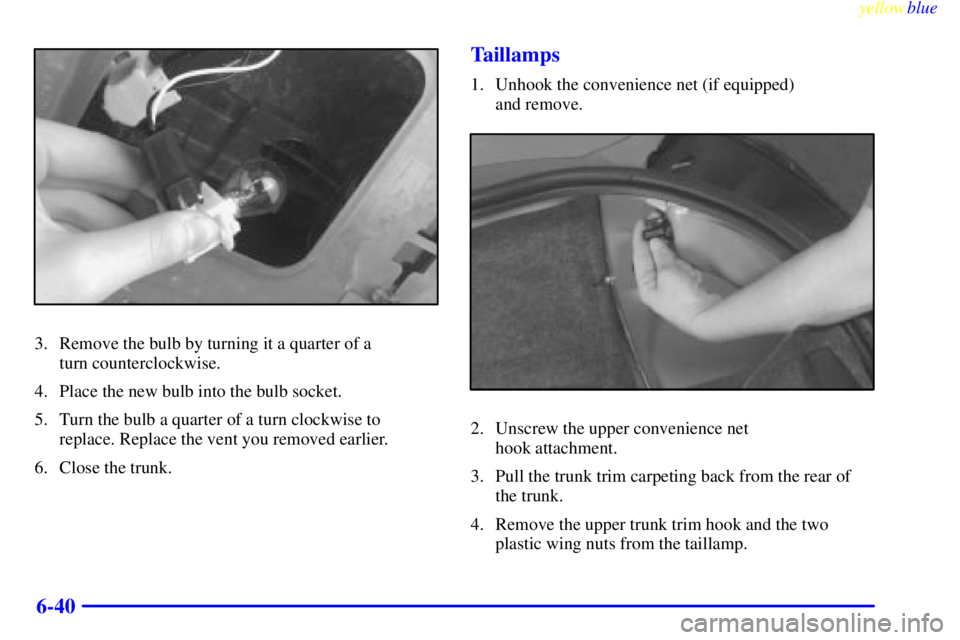
3. Remove the bulb by turning it a quarter of a
turn counterclockwise.
4. Place the new bulb into the bulb socket.
5. Turn the bulb a quarter of a turn clockwise to
replace. Replace the vent you removed earlier.
6. Close the trunk.
Taillamps
1. Unhook the convenience net (if equipped)
and remove.
2. Unscrew the upper convenience net
hook attachment.
3. Pull the trunk trim carpeting back from the rear of
the trunk.
4. Remove the upper trunk trim hook and the two
plastic wing nuts from the taillamp.
