glove box PONTIAC GRAND PRIX 2003 Owners Manual
[x] Cancel search | Manufacturer: PONTIAC, Model Year: 2003, Model line: GRAND PRIX, Model: PONTIAC GRAND PRIX 2003Pages: 378, PDF Size: 17.64 MB
Page 68 of 378

Section 2 Features and Controls
Keys ............................................................... 2.3
Remote Keyless Entry System
......................... 2.4
Remote Keyless Entry System Operation ........... 2.5
Doors and Locks ............................................. 2-8
Door Locks
.................................................... 2-8
Power Door Locks
.......................................... 2-9
Last Door Closed Locking
................................ 2-9
Programmable Automatic Door Locks
.............. 2-10
Lockout Protection
........................................ 2-10
Leaving Your Vehicle
.................................... 2-1 1
Trunk
.......................................................... 2-1 1
Windows ........................................................ 2.13
Power Windows
............................................ 2-14
Sun Visors
................................................... 2.14
Theft-Deterrent Systems .................................. 2.15
Content Theft-Deterrent
................................. 2.15
PASS-Key@
Ill .......................................... 2.16
PASS-Key@
Ill Operation ........................... 2-17
Starting and Operating Your Vehicle ............... -2-1 9
New Vehicle Break-In
.................................... 2-19
Ignition Positions
.......................................... 2.19
Starting Your Engine
..................................... 2-20
Engine Coolant Heater
.................................. 2-23
Automatic Transaxle Operation
....................... 2.24 Shifting Into
Park
(P) ..................................... 2-28
Parking Over Things That Burn
....................... 2-30
Shifting
Out
of Park (PI ................................. 2-30
Engine Exhaust ............................................ 2-31
Running Your Engine While You Are Parked
.... 2-32
Mirrors ........................................................... 2-33
Manual Rearview Mirror
................................ -2-33
Automatic Dimming Rearview Mirror with
Onstar@, Compass and Temperature
Automatic Dimming Rearview Mirror with
Compass and Temperature Display
.............. 2-34
Outside Power Mirrors
................................... 2-37
Outside Convex Mirror
................................... 2-37
OnStar@ System ............................................. 2-38
Storage Areas .... -2-40
Glove Box
................................................... 2-40
Overhead Console
........................................ 2-40
Center Console Storage Area
......................... 2-40
Assist Handles
............................................. 2-41
Purse or Litter Bag Holder
............................. 2-41
Rear Storage Area
........................................ 2-41
Convenience Net
.......................................... 2-41
Trunk Access Panel
...................................... 2-41
Display
.................................................... 2-33
....................................
Parking Brake .............................................. 2-27 Sunroof .................. ........... ............. 2.42
2-1
Page 79 of 378
Remote Trunk Release
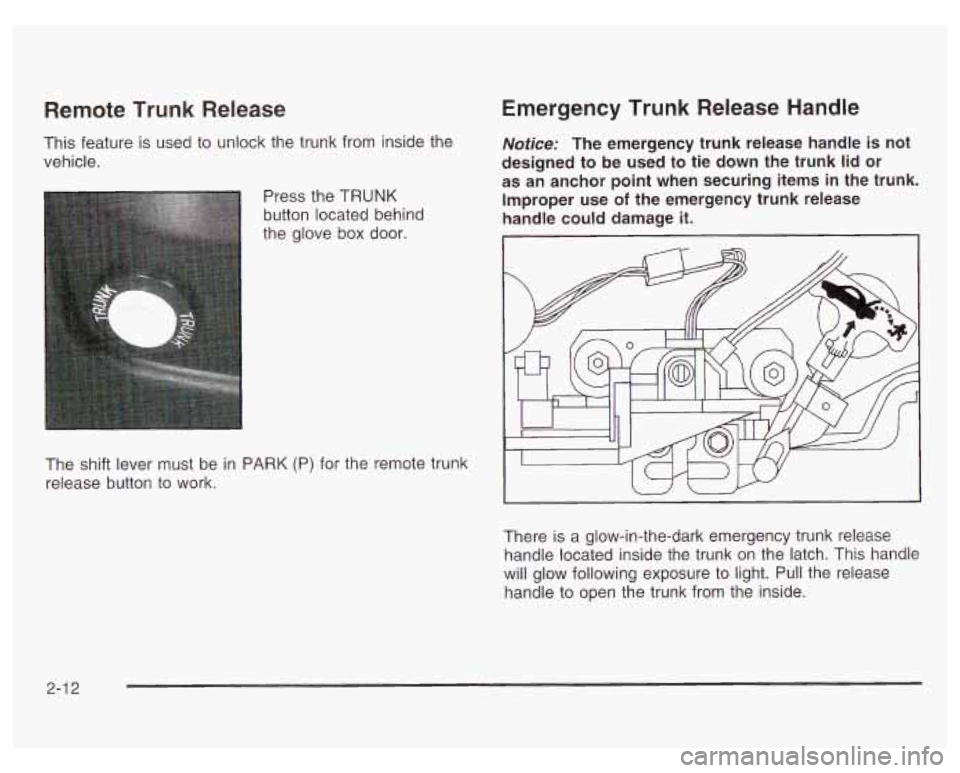
This feature is used to unlock the trunk from inside the
vehicle.
Press the TRUNK
button located behind
the glove box door.
Emergency Trunk Release Handle
Notice: The emergency trunk release handle is not
designed to be used to tie down the trunk lid or
as an anchor point when securing items in the trunk.
Improper use
of the emergency trunk release
handle could damage it.
I
The shift lever must be in PARK (P) for the remote trunk
release button to work.
There is a glow-in-the-dark emergency trunk release
handle located inside the trunk on the latch. This handle
will glow following exposure to light. Pull the release
handle to open the trunk from the inside.
2-1 2
Page 105 of 378
Onstar@ System Onstar@' Services
Onstar@ provides a number of service plans to closely
meet your needs. Some of the services currently
provided by Onstar@ are:
Automatic Notification of Air Bag Deployment
Emergency Services
Roadside Assistance Stolen Vehicle Tracking
Onstar@ uses global positioning system (GPS) satellite
technology, wireless communications, and state of
the art call centers to provide you with a wide range of
safety, security, information and convenience services.
An Onstar@ subscription plan is included in the price
of your vehicle. You can easily upgrade or extend your
Onstar@ services to meet your personal needs.
A complete Onstar@ user's guide and the terms and
conditions of the Onstar@ Subscription Service
Agreement are included in your Onstar@-equipped
vehicle's glove box literature. For more information, visit
www.onstar.com, contact Onstar@ at
1 -888-4-ONSTAR
(1-888-466-7827),
or press the blue Onstar@ button
to speak to an Onstar@ advisor 24 hours a day,
7 days a week.
AccidentAssist
Remote Door Unlock
Remote Diagnostics
Onstar@ MED-NET (Requires separate activation
and annual fee on some plans)
0 Online and Personal Concierge Services
Route Support
RideAssist
Information and Convenience Services
2-38
Page 106 of 378
Onstar@ Personal Calling
With Onstar@ Personal Calling, you have a safer way to
stay connected while driving. It’s a hands-free wireless
phone that’s integrated into your vehicle. You can place
calls nationwide using voice-activated dialing with no
contracts, no roaming charges and
no access fees.
io find out more about Onstar@ Personal Calling,
refer to the Onstar@ owner’s guide
in your vehicle’s
glove
box, or call Onstar@ at 1-888-4-ONSTAR
(1 -888-466-7827).
Onstar@ Virtual Advisor
With Onstar@ Virtual Advisor you can listen to your
favorite news, entertainment and information topics,
such as traffic and weather reports, stock quotes
and sports scores. You listen to your e-mail through
your vehicle’s speakers, and reply with your hands on
the wheel and your eyes
on the road.
A completed Subscription Service Agreement is required
prior to delivery of Onstar@ services and prepaid
calling minutes are also required for Onstat-@ Personal
Calling and Onstar@ Virtual Advisor use. Terms and
conditions of the Subscription Service Agreement can be
found at www.onstar.com.
2-39
Page 107 of 378
Storage Areas
Glove Box
Use your key to lock and unlock the glove box.
To open, lift the right side
of the latch.
Overhead Console
The overhead console has reading lamps and storage
compartments including one for your garage door
opener and one for sunglasses.
Garage Door Opener Compartment
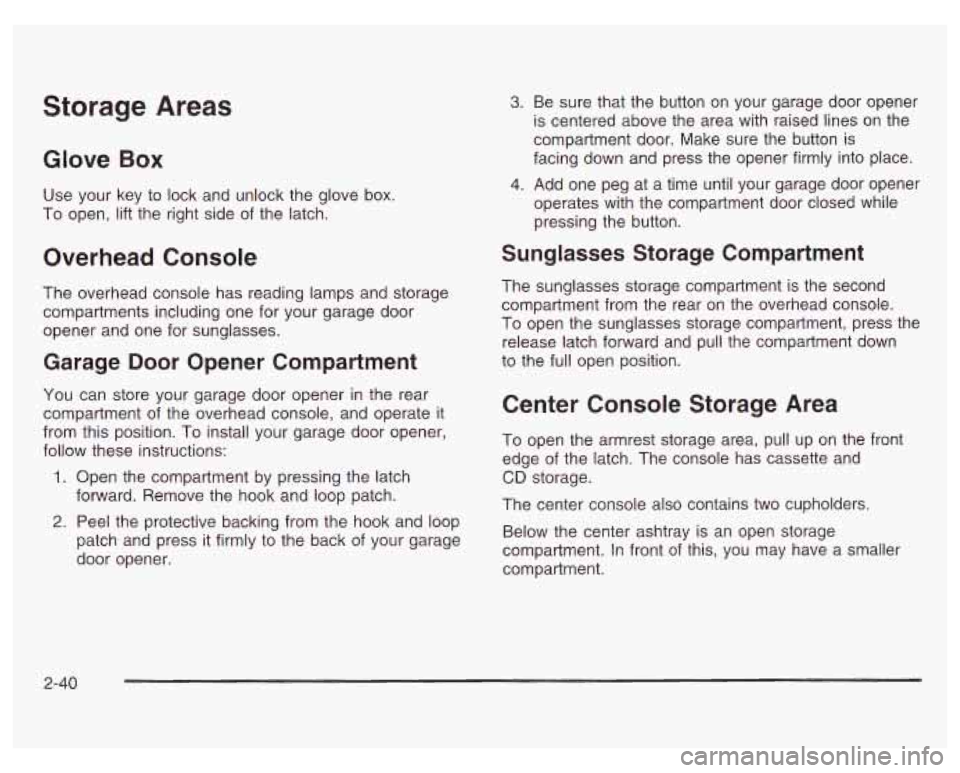
You can store your garage door opener in the rear
compartment of the overhead console, and operate it
from this position. To install your garage door opener,
follow these instructions:
1. Open the compartment by pressing the latch
forward. Remove the hook and loop patch.
2. Peel the protective backing from the hook and loop
patch and press it firmly to the back of your garage
door opener.
3. Be sure that the button on your garage door opener
is centered above the area with raised lines on the
compartment door. Make sure the button is
facing down and press the opener firmly into place.
4. Add one peg at a time until your garage door opener
operates with the compartment door closed while
pressing the button.
Sunglasses Storage Compartment
The sunglasses storage compartment is the second
compartment from the rear on the overhead console.
To open the sunglasses storage compartment, press the
release latch forward and pull the compartment down
to the full open position.
Center Console Storage Area
To open the armrest storage area, pull up on the front
edge
of the latch. The console has cassette and
CD storage.
The center console also contains two cupholders.
Below the center ashtray is an open storage
compartment. In front
of this, you may have a smaller
compartment.
2-40
Page 124 of 378
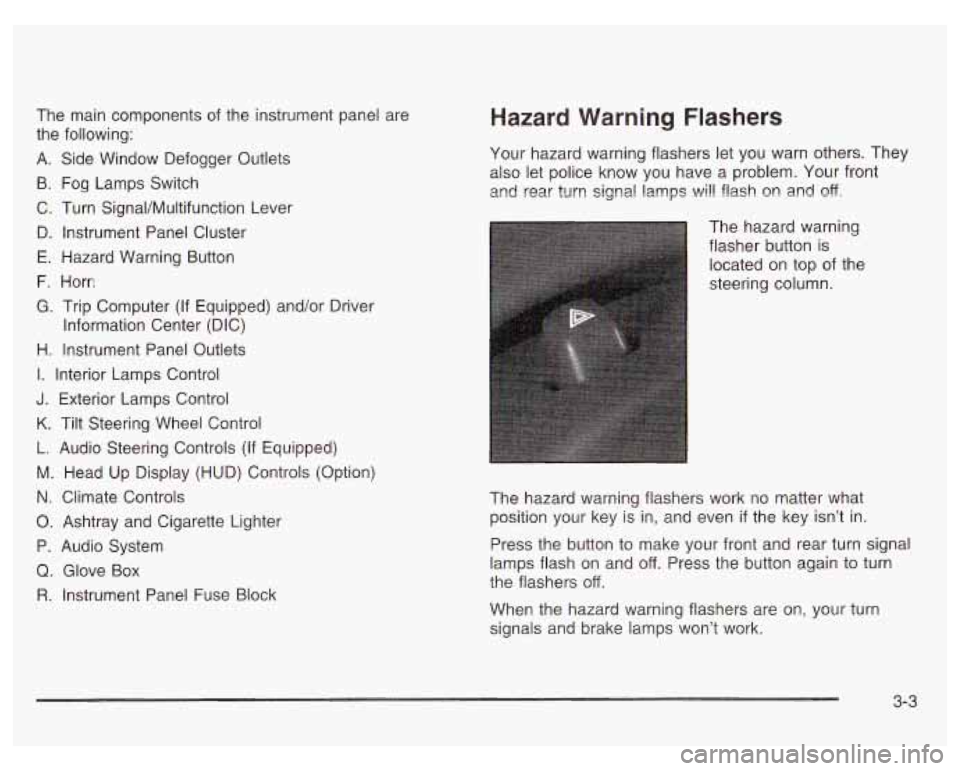
The main components of the instrument panel are
the following:
A. Side Window Defogger Outlets
B. Fog Lamps Switch
C. Turn SignaVMultifunction Lever
D. Instrument Panel Cluster
E. Hazard Warning Button
F. Horn
G. Trip Computer (If Equipped) and/or Driver
Information Center (DIC)
H. Instrument Panel Outlets
I. Interior Lamps Control
J. Exterior Lamps Control
K. Tilt Steering Wheel Control
L. Audio Steering Controls
(If Equipped)
M. Head Up Display (HUD) Controls (Option)
N. Climate Controls
0. Ashtray and Cigarette Lighter
P. Audio System
Q. Glove Box
R. Instrument Panel Fuse Block
Hazard Warning Flashers
Your hazard warning flashers let you warn others. They
also let police know you have a problem. Your front
and rear turn signa! !amps
will flash or! and off.
The hazard warning
flasher button is
located on top of the
steering column.
The hazard warning flashers work no matter what
position your key is in, and even
if the key isn’t in.
Press the button to make your front and rear turn signal
lamps flash on and
off. Press the button again to turn
the flashers
off.
When the hazard warning flashers are on, your turn
signals and brake lamps won’t work.
3-3
Page 140 of 378
Notice: Adding some electrical equipment to your
vehicle can damage
it or keep other things from
working as they should. This wouldn’t be covered by
your warranty. Check with your dealer before
adding electricai
equipment, and never use anything
that exceeds the amperage
rating.
When adding electrical equipment, be sure to follow the
proper installation instructions included with the
equipment.
Notices Power outlets are designed for accessory
plugs only. Do not hang any type of accessory
or accessory bracket from the plug. Improper use
of the power outlet can cause damage not covered
by your warranty.
Auxiliary Power Connection
(Power Drop)
The vehicle is equipped with an auxiliary power
connection. This feature provides power, ground and
accessing wires which can
be used to add aftermarket
electrical equipment to the vehicle. The connection
is located on the passenger’s side of the vehicle, below
the glove box on the right side of the console.
Ashtrays and Cigarette Lighter
The center front ashtray is on the instrument panel.
To open it, pull at the bottom of the ashtray until it is fully
open.
To remove the ashtray cup, lift the tabs on the
sides and pull out.
Notice: Don’t put papers or other flammable
items into your ashtrays. Hot cigarettes
or other
smoking materials could ignite them, causing
a damaging fire.
To use the lighter, located inside the center front
ashtray, push it in all the way and let go. When it’s
ready, it will pop back out by itself.
Notice: Don’t hold a cigarette lighter in with you
hand while
it is heating. If you do, it won’t be able to
back away from the heating element when
it’s
ready. That can make it overheat, damaging the
lighter and the heating element.
3-1 9
Page 323 of 378
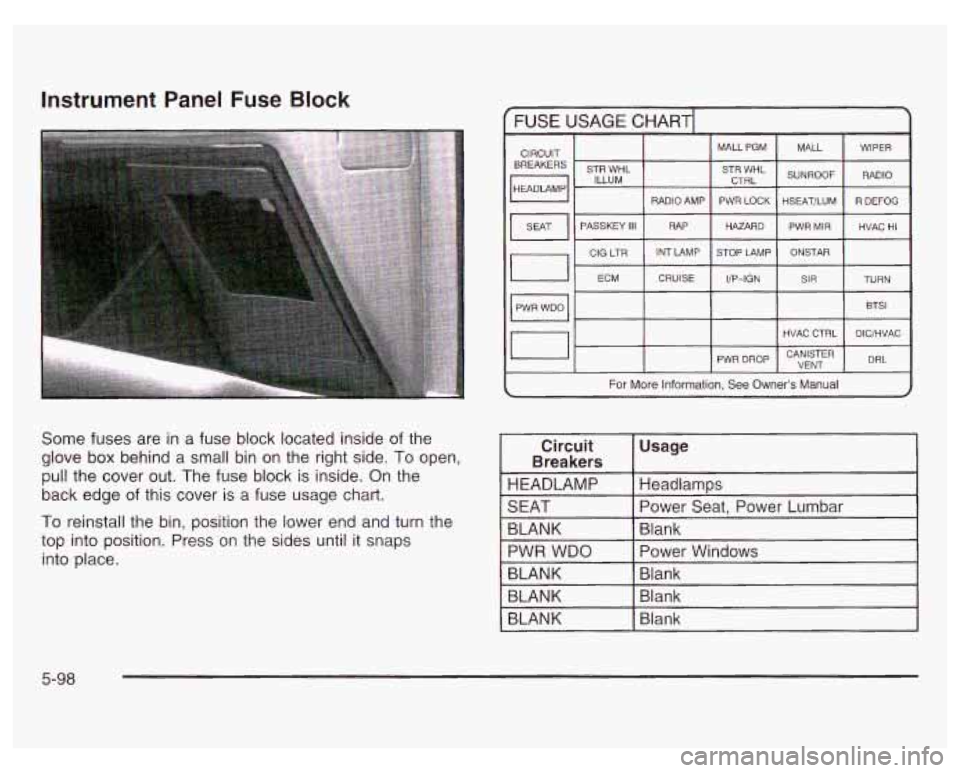
Instrument Panel Fuse Block
Some fuses are in a fuse block located inside of the
glove box behind a small bin on the right side.
To open,
pull the cover out. The fuse block is inside. On the
back edge of this cover is a fuse usage chart.
To reinstall the bin, position the lower end and turn the
top into position. Press on the sides until it snaps
into place.
CIRCUIT
BREAKERS
(HEADLAMPI
I
I I MALLPGM I MALL I WIPER I I STR WHL
ILLUM I 'TT:rL SUNROOF RADIO
PASSKEY
111
CRUISE
I PWR LOCK
HAZARD
r
FUSE USAGE CHARTI I
STOP LAMP
I/P-IGN HSEATILUM
PWR MIR
ONSTAR
SIR
HVAC
CTRL
R DEFOG
HVAC
HI
TURN
BTSl
DICIHVAC
For More Information. See Owner's Manual
Circuit
Usage
Breakers
HEADLAMP Headlamps
SEAT Power Seat, Power Lumbar
BLANK Blank
PWR WDO Power Windows
I BLANK Bian k
BLANK Blank
BLANK Blank
5-98
Page 339 of 378
At Least Twice a Year
Restraint System Check
Make sure the safety belt reminder light and all your belts,
buckles, latch plates, retractors and anchorages are
working properly. Look for any other loose or damaged
safety belt system parts. If you see anything that might
keep a safety belt system from doing its job, have it
repaired. Have any torn or frayed safety belts replaced.
Also look for any opened or broken air bag coverings,
and have them repaired or replaced. (The air bag
system does not need regular maintenance.)
Wiper Blade Check
Inspect wiper blades for wear or cracking. Replace
blade inserts that appear worn or damaged or that
streak or miss areas of the windshield.
Also see
“Windshield Wiper and Wiper Blades” under Cleaning
the Outside
of Your Vehicle on page 5-9 1.
Weatherstrip Lubrication
Silicone grease on weatherstrips will make them last
longer, seal better, and not stick or squeak. Apply
silicone grease with a clean cloth. During very cold, damp weather more frequent
application may be
required. See Part
D: Recommended Fluids and
Lubricants on page
6- 15.
Automatic Transaxle Check
Check the transaxle fluid level; add if needed. See
Automatic Transaxle Fluid on page
5-27. A fluid loss
may indicate a problem. Check the system and repair
if needed.
At Least Once a Year
Key Lock Cylinders Service
Lubricate the key lock cylinders with the lubricant
specified in Part D.
Body Lubrication Service
Lubricate all hood hinges, hood latch assembly,
secondary latch, pivots, spring anchor, release pawl,
door hinges, rear compartment, glove box door, console
door and any folding seat hardware. Part D tells you
what to use. More frequent lubrication may be required
when exposed to a corrosive environment.
6-1 0
Page 365 of 378
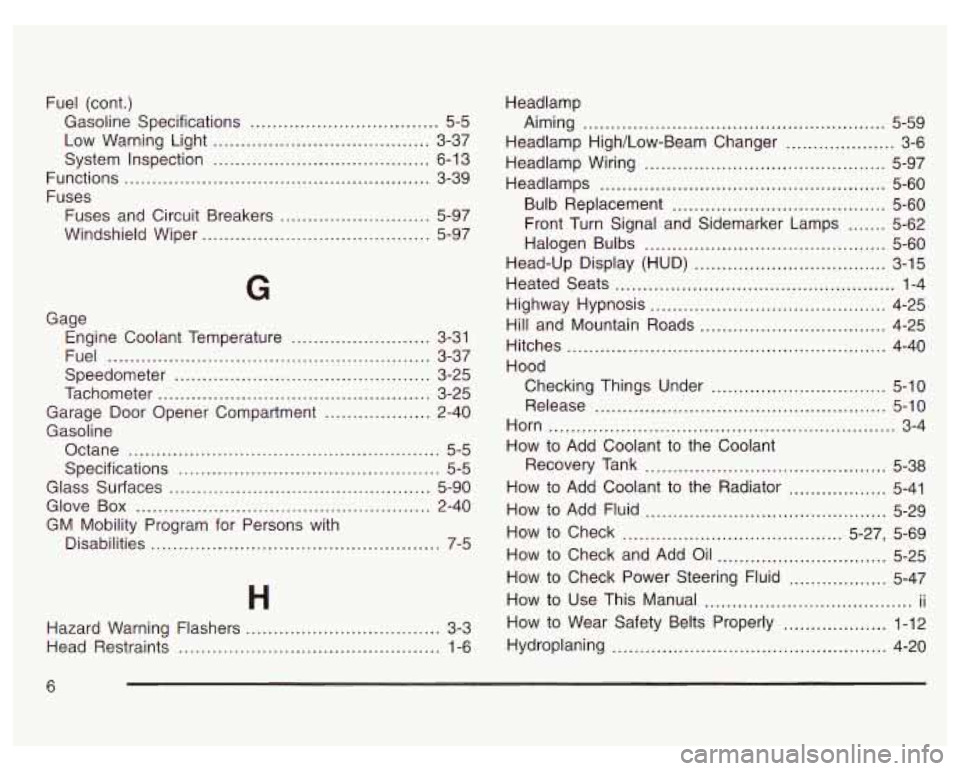
Fuel (cont.)
Gasoline Specifications
................
Low Warning Light ........ , ....
System Inspection .............
Functions ......................................
Fuses
Fuses and Circuit Breakers
....
Windshield Wiper ..............
.........
..........
..........
...........
........
...... 5-5
..... 3-37
..... 6-13
..... 3-39
..... 5-97
..... 5-97
G
Gage
Engine Coolant Temperature
......................... 3-31
Fuel
.......................................................... 3-37
Speedometer
.............................................. 3-25
Tachometer
................................................. 3-25
Garage Door Opener Compartment
................... 2-40
Gasoline Octane
........................................................ 5-5
Specifications ............................................... 5-5
Glass Surfaces
............................................... 5-90
Glove Box ..................................................... 2-40
GM Mobility Program for Persons with
Disabilities
................................... .. 7-5
Hazard Warning Flashers
................................... 3-3
Head Restraints
............................................... 1-6 Headlamp
Aiming
....................................................... 5-59
Headlamp Wiring
............................................ 5-97
Headlamps
.................................................... 5-60
Bulb Replacement
....................................... 5-60
Front Turn Signal and Sidemarker Lamps
....... 5-62
Halogen Bulbs
............................................ 5-60
Head-Up Display (HUD)
................................... 3-15
Heated Seats
................................................... 1-4
Highway Hypnosis
........................................... 4-25
Hill and Mountain Roads
.................................. 4-25
Hitches
.......................................................... 4-40
Hood Checking Things Under
................................ 5-10
Release
..................................................... 5-10
Horn
............................................................... 3-4
How to Add Coolant
to the Coolant
Recovery Tank
............................................ 5-38
How to Add Coolant
to the Radiator .................. 5-41
How to Add Fluid
............................................ 5-29
How to Check
........................................ 5-27, 5-69
How to Check and Add Oil
............................... 5-25
How to Check Power Steering Fluid .................. 5-47
How to Use This Manual ...................................... ii
How to Wear Safety Belts Properly ................... 1-12
Headlamp High/Low-Beam Changer
.................... 3-6
Hydroplaning
.................................................. 4-20
6