steering PONTIAC GRAND PRIX 2004 User Guide
[x] Cancel search | Manufacturer: PONTIAC, Model Year: 2004, Model line: GRAND PRIX, Model: PONTIAC GRAND PRIX 2004Pages: 432, PDF Size: 2.99 MB
Page 108 of 432
Hazard Warning Flashers
Your hazard warning ¯ashers let you warn others.
They also let police know you have a problem.
Your front and rear turn signal lamps will ¯ash on
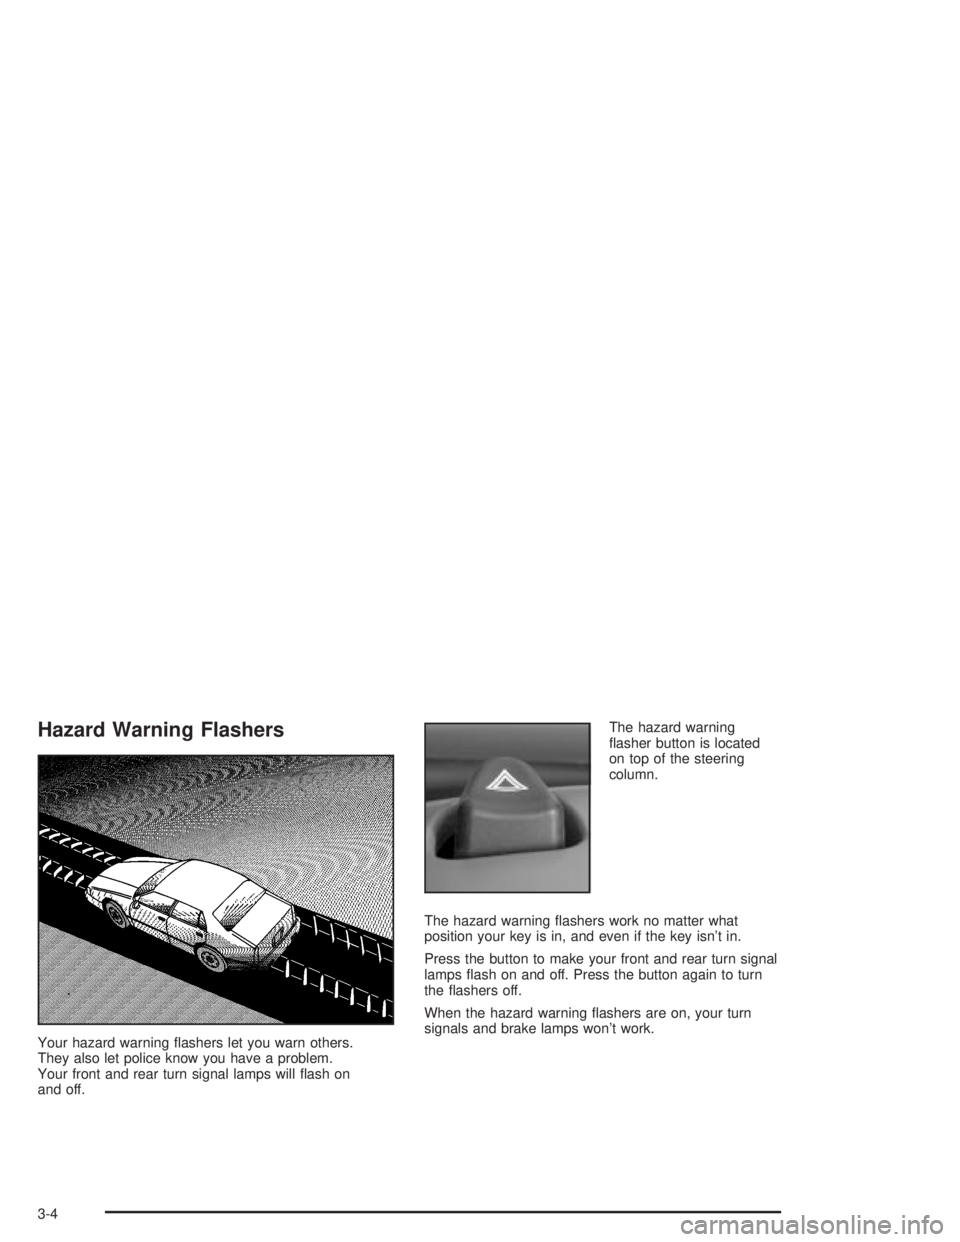
and off.The hazard warning
¯asher button is located
on top of the steering
column.
The hazard warning ¯ashers work no matter what
position your key is in, and even if the key isn't in.
Press the button to make your front and rear turn signal
lamps ¯ash on and off. Press the button again to turn
the ¯ashers off.
When the hazard warning ¯ashers are on, your turn
signals and brake lamps won't work.
3-4
Page 109 of 432
Other Warning Devices
If you carry re¯ective triangles, you can set one up at
the side of the road about 300 feet (100 m) behind
your vehicle.
Horn
Press the vehicle's steering wheel pad to sound the horn.
Tilt Wheel
A tilt steering wheel allows you to adjust the steering
wheel before you drive. You can raise it to the highest
level to give your legs more room when you exit and
enter the vehicle, or you can lower it so that you're more
comfortable while driving.
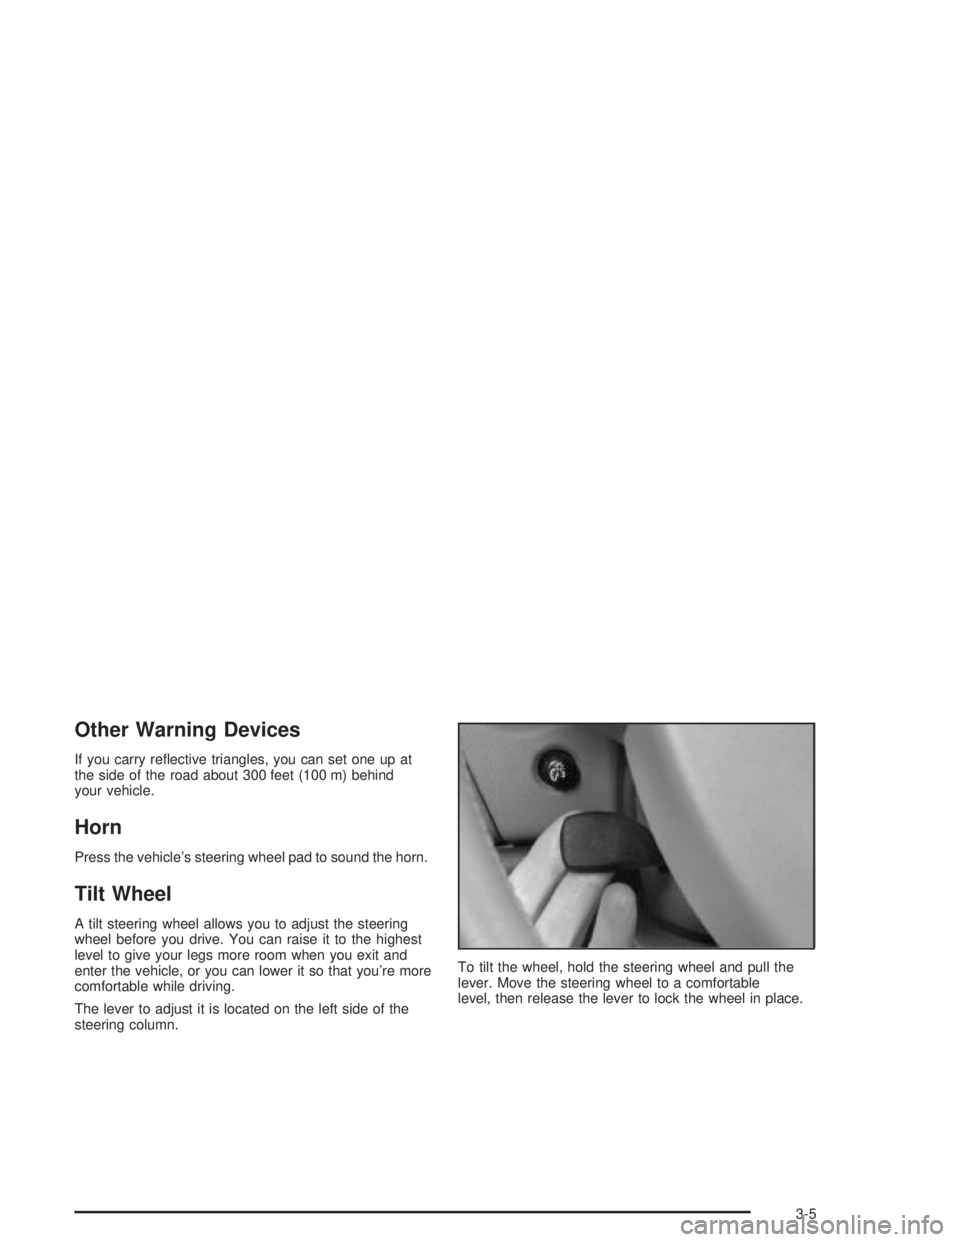
The lever to adjust it is located on the left side of the
steering column.To tilt the wheel, hold the steering wheel and pull the
lever. Move the steering wheel to a comfortable
level, then release the lever to lock the wheel in place.
3-5
Page 110 of 432

Windshield Washer Lever
Windshield Wipers
N
(Windshield Wipers):The lever with this symbol,
located on the right side of the steering column,
operates the windshield wipers.
9(Off):Lower the lever to its original position to turn
the wipers off.
&(Delay):Push the lever up once to this position to
set a delay between wipes. Turn the delay adjustment
band to set the length of the delay.
x(Delay Adjustment):Turn the band, located on
the left of the windshield wiper lever, to set the length of
the delay between wiper cycles when using the delay
feature. There are ®ve delay adjustment settings.
Turn the band up to make the delays shorter in between
wiper cycles. Turn the band down to make the delays
longer between wiper cycles. The windshield wiper lever
must be in delay for this feature to work.
6(Low Speed):Push the lever up to the second
position for steady wiping cycles at a slow speed.
1(High Speed):Push the lever up to the third
position for steady wiping cycles at a high speed.
3-6
Page 112 of 432
Cruise Control Lever
Cruise Control
{CAUTION:
·Cruise control can be dangerous where
you can't drive safely at a steady speed.
So, don't use your cruise control on
winding roads or in heavy traffic.
·Cruise control can be dangerous on
slippery roads. On such roads, fast
changes in tire traction can cause
needless wheel spinning, and you could
lose control. Don't use cruise control on
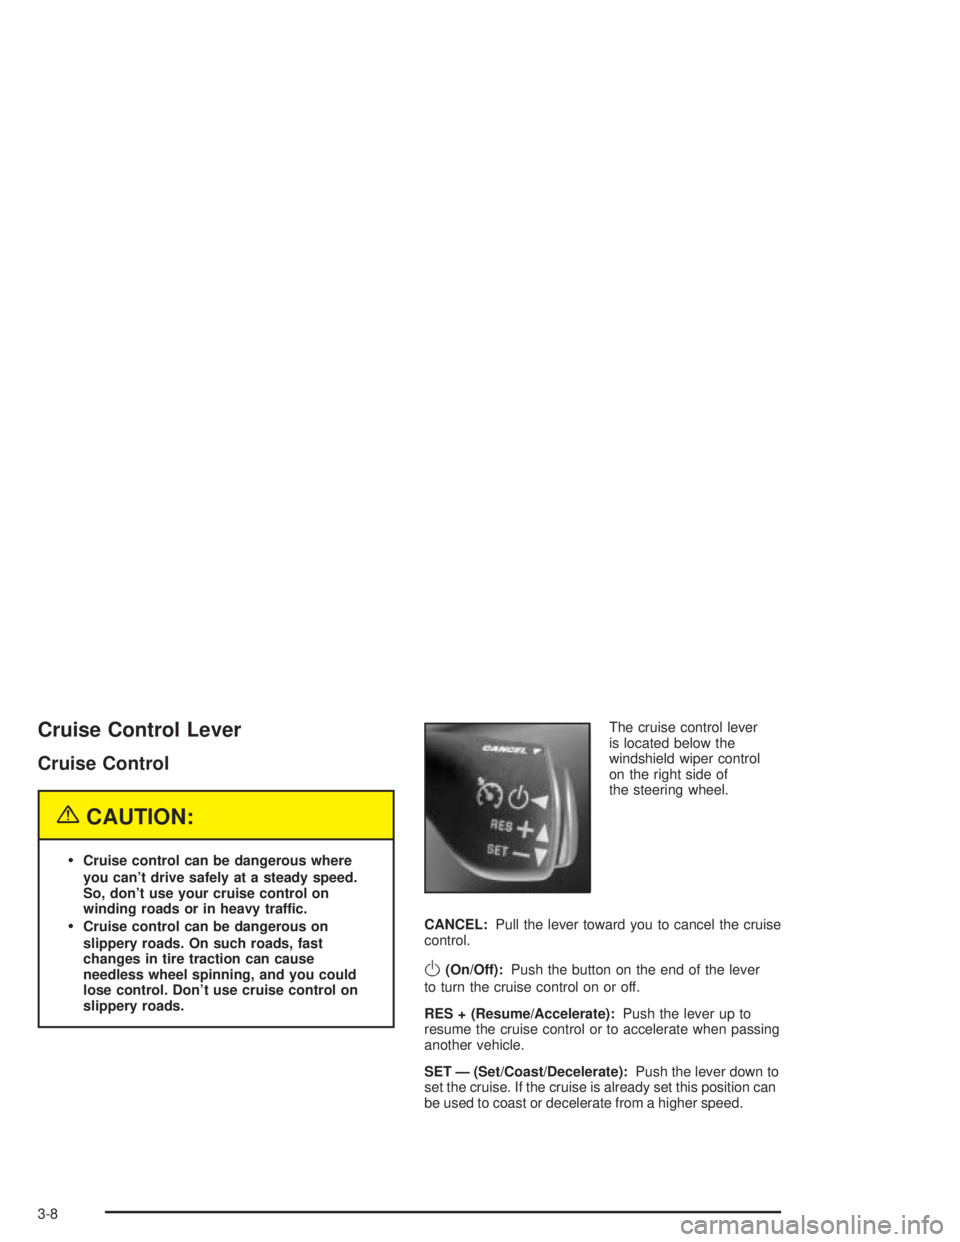
slippery roads.The cruise control lever
is located below the
windshield wiper control
on the right side of
the steering wheel.
CANCEL:Pull the lever toward you to cancel the cruise
control.
O(On/Off):Push the button on the end of the lever
to turn the cruise control on or off.
RES + (Resume/Accelerate):Push the lever up to
resume the cruise control or to accelerate when passing
another vehicle.
SET Ð (Set/Coast/Decelerate):Push the lever down to
set the cruise. If the cruise is already set this position can
be used to coast or decelerate from a higher speed.
3-8
Page 116 of 432
Exterior Lamps
Exterior Lamp Control Lever
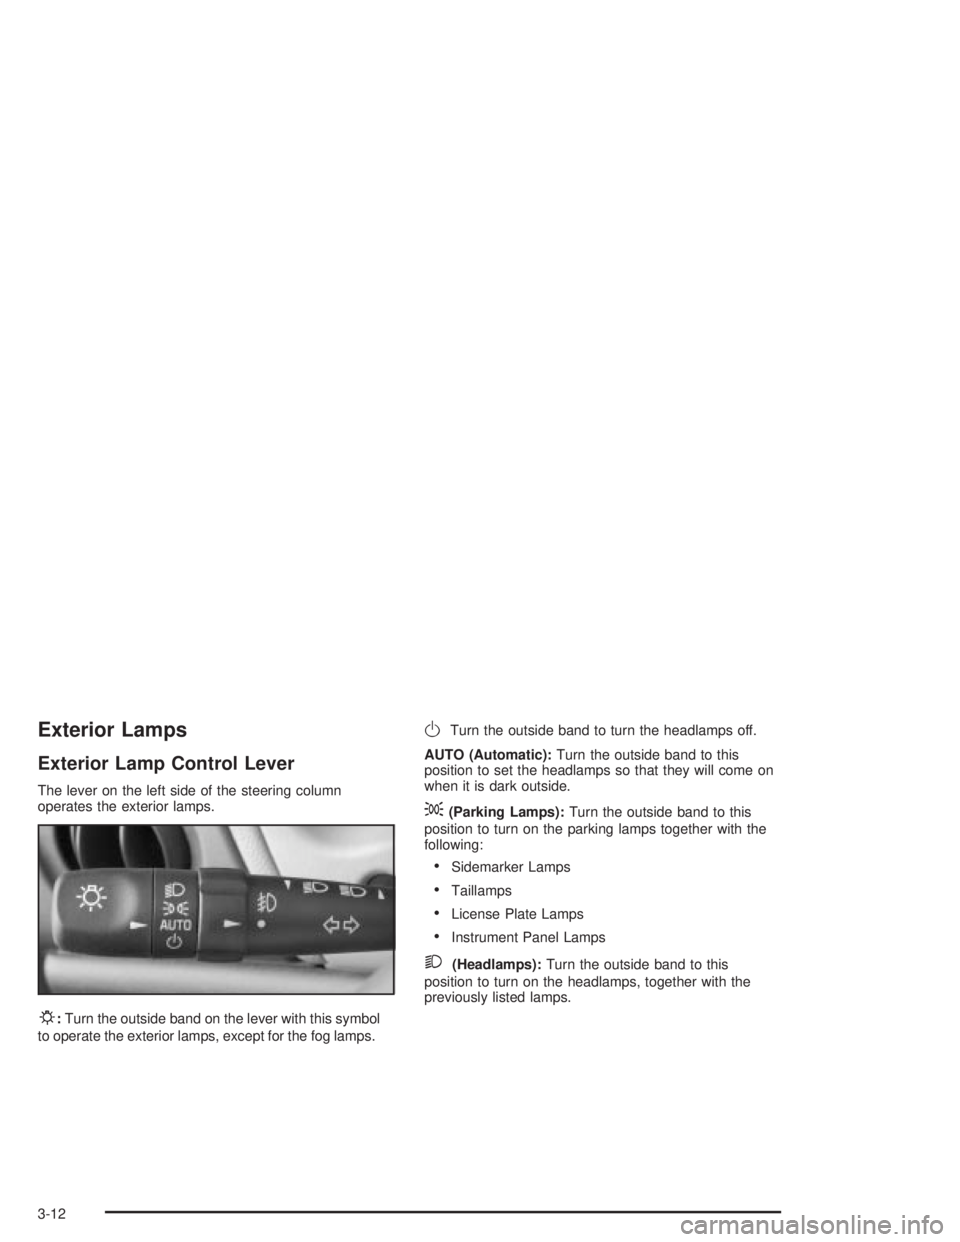
The lever on the left side of the steering column
operates the exterior lamps.
P:Turn the outside band on the lever with this symbol
to operate the exterior lamps, except for the fog lamps.
OTurn the outside band to turn the headlamps off.
AUTO (Automatic):Turn the outside band to this
position to set the headlamps so that they will come on
when it is dark outside.
;(Parking Lamps):Turn the outside band to this
position to turn on the parking lamps together with the
following:
·Sidemarker Lamps
·Taillamps
·License Plate Lamps
·Instrument Panel Lamps
2(Headlamps):Turn the outside band to this
position to turn on the headlamps, together with the
previously listed lamps.
3-12
Page 120 of 432
Light Sensor
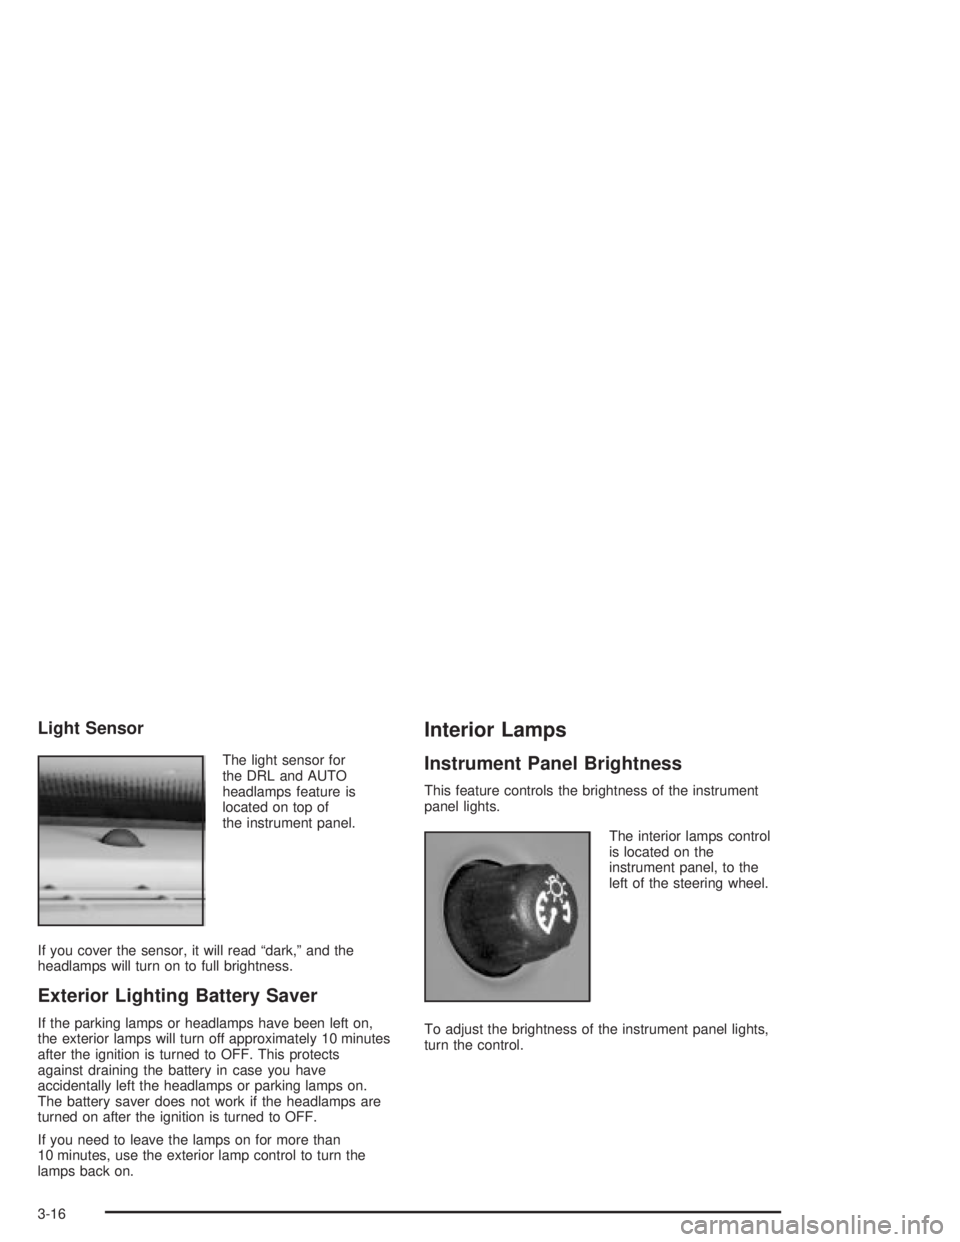
The light sensor for
the DRL and AUTO
headlamps feature is
located on top of
the instrument panel.
If you cover the sensor, it will read ªdark,º and the
headlamps will turn on to full brightness.
Exterior Lighting Battery Saver
If the parking lamps or headlamps have been left on,
the exterior lamps will turn off approximately 10 minutes
after the ignition is turned to OFF. This protects
against draining the battery in case you have
accidentally left the headlamps or parking lamps on.
The battery saver does not work if the headlamps are
turned on after the ignition is turned to OFF.
If you need to leave the lamps on for more than
10 minutes, use the exterior lamp control to turn the
lamps back on.
Interior Lamps
Instrument Panel Brightness
This feature controls the brightness of the instrument
panel lights.
The interior lamps control
is located on the
instrument panel, to the
left of the steering wheel.
To adjust the brightness of the instrument panel lights,
turn the control.
3-16
Page 139 of 432
{CAUTION:
If the air bag readiness light stays on after you
start your vehicle, it means the air bag system
may not be working properly. The air bags in
your vehicle may not in¯ate in a crash, or they
could even in¯ate without a crash. To help
avoid injury to yourself or others, have your
vehicle serviced right away if the air bag
readiness light stays on after you start your
vehicle.
The air bag readiness light should ¯ash for a few
seconds when you turn the ignition key to RUN. If the
light doesn't come on then, have it ®xed so it will
be ready to warn you if there is a problem.
Up-Shift Light
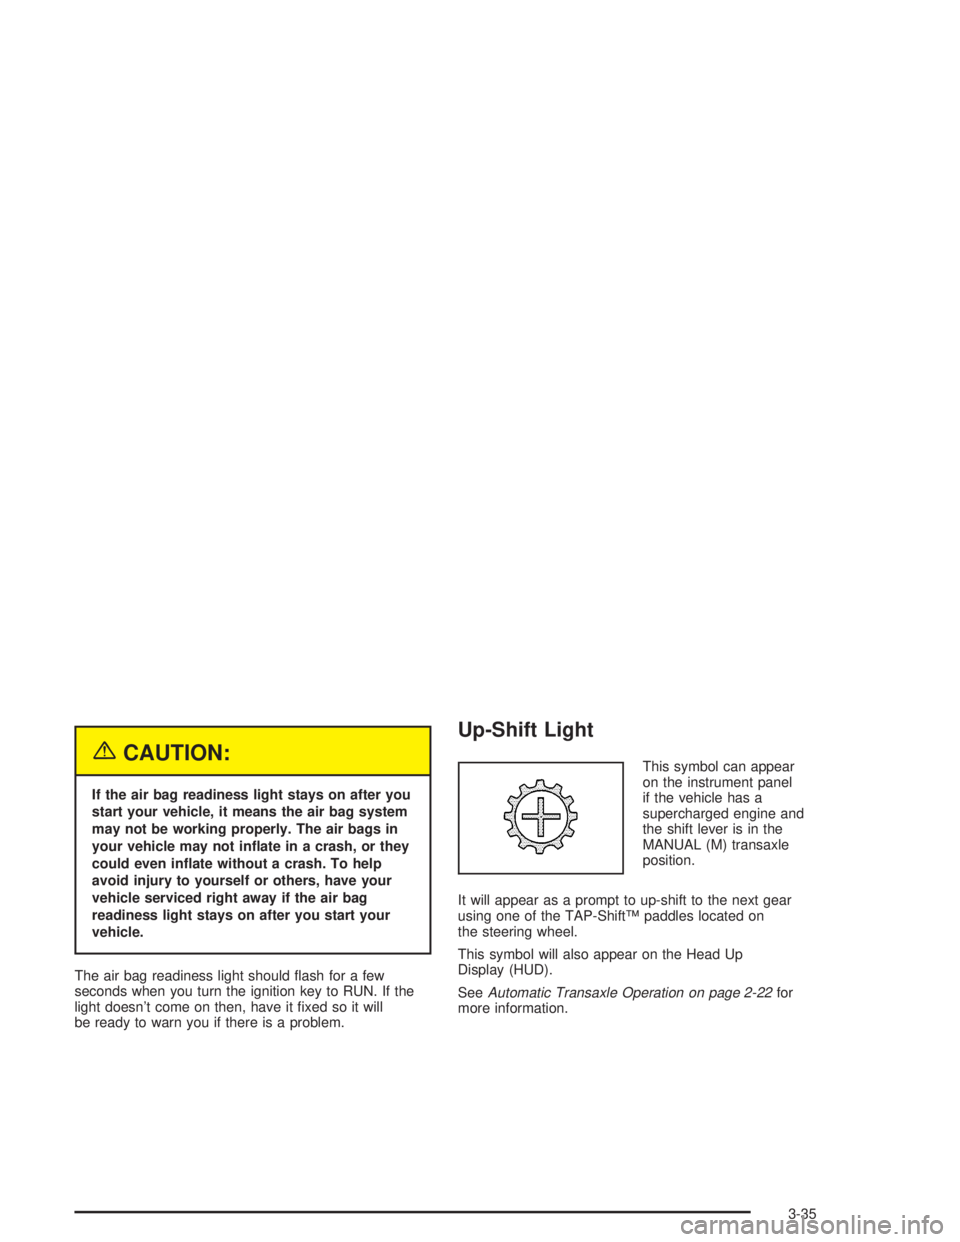
This symbol can appear
on the instrument panel
if the vehicle has a
supercharged engine and
the shift lever is in the
MANUAL (M) transaxle
position.
It will appear as a prompt to up-shift to the next gear
using one of the TAP-ShiftŸ paddles located on
the steering wheel.
This symbol will also appear on the Head Up
Display (HUD).
See
Automatic Transaxle Operation on page 2-22for
more information.
3-35
Page 188 of 432
SERVICE VARIABLE EFFORT
STEERING
This symbol appears with
the SERVICE VARIABLE
EFFORT STEERING
warning message.
If the vehicle has Anti-Lock Brakes (ABS), it has the
variable steering effort system. This warning message
will display if this system is not functioning properly.
See
Steering on page 4-14for more information.
Have your system serviced by your dealer as soon
as possible.
This warning message will display only while the ignition
is in RUN. Press the set/reset button to acknowledge
this warning message and to clear it from the screen.
This message will continue to display if it has not been
acknowledged when the engine is turned off. It will
also re-display for three seconds if the message has
been acknowledged, but the condition still exists
when the engine is turned off.
The message will re-appear when the engine is turned
on and the condition still exists.
SERVICE VEHICLE SOON
This symbol appears with
the SERVICE VEHICLE
SOON warning message.
This warning message displays when a non-emissions
related malfunction occurs. Have the vehicle serviced
by your dealer as soon as possible.
This warning message will display only while the ignition
is in RUN. Press the set/reset button to acknowledge
this warning message and to clear it from the screen.
This message will continue to display if it has not been
acknowledged when the engine is turned off. It will
also re-display for three seconds if the message has
been acknowledged, but the condition still exists
when the engine is turned off.
The message will re-appear when the engine is turned
on and the condition still exists.
3-84
Page 233 of 432
Audio Steering Wheel Controls
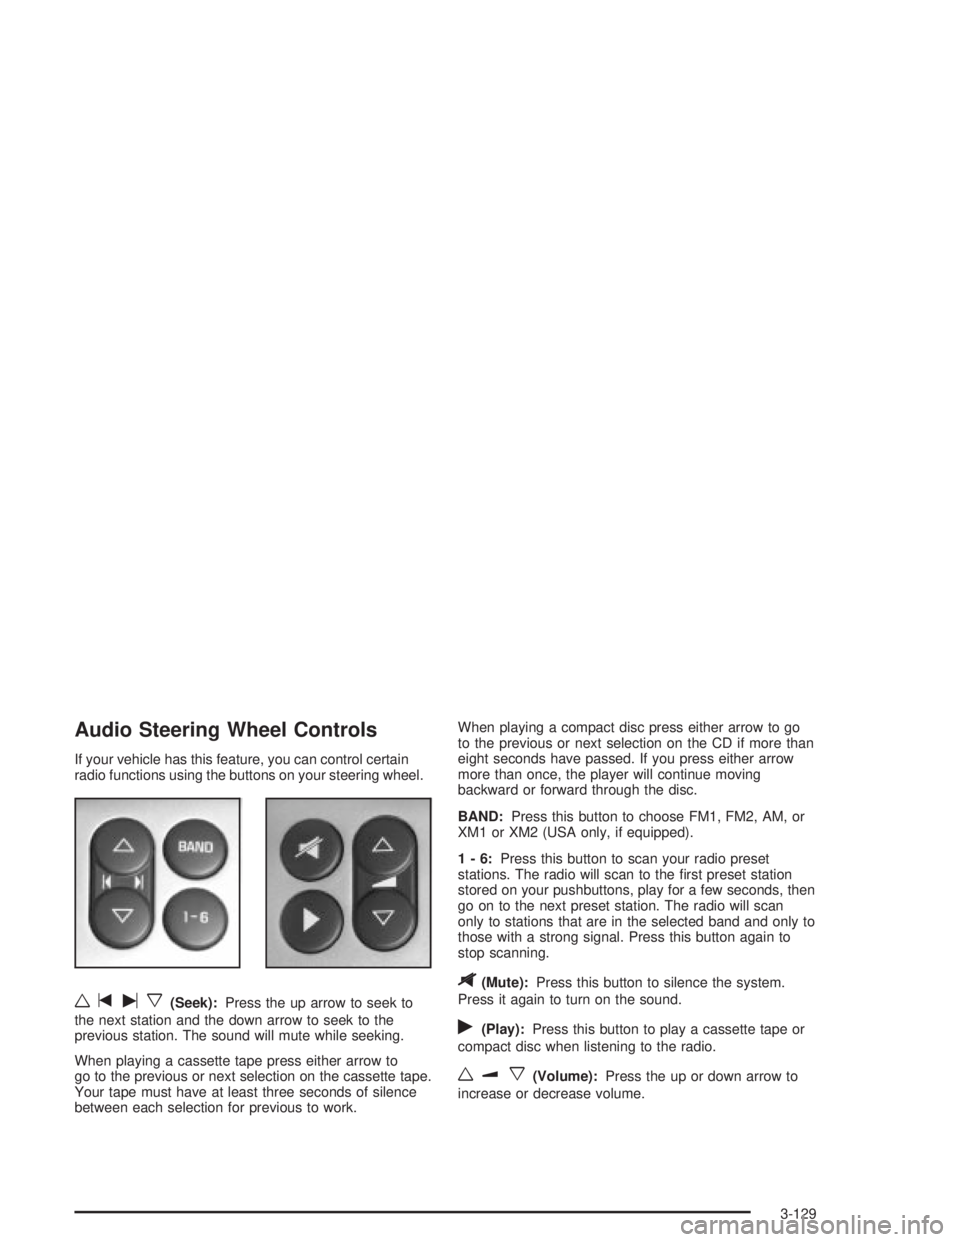
If your vehicle has this feature, you can control certain
radio functions using the buttons on your steering wheel.
wtux(Seek):Press the up arrow to seek to
the next station and the down arrow to seek to the
previous station. The sound will mute while seeking.
When playing a cassette tape press either arrow to
go to the previous or next selection on the cassette tape.
Your tape must have at least three seconds of silence
between each selection for previous to work.When playing a compact disc press either arrow to go
to the previous or next selection on the CD if more than
eight seconds have passed. If you press either arrow
more than once, the player will continue moving
backward or forward through the disc.
BAND:Press this button to choose FM1, FM2, AM, or
XM1 or XM2 (USA only, if equipped).
1-6:Press this button to scan your radio preset
stations. The radio will scan to the ®rst preset station
stored on your pushbuttons, play for a few seconds, then
go on to the next preset station. The radio will scan
only to stations that are in the selected band and only to
those with a strong signal. Press this button again to
stop scanning.
$(Mute):Press this button to silence the system.
Press it again to turn on the sound.
r(Play):Press this button to play a cassette tape or
compact disc when listening to the radio.
wux(Volume):Press the up or down arrow to
increase or decrease volume.
3-129
Page 237 of 432
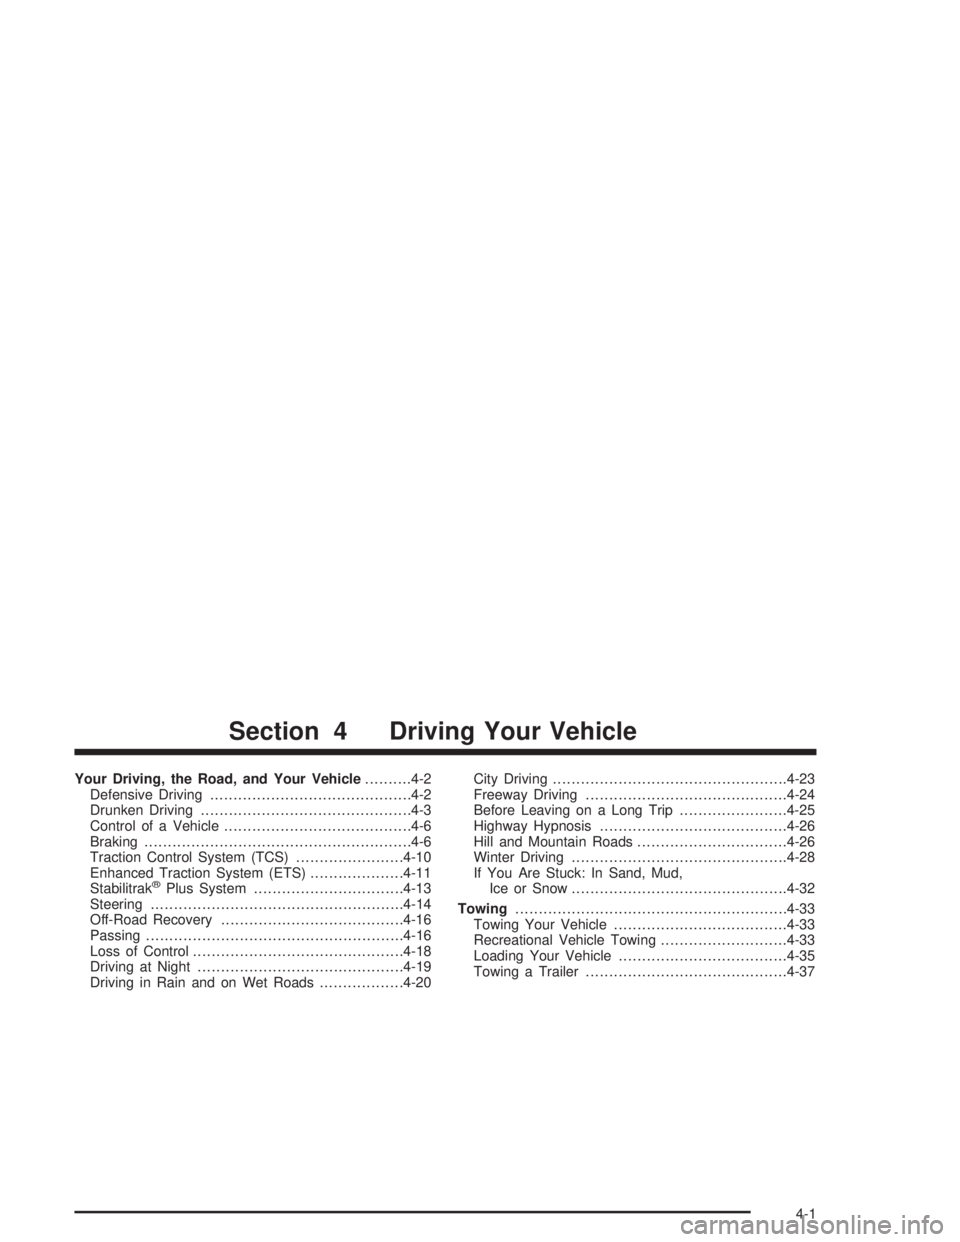
Your Driving, the Road, and Your Vehicle..........4-2
Defensive Driving...........................................4-2
Drunken Driving.............................................4-3
Control of a Vehicle........................................4-6
Braking.........................................................4-6
Traction Control System (TCS).......................4-10
Enhanced Traction System (ETS)....................4-11
Stabilitrak
žPlus System................................4-13
Steering......................................................4-14
Off-Road Recovery.......................................4-16
Passing.......................................................4-16
Loss of Control.............................................4-18
Driving at Night............................................4-19
Driving in Rain and on Wet Roads..................4-20City Driving..................................................4-23
Freeway Driving...........................................4-24
Before Leaving on a Long Trip.......................4-25
Highway Hypnosis........................................4-26
Hill and Mountain Roads................................4-26
Winter Driving..............................................4-28
If You Are Stuck: In Sand, Mud,
Ice or Snow..............................................4-32
Towing..........................................................4-33
Towing Your Vehicle.....................................4-33
Recreational Vehicle Towing...........................4-33
Loading Your Vehicle....................................4-35
Towing a Trailer...........................................4-37
Section 4 Driving Your Vehicle
4-1