headlamp PONTIAC GRAND PRIX 2004 Owner's Manual
[x] Cancel search | Manufacturer: PONTIAC, Model Year: 2004, Model line: GRAND PRIX, Model: PONTIAC GRAND PRIX 2004Pages: 432, PDF Size: 2.99 MB
Page 282 of 432
If a Tire Goes Flat........................................5-78
Changing a Flat Tire.....................................5-78
Compact Spare Tire......................................5-89
Appearance Care............................................5-90
Cleaning the Inside of Your Vehicle.................5-90
Care of Safety Belts......................................5-93
Weatherstrips...............................................5-93
Cleaning the Outside of Your Vehicle..............5-93
Sheet Metal Damage.....................................5-95
Finish Damage.............................................5-95
Underbody Maintenance................................5-96
Chemical Paint Spotting.................................5-96
GM Vehicle Care/Appearance Materials...........5-96Vehicle Identi®cation......................................5-98
Vehicle Identi®cation Number (VIN).................5-98
Service Parts Identi®cation Label.....................5-98
Electrical System............................................5-99
Add-On Electrical Equipment..........................5-99
Headlamp Wiring..........................................5-99
Windshield Wiper Fuses................................5-99
Power Windows and Other Power Options.......5-99
Fuses and Circuit Breakers............................5-99
Capacities and Speci®cations........................5-104
Capacities and Speci®cations........................5-104
Normal Maintenance Replacement Parts.........5-105
Normal Maintenance Replacement Parts.........5-105
Section 5 Service and Appearance Care
5-2
Page 336 of 432
Headlamp Aiming
The vehicle has a visual optical headlamp aiming
system. The aim has been preset at the factory and
should need no further adjustment
If the vehicle is damaged in an accident, the headlamp
aim may be affected and adjustment may be
necessary.
If oncoming vehicles ¯ash their high beams at you, this
may also mean the vertical aim needs to be adjusted.
It is recommended that you take the vehicle to your
dealer for service if the headlamps need to be re-aimed.
However, it is possible for you to re-aim the headlamps
as described in the following procedure.The vehicle should be properly prepared as follows:·The vehicle should be placed so the headlamps are
25 ft. (7.6 m) from a light colored wall or other ¯at
surface.
·The vehicle must have all four tires on a perfectly
level surface which is level all the way to the wall
or other ¯at surface.
·The vehicle should be placed so it is perpendicular
to the wall or other ¯at surface.
·The vehicle should not have any snow, ice or mud
attached to it.
·The vehicle should be fully assembled and all other
work stopped while headlamp aiming is being done.
·The vehicle should be normally loaded with a
full tank of fuel and one person or 160 lbs (75 kg) on
the driver's seat.
·Tires should be properly in¯ated.
5-56
Page 337 of 432
Headlamp aiming is done with the vehicle's low-beam
lamps. The high-beam lamps will be correctly aimed
if the low-beam lamps are aimed properly.
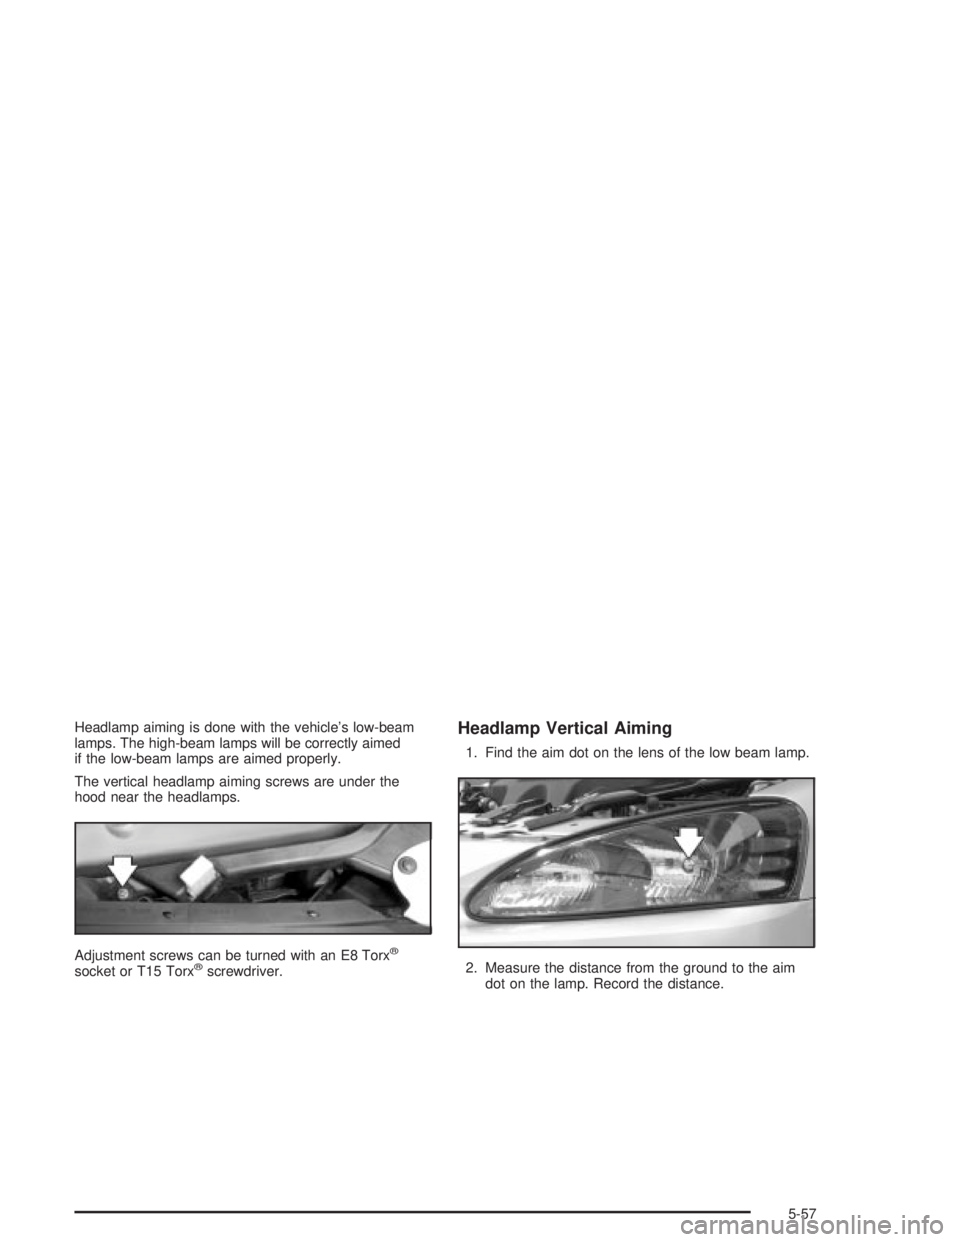
The vertical headlamp aiming screws are under the
hood near the headlamps.
Adjustment screws can be turned with an E8 Torx
ž
socket or T15 Torxžscrewdriver.
Headlamp Vertical Aiming
1. Find the aim dot on the lens of the low beam lamp.
2. Measure the distance from the ground to the aim
dot on the lamp. Record the distance.
5-57
Page 338 of 432
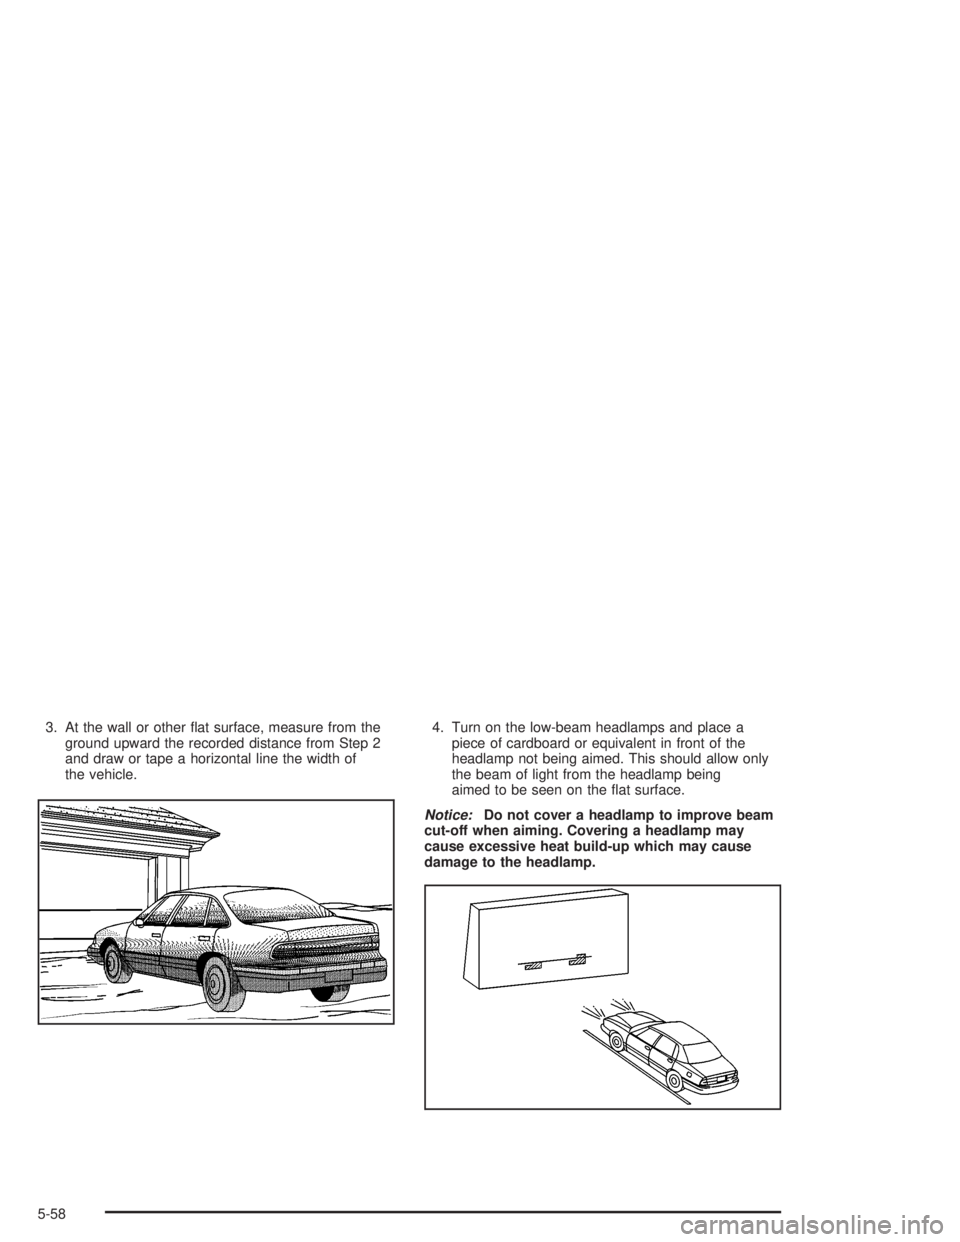
3. At the wall or other ¯at surface, measure from the
ground upward the recorded distance from Step 2
and draw or tape a horizontal line the width of
the vehicle.4. Turn on the low-beam headlamps and place a
piece of cardboard or equivalent in front of the
headlamp not being aimed. This should allow only
the beam of light from the headlamp being
aimed to be seen on the ¯at surface.
Notice:Do not cover a headlamp to improve beam
cut-off when aiming. Covering a headlamp may
cause excessive heat build-up which may cause
damage to the headlamp.
5-58
Page 339 of 432
5. Turn the vertical aiming screw until the headlamp
beam is aimed to the horizontal tape line. The top
edge of the cut-off should be positioned at the
bottom edge of the horizontal tape line.
6. Repeat steps 4 and 5 for the opposite headlamp.
Bulb Replacement
For the proper type of replacement bulb, seeReplacement Bulbs on page 5-66.
For any bulb changing procedure not listed in this
section, contact your dealer.
Halogen Bulbs
{CAUTION:
Halogen bulbs have pressurized gas inside
and can burst if you drop or scratch the bulb.
You or others could be injured. Be sure to
read and follow the instructions on the bulb
package.
5-59
Page 340 of 432
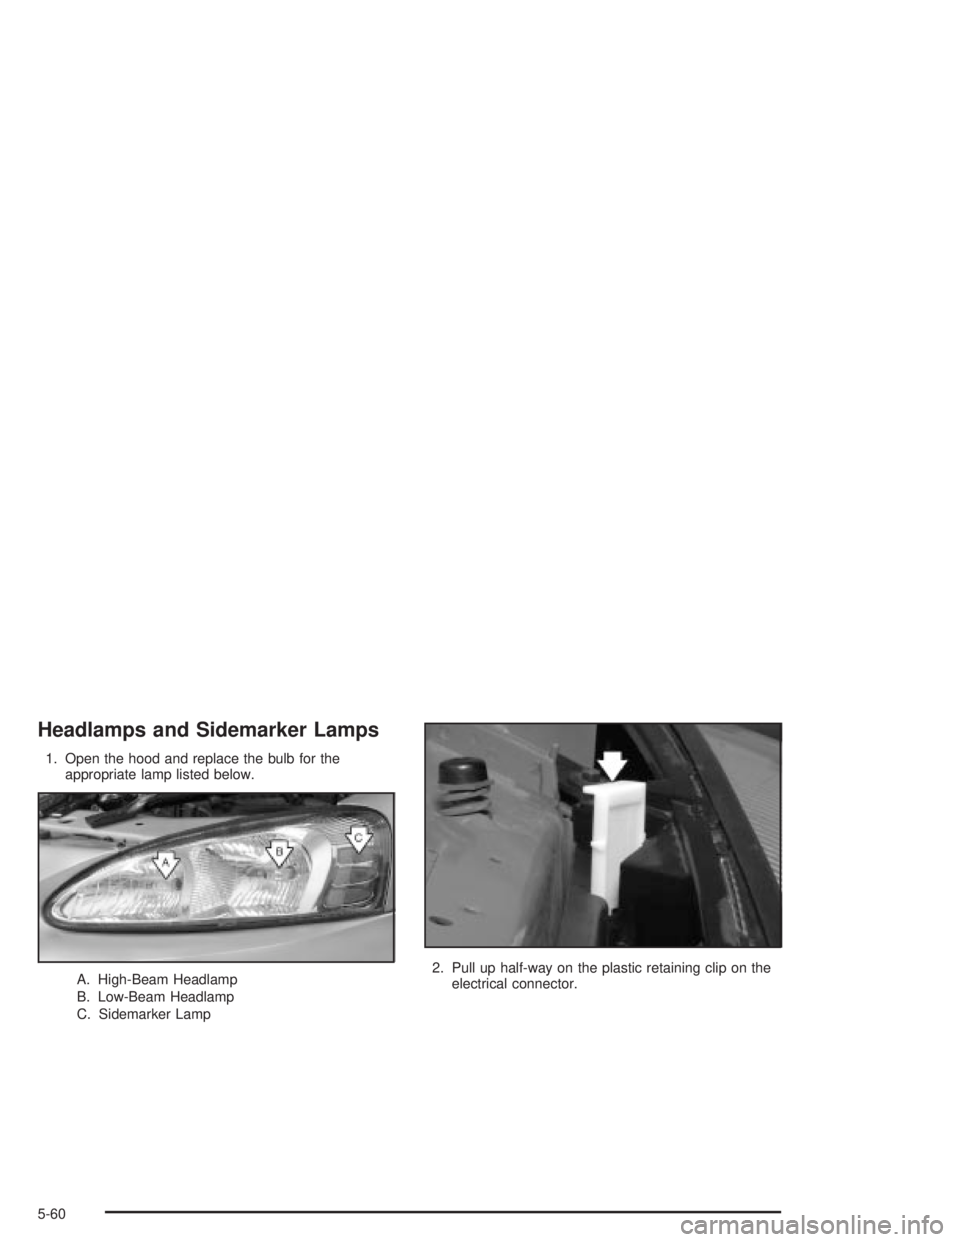
Headlamps and Sidemarker Lamps
1. Open the hood and replace the bulb for the
appropriate lamp listed below.
A. High-Beam Headlamp
B. Low-Beam Headlamp
C. Sidemarker Lamp2. Pull up half-way on the plastic retaining clip on the
electrical connector.
5-60
Page 341 of 432
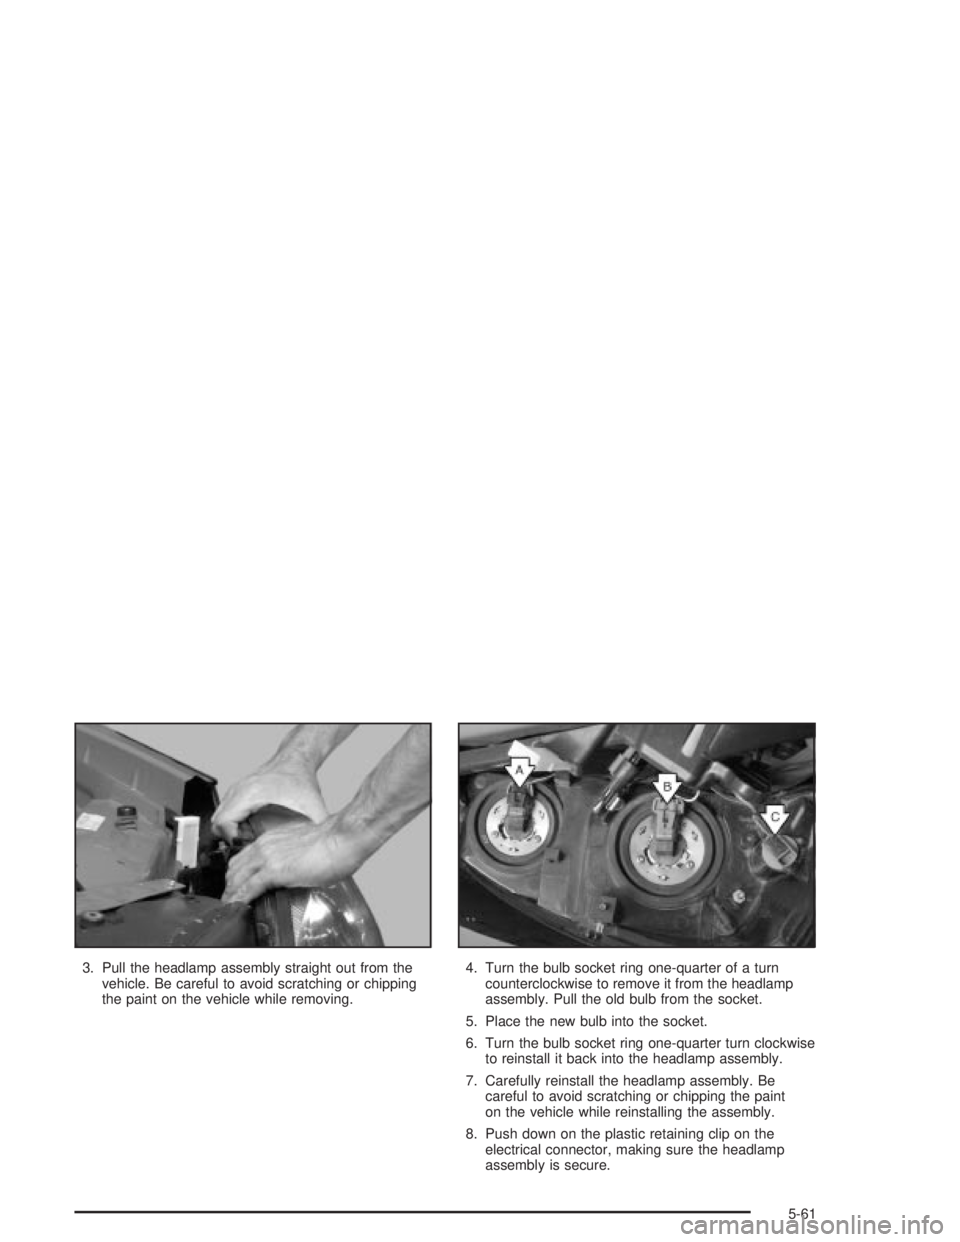
3. Pull the headlamp assembly straight out from the
vehicle. Be careful to avoid scratching or chipping
the paint on the vehicle while removing.4. Turn the bulb socket ring one-quarter of a turn
counterclockwise to remove it from the headlamp
assembly. Pull the old bulb from the socket.
5. Place the new bulb into the socket.
6. Turn the bulb socket ring one-quarter turn clockwise
to reinstall it back into the headlamp assembly.
7. Carefully reinstall the headlamp assembly. Be
careful to avoid scratching or chipping the paint
on the vehicle while reinstalling the assembly.
8. Push down on the plastic retaining clip on the
electrical connector, making sure the headlamp
assembly is secure.
5-61
Page 342 of 432
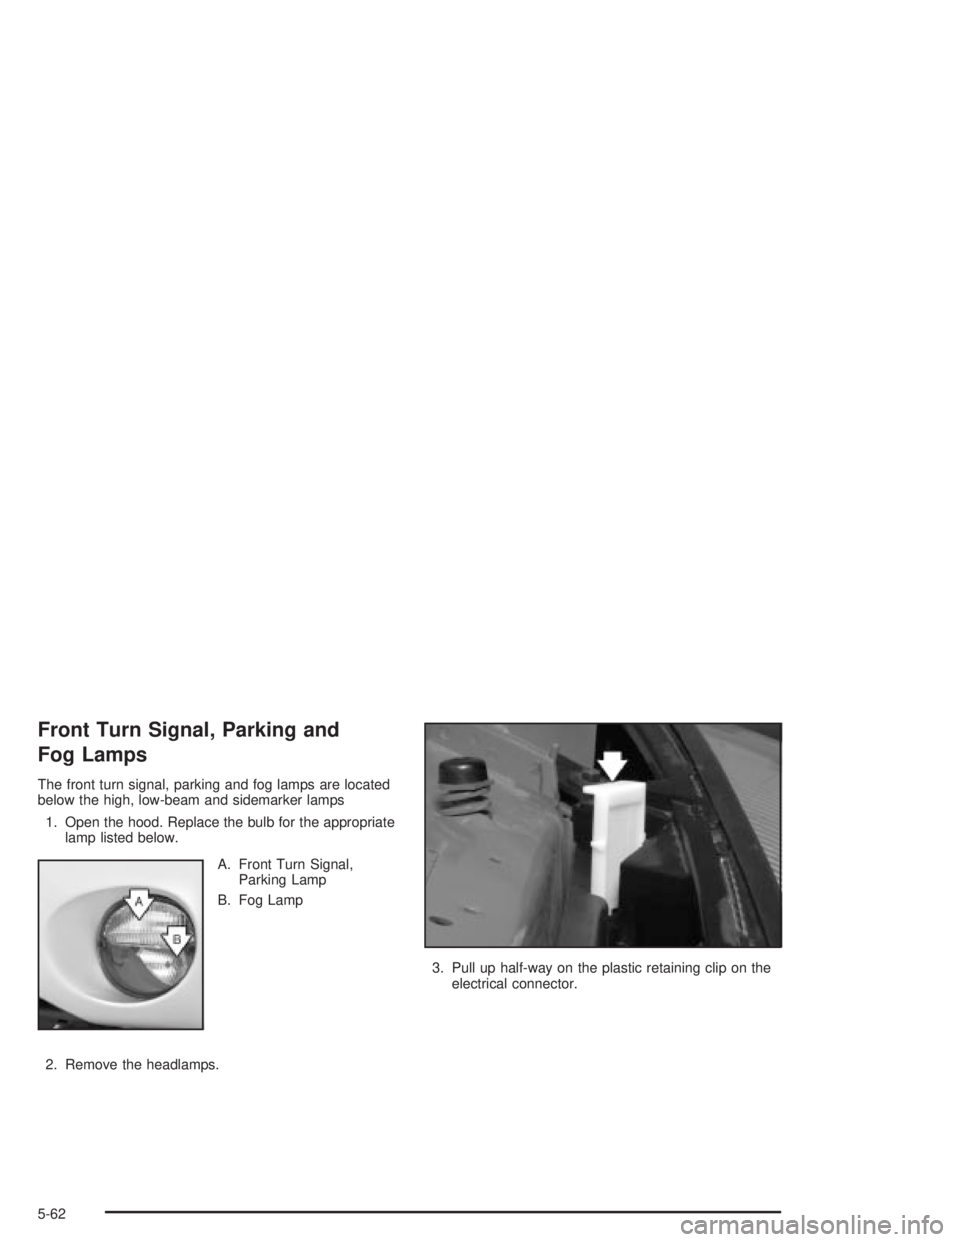
Front Turn Signal, Parking and
Fog Lamps
The front turn signal, parking and fog lamps are located
below the high, low-beam and sidemarker lamps
1. Open the hood. Replace the bulb for the appropriate
lamp listed below.
A. Front Turn Signal,
Parking Lamp
B. Fog Lamp
2. Remove the headlamps.3. Pull up half-way on the plastic retaining clip on the
electrical connector.
5-62
Page 343 of 432
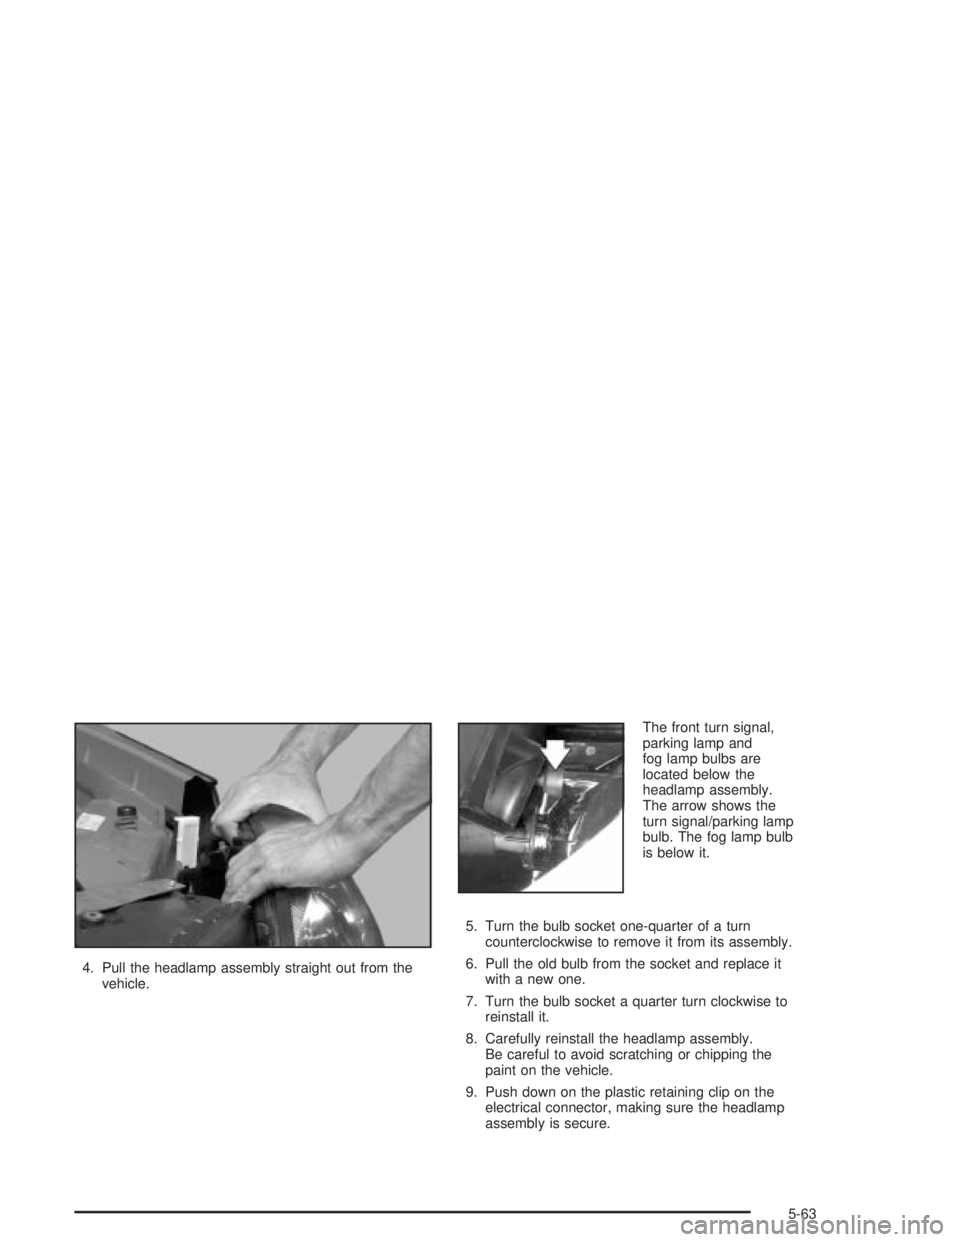
4. Pull the headlamp assembly straight out from the
vehicle.The front turn signal,
parking lamp and
fog lamp bulbs are
located below the
headlamp assembly.
The arrow shows the
turn signal/parking lamp
bulb. The fog lamp bulb
is below it.
5. Turn the bulb socket one-quarter of a turn
counterclockwise to remove it from its assembly.
6. Pull the old bulb from the socket and replace it
with a new one.
7. Turn the bulb socket a quarter turn clockwise to
reinstall it.
8. Carefully reinstall the headlamp assembly.
Be careful to avoid scratching or chipping the
paint on the vehicle.
9. Push down on the plastic retaining clip on the
electrical connector, making sure the headlamp
assembly is secure.
5-63
Page 346 of 432
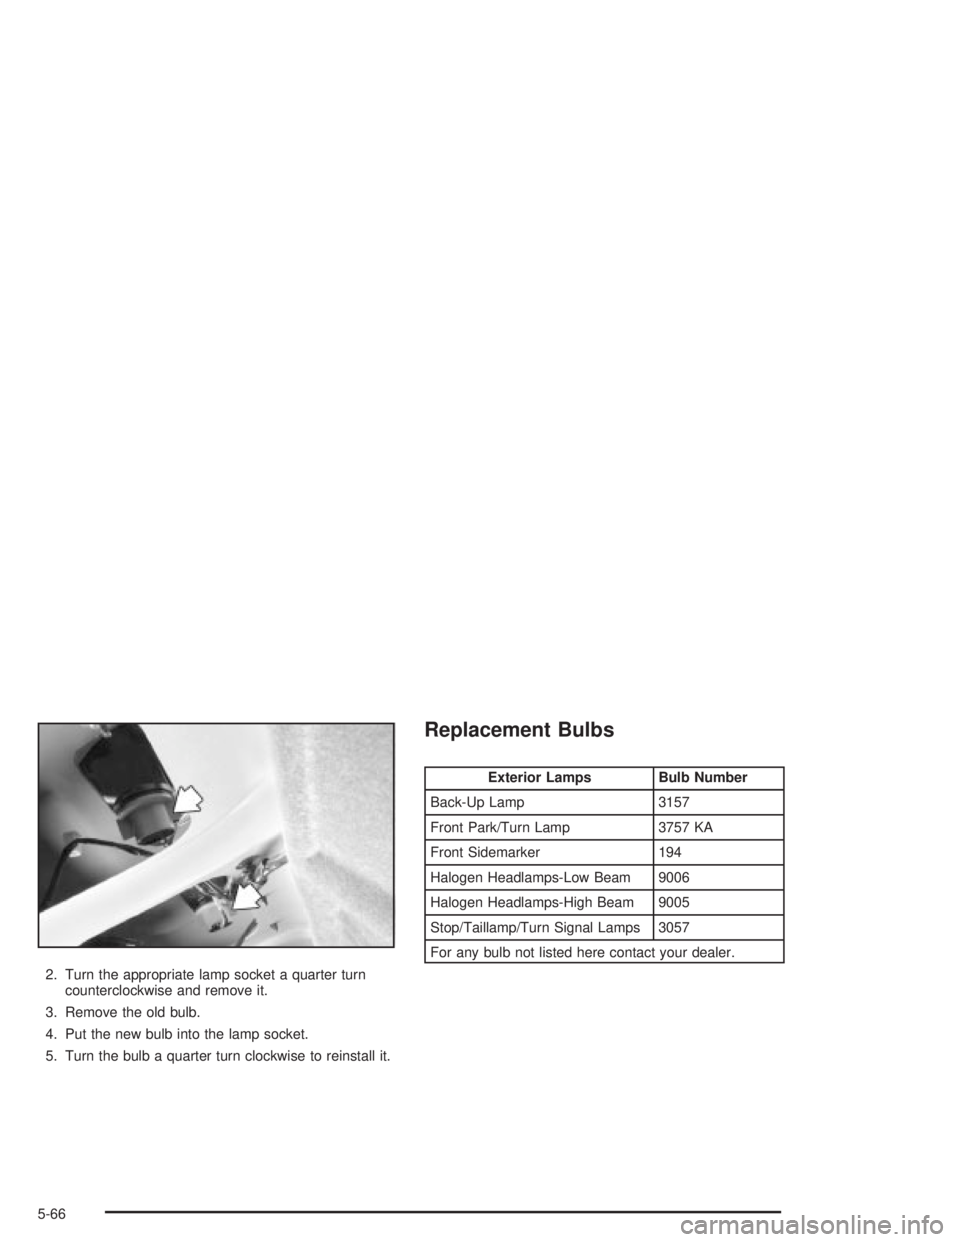
2. Turn the appropriate lamp socket a quarter turn
counterclockwise and remove it.
3. Remove the old bulb.
4. Put the new bulb into the lamp socket.
5. Turn the bulb a quarter turn clockwise to reinstall it.
Replacement Bulbs
Exterior Lamps Bulb Number
Back-Up Lamp 3157
Front Park/Turn Lamp 3757 KA
Front Sidemarker 194
Halogen Headlamps-Low Beam 9006
Halogen Headlamps-High Beam 9005
Stop/Taillamp/Turn Signal Lamps 3057
For any bulb not listed here contact your dealer.
5-66