fuel cap PONTIAC GRAND PRIX 2004 Owners Manual
[x] Cancel search | Manufacturer: PONTIAC, Model Year: 2004, Model line: GRAND PRIX, Model: PONTIAC GRAND PRIX 2004Pages: 432, PDF Size: 2.99 MB
Page 1 of 432
Seats and Restraint Systems........................... 1-1
Front Seats
............................................... 1-2
Rear Seats
............................................... 1-8
Safety Belts
.............................................1-10
Child Restraints
.......................................1-29
Air Bag Systems
......................................1-48
Restraint System Check
............................1-56
Features and Controls..................................... 2-1
Keys
........................................................ 2-2
Doors and Locks
....................................... 2-7
Windows
.................................................2-12
Theft-Deterrent Systems
............................2-14
Starting and Operating Your Vehicle
...........2-18
Mirrors
....................................................2-33
OnStar
žSystem
......................................2-35
Storage Areas
.........................................2-36
Sunroof
..................................................2-39
Instrument Panel............................................. 3-1
Instrument Panel Overview
.......................... 3-2
Climate Controls
......................................3-25
Warning Lights, Gages and Indicators
.........3-31
Driver Information Center (DIC)
..................3-45
Audio System(s)
.......................................3-88Driving Your Vehicle....................................... 4-1
Your Driving, the Road, and Your Vehicle
..... 4-2
Towing
...................................................4-33
Service and Appearance Care.......................... 5-1
Service
..................................................... 5-3
Fuel
......................................................... 5-4
Checking Things Under the Hood
...............5-10
Headlamp Aiming
.....................................5-56
Bulb Replacement
....................................5-59
Windshield Wiper Blade Replacement
.........5-67
Tires
......................................................5-68
Appearance Care
.....................................5-90
Vehicle Identi®cation
.................................5-98
Electrical System
......................................5-99
Capacities and Speci®cations
...................5-104
Normal Maintenance Replacement Parts
......5-105
Maintenance Schedule..................................... 6-1
Maintenance Schedule
................................ 6-2
Customer Assistance Information.................... 7-1
Customer Assistance Information
.................. 7-2
Reporting Safety Defects
............................ 7-9
Index................................................................ 1
2004 Pontiac Grand Prix Owner ManualM
Page 145 of 432
This light should come on, as a check to show you it
is working, when the ignition is on and the engine is not
running. If the light doesn't come on, have it repaired.
This light will also come on during a malfunction in one
of two ways:
·Light FlashingÐ A mis®re condition has been
detected. A mis®re increases vehicle emissions
and may damage the emission control system
on your vehicle. Diagnosis and service may
be required.
·Light On SteadyÐ An emission control system
malfunction has been detected on your vehicle.
Diagnosis and service may be required.
If the Light is Flashing
The following may prevent more serious damage to
your vehicle:
·Reducing vehicle speed.
·Avoiding hard accelerations.
·Avoiding steep uphill grades.
·If you are towing a trailer, reduce the amount of
cargo being hauled as soon as it is possible.If the light stops ¯ashing and remains on steady,
see ªIf the Light Is On Steadyº following.
If the light continues to ¯ash, when it is safe to do so,
stop the vehicle.Find a safe place to park your vehicle.
Turn the key off, wait at least 10 seconds and restart
the engine. If the light remains on steady, see ªIf the
Light Is On Steadyº following. If the light is still ¯ashing,
follow the previous steps, and see your dealer for
service as soon as possible.
If the Light Is On Steady
You may be able to correct the emission system
malfunction by considering the following:
Did you recently put fuel into your vehicle?
If so, reinstall the fuel cap, making sure to fully
install the cap. See
Filling Your Tank on page 5-7.
The diagnostic system can determine if the fuel cap has
been left off or improperly installed. A loose or missing
fuel cap will allow fuel to evaporate into the atmosphere.
A few driving trips with the cap properly installed
should turn the light off.
3-41
Page 148 of 432
Fog Lamp Light
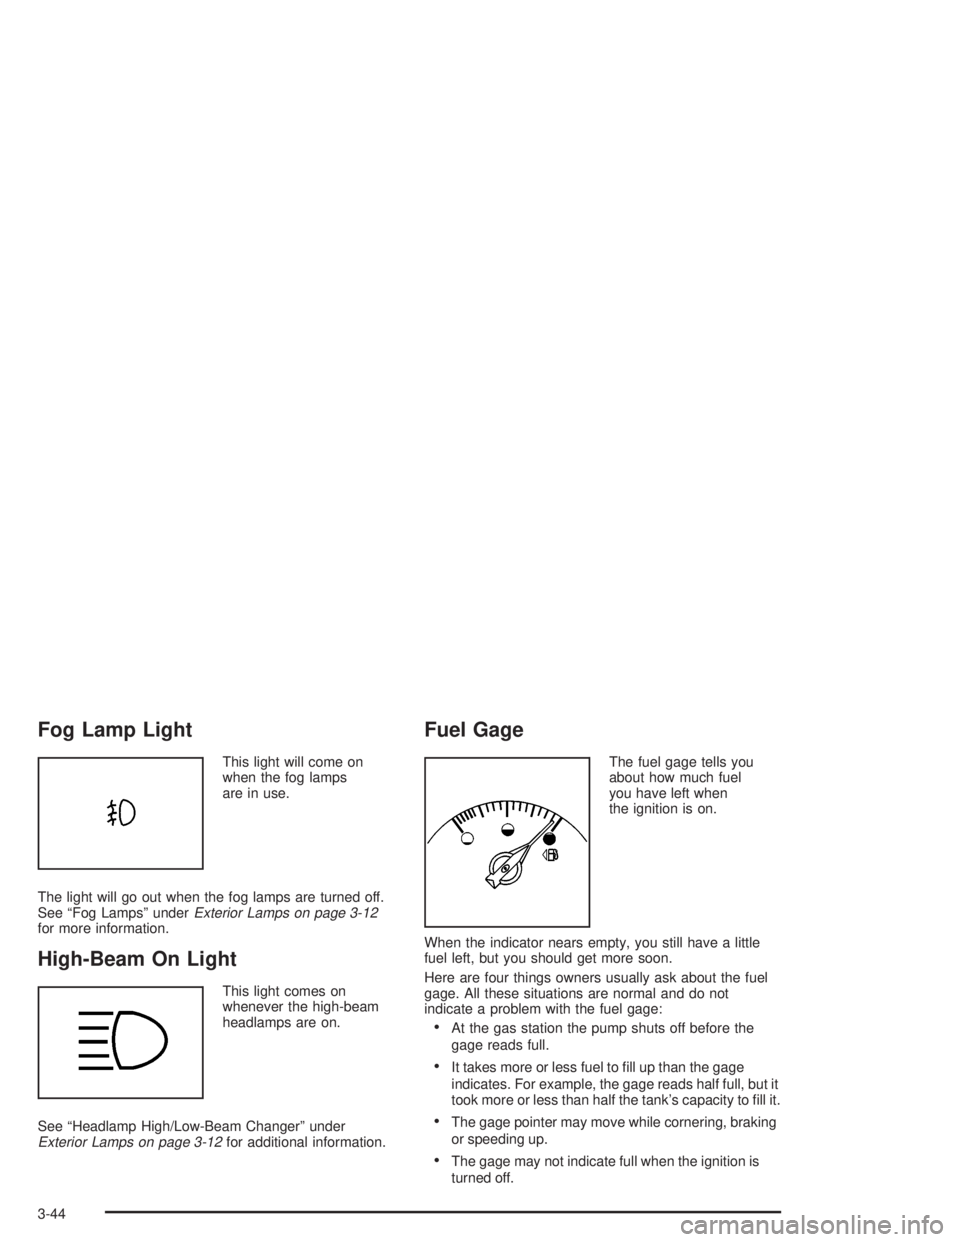
This light will come on
when the fog lamps
are in use.
The light will go out when the fog lamps are turned off.
See ªFog Lampsº under
Exterior Lamps on page 3-12for more information.
High-Beam On Light
This light comes on
whenever the high-beam
headlamps are on.
See ªHeadlamp High/Low-Beam Changerº under
Exterior Lamps on page 3-12for additional information.
Fuel Gage
The fuel gage tells you
about how much fuel
you have left when
the ignition is on.
When the indicator nears empty, you still have a little
fuel left, but you should get more soon.
Here are four things owners usually ask about the fuel
gage. All these situations are normal and do not
indicate a problem with the fuel gage:
·At the gas station the pump shuts off before the
gage reads full.
·It takes more or less fuel to ®ll up than the gage
indicates. For example, the gage reads half full, but it
took more or less than half the tank's capacity to ®ll it.
·The gage pointer may move while cornering, braking
or speeding up.
·The gage may not indicate full when the ignition is
turned off.
3-44
Page 271 of 432
Loading Your Vehicle
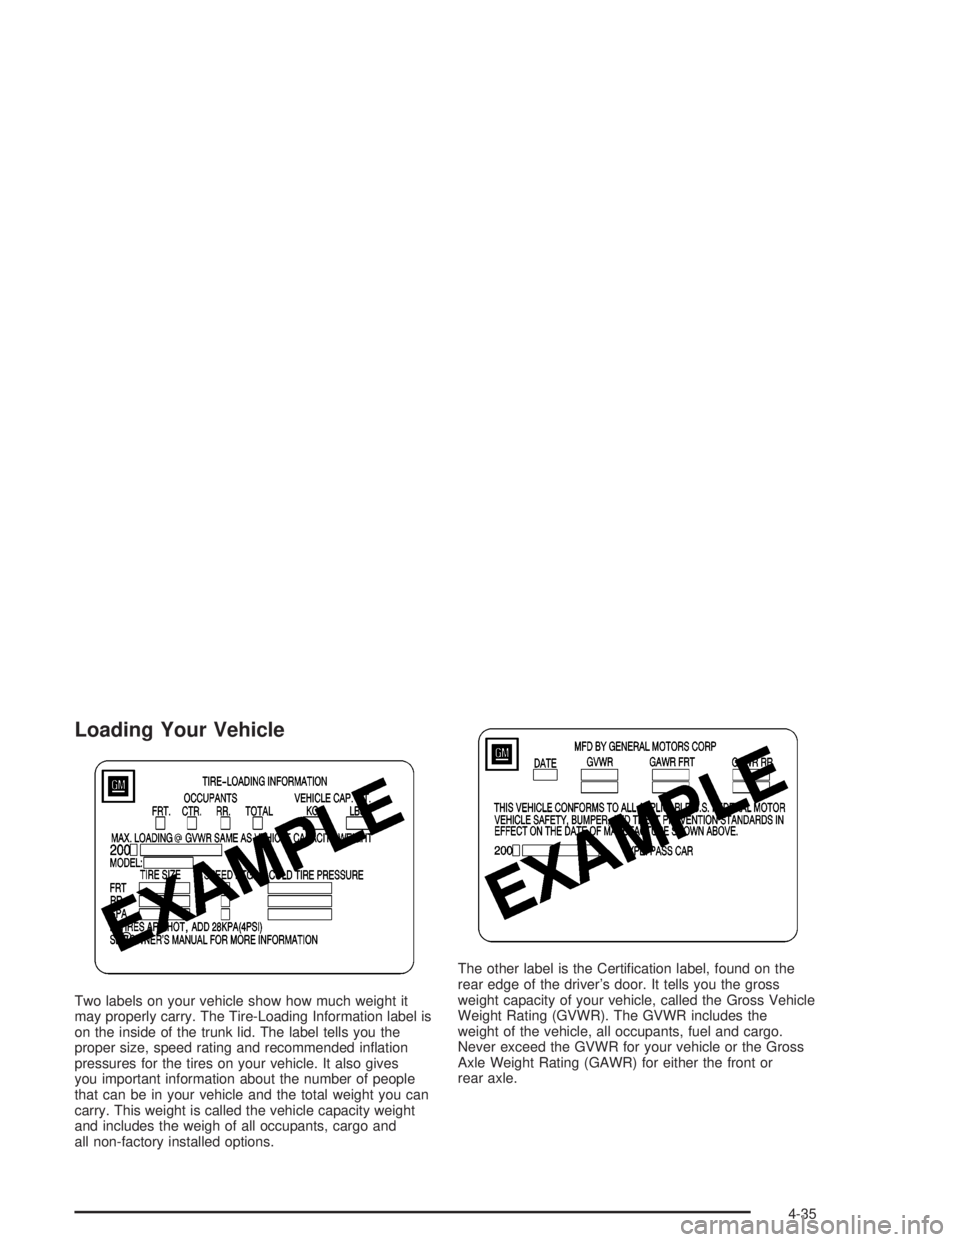
Two labels on your vehicle show how much weight it
may properly carry. The Tire-Loading Information label is
on the inside of the trunk lid. The label tells you the
proper size, speed rating and recommended in¯ation
pressures for the tires on your vehicle. It also gives
you important information about the number of people
that can be in your vehicle and the total weight you can
carry. This weight is called the vehicle capacity weight
and includes the weigh of all occupants, cargo and
all non-factory installed options.The other label is the Certi®cation label, found on the
rear edge of the driver's door. It tells you the gross
weight capacity of your vehicle, called the Gross Vehicle
Weight Rating (GVWR). The GVWR includes the
weight of the vehicle, all occupants, fuel and cargo.
Never exceed the GVWR for your vehicle or the Gross
Axle Weight Rating (GAWR) for either the front or
rear axle.
4-35
Page 273 of 432
Towing a Trailer
{CAUTION:
If you don't use the correct equipment and
drive properly, you can lose control when you
pull a trailer. For example, if the trailer is too
heavy, the brakes may not work well Ð or
even at all. You and your passengers could be
seriously injured. You may also damage your
vehicle; the resulting repairs would not be
covered by your warranty. Pull a trailer only if
you have followed all the steps in this section.
Ask your dealer for advice and information
about towing a trailer with your vehicle.Your vehicle can tow a trailer if it is equipped with the
proper trailer towing equipment. To identify what
the vehicle trailering capacity is for your vehicle, you
should read the information in ªWeight of the Trailerº that
appears later in this section. But trailering is different
than just driving your vehicle by itself. Trailering means
changes in handling, durability and fuel economy.
Successful, safe trailering takes correct equipment,
and it has to be used properly.
That's the reason for this part. In it are many time-tested,
important trailering tips and safety rules. Many of
these are important for your safety and that of your
passengers. So please read this section carefully before
you pull a trailer.
Load-pulling components such as the engine, transaxle,
wheel assemblies and tires are forced to work harder
against the drag of the added weight. The engine
is required to operate at relatively higher speeds and
under greater loads, generating extra heat. What's more,
the trailer adds considerably to wind resistance,
increasing the pulling requirements.
4-37
Page 281 of 432
Service............................................................5-3
Doing Your Own Service Work.........................5-3
Adding Equipment to the Outside
of Your Vehicle...........................................5-4
Fuel................................................................5-4
Gasoline Octane............................................5-4
Gasoline Speci®cations....................................5-5
California Fuel...............................................5-5
Additives.......................................................5-6
Fuels in Foreign Countries...............................5-7
Filling Your Tank............................................5-7
Filling a Portable Fuel Container.....................5-10
Checking Things Under the Hood....................5-10
Hood Release..............................................5-11
Engine Compartment Overview.......................5-12
Engine Oil...................................................5-16
Supercharger Oil..........................................5-21
Engine Air Cleaner/Filter................................5-22
Automatic Transaxle Fluid..............................5-24
Engine Coolant.............................................5-26
Radiator Pressure Cap..................................5-29
Engine Overheating.......................................5-29
Cooling System............................................5-32
Power Steering Fluid.....................................5-42
Windshield Washer Fluid................................5-43Brakes........................................................5-45
Battery........................................................5-48
Jump Starting...............................................5-49
Headlamp Aiming...........................................5-56
Bulb Replacement..........................................5-59
Halogen Bulbs..............................................5-59
Headlamps and Sidemarker Lamps.................5-60
Front Turn Signal, Parking and
Fog Lamps...............................................5-62
Center High-Mounted Stoplamp (CHMSL).........5-64
Taillamps, Turn Signal, and Stoplamps............5-64
Back-Up Lamps............................................5-65
Replacement Bulbs.......................................5-66
Windshield Wiper Blade Replacement..............5-67
Tires..............................................................5-68
In¯ation -- Tire Pressure................................5-69
Tire Pressure Monitor System.........................5-70
Tire Inspection and Rotation...........................5-71
When It Is Time for New Tires.......................5-72
Buying New Tires.........................................5-73
Uniform Tire Quality Grading..........................5-74
Wheel Alignment and Tire Balance..................5-75
Wheel Replacement......................................5-75
Tire Chains..................................................5-77
Section 5 Service and Appearance Care
5-1
Page 288 of 432
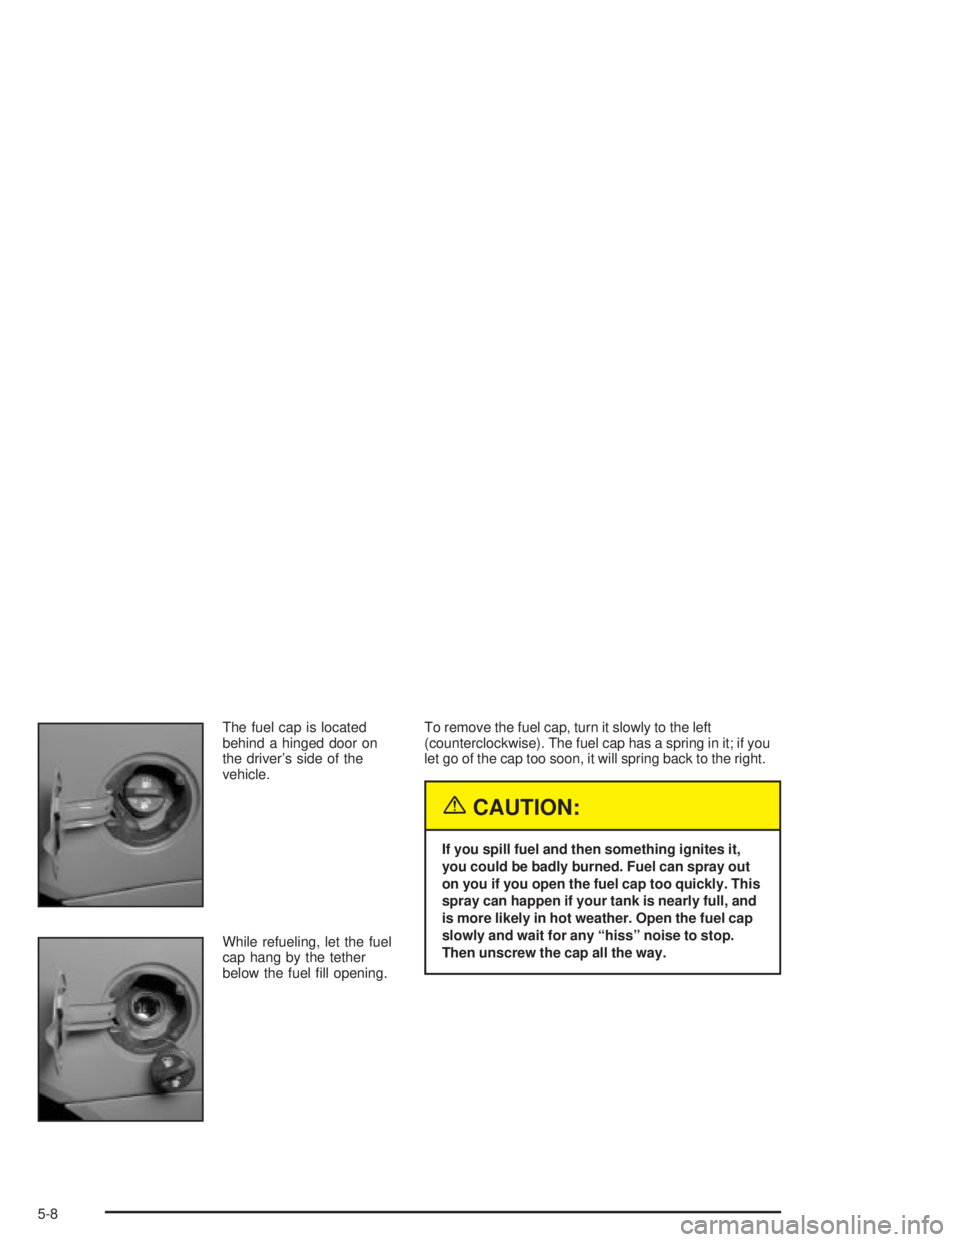
The fuel cap is located
behind a hinged door on
the driver's side of the
vehicle.
While refueling, let the fuel
cap hang by the tether
below the fuel ®ll opening.To remove the fuel cap, turn it slowly to the left
(counterclockwise). The fuel cap has a spring in it; if you
let go of the cap too soon, it will spring back to the right.
{CAUTION:
If you spill fuel and then something ignites it,
you could be badly burned. Fuel can spray out
on you if you open the fuel cap too quickly. This
spray can happen if your tank is nearly full, and
is more likely in hot weather. Open the fuel cap
slowly and wait for any ªhissº noise to stop.
Then unscrew the cap all the way.
5-8
Page 289 of 432
Be careful not to spill fuel. Don't top off or over®ll your
tank, and wait a few seconds after you have ®nished
pumping before you remove the nozzle. Clean fuel from
painted surfaces as soon as possible. See
Cleaning
the Outside of Your Vehicle on page 5-93.
When you put the fuel cap back on, turn it to the right
(clockwise) until you hear three ªclicks.º Make sure
you fully install the cap. The diagnostic system
can determine if the fuel cap has been left off or
improperly installed. This would allow fuel to evaporate
into the atmosphere. See
Malfunction Indicator Lamp
on page 3-40.
{CAUTION:
If a ®re starts while you're refueling, don't
remove the nozzle. Shut off the ¯ow of fuel by
shutting off the pump or by notifying the
station attendant. Leave the area immediately.
Notice:If you need a new fuel cap, be sure to get the
right type. Your dealer can get one for you. If you get
the wrong type, it may not ®t properly. This may
cause your malfunction indicator lamp to light and
may damage your fuel tank and emissions system.
See ªMalfunction Indicator Lampº in the Index.
5-9
Page 349 of 432
In¯ation -- Tire Pressure
The Tire-Loading Information label, which is on the
inside of the trunk lid, shows the correct in¯ation
pressures for your tires when they're cold. ªColdº means
your vehicle has been sitting for at least three hours
or driven no more than 1 mile (1.6 km).
Notice:Don't let anyone tell you that underin¯ation
or overin¯ation is all right. It's not. If your tires
don't have enough air (underin¯ation), you can get
the following:
·Too much ¯exing
·Too much heat
·Tire overloading
·Bad wear
·Bad handling
·Bad fuel economyIf your tires have too much air (overin¯ation),
you can get the following:
·Unusual wear
·Bad handling
·Rough ride
·Needless damage from road hazards
When to Check
Check your tires once a month or more.
Don't forget your compact spare tire. It should be at
60 psi (420 kPa).
How to Check
Use a good quality pocket-type gage to check tire
pressure. You can't tell if your tires are properly in¯ated
simply by looking at them. Radial tires may look
properly in¯ated even when they're underin¯ated.
Be sure to put the valve caps back on the valve stems.
They help prevent leaks by keeping out dirt and moisture.
5-69
Page 384 of 432
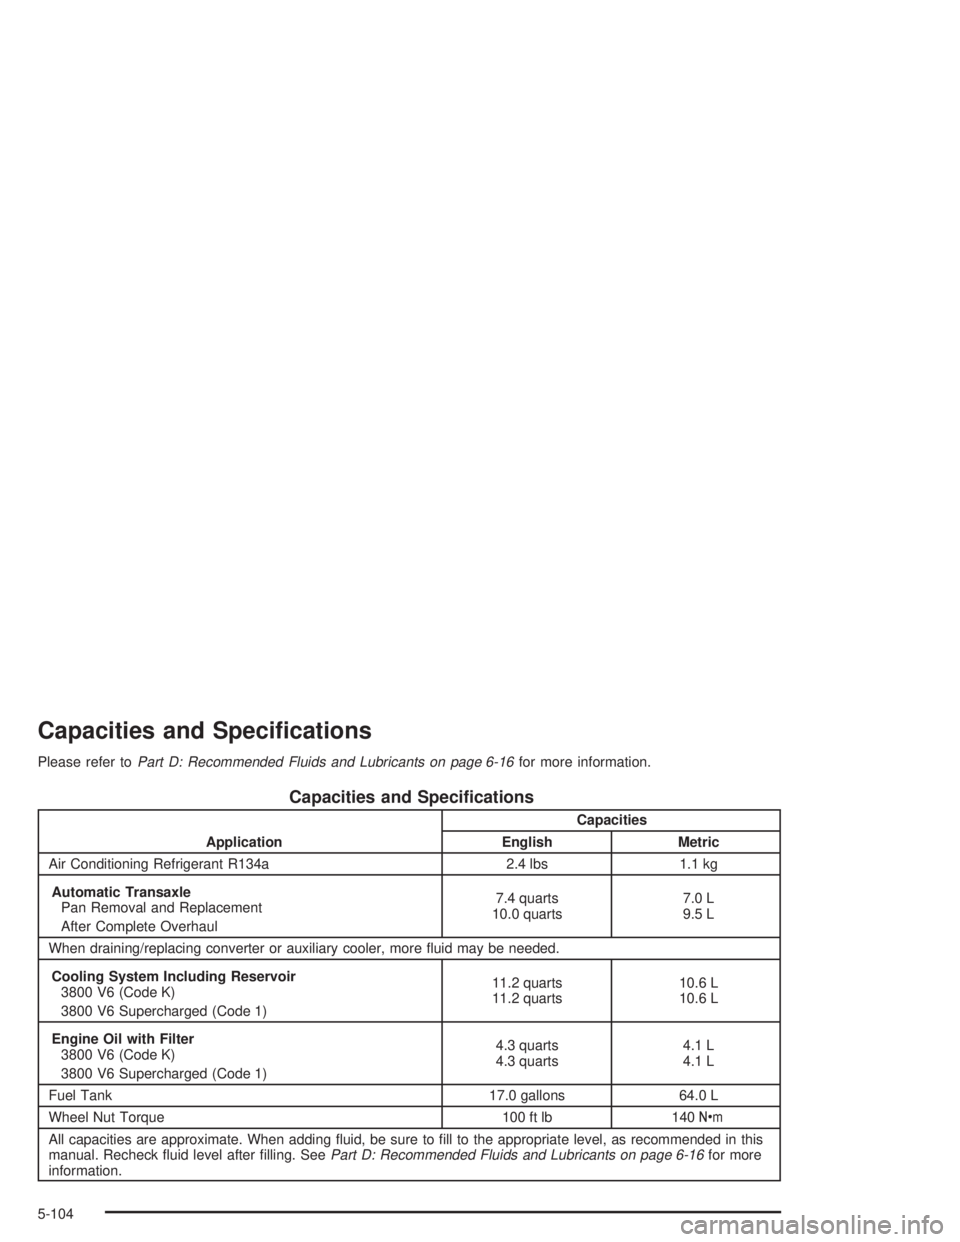
Capacities and Speci®cations
Please refer toPart D: Recommended Fluids and Lubricants on page 6-16for more information.
Capacities and Speci®cations
ApplicationCapacities
English Metric
Air Conditioning Refrigerant R134a 2.4 lbs 1.1 kg
Automatic Transaxle
Pan Removal and Replacement
After Complete Overhaul7.4 quarts
10.0 quarts7.0 L
9.5 L
When draining/replacing converter or auxiliary cooler, more ¯uid may be needed.
Cooling System Including Reservoir
3800 V6 (Code K)
3800 V6 Supercharged (Code 1)11.2 quarts
11.2 quarts10.6 L
10.6 L
Engine Oil with Filter
3800 V6 (Code K)
3800 V6 Supercharged (Code 1)4.3 quarts
4.3 quarts4.1 L
4.1 L
Fuel Tank 17.0 gallons 64.0 L
Wheel Nut Torque 100 ft lb 140Y
All capacities are approximate. When adding ¯uid, be sure to ®ll to the appropriate level, as recommended in this
manual. Recheck ¯uid level after ®lling. See
Part D: Recommended Fluids and Lubricants on page 6-16for more
information.
5-104