instrument panel PONTIAC GRAND PRIX 2008 Owner's Manual
[x] Cancel search | Manufacturer: PONTIAC, Model Year: 2008, Model line: GRAND PRIX, Model: PONTIAC GRAND PRIX 2008Pages: 450, PDF Size: 2.64 MB
Page 121 of 450
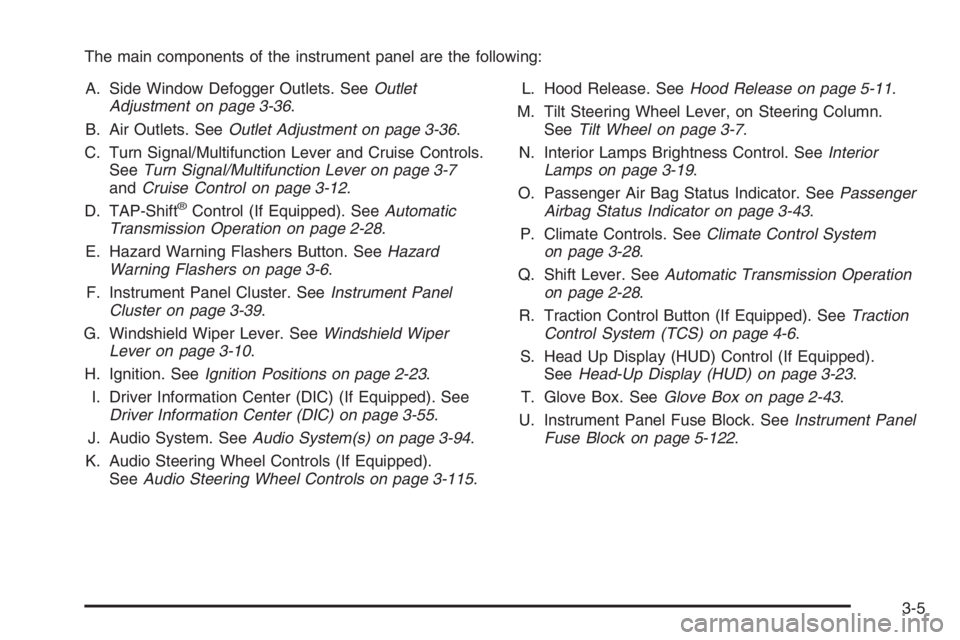
The main components of the instrument panel are the following:
A. Side Window Defogger Outlets. SeeOutlet
Adjustment on page 3-36.
B. Air Outlets. SeeOutlet Adjustment on page 3-36.
C. Turn Signal/Multifunction Lever and Cruise Controls.
SeeTurn Signal/Multifunction Lever on page 3-7
andCruise Control on page 3-12.
D. TAP-Shift
®Control (If Equipped). SeeAutomatic
Transmission Operation on page 2-28.
E. Hazard Warning Flashers Button. SeeHazard
Warning Flashers on page 3-6.
F. Instrument Panel Cluster. SeeInstrument Panel
Cluster on page 3-39.
G. Windshield Wiper Lever. SeeWindshield Wiper
Lever on page 3-10.
H. Ignition. SeeIgnition Positions on page 2-23.
I. Driver Information Center (DIC) (If Equipped). See
Driver Information Center (DIC) on page 3-55.
J. Audio System. SeeAudio System(s) on page 3-94.
K. Audio Steering Wheel Controls (If Equipped).
SeeAudio Steering Wheel Controls on page 3-115.L. Hood Release. SeeHood Release on page 5-11.
M. Tilt Steering Wheel Lever, on Steering Column.
SeeTilt Wheel on page 3-7.
N. Interior Lamps Brightness Control. SeeInterior
Lamps on page 3-19.
O. Passenger Air Bag Status Indicator. SeePassenger
Airbag Status Indicator on page 3-43.
P. Climate Controls. SeeClimate Control System
on page 3-28.
Q. Shift Lever. SeeAutomatic Transmission Operation
on page 2-28.
R. Traction Control Button (If Equipped). SeeTraction
Control System (TCS) on page 4-6.
S. Head Up Display (HUD) Control (If Equipped).
SeeHead-Up Display (HUD) on page 3-23.
T. Glove Box. SeeGlove Box on page 2-43.
U. Instrument Panel Fuse Block. SeeInstrument Panel
Fuse Block on page 5-122.
3-5
Page 124 of 450
Turn and Lane-Change Signals
To signal a turn, move the turn signal lever located on
the left side of the steering column all the way up
or down. The lever returns automatically when the turn
is complete.
An arrow on the instrument
panel cluster will �ash in
the direction of the
turn or lane change.
If the vehicle is equipped with the Head-Up-Display
(HUD), a right or left turn signal will appear in the
HUD area when making turns or lane changes.
SeeHead-Up Display (HUD) on page 3-23for more
information.
Raise or lower the lever until the arrow starts to �ash
to signal a lane change. Hold it there until the lane
change is complete. The lever returns to its original
position when it is released.Arrows that �ash rapidly when signaling for a turn or
lane change may be caused by a burned-out signal bulb.
Other drivers will not see the signal.
Replace burned-out bulbs to help avoid possible
accidents. SeeReplacement Bulbs on page 5-60,
Front Turn Signal, Parking and Fog Lamps on
page 5-57, andTaillamps, Turn Signal, and Stoplamps
on page 5-58. Also, check the fuse for burned-out
bulbs if a turn signal arrow fails to work when signaling
a turn. SeeFuses and Circuit Breakers on page 5-121
for location information.
Turn Signal On Chime
If the turn signal is left on for more than 0.75 of a mile
(1.21 km), a warning chime will sound and the TURN
SIGNAL ON warning message will appear on the
Driver Information Center (DIC) display. See “Turn
Signal On” underDIC Warnings and Messages
on page 3-67.
3-8
Page 125 of 450
Headlamp High/Low-Beam Changer
Push forward on the exterior lamps control lever to
change the headlamps from low to high-beam. Pull the
lever back and then release it to change from high
to low-beam.
This symbol appears on
the instrument panel
cluster when the
high-beam headlamps
are on.
When the high-beam headlamps are on, the fog lamps
will not be on. If the vehicle is equipped with the
Head-Up-Display (HUD) an arrow will appear in the
HUD area indicating that the high-beams are on.
SeeHead-Up Display (HUD) on page 3-23for more
information.
Flash-to-Pass
This feature allows the use of the high-beam headlamps
to signal the driver in front of you that you want to pass.
Pull and hold the exterior lamps control lever to use this
feature. When this is done, the following will occur:
The high-beam headlamps will turn on, while
the headlamps are off, in low-beam, or in Daytime
Running Lamps (DRL) mode. They will stay on
as long as the lever is held in this position. Release
the lever to turn them off.
The headlamps will switch to low beam if the
headlamps had been in the high-beam mode.
To return to high-beam, push the lever.
If the vehicle is equipped with the Head-Up Display
(HUD), an arrow will appear on the display to indicate
that the high beams are on.
3-9
Page 127 of 450
x(Delay Adjustment):Turn the band, located on
the left of the windshield wiper lever, to set the length of
the delay between wiper cycles when using the delay
feature. There are �ve delay adjustment settings.
Turn the band up to make the delays shorter in between
wiper cycles. Turn the band down to make the delays
longer between wiper cycles. The windshield wiper lever
must be in delay for this feature to work.
6(Low Speed):Push the lever up to the
second position for steady wiping cycles at a slow
speed.
1(High Speed):Push the lever up to the
third position for steady wiping cycles at a high speed.
7(Mist):For a single wiping cycle, push the
lever down once and let go. The wipers will stop after
one cycle. For additional cycles, hold the lever down.
About 30 seconds after the wipers are on, the
headlamps, taillamps, and instrument panel lighting
will come on, and the Driver Information Center (DIC)
back lighting will decrease to the night time mode.
About ten seconds after the wipers are turned off, all
the lamps will go back to the AUTO (Automatic) mode.
SeeExterior Lamps on page 3-16.
Windshield Washer
{CAUTION:
In freezing weather, do not use your washer
until the windshield is warmed. Otherwise the
washer �uid can form ice on the windshield,
blocking your vision.
The windshield washer button is located at the end of
the windshield wiper lever.
K(Washer Fluid):Press this button to activate the
washer �uid to spray onto the windshield. The wipers
will run for a few cycles to clear the windshield. For more
wash cycles, press and hold the button.
If the vehicle is low on washer �uid, the LOW WASHER
FLUID message will appear on the Driver Information
Center (DIC) display. See “LOW WASHER FLUID”
underDIC Warnings and Messages on page 3-67for
more information.
3-11
Page 130 of 450
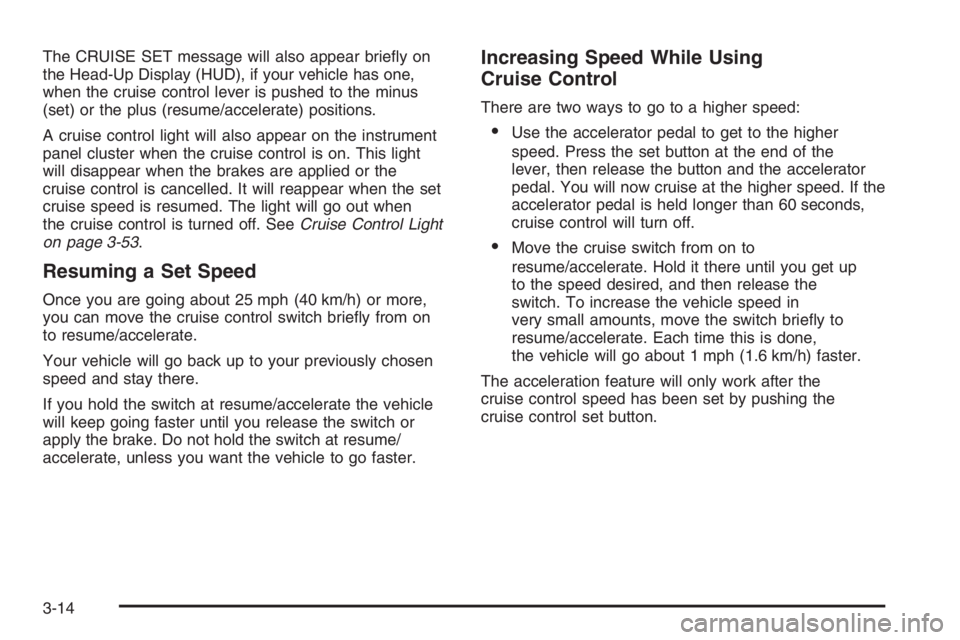
The CRUISE SET message will also appear brie�y on
the Head-Up Display (HUD), if your vehicle has one,
when the cruise control lever is pushed to the minus
(set) or the plus (resume/accelerate) positions.
A cruise control light will also appear on the instrument
panel cluster when the cruise control is on. This light
will disappear when the brakes are applied or the
cruise control is cancelled. It will reappear when the set
cruise speed is resumed. The light will go out when
the cruise control is turned off. SeeCruise Control Light
on page 3-53.
Resuming a Set Speed
Once you are going about 25 mph (40 km/h) or more,
you can move the cruise control switch brie�y from on
to resume/accelerate.
Your vehicle will go back up to your previously chosen
speed and stay there.
If you hold the switch at resume/accelerate the vehicle
will keep going faster until you release the switch or
apply the brake. Do not hold the switch at resume/
accelerate, unless you want the vehicle to go faster.
Increasing Speed While Using
Cruise Control
There are two ways to go to a higher speed:
Use the accelerator pedal to get to the higher
speed. Press the set button at the end of the
lever, then release the button and the accelerator
pedal. You will now cruise at the higher speed. If the
accelerator pedal is held longer than 60 seconds,
cruise control will turn off.
Move the cruise switch from on to
resume/accelerate. Hold it there until you get up
to the speed desired, and then release the
switch. To increase the vehicle speed in
very small amounts, move the switch brie�y to
resume/accelerate. Each time this is done,
the vehicle will go about 1 mph (1.6 km/h) faster.
The acceleration feature will only work after the
cruise control speed has been set by pushing the
cruise control set button.
3-14
Page 132 of 450
Exterior Lamps
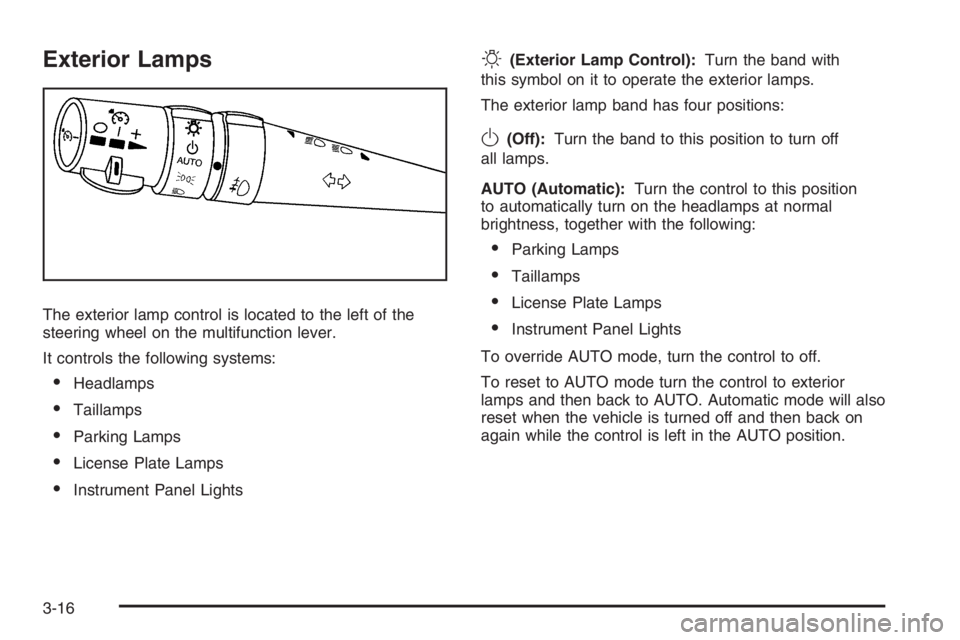
The exterior lamp control is located to the left of the
steering wheel on the multifunction lever.
It controls the following systems:
Headlamps
Taillamps
Parking Lamps
License Plate Lamps
Instrument Panel Lights
O(Exterior Lamp Control):Turn the band with
this symbol on it to operate the exterior lamps.
The exterior lamp band has four positions:
O(Off):Turn the band to this position to turn off
all lamps.
AUTO (Automatic):Turn the control to this position
to automatically turn on the headlamps at normal
brightness, together with the following:
Parking Lamps
Taillamps
License Plate Lamps
Instrument Panel Lights
To override AUTO mode, turn the control to off.
To reset to AUTO mode turn the control to exterior
lamps and then back to AUTO. Automatic mode will also
reset when the vehicle is turned off and then back on
again while the control is left in the AUTO position.
3-16
Page 133 of 450
;(Parking Lamp):Turn the band to this position to
turn on the parking lamps together with the following:
Taillamps
License Plate Lamps
Instrument Panel Lights
The parking brake indicator light comes on and stays
on when the parking lamps are on with the engine
in LOCK/OFF and the ignition to ACC/ACCESSORY.
5(Headlamps):Turn the control to this position
to turn on the headlamps together with the following
lamps listed below. A warning chime sounds if the
driver’s door is opened while the ignition switch is off
and the headlamps are on.
Parking Lamps
Taillamps
License Plate Lamps
Instrument Panel Lights
Headlamps on Reminder
A warning chime will sound if the vehicle’s ignition is
off and the driver’s door is opened when the exterior
lamp control is left on in either the headlamp or
parking lamp position.
Daytime Running Lamps (DRL)
Daytime Running Lamps (DRL) can make it easier
for others to see the front of your vehicle during the day.
DRL can be helpful in many different driving conditions,
but they can be especially helpful in the short periods
after dawn and before sunset. Daytime running
lamps are required to function at all times on all
vehicles �rst sold in Canada.
A light sensor on top of the instrument panel makes
the DRL work, so be sure it is not covered.
The DRL system will make the low-beam headlamps
come on at reduced brightness when the following
conditions are met:
The ignition is on.
The exterior lamps control is off.
The parking brake is released.
While the DRL are on, only the vehicle’s low-beam
headlamps will be on at reduced brightness. The turn
signal, taillamps, sidemarker and other lamps will not be
on. The instrument panel cluster will not be lit up either.
3-17
Page 134 of 450
When it is dark enough outside, the DRL will turn off
and the vehicle’s headlamps and parking lamps will turn
on. The other lamps that come on with the headlamps
will also come on.
When it is bright enough outside, the headlamps will go
off and the DRL will come on.
To idle the vehicle with the DRL off, turn the exterior
lamp control off and then do one of the following:
Turn the exterior lamp control to the parking
lamp position.
Turn the exterior lamp control to the headlamp
position.
Turn the exterior lamp control from AUTO to off
and back to AUTO.
This feature is not available for vehicles �rst sold in
Canada.
To turn off the automatic headlamp feature when it is
dark outside, move the exterior lamp control to the
parking lamp position. The parking lamps will remain
illuminated and the headlamps will turn off. The
fog lamps will also go on if they were on previously.
As with any vehicle, the regular headlamp system
should be turned on when needed.
Fog Lamps
If equipped, fog lamps provide brighter roadway lighting
for better vision in foggy or misty conditions.
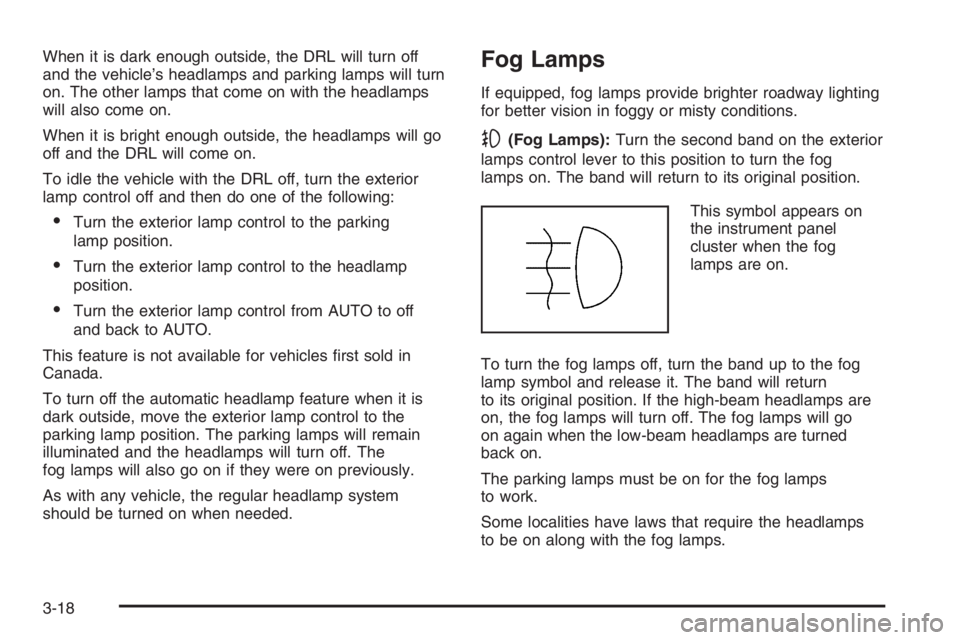
-(Fog Lamps):Turn the second band on the exterior
lamps control lever to this position to turn the fog
lamps on. The band will return to its original position.
This symbol appears on
the instrument panel
cluster when the fog
lamps are on.
To turn the fog lamps off, turn the band up to the fog
lamp symbol and release it. The band will return
to its original position. If the high-beam headlamps are
on, the fog lamps will turn off. The fog lamps will go
on again when the low-beam headlamps are turned
back on.
The parking lamps must be on for the fog lamps
to work.
Some localities have laws that require the headlamps
to be on along with the fog lamps.
3-18
Page 135 of 450
Exterior Lighting Battery Saver
If the parking lamps or headlamps have been left on
after the ignition has been turned to off, the exterior
lamps will turn off after about 10 minutes. This protects
the battery from being drained.
Use the exterior lamp control to turn the lamps back on,
if they are still needed.
Interior Lamps
The interior lamps can be controlled, or automatically
turn on or off under certain conditions. They are
explained in the following text.
Instrument Panel Brightness
This feature controls the brightness of the instrument
panel lights.
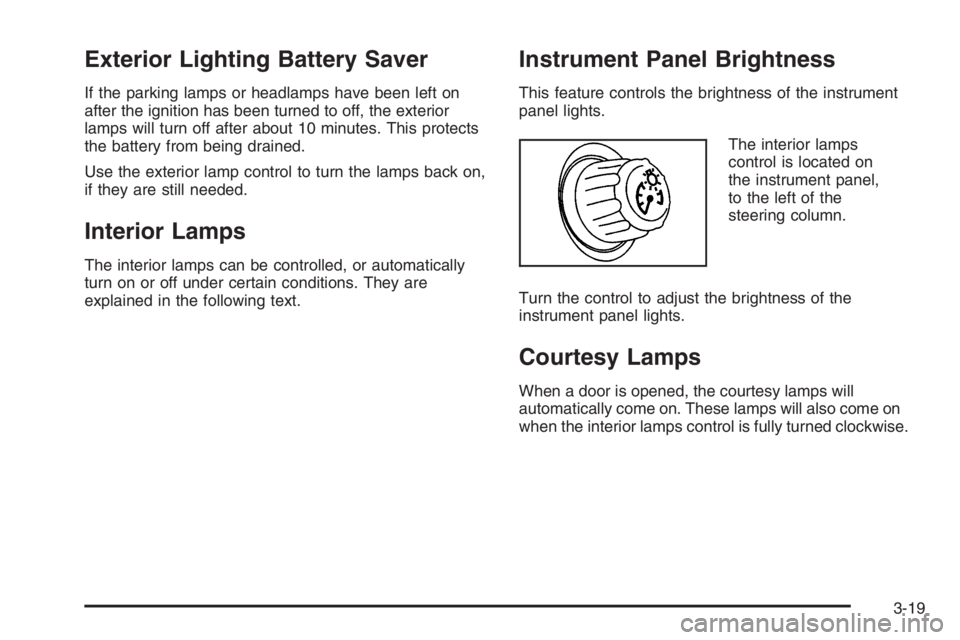
The interior lamps
control is located on
the instrument panel,
to the left of the
steering column.
Turn the control to adjust the brightness of the
instrument panel lights.
Courtesy Lamps
When a door is opened, the courtesy lamps will
automatically come on. These lamps will also come on
when the interior lamps control is fully turned clockwise.
3-19
Page 139 of 450
Head-Up Display (HUD)
{CAUTION:
If the HUD image is too bright or too high in
your �eld of view, it may take you more time
to see things you need to see when it is dark
outside. Be sure to keep the HUD image dim
and placed low in your �eld of view.
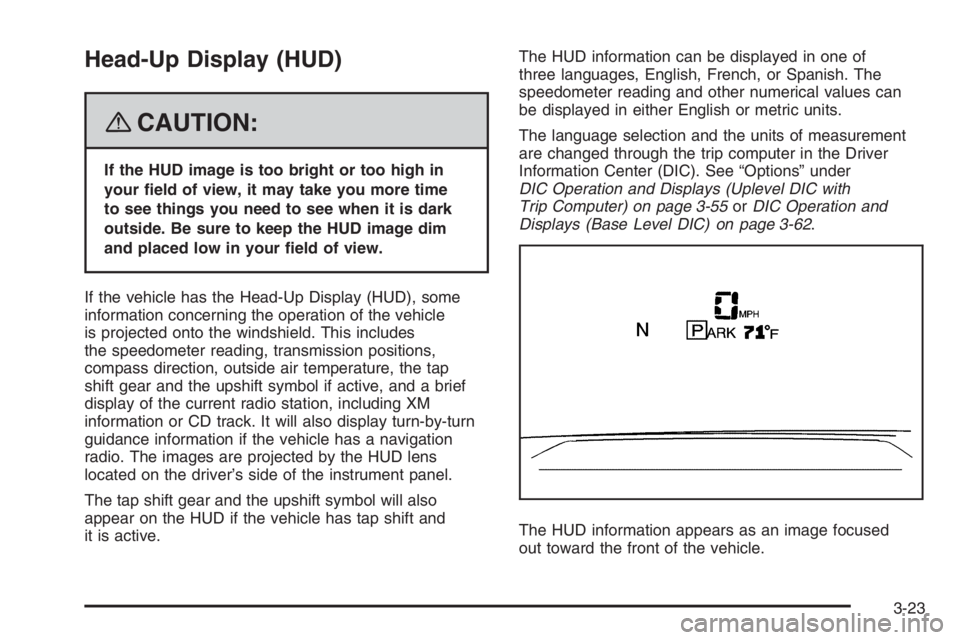
If the vehicle has the Head-Up Display (HUD), some
information concerning the operation of the vehicle
is projected onto the windshield. This includes
the speedometer reading, transmission positions,
compass direction, outside air temperature, the tap
shift gear and the upshift symbol if active, and a brief
display of the current radio station, including XM
information or CD track. It will also display turn-by-turn
guidance information if the vehicle has a navigation
radio. The images are projected by the HUD lens
located on the driver’s side of the instrument panel.
The tap shift gear and the upshift symbol will also
appear on the HUD if the vehicle has tap shift and
it is active.The HUD information can be displayed in one of
three languages, English, French, or Spanish. The
speedometer reading and other numerical values can
be displayed in either English or metric units.
The language selection and the units of measurement
are changed through the trip computer in the Driver
Information Center (DIC). See “Options” under
DIC Operation and Displays (Uplevel DIC with
Trip Computer) on page 3-55orDIC Operation and
Displays (Base Level DIC) on page 3-62.
The HUD information appears as an image focused
out toward the front of the vehicle.
3-23