hood release PONTIAC GTO 2006 Owners Manual
[x] Cancel search | Manufacturer: PONTIAC, Model Year: 2006, Model line: GTO, Model: PONTIAC GTO 2006Pages: 326, PDF Size: 1.62 MB
Page 136 of 326
Trip Computer Warning Messages
The following messages may appear on the center trip
computer display located on the instrument panel
cluster. If a message is active, it will appear on the
display for 10 seconds, unless the trip computer MODE
button is pressed. Pressing the MODE button will
acknowledge and clear messages from the display.
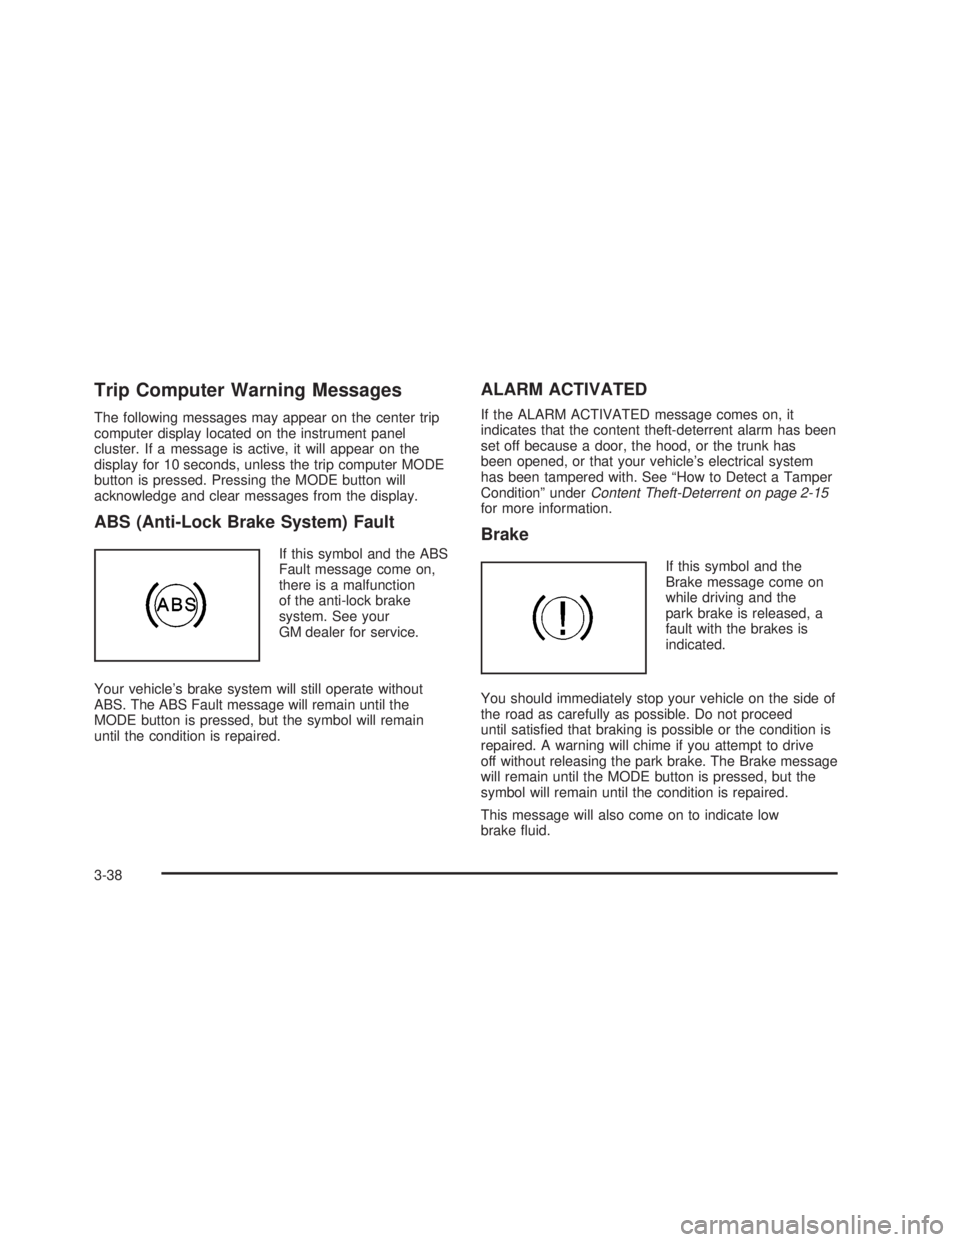
ABS (Anti-Lock Brake System) Fault
If this symbol and the ABS
Fault message come on,
there is a malfunction
of the anti-lock brake
system. See your
GM dealer for service.
Your vehicle's brake system will still operate without
ABS. The ABS Fault message will remain until the
MODE button is pressed, but the symbol will remain
until the condition is repaired.
ALARM ACTIVATED
If the ALARM ACTIVATED message comes on, it
indicates that the content theft-deterrent alarm has been
set off because a door, the hood, or the trunk has
been opened, or that your vehicle's electrical system
has been tampered with. See ªHow to Detect a Tamper
Conditionº under
Content Theft-Deterrent on page 2-15for more information.
Brake
If this symbol and the
Brake message come on
while driving and the
park brake is released, a
fault with the brakes is
indicated.
You should immediately stop your vehicle on the side of
the road as carefully as possible. Do not proceed
until satis®ed that braking is possible or the condition is
repaired. A warning will chime if you attempt to drive
off without releasing the park brake. The Brake message
will remain until the MODE button is pressed, but the
symbol will remain until the condition is repaired.
This message will also come on to indicate low
brake ¯uid.
3-38
2006 - Pontiac GTO Owner Manual
Page 191 of 326
Service............................................................5-3
Accessories and Modi®cations..........................5-3
California Proposition 65 Warning.....................5-3
Doing Your Own Service Work.........................5-4
Adding Equipment to the Outside of Your
Vehicle......................................................5-5
Fuel................................................................5-5
Gasoline Octane............................................5-5
Gasoline Speci®cations....................................5-5
California Fuel...............................................5-6
Additives.......................................................5-6
Fuels in Foreign Countries...............................5-7
Filling the Tank..............................................5-8
Filling a Portable Fuel Container.....................5-10
Checking Things Under the Hood....................5-10
Hood Release..............................................5-11
Engine Compartment Overview.......................5-12
Engine Oil...................................................5-13
Engine Oil Life System..................................5-16
Engine Air Cleaner/Filter................................5-18
Automatic Transmission Fluid.........................5-19
Manual Transmission Fluid.............................5-21
Hydraulic Clutch...........................................5-22
Engine Coolant.............................................5-23
Radiator Pressure Cap..................................5-26
Engine Overheating.......................................5-26Cooling System............................................5-29
Power Steering Fluid.....................................5-33
Windshield Washer Fluid................................5-34
Brakes........................................................5-35
Battery........................................................5-38
Jump Starting...............................................5-39
Headlamp Aiming...........................................5-44
Bulb Replacement..........................................5-46
Halogen Bulbs..............................................5-46
Headlamps..................................................5-46
Front Turn Signal and Parking Lamps..............5-48
Taillamps, Turn Signal, Stoplamps and
Back-up Lamps.........................................5-49
Replacement Bulbs.......................................5-50
Windshield Wiper Blade Replacement..............5-51
Tires..............................................................5-52
Tire Sidewall Labeling...................................5-54
Tire Terminology and De®nitions.....................5-56
In¯ation - Tire Pressure.................................5-59
Tire Inspection and Rotation...........................5-62
When It Is Time for New Tires.......................5-63
Buying New Tires.........................................5-64
Different Size Tires and Wheels......................5-65
Uniform Tire Quality Grading..........................5-66
Wheel Alignment and Tire Balance..................5-67
Wheel Replacement......................................5-67
Section 5 Service and Appearance Care
5-1
2006 - Pontiac GTO Owner Manual
Page 201 of 326
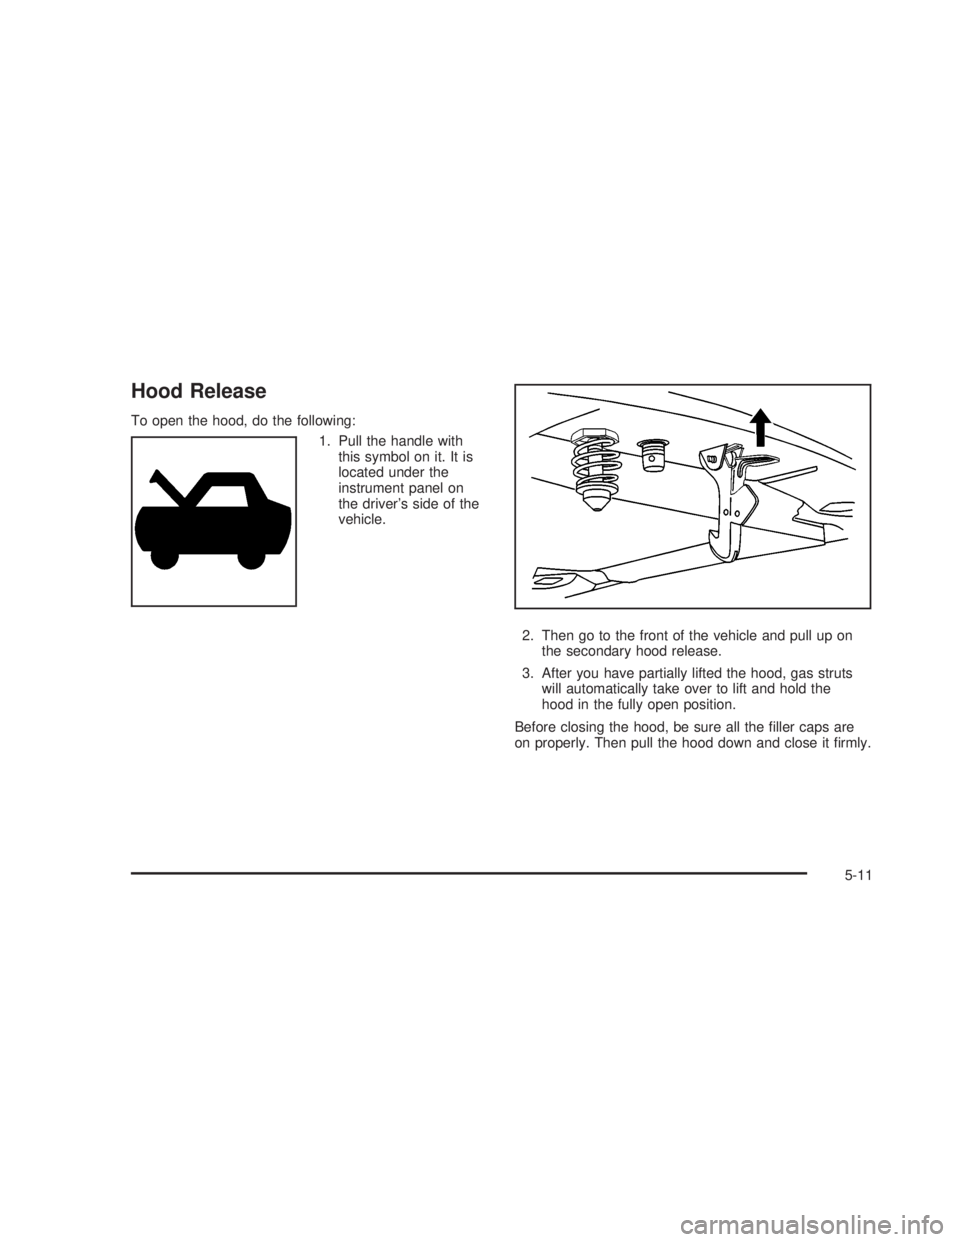
Hood Release
To open the hood, do the following:
1. Pull the handle with
this symbol on it. It is
located under the
instrument panel on
the driver's side of the
vehicle.
2. Then go to the front of the vehicle and pull up on
the secondary hood release.
3. After you have partially lifted the hood, gas struts
will automatically take over to lift and hold the
hood in the fully open position.
Before closing the hood, be sure all the ®ller caps are
on properly. Then pull the hood down and close it ®rmly.
5-11
2006 - Pontiac GTO Owner Manual
Page 234 of 326

To adjust the vertical aim on the headlamps, do the
following:
1. Open the hood. See
Hood Release on page 5-11for more information.
2. Find the aim dot on the lens of the low-beam
headlamp.
3. Measure the distance from the ground to the aim
dot on the low-beam headlamp. Record the
distance.
4. At the wall or other ¯at surface, measure from the
ground upward the recorded distance from Step 2
and mark it.
5. Draw or tape a horizontal line the width of the
vehicle at the wall or other ¯at surface where it
was marked it Step 4.
Notice:Do not cover a headlamp to improve beam
cut-off when aiming. Covering a headlamp may
cause excessive heat build-up which may cause
damage to the headlamp.
6. Turn on the low-beam headlamps and place a
piece of cardboard or equivalent in front of the
headlamp not being aimed. This should allow only
the beam of light from the headlamp being
aimed to be seen on the ¯at surface.
7. Locate the vertical headlamp aiming screws, which
are under the hood near each headlamp assembly.
The adjustment screw can be turned with a
No. 2 Phillips head screwdriver.
5-44
2006 - Pontiac GTO Owner Manual
Page 235 of 326
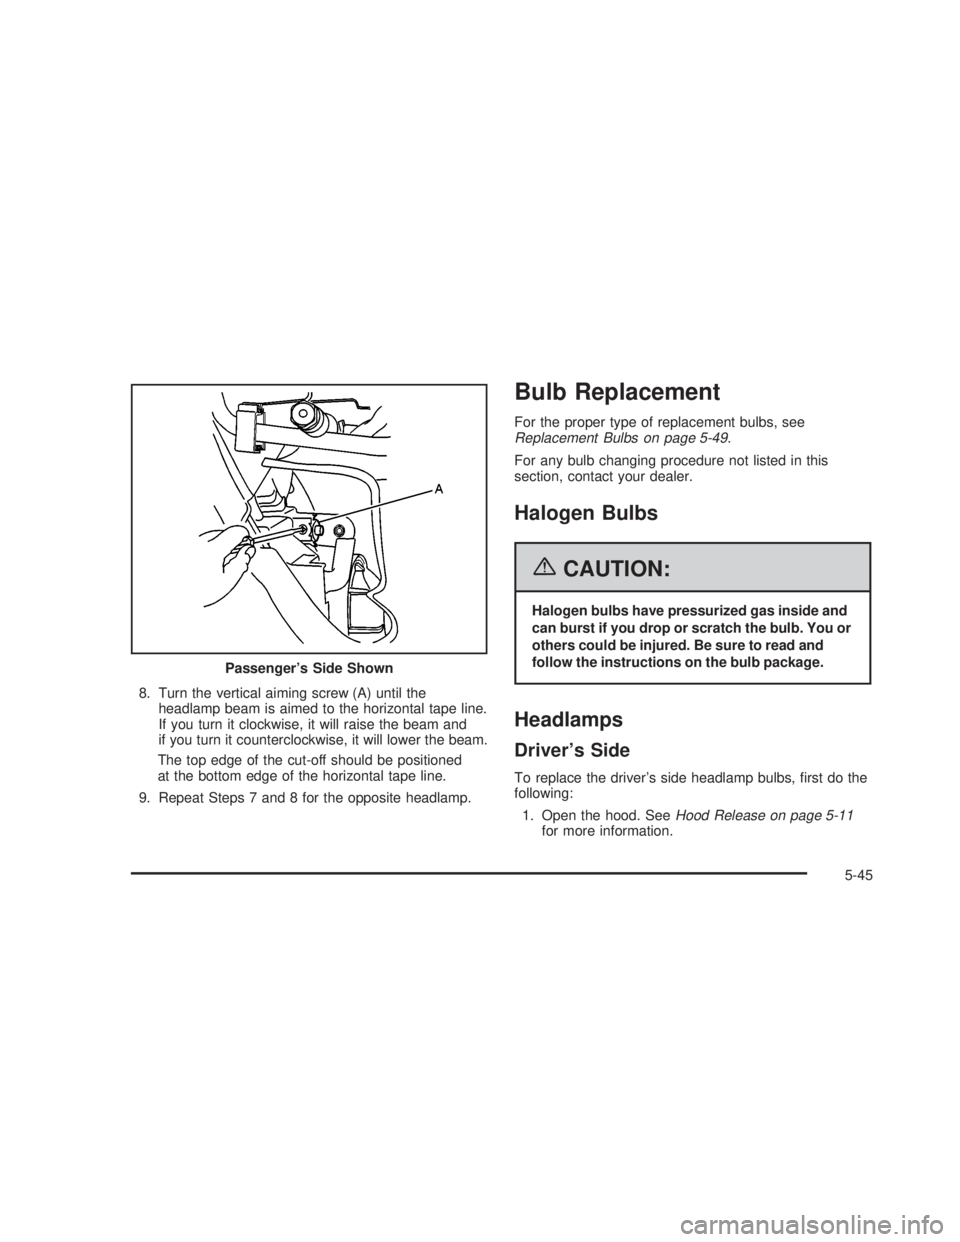
8. Turn the vertical aiming screw (A) until the
headlamp beam is aimed to the horizontal tape line.
If you turn it clockwise, it will raise the beam and
if you turn it counterclockwise, it will lower the beam.
The top edge of the cut-off should be positioned
at the bottom edge of the horizontal tape line.
9. Repeat Steps 7 and 8 for the opposite headlamp.
Bulb Replacement
For the proper type of replacement bulbs, seeReplacement Bulbs on page 5-49.
For any bulb changing procedure not listed in this
section, contact your dealer.
Halogen Bulbs
{CAUTION:
Halogen bulbs have pressurized gas inside and
can burst if you drop or scratch the bulb. You or
others could be injured. Be sure to read and
follow the instructions on the bulb package.
Headlamps
Driver's Side
To replace the driver's side headlamp bulbs, ®rst do the
following:
1. Open the hood. See
Hood Release on page 5-11for more information. Passenger's Side Shown
5-45
2006 - Pontiac GTO Owner Manual
Page 236 of 326
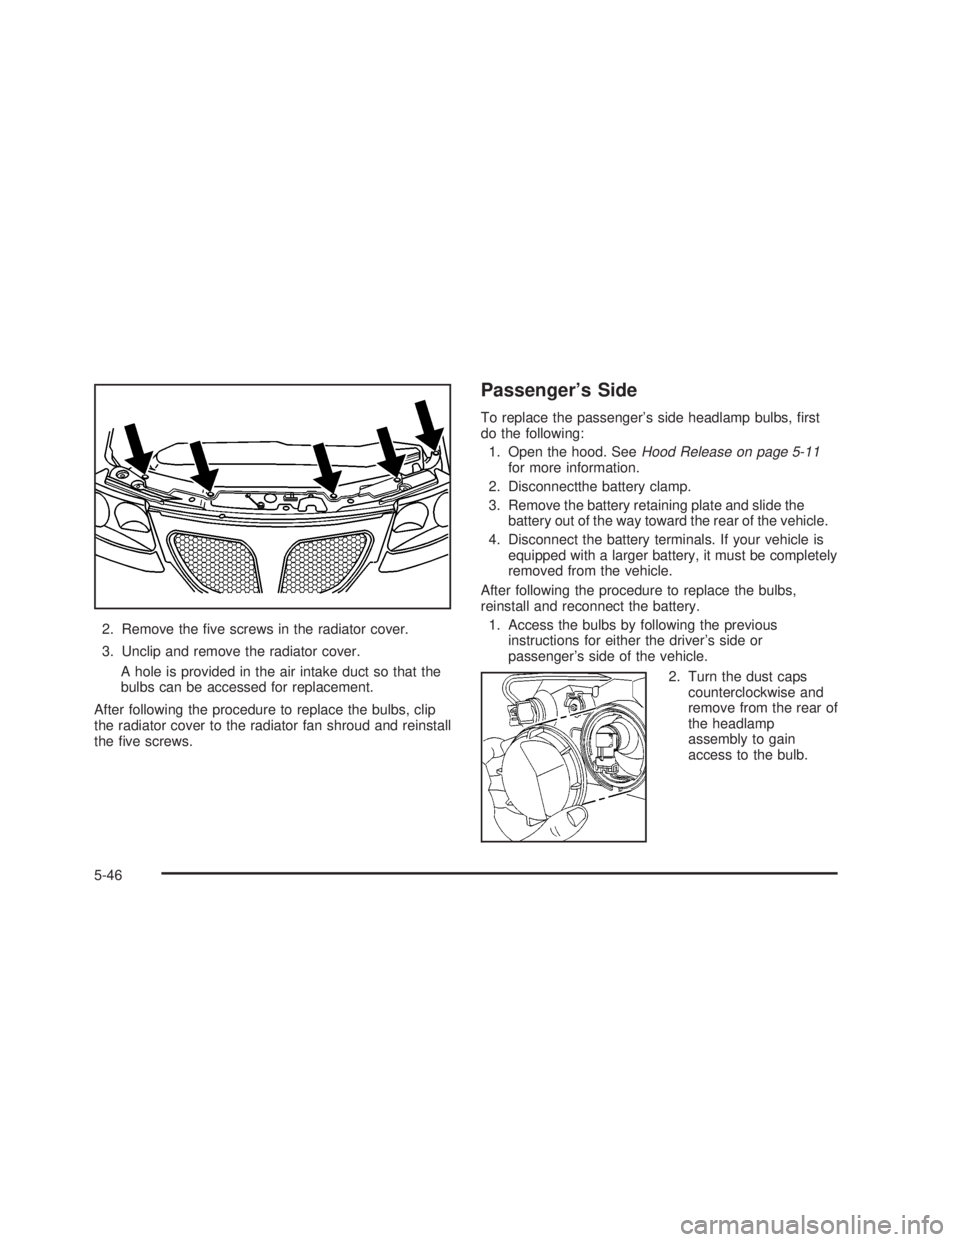
2. Remove the ®ve screws in the radiator cover.
3. Unclip and remove the radiator cover.
A hole is provided in the air intake duct so that the
bulbs can be accessed for replacement.
After following the procedure to replace the bulbs, clip
the radiator cover to the radiator fan shroud and reinstall
the ®ve screws.
Passenger's Side
To replace the passenger's side headlamp bulbs, ®rst
do the following:
1. Open the hood. See
Hood Release on page 5-11for more information.
2. Disconnectthe battery clamp.
3. Remove the battery retaining plate and slide the
battery out of the way toward the rear of the vehicle.
4. Disconnect the battery terminals. If your vehicle is
equipped with a larger battery, it must be completely
removed from the vehicle.
After following the procedure to replace the bulbs,
reinstall and reconnect the battery.
1. Access the bulbs by following the previous
instructions for either the driver's side or
passenger's side of the vehicle.
2. Turn the dust caps
counterclockwise and
remove from the rear of
the headlamp
assembly to gain
access to the bulb.
5-46
2006 - Pontiac GTO Owner Manual
Page 237 of 326
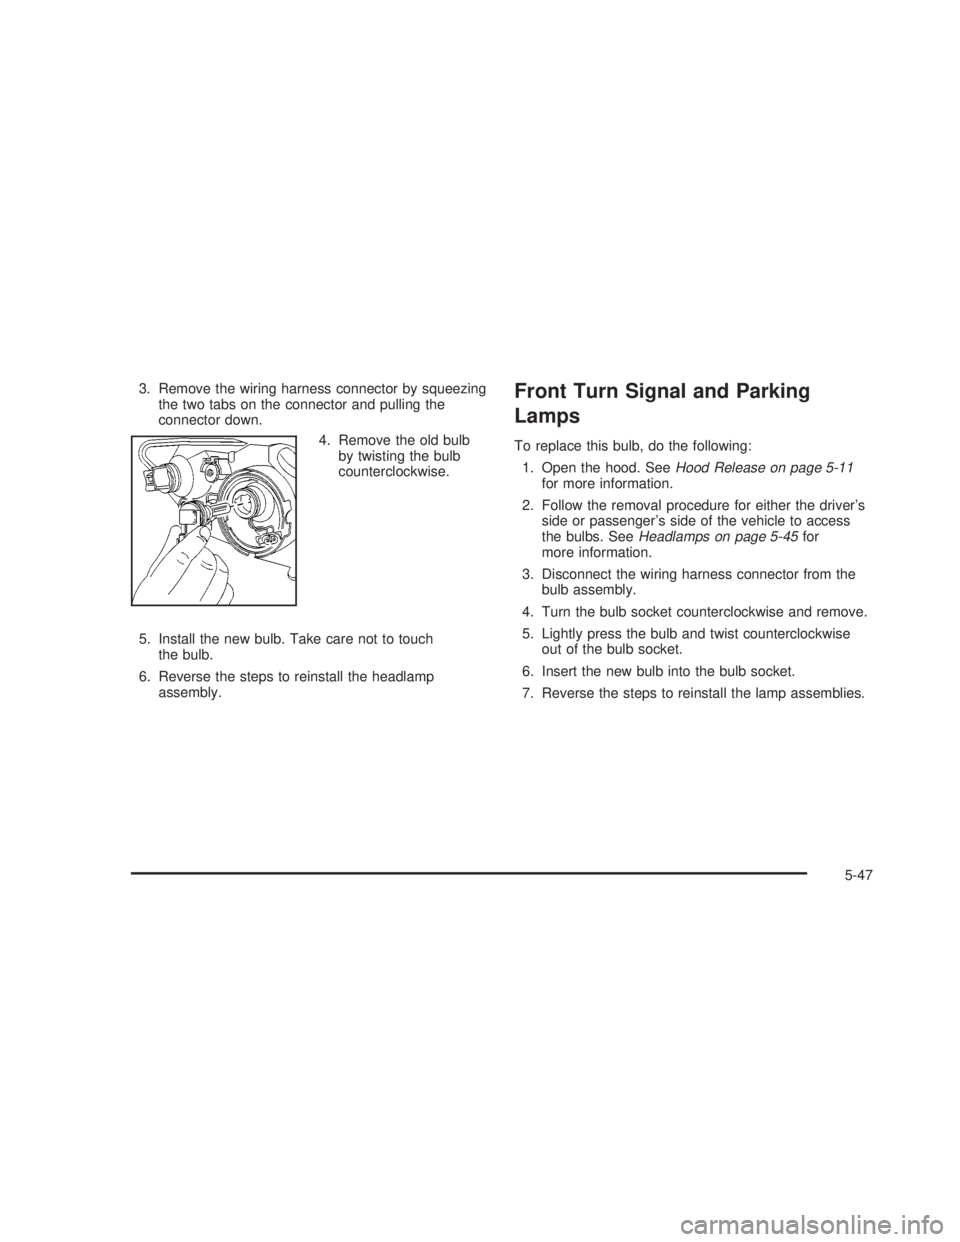
3. Remove the wiring harness connector by squeezing
the two tabs on the connector and pulling the
connector down.
4. Remove the old bulb
by twisting the bulb
counterclockwise.
5. Install the new bulb. Take care not to touch
the bulb.
6. Reverse the steps to reinstall the headlamp
assembly.Front Turn Signal and Parking
Lamps
To replace this bulb, do the following:
1. Open the hood. See
Hood Release on page 5-11for more information.
2. Follow the removal procedure for either the driver's
side or passenger's side of the vehicle to access
the bulbs. See
Headlamps on page 5-45for
more information.
3. Disconnect the wiring harness connector from the
bulb assembly.
4. Turn the bulb socket counterclockwise and remove.
5. Lightly press the bulb and twist counterclockwise
out of the bulb socket.
6. Insert the new bulb into the bulb socket.
7. Reverse the steps to reinstall the lamp assemblies.
5-47
2006 - Pontiac GTO Owner Manual
Page 293 of 326

Usage Fluid/Lubricant
Manual
TransmissionDEXRONž-III Automatic
Transmission Fluid. Look for
ªApproved for the H-Speci®cationº
on the label.
Automatic
TransmissionDEXRON
ž-VI Automatic
Transmission Fluid.
Key Lock
CylindersMulti-Purpose Lubricant, Superlube
(GM Part No. U.S. 12346241, in
Canada 10953474).
Rear AxleSAE 75W-140 GL-5 Synthetic Gear
Oil (GM Part No. 89021809). With a
complete drain and re®ll add 1 oz.
(25 ml) of Limited-Slip Differential
Friction Modi®er 7098
(GM Part No. 89021958).
Usage Fluid/Lubricant
Hood Latch
Assembly,
Secondary
Latch, Pivots,
Spring Anchor,
and Release
PawlLubriplate Lubricant Aerosol
(GM Part No. U.S. 12346293, in
Canada 992723) or lubricant
meeting requirements of NLGI #2,
Category LB or GC-LB.
Hood and Door
HingesMulti-Purpose Lubricant, Superlube
(GM Part No. U.S. 12346241, in
Canada 10953474).
Weatherstrip
ConditioningDielectric Silicone Grease
(GM Part No. U.S. 12345579, in
Canada 992887).
6-13
2006 - Pontiac GTO Owner Manual
Page 320 of 326
H
Hazard Warning Flashers................................... 3-6
Head Restraints............................................... 1-4
Headlamp
Aiming.......................................................5-43
Headlamps............................................3-13, 5-45
Automatic Headlamp System.........................3-14
Bulb Replacement.......................................5-45
Daytime Running Lamps...............................3-14
Flash-to-Pass............................................... 3-9
Front Turn Signal and Parking Lamps.............5-47
Halogen Bulbs............................................5-45
High/Low Beam Changer................................ 3-8
Heater...........................................................3-19
Highbeam On Light.........................................3-31
Highway Hypnosis...........................................4-21
Hill and Mountain Roads..................................4-22
Hood
Checking Things Under................................5-10
Release.....................................................5-11
Horn............................................................... 3-6
How to Use This Manual...................................... ii
How to Wear Safety Belts Properly...................1-11
Hydraulic Clutch.............................................5-22
I
Ignition Positions.............................................2-16
Immobilizer....................................................2-14
Immobilizer Operation......................................2-14
Infants and Young Children, Restraints...............1-28
In¯ation - Tire Pressure...................................5-58
Instrument Panel
Overview..................................................... 3-4
Instrument Panel (I/P)
Brightness..................................................3-15
Cluster.......................................................3-23
J
Jump Starting.................................................5-38
K
Keyless Entry System....................................... 2-4
Keys............................................................... 2-2
6
2006 - Pontiac GTO Owner Manual