ECO mode PONTIAC PONTIAC 1997 Owners Manual
[x] Cancel search | Manufacturer: PONTIAC, Model Year: 1997, Model line: PONTIAC, Model: PONTIAC PONTIAC 1997Pages: 419, PDF Size: 19.67 MB
Page 97 of 419
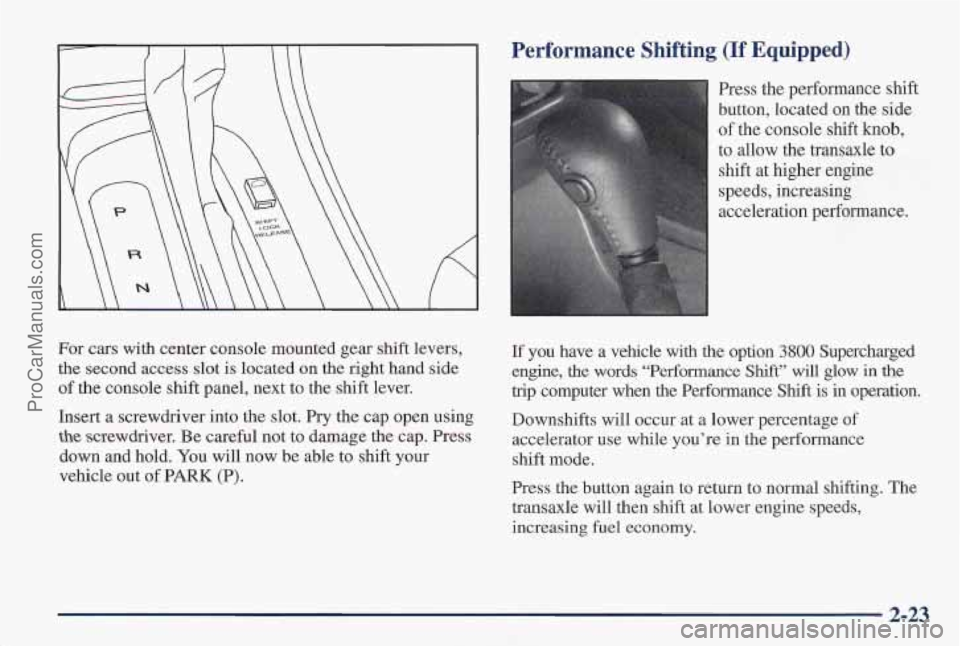
For cars with center console mounted gear shift levers,
the second access slot is located on the right hand side
of the console shift panel, next to the shift lever.
Insert a screwdriver into the slot. Pry the cap open using
the screwdriver. Be careful not to damage the cap. Press
down and hold. You will now be able to shift your
vehicle out of PARK (P).
Performance Shifting (If Equipped)
Press the performance shift
button, located on the side
of the console shift knob,
to allow the transaxle
to
shift at higher engine
speeds, increasing
acceleration performance.
If you have a vehicle with the option 3800 Supercharged
engine,
the words “Performance Shift” will glow in the
trip computer when the Performance Shift is in operation.
Downshifts will occur at a lower percentage of
accelerator use while you’re in the performance
shift mode.
Press the button again to return to normal shifting. The
transaxle will then shift at lower engine speeds,
increasing fuel economy.
2-23
ProCarManuals.com
Page 120 of 419
To change the factory setting while in the programming
mode do the following:
1. Tun the interior lamps dial all the way to the right
and then back slightly
to the left.
2. Count the number of chimes you hear. The number
of chimes tells you which mode your vlehide is set
for. You change the mode by turning the interior
lamps dial all
the way to the right and then back
slightly
to the left.
3. Repeat step 2 until you hear the number of chimes
Mode 1: Both Off (The interior lamps will turn on OF off
at the same instant that a door is opened or closed).
Mode 2: Delayed Illumination Only (The interior lamps
will
stay on for about 25 seconds after all the doors are
closed, or until you lock the doors).
that matches the mode you want.
Mode 3: Exit Lighting Only (The interim lamps will
come on whenever you remwe
the key from the ignition
and stay on for about 25 seconds, or until you lock
the doors).
Mode 4: Both On (This combines modes 2 and 3).
Automatic Door Locks
A CAUTION:
Unlocked doors can be dangerous.
Passengers-especially children-can easily fall
out. When
a door is locked, the inside handle
won’t open it.
Outsiders can easily enter through an unlocked
door when you slow down or stop your vehicle.
This may
not be so obvious: You increase the
chance
of being thrown out of the vehicle in a
crash
if the doors aren’t locked, Wear safety belts
properly, lock your doors, and you will be far
better off whenever you drive your vehicle.
2-46
ProCarManuals.com
Page 122 of 419
Lockout DeterrenULast Door
CIosed Locking
Your vehicle comes with this feature set in Mode 2. This
means that:
If you leave your keys in the ignition and get out of
the driver’s door, you won’t be able to lock the doors
with the power door locks and
To change the factory setting, do the following:
1. Press UNLOCK on the power lock switch.
2. Count the number of chimes you hear. The nurnber of
chimes tells you which mode your vehcle is set for.
You change the mode by pressing UNLOCK again.
3. Repeat step 2 until you hear the number of chimes
that matches the mode you want.
Mode 1: Both Off (Doors will always lock immediately
when you press
LOCK on the power lock switch or the
key chain transmitter, if equipped).
Mode 2: Lockout Deterrent Only (If you leave your key
in the ignition with the driver’s door
open, you will not
be able to lock the doors using your
power locks).
Mode 3: Last Door Closed Locking Only (If the power
lock switch or
key chain transmitter (if equipped) is
used to lock the vehicle while any door is open and key
is out of ignition, you will hear three chimes. The doors
will not lock. Five seconds after the last door
is closed,
all doors will lock).
Mode 4: Both On (This combines modes 2 and 3).
Remote Driver’s Unlock Control
Your vehicle comes with this feature set in Mode 2. This
means that:
0 When you press UNLOCK on your key chain
When you press UNLOCK on your key chain
transmitter,
the driver’s
door will unlock and
transmitter again, all doors will unlock,
2-48
ProCarManuals.com
Page 123 of 419
To change the factory setting while in the programming
mode, do the following:
1. Press UNLOCK on the key chain transmitter.
2. Count the number of chimes you hear. The number of
c?&mes tells you which mode your vehicle is set for.
You change
the mode by pressing UNLOCK again.
3. Repeat step 2 until you hear the number of chimes
Mode 1: Remote All Doors Unlock (When you press
UNLOCK on your key chain transmitter, all doors
will unlock).
Mode 2: Remote Driver’s Door and All Doors Unlock
(When you press UNLOCK on your key chain transmitter
once, the driver’s door will unlock. If you press UNLOCK
again within five seconds,
all doors will unlock.
Remote LocMUnlock Confirmation
Your vehicle comes with this feature set in Mode 4. This
means that:
When you use the key chain transmitter to lock your that matches
the mode you want.
vehicle, your headlamps will flash briefly to let you
know the command has been received. If you press
LOCK on the key chain transmitter again,
the horn will
sound briefly and
the headlamps will flash briefly to let
you know your vehicle is locked.
0 When you use the key chain transmitter to unlock
your vehicle or open your trunk,
your headlamps will
flash briefly.
To change the factory setting while in the programming
mode do the following:
1.
2.
3.
Press the LOCK button on the key chain transmitter.
Count the number
of chimes you hear. The number
of chimes tells you which mode your vehicle is set
for. You change the mode by pressing LOCK on
your key chain transmitter again.
Repeat step
2 until you hear the number of chimes
that matches the mode you want.
Mode 1: Off (Remote lock and unlock confirmation
are disabled).
Mode 2: Remote Lock Confirmation with Exterior
Lamps Only
Remote Lock Confirmation:
0 When you use the chain transmitter to lock your
vehicle, your headlamps will flash briefly to let you
know your command is received.
0 Remote Unlock confirmation: when you use the key
chain transmitter to unlock your vehicle
or open your
trunk, your headlamps will flash briefly to let you
know your command is received.
2-49
ProCarManuals.com
Page 124 of 419
Mode 3: Remote Lock Confirmation with Exterior
Lights and Horn
Remote Lock Confirmation: When you use the key
chain transmitter to lock your vehicle, the horn will
sound briefly and your headlamps will flash briefly
to let you know your command is received.
Remote Unlock confirmation: When you use the key
chain transmitter to unlock your vehicle or open your
trunk, your headlamps will flash briefly
to let you
know your command is received.
Mode 4: Remote Lock Confirmation with Exterior
Lights and Horn (on second LOCK press)
Remote Lock Confirmation: When you use the
key chain transmitter
to lock your vehicle, your
headlamps will flash briefly to let
you know your
command is received. The horn will sound briefly
and the headlamps will flash briefly if you press
the
LOCK button again within five seconds.
Remote Unlock Confirmation: When you use the key
chain transmitter to unlock your vehicle
or open your
trunk, your headlamps will flash briefly to let
you
know your command is received.
Content Theft
Your vehicle comes with this feature set in Mode 4. This
means that:
If anyone damages or enters your vehicle while your
Content Theft-Deterrent System is armed, an alarm
will sound and your headlamps will flash for up to
two minutes.
To change the factory setting while in the programming
mode, do the following:
1. Turn the parking lamps on, then off.
2. Count the number of chimes you hear. The number
of chimes tells you which mode your vehicle is set
for. You change the mode by turning the
park lamps
on, then off again.
3. Repeat step 2 until you hear the number of chimes
that matches the mode
you want.
Mode 1: Damage Detection with Less Sensitivity (If
anyone seriously damages your vehicle, tampers with
the trunk lock or opens a door while your theft deterrent
is armed, an alarm will sound and your headlamps will
flash for up to two minutes).
2-50
ProCarManuals.com
Page 125 of 419
Mode 2: Damage Detection Off (If anyone tampers with
your trunk lock or opens a door while your Content
Theft-Deterrent System is armed, an alarm will sound
and your headlamps will flash for up to two minutes).
Mode 3: All Off (Your Content Theft-Deterrent System
is always disarmed).
Mode 4: Damage Detection with More Sensitivity (If
anyone damages your vehicle, tampers with your trunk
lock or enters your vehicle while your theft deterrent
system is armed,
an alarm will sound and your
headlamps will flash for up
to two minutes).
Content Theft-Deterrent Arming
and Disarming
Your vehicle comes with this feature in Mode 1. This
means that:
0
0
0
your Lontent Theft-Deterrent System will arm when
you lock the doors using either the power lock
switch while any door is open and the key is
removed from
the ignition.
Your Content Theft-Deterrent System will arm when
you lock the doors with the key chain transmitter.
Your Content Theft-Deterrent System will disarm
when you unlock
the doors with your key or with
your key chain transmitter. To
change the factory setting, while in the programming
mode do the following:
1.
2.
3.
4.
5.
Insert your second key fully into any door key
cylinder and turn it to the unlock position. This step
is inconvenient, but necessary to prevent accidental
programming of this feature to Mode
2. Do not
program this feature to Mode
2 without first reading
the special note contained in the description for that
mode. The door key lock cylinder must remain in the
unlock position during steps
2-4.
Press the horn symbol on your key chain transmitter.
Count the number of chimes you hear. The number
of chimes tells you which mode your vehicle is set
for. You change the mode by pressing the horn
symbol on your key chain transmitter again.
Repeat step
3 until you hear the number of chimes
that matches the mode you want.
Remove your key from
the door key cylinder.
2-51
ProCarManuals.com
Page 155 of 419
ENG/MET RESET
~~
0 AVG ECON ORANGE CHECK
PRESS
TRAC INFORMATION
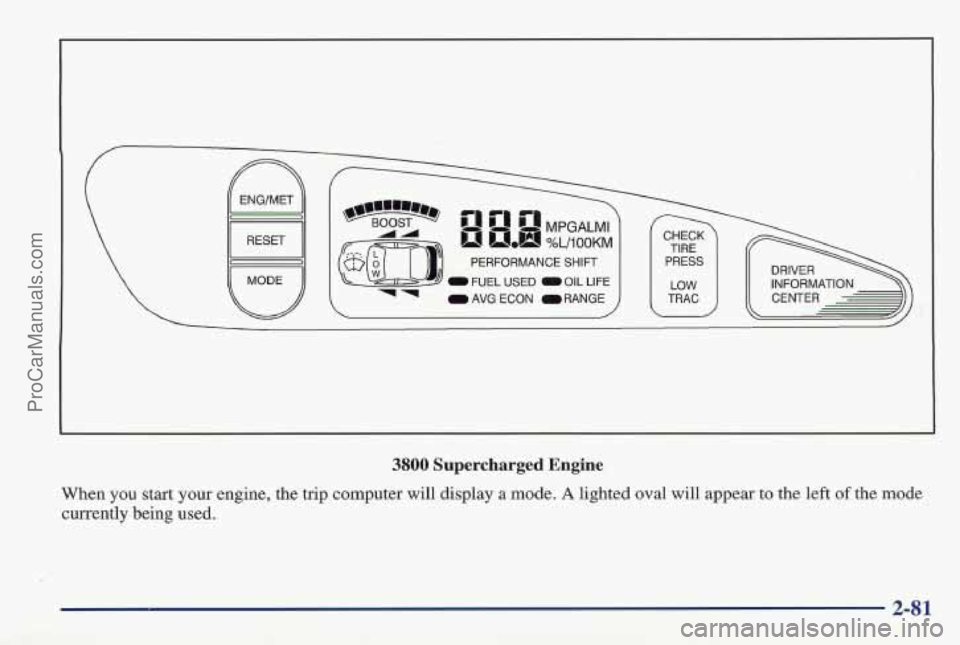
3800 Supercharged Engine
When
you start your engine, the trip computer will display a mode. A lighted oval will appear to the left of the mode
currently being used.
ProCarManuals.com
Page 156 of 419
Control Buttons
The trip computer has three buttons that control
its functions.
ENG/MET: Press this button to change the display from
English to metric units
or metric t’o English.
RESET Press this button for two seconds to reset the
mode displayed.
MODE: Press this button to change the mode
being displayed.
Functions
FUEL USED: Shows the total amount of fuel used
since you last reset this mode. The amount can be
displayed in gallons or liters.
AVG ECON: Shows your average fuel economy since
you last reset this mode.
OIL LIFE: Shows a percentage of the oil’s remaining
useful life. The system predicts remaining
oil life using
inputs from length of drives, coolant temperature,
engine rpm and vehicle speed. Each time
you get an oil
change,
be sure to reset this function so that it will give
you an accurate percentage.
To reset the ail life indicator after the oil has been
changed, press the mode button until the light appears
next to
O’IL LIFE. Press and hold the reset button for
three seconds. The oil life percentage should change
to
100%.
RANGE: Shows how much farther you can travel with
the fuel you have before refueling.
CHECK TIRE PREISS: This light alerts you that a tire
is low or flat, See “Check Tire Pressure Light” in
the Index.
LOW WASHER FLUID: This light will come on when
your ignition is on and the fluid container
is low.
DOOR A JAR: If one of your ‘doors is left ajar, a light
will appear next to that
door on the vehicle outline.
PERFORMANCE SHIFT This light comes on when
you press the performance shift button (located on the
console shift)
to indicate that your vehicle is in
performance shifting mode, See “Performance Shifting”
in the Index.
BOOST GAGE: If you have the supercharged engine,
this gage will show the amount of boost your engine
is receiving.
ProCarManuals.com
Page 163 of 419
0
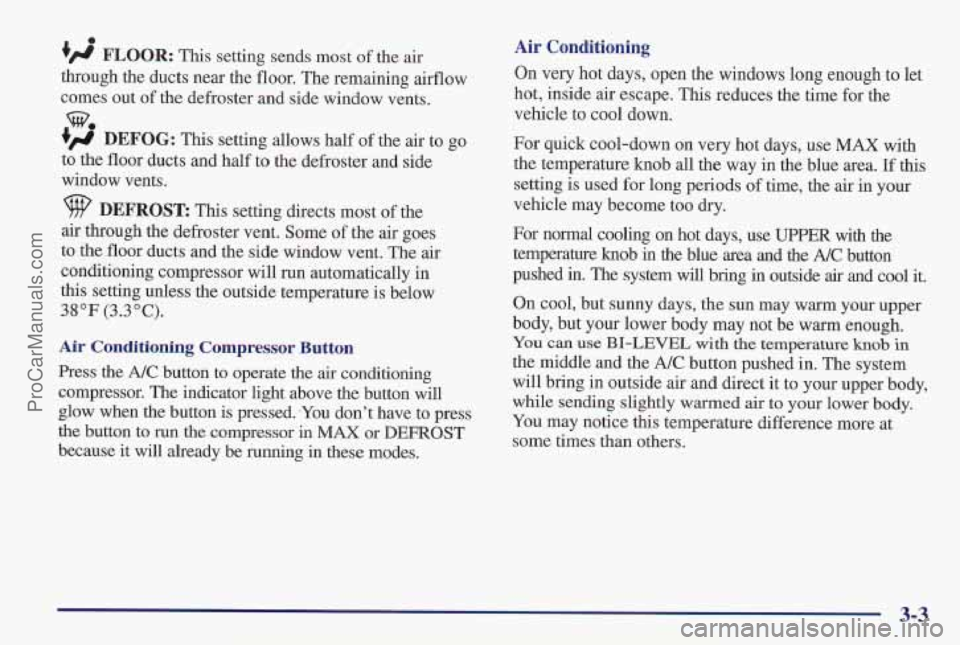
t' FLOOR: This setting sends most of the air
through the ducts near the floor. The remaining airflow
comes out of the defroster and side window vents.
4' DEFOG: This setting allows half of the air to go
to the
floor ducts and half to the defroster and side
window vents.
w.
DEFROST This setting directs most of the
air through the defroster vent. Some of the air goes
to the floor ducts and the side window vent. The air
conditioning compressor will run automatically in
this setting unless the outside temperature is below
38°F (3.3"C).
Air Conditioning COI - --- -1r Button
Press the A/C button to operate the air conditioning
compressor. The indicator light above the button will
glow when the button is pressed. ,You don't have to press
the button
to run the compressor in MAX or DEFROST
because
it will already be running in these modes.
Air Conditioning
On very hot days, open the windows long enough to let
hot, inside air escape. This reduces the time for the
vehicle
to cool down.
For quick cool-down on very hot days, use
MAX with
the temperature knob all the way in the blue area.
If this
setting is used
for long periods of time, the air in your
vehicle may become too dry.
For normal cooling on hot days, use UPPER with the
temperature knob in the blue area and the
A/C button
pushed in. The system will bring in outside
air and cool it.
On cool, but sunny days, the sun may warm your upper
body, but your lower body may not be warm enough.
You can use BI-LEVEL with the temperature knob in
the middle and the A/C button pushed in. The system
will bring in outside air and direct it to your upper body,
while sending slightly warmed air to your lower body.
You may notice this temperature difference more at
some times than others.
3-3
ProCarManuals.com
Page 165 of 419
Automatic Control Dual Zone Button Light
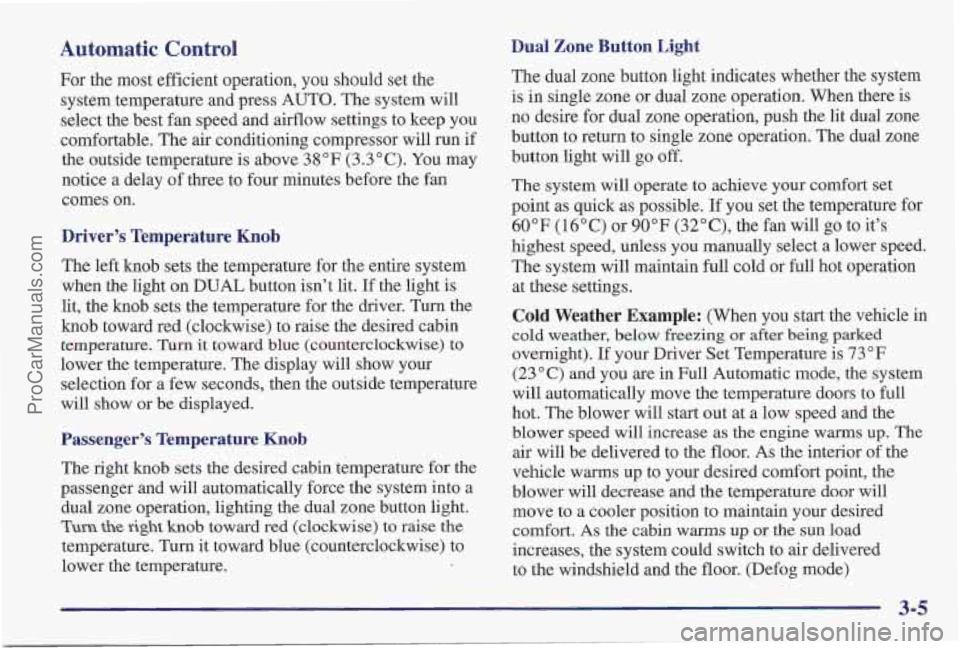
For the most efficient operation, you should set the
system temperature and press AUTO. The system will
select the best fan speed and airflow settings to keep you
comfortable. The air conditioning compressor will run if
the outside temperature is above
38 OF (3.3 O C). You may
notice a delay of three to four minutes before the fan
comes on.
Driver's Temperature Knob
The left knob sets the temperature for the entire system
when the light on DUAL button isn't lit.
If the light is
lit, the knob sets the temperature for the driver. Turn the
knob toward red (clockwise) to raise the desired cabin
temperature. Turn it toward blue (counterclockwise) to
lower the temperature. The display will show your
selection for a few seconds, then the outside temperature
will show or be displayed.
Passenger's Temperature Knob
The right knob sets the desired cabin temperature for the
passenger and will automatically force the system into a
dual zone operation, lighting the dual zone button light.
Turn the right knob toward red (clockwise) to raise the
temperature. Turn it toward blue (counterclockwise) to
lower the temperature. The
dual zone button light indicates whether the system
is in single zone
or dual zone operation. When there is
no desire for dual zone operation, push the lit dual zone
button to return to single zone operation. The dual zone
button light will
go off.
The system will operate to achieve your comfort set
point as quick as possible. If you set the temperature for
60°F (16°C)
or 90°F (32"C), the fan will go to it's
highest speed, unless you manually select a lower speed.
The system will maintain full cold or full hot operation
at these settings.
Cold Weather Example: (When you start the vehicle in
cold weather, below freezing or after being parked
overnight). If your Driver Set Temperature is 73°F
(23 "C) and you are in Full Automatic mode, the system
will automatically move the temperature doors to full
hot. The blower will start out at a low speed and the
blower speed will increase
as the engine warms up. The
air will be delivered to the floor. As the interior of the
vehicle warms up to your desired comfort point, the
blower will decrease and
the temperature door will
move to a cooler position to maintain your desired
comfort. As the cabin warms
up or the sun load
increases, the system could switch to air delivered
to the windshield and the floor. (Defog mode)
3-5
ProCarManuals.com