clock PONTIAC SOLSTICE 2009 Owners Manual
[x] Cancel search | Manufacturer: PONTIAC, Model Year: 2009, Model line: SOLSTICE, Model: PONTIAC SOLSTICE 2009Pages: 354, PDF Size: 1.98 MB
Page 92 of 354

Notice:Lowering the top if it is damp, wet, or dirty
can cause stains, mildew, and damage to the
inside of your vehicle. Dry off the top before
lowering it.
Notice:If you lower the top on your vehicle in cold
weather (0°F/-18°C or lower), you may damage
top components. Do not lower the top in cold
weather.
Notice:If you raise or lower the convertible top
while the vehicle is in motion, you could damage the
top or the top mechanism. The repairs would not
be covered by your warranty. Always put an
automatic transmission in (P) Park or a manual
transmission in (1) First or (R) Reverse, turn
the ignition off and engage the parking brake before
raising or lowering the convertible top.
{CAUTION:
Moving parts of the convertible top can be
dangerous. People can be injured by the
convertible top and its mechanism. Keep people
away from your vehicle when you are lowering or
raising the top.
Lowering the Manual Convertible Top
1. Empty the trunk of all contents.
2. Park on a level surface and set the parking brake.
Shift an automatic transmission into (P) Park. Shift
a manual transmission into (1) First or (R) Reverse.
3. Turn the ignition off.
4. Open the trunk.
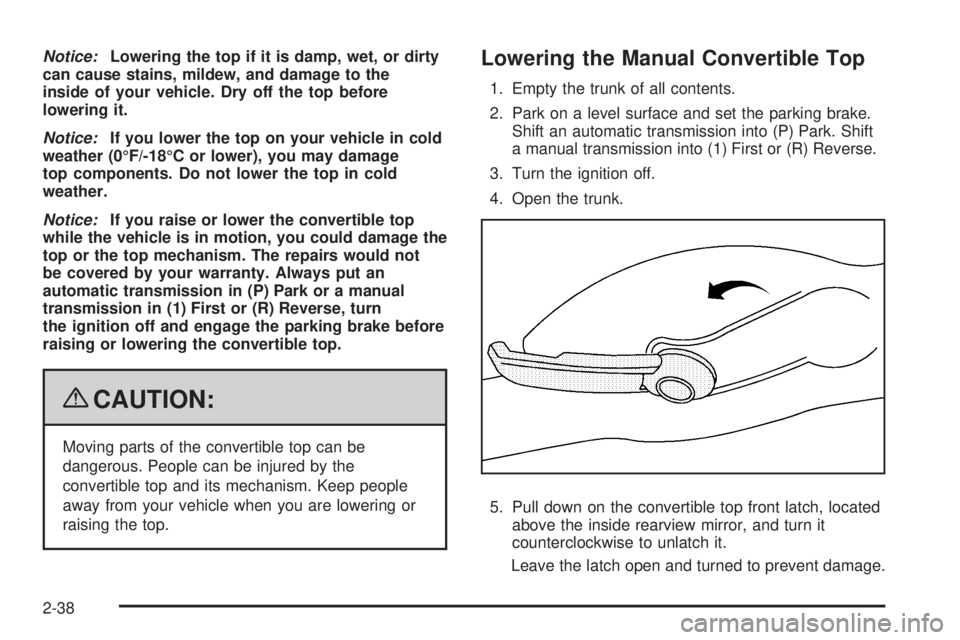
5. Pull down on the convertible top front latch, located
above the inside rearview mirror, and turn it
counterclockwise to unlatch it.
Leave the latch open and turned to prevent damage.
2-38
Page 94 of 354

6. Pull the front edge (A) of the convertible top forward
from the outside of the vehicle, or push the front
edge (A) of the convertible top forward from
the inside of the vehicle.
7. Turn the top front latch handle clockwise to latch
the convertible top.
8. Make sure the lower seal pins (C) are correctly
aligned and inserted.
9. Close the trunk by pressing down on the rear
center with a swift, �rm motion.
10. At the rear edge of the convertible top, press down
on the two buttresses (D) to latch them into the top
of the trunk.
2-40
Page 96 of 354

Driver Information Center (DIC).......................3-34
DIC Operation and Displays...........................3-35
DIC Warnings and Messages.........................3-37
DIC Vehicle Personalization............................3-41
Audio System(s).............................................3-46
Setting the Clock..........................................3-47
Radio(s)......................................................3-49
Using an MP3..............................................3-60XM Radio Messages.....................................3-67
Bluetooth®...................................................3-68
Theft-Deterrent Feature..................................3-78
Audio Steering Wheel Controls.......................3-79
Radio Reception...........................................3-80
Fixed Mast Antenna......................................3-81
XM™ Satellite Radio Antenna System.............3-81
Chime Level Adjustment................................3-81
Section 3 Instrument Panel
3-2
Page 108 of 354

Instrument Panel Brightness
The control for this feature is located on the instrument
panel to the right of the steering wheel.
DInstrument Panel Brightness:Turn the knob
clockwise or counterclockwise to brighten or dim
the lights.
Entry/Exit Lighting
The lamps inside the vehicle come on when any door is
opened. These lamps will fade out after about
20 seconds after all of the doors have been closed or
when the ignition is turned on. These lamps will also go
on when you press the trunk release, unlock symbol
button or the horn symbol on the Remote Keyless Entry
System (RKE) Transmitter.
The lamps inside the vehicle will stay on for about
20 seconds after the key is removed from the ignition to
provide an illuminated exit.
Mirror Reading Lamps
The vehicle has reading lamps on the rearview mirror.
Push the button to turn the reading lamps on and off.
Battery Run-Down Protection
The vehicle has a battery saver feature designed to
protect the vehicle’s battery.
When any interior lamp is left on and the ignition is
turned off, the battery rundown protection system
automatically turns the lamp off after 20 minutes. This
prevents draining of the battery.
Accessory Power Outlet(s)
The accessory power outlet can be used to connect
electrical equipment, such as a cellular phone.
The accessory power outlet is located on the instrument
panel, below the radio.
To use the outlet, remove the cover. When not in use,
always cover the outlet with the protective cap.
Notice:Leaving electrical equipment plugged in for
an extended period of time while the vehicle is off
will drain the battery. Power is always supplied
to the outlets. Always unplug electrical equipment
when not in use and do not plug in equipment
that exceeds the maximum 20 ampere rating.
3-14
Page 110 of 354

Climate Controls
Climate Control System
A. Temperature
Control
B. Fan Control
C. Air Delivery Mode
ControlD. Air Conditioning
E. Recirculation
F. Rear Window
DefoggerThe heating and ventilation of the vehicle can be
controlled with this system. For vehicles with air
conditioning, you will also be able to control the cooling
of the vehicle.
9(Off):Turn the fan control to this position to turn
the fan off.
Temperature Control:Turn clockwise or
counterclockwise to increase or decrease the
temperature.
9(Fan Control):Turn clockwise or counterclockwise
to increase or decrease the fan speed.
Air Delivery Mode Control:Turn clockwise or
counterclockwise to change the direction of the air�ow
inside the vehicle.
Select from the following modes:
H(Vent):Air is directed to the instrument panel
outlets.
\(Bi-Level):Air is directed to the instrument panel,
�oor, defroster and side window outlets. Cooler air
is directed to the upper outlets and warmer air to the
�oor outlets. Climate Control System with Air Conditioning
shown, Climate Control System without Air
Conditioning similar
3-16
Page 113 of 354

Outlet Adjustment
Use the air outlets located in the center and on the side
of the instrument panel to direct the air�ow.
The vehicle has air outlets that allow you to adjust the
direction and amount of air�ow inside the vehicle. Move
the louvers up or down or turn them clockwise or
counterclockwise to change the direction of the air�ow.
The vehicle has �ow through ventilation that allows
outside air to be forced through the ventilation system
when the vehicle is moving. Outside air will enter
the vehicle when the air conditioning fan is running.
Flow through ventilation can be stopped in vent
and bi-level modes by pressing the recirculation button.
Operation Tips
Clear away any ice, snow or leaves from the air
inlets at the base of the windshield that may
block the �ow of air into the vehicle.
Use of non-GM approved hood de�ectors may
adversely affect the performance of the system.
Keep the path under the front seats clear of objects
to help circulate the air inside of the vehicle more
effectively.
Warning Lights, Gages, and
Indicators
Warning lights and gages can signal that something is
wrong before it becomes serious enough to cause
an expensive repair or replacement. Paying attention to
the warning lights and gages could prevent injury.
Warning lights come on when there may be or is a
problem with one of the vehicle’s functions. Some
warning lights come on brie�y when the engine is started
to indicate they are working.
Gages can indicate when there may be or is a problem
with one of the vehicle’s functions. Often gages and
warning lights work together to indicate a problem with
the vehicle.
When one of the warning lights comes on and stays on
while driving, or when one of the gages shows there
may be a problem, check the section that explains what
to do. Follow this manual’s advice. Waiting to do
repairs can be costly and even dangerous.
3-19
Page 141 of 354

Setting the Clock
Without Date Display
AM/FM Base Radio with a Single CD
Player
To set the time:
1. Turn the ignition key to ACC/ACCESSORY or
ON/RUN. Press
Oto turn the radio on.
2. Press
Huntil the hour begins �ashing on the
display. Press
Ha second time and the minute
begins �ashing on the display.
3. While either the hour or the minute numbers are
�ashing, turn
fto increase or decrease the time.
4. Press
Hagain until the clock display stops �ashing
to set the currently displayed time; otherwise, the
�ashing stops after �ve seconds and the current
time displayed is automatically set.
To change the time default setting from 12 hour to
24 hour, press the
Hbutton until 12H or 24H is
displayed. Once 12H or 24H is displayed, turn
the
fknob to the desired option to select the setting.
Press the
Hbutton again to apply the setting, or let the
screen time out.
With Date Display
Radio with CD (MP3) and USB Port, and
Radio with Single CD (MP3) Player
To set the time and date:
1. Turn the ignition key to ACC/ACCESSORY or
ON/RUN. Press
Oto turn the radio on.
2. Press
Hand the HR, MIN, MM, DD, YYYY
(hour, minute, month, day, and year) displays.
3. Press the softkey located below any one of the tabs
that you want to change.
4. To increase the time or date do one of the following:
Press the softkey located below the selected tab.
Press¨SEEK, or\FWD.
Turnfclockwise.
5. To decrease the time or date do one of the
following:
Press©SEEK orsREV.
Turnfcounterclockwise.
The date does not automatically display. To see the
date press
Hwhile the radio is on. The date with display
times out after a few seconds and goes back to the
normal radio and time display.
3-47
Page 142 of 354

To change the time default setting from 12 hour to
24 hour or to change the date default setting from
month/day/year to day/month/year:
1. Press
Hand then the softkey located below the
forward arrow label. Once the time 12H and 24H,
and the date MM/DD/YYYY (month, day, and
year) and DD/MM/YYYY (day, month, and year)
displays.
2. Press the softkey located below the desired option.
3. Press
Hagain to apply the selected default, or
let the screen time out.
Six-Disc CD (MP3) Player
To set the time and date:
1. Turn the ignition key to ACC/ACCESSORY or
ON/RUN. Press
Oto turn the radio on.
2. Press MENU.
3. Press the softkey below the
Htab. The HR, MIN,
MM, DD, YYYY displays.
4. Press the softkey below any one of the tabs you
want to change.5. To increase the time or date do one of the following:
Press the softkey located below the selected tab.
Press¨SEEK, or\FWD.
Turnfclockwise.
6. To decrease the time or date do one of the
following:
Press©SEEK orsREV.
Turnfcounterclockwise.
The date does not automatically display. To see the
date press MENU and then softkey below the
Htab
while the radio is on. The date with display times
out after a few seconds and goes back to the normal
radio and time display.
To change the time default setting from 12 hour to
24 hour or to change the date default setting from
month/day/year to day/month/year:
1. Press MENU, and then the softkey below the
Htab. The HR, MIN, MM, DD, YYYY displays.
2. Press the softkey below the forward arrow tab. The
time 12H and 24H, and the date MM/DD/YYYY
(month, day, and year) and DD/MM/YYYY
(day, month, and year) displays.
3. Press the softkey located below the desired option.
4. Press MENU again to apply the selected default,
or let the screen time out.
3-48
Page 147 of 354

Storing a Radio Station as a Preset
Radios that have numbered pushbuttons store radio
stations as presets.
If the radio does not have XM, up to 18 stations
(six FM1, six FM2, and six AM), can be programmed on
the six numbered buttons.
To store preset stations:
1. Tune in the desired station.
2. Press and hold one of the six numbered buttons for
three seconds until a beep sounds.
3. Repeat the Steps 1 and 2 for each numbered
button.
Setting the Tone
(Bass/Midrange/Treble)
BASS/MID/TREB (Bass, Midrange, or Treble):The
radio may display some or all tones such as BASS, MID,
and TREB.
To adjust the tone settings on the Radio with
CD (Base):
Press
funtil the tone control labels display, then turn
fto change the setting.To adjust the tone settings on the Radio with CD (MP3)
and USB Port, Radio with CD (MP3), or Radio with
Six-Disc CD (MP3):
1. Press
funtil the tone control tabs display.
2. Press the softkey below the desired tab to be
adjusted.
3. To increase the level of the bass, midrange,
or treble:
Press¨SEEK, or\FWD.
Turnfclockwise.
4. To decrease the level of the bass, midrange,
or treble:
Press©SEEK, orsREV.
Turnfcounterclockwise.
The radio may be capable of adjusting bass, midrange,
or treble to the middle position by pressing the
softkey below the BASS, MID, or TREB tab for more
than two seconds. The radio beeps once and the level
adjusts to the middle position.
The radio may also be capable of adjusting all tone and
speaker controls to the middle position by pressing
ffor more than two seconds until the radio beeps once.
If a station’s frequency is weak, or has static, decrease
the treble.
3-53
Page 187 of 354

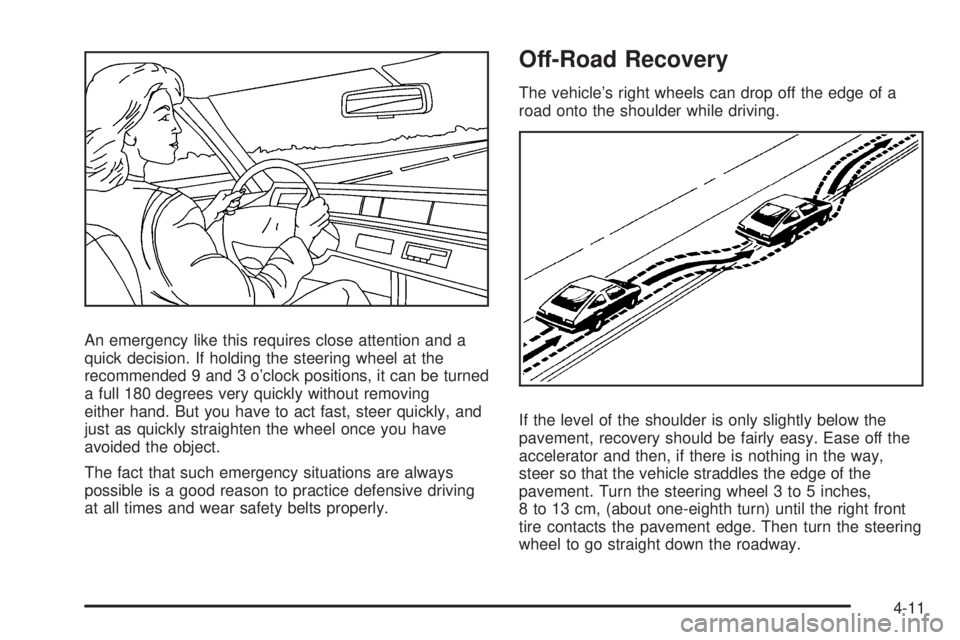
An emergency like this requires close attention and a
quick decision. If holding the steering wheel at the
recommended 9 and 3 o’clock positions, it can be turned
a full 180 degrees very quickly without removing
either hand. But you have to act fast, steer quickly, and
just as quickly straighten the wheel once you have
avoided the object.
The fact that such emergency situations are always
possible is a good reason to practice defensive driving
at all times and wear safety belts properly.
Off-Road Recovery
The vehicle’s right wheels can drop off the edge of a
road onto the shoulder while driving.
If the level of the shoulder is only slightly below the
pavement, recovery should be fairly easy. Ease off the
accelerator and then, if there is nothing in the way,
steer so that the vehicle straddles the edge of the
pavement. Turn the steering wheel 3 to 5 inches,
8 to 13 cm, (about one-eighth turn) until the right front
tire contacts the pavement edge. Then turn the steering
wheel to go straight down the roadway.
4-11