light PONTIAC VIBE 2004 Repair Manual
[x] Cancel search | Manufacturer: PONTIAC, Model Year: 2004, Model line: VIBE, Model: PONTIAC VIBE 2004Pages: 370, PDF Size: 2.68 MB
Page 194 of 370
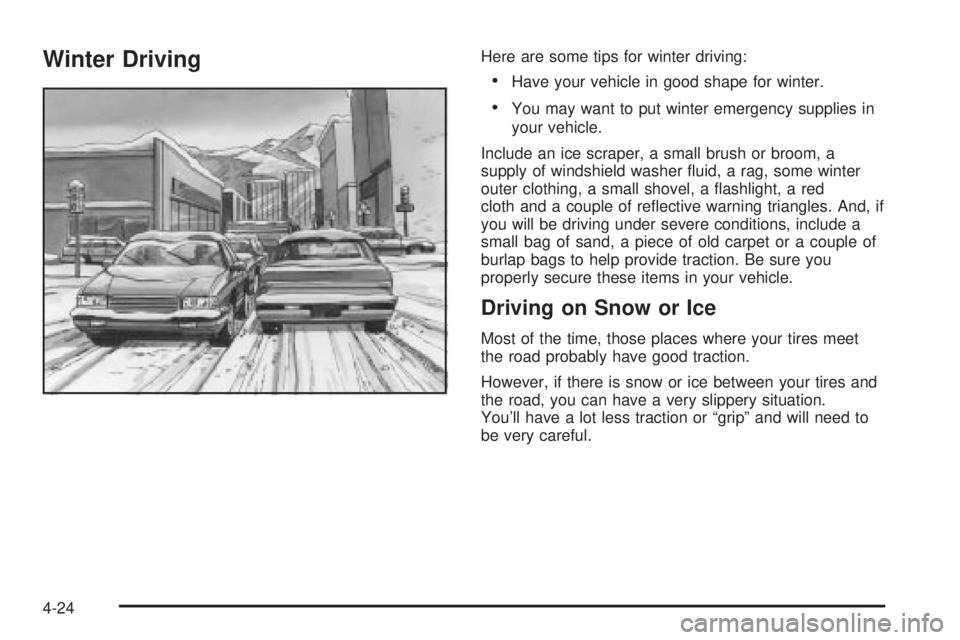
Winter DrivingHere are some tips for winter driving:
·Have your vehicle in good shape for winter.
·You may want to put winter emergency supplies in
your vehicle.
Include an ice scraper, a small brush or broom, a
supply of windshield washer ¯uid, a rag, some winter
outer clothing, a small shovel, a ¯ashlight, a red
cloth and a couple of re¯ective warning triangles. And, if
you will be driving under severe conditions, include a
small bag of sand, a piece of old carpet or a couple of
burlap bags to help provide traction. Be sure you
properly secure these items in your vehicle.
Driving on Snow or Ice
Most of the time, those places where your tires meet
the road probably have good traction.
However, if there is snow or ice between your tires and
the road, you can have a very slippery situation.
You'll have a lot less traction or ªgripº and will need to
be very careful.
4-24
Page 197 of 370
{CAUTION:
Snow can trap exhaust gases under your
vehicle. This can cause deadly CO (carbon
monoxide) gas to get inside. CO could
overcome you and kill you. You can not see it
or smell it, so you might not know it is in your
vehicle. Clear away snow from around the
base of your vehicle, especially any that is
blocking your exhaust pipe. And check around
again from time to time to be sure snow does
not collect there.
Open a window just a little on the side of the
vehicle that is away from the wind. This will
help keep CO out.Run your engine only as long as you must. This saves
fuel. When you run the engine, make it go a little
faster than just idle. That is, push the accelerator
slightly. This uses less fuel for the heat that you get and
it keeps the battery charged. You will need a
well-charged battery to restart the vehicle, and possibly
for signaling later on with your headlamps. Let the
heater run for a while.
Then, shut the engine off and close the window almost
all the way to preserve the heat. Start the engine
again and repeat this only when you feel really
uncomfortable from the cold. But do it as little as
possible. Preserve the fuel as long as you can. To help
keep warm, you can get out of the vehicle and do
some fairly vigorous exercises every half hour or so until
help comes.
4-27
Page 198 of 370

If You Are Stuck: In Sand, Mud, Ice
or Snow
In order to free your vehicle when it is stuck, you will
need to spin the wheels, but you don't want to spin your
wheels too fast. The method known as ªrockingº can
help you get out when you're stuck, but you must
use caution.
{CAUTION:
If you let your tires spin at high speed, they
can explode, and you or others could be
injured. And, the transaxle or other parts of the
vehicle can overheat. That could cause an
engine compartment ®re or other damage.
When you are stuck, spin the wheels as little
as possible. Do not spin the wheels above
35 mph (55 km/h) as shown on the
speedometer.
Notice:Spinning your wheels can destroy parts of
your vehicle as well as the tires. If you spin the
wheels too fast while shifting your transaxle back
and forth, you can destroy your transaxle. See
ªRocking Your Vehicle To Get It Out.º
For information about using tire chains on your vehicle,
see
Tire Chains on page 5-75.
Rocking Your Vehicle To Get It Out
First, turn your steering wheel left and right. That will
clear the area around your front wheels. Then shift back
and forth between REVERSE (R) and a forward gear
(or with a manual transaxle, between FIRST (1) or
SECOND (2) and REVERSE (R)), spinning the wheels
as little as possible. Release the accelerator pedal
while you shift, and press lightly on the accelerator pedal
when the transaxle is in gear. By slowly spinning your
wheels in the forward and reverse directions, you
will cause a rocking motion that may free your vehicle.
If that doesn't get you out after a few tries, you may
need to be towed out. Or, you can use your recovery
hook. If you do need to be towed out, see
Towing Your
Vehicle on page 4-30.
4-28
Page 203 of 370
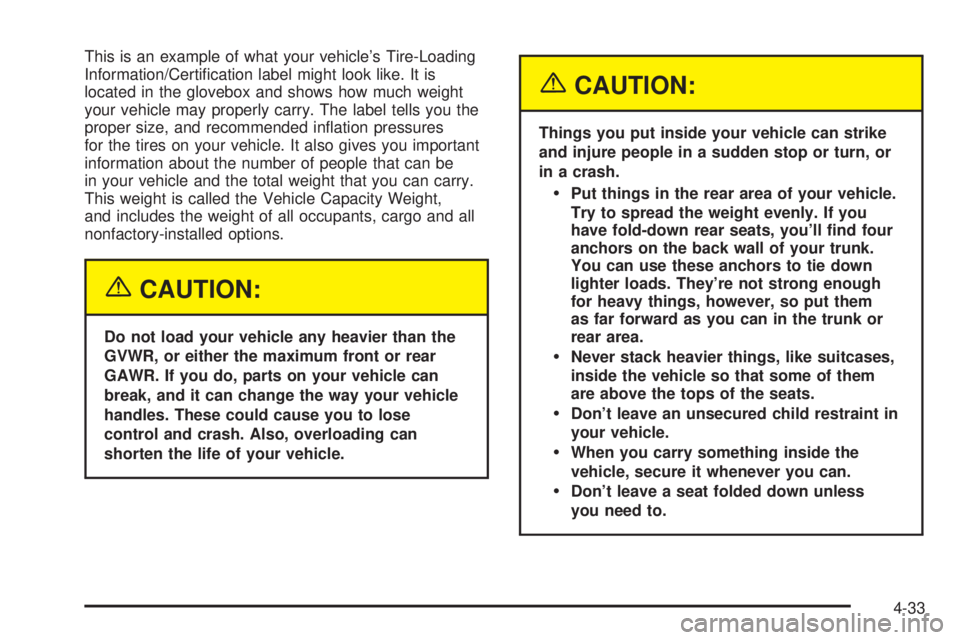
This is an example of what your vehicle's Tire-Loading
Information/Certi®cation label might look like. It is
located in the glovebox and shows how much weight
your vehicle may properly carry. The label tells you the
proper size, and recommended in¯ation pressures
for the tires on your vehicle. It also gives you important
information about the number of people that can be
in your vehicle and the total weight that you can carry.
This weight is called the Vehicle Capacity Weight,
and includes the weight of all occupants, cargo and all
nonfactory-installed options.
{CAUTION:
Do not load your vehicle any heavier than the
GVWR, or either the maximum front or rear
GAWR. If you do, parts on your vehicle can
break, and it can change the way your vehicle
handles. These could cause you to lose
control and crash. Also, overloading can
shorten the life of your vehicle.
{CAUTION:
Things you put inside your vehicle can strike
and injure people in a sudden stop or turn, or
in a crash.
·Put things in the rear area of your vehicle.
Try to spread the weight evenly. If you
have fold-down rear seats, you'll ®nd four
anchors on the back wall of your trunk.
You can use these anchors to tie down
lighter loads. They're not strong enough
for heavy things, however, so put them
as far forward as you can in the trunk or
rear area.
·Never stack heavier things, like suitcases,
inside the vehicle so that some of them
are above the tops of the seats.
·Don't leave an unsecured child restraint in
your vehicle.
·When you carry something inside the
vehicle, secure it whenever you can.
·Don't leave a seat folded down unless
you need to.
4-33
Page 219 of 370
When you put the fuel cap back on, turn it to the right
(clockwise) until you hear a clicking sound. Make
sure you fully install the cap. The diagnostic system can
determine if the fuel cap has been left off or improperly
installed. This would allow fuel to evaporate into the
atmosphere. See
Malfunction Indicator Lamp on
page 3-34.
{CAUTION:
If a ®re starts while you're refueling, don't
remove the nozzle. Shut off the ¯ow of fuel by
shutting off the pump or by notifying the
station attendant. Leave the area immediately.
Notice:If you need a new fuel cap, be sure to get
the right type. Your dealer can get one for you.
If you get the wrong type, it may not ®t properly.
This may cause your malfunction indicator lamp to
light and may damage your fuel tank and emissions
system. See ªMalfunction Indicator Lampº in the
Index.
Filling a Portable Fuel Container
{CAUTION:
Never ®ll a portable fuel container while it is in
your vehicle. Static electricity discharge from
the container can ignite the gasoline vapor.
You can be badly burned and your vehicle
damaged if this occurs. To help avoid injury to
you and others:
·Dispense gasoline only into approved
containers.
·Do not ®ll a container while it is inside a
vehicle, in a vehicle's trunk, pickup bed or
on any surface other than the ground.
·Bring the ®ll nozzle in contact with the
inside of the ®ll opening before operating
the nozzle. Contact should be maintained
until the ®lling is complete.
·Do not smoke while pumping gasoline.
5-9
Page 226 of 370
Engine Oil
If the engine oil pressure
light appears on the
instrument cluster, it
means you need to check
your engine oil level
right away.
For more information, see
Oil Pressure Light on
page 3-38.
You should check your engine oil level regularly; this is
an added reminder.
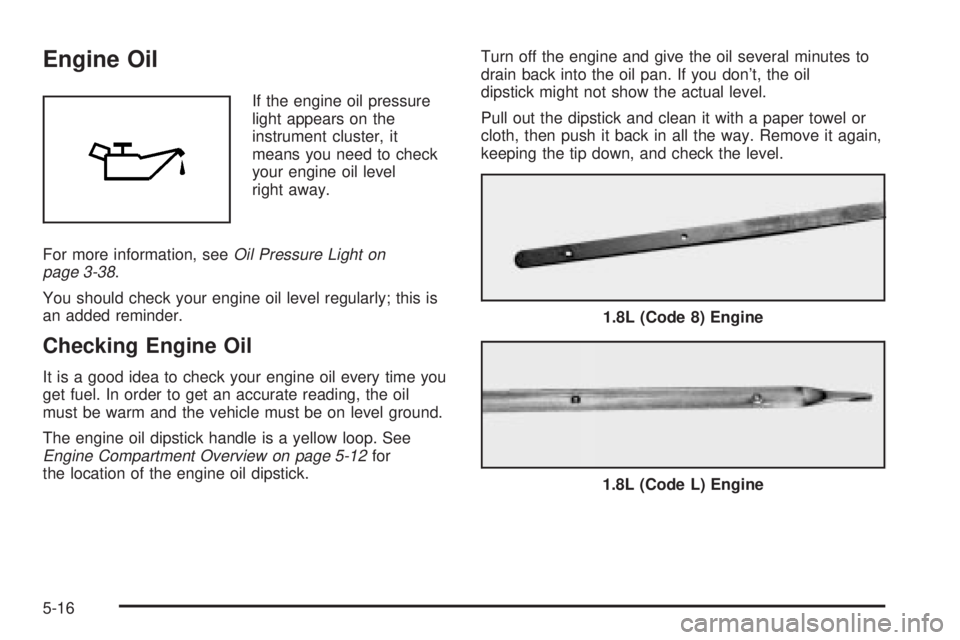
Checking Engine Oil
It is a good idea to check your engine oil every time you
get fuel. In order to get an accurate reading, the oil
must be warm and the vehicle must be on level ground.
The engine oil dipstick handle is a yellow loop. See
Engine Compartment Overview on page 5-12for
the location of the engine oil dipstick.Turn off the engine and give the oil several minutes to
drain back into the oil pan. If you don't, the oil
dipstick might not show the actual level.
Pull out the dipstick and clean it with a paper towel or
cloth, then push it back in all the way. Remove it again,
keeping the tip down, and check the level.
1.8L (Code 8) Engine
1.8L (Code L) Engine
5-16
Page 237 of 370

When to Check and What to Use
Refer to the Maintenance
Schedule to determine
how often you should
check the ¯uid level in your
master cylinder reservoir
and for the proper
¯uid. See
Part B: Owner
Checks and Services
on page 6-19
andPart D:
Recommended Fluids
and Lubricants on
page 6-26
.
How to Check and Add Fluid
Check to make sure that the ¯uid level is at or above
the MIN mark. If the level is below the MIN mark,
see the instructions on the reservoir cap.
Engine Coolant
The following explains your cooling system and how to
add coolant when it is low. If you have a problem
with engine overheating, see
Engine Overheating on
page 5-30.
A 50/50 mixture of clean, drinkable water and the proper
coolant will:
·Give freezing protection down to-34ÉF (-37ÉC).
·Give boiling protection up to 265ÉF (129ÉC).
·Protect against rust and corrosion.
·Help keep the proper engine temperature.
·Let the warning lights and gages work as they
should.
5-27
Page 249 of 370

Windshield Washer Fluid
What to Use
When you need windshield washer ¯uid, be sure to read
the manufacturer's instructions before use. If you will
be operating your vehicle in an area where the
temperature may fall below freezing, use a ¯uid that has
sufficient protection against freezing. See
Engine
Compartment Overview on page 5-12for reservoir
location.
Adding Washer Fluid
The low windshield washer
¯uid level warning light will
come on when the ¯uid
level is too low. See
Low Washer Fluid Warning
Light on page 3-39.The windshield washer
¯uid reservoir is located in
the engine compartment
on the passenger's side of
the vehicle.
Open the cap with the washer symbol on it. Add
washer ¯uid until the tank is full.
Canada Only
5-39
Page 251 of 370

So, it is not a good idea to ªtop offº your brake ¯uid.
Adding brake ¯uid will not correct a leak. If you add ¯uid
when your linings are worn, then you will have too
much ¯uid when you get new brake linings. You should
add (or remove) brake ¯uid, as necessary, only when
work is done on the brake hydraulic system.
{CAUTION:
If you have too much brake ¯uid, it can spill on
the engine. The ¯uid will burn if the engine is
hot enough. You or others could be burned,
and your vehicle could be damaged. Add brake
¯uid only when work is done on the brake
hydraulic system.When your brake ¯uid falls to a low level, your brake
warning light will come on. SeeBrake System Warning
Light on page 3-31. United States
Canada
5-41
Page 253 of 370

Brake Wear
The GT series has four-wheel disc brakes. All other
models have front disc brakes and rear drum brakes.
Disc brake pads have built-in wear indicators that make
a high-pitched warning sound when the brake pads
are worn and new pads are needed. The sound
may come and go or be heard all the time your vehicle
is moving (except when you are pushing on the
brake pedal ®rmly).
{CAUTION:
The brake wear warning sound means that
soon your brakes will not work well. That
could lead to an accident. When you hear the
brake wear warning sound, have your vehicle
serviced.
Notice:Continuing to drive with worn-out brake
pads could result in costly brake repair.
Some driving conditions or climates may cause a brake
squeal when the brakes are ®rst applied or lightly
applied. This does not mean something is wrong with
your brakes.Properly torqued wheel nuts are necessary to help
prevent brake pulsation. When tires are rotated, inspect
brake pads for wear and evenly tighten wheel nuts in
the proper sequence to GM torque speci®cations.
If you have rear drum brakes, they do not have wear
indicators, but if you ever hear a rear brake rubbing
noise, have the rear brake linings inspected immediately.
Also, the rear brake drums should be removed and
inspected each time the tires are removed for rotation or
changing. When you have the front brake pads
replaced, have the rear brakes inspected, too.
Brake linings should always be replaced as complete
axle sets.
See
Brake System Inspection on page 6-25.
Brake Pedal Travel
See your dealer if the brake pedal does not return to
normal height, or if there is a rapid increase in
pedal travel. This could be a sign of brake trouble.
Brake Adjustment
Every time you make a moderate brake stop, your disc
brakes adjust for wear. If you rarely make a moderate
or heavier stop, then your brakes might not adjust
correctly. If you drive in that way, then Ð very
carefully Ð make a few moderate brake stops about
every 1,000 miles (1 600 km), so your brakes will
adjust properly.
5-43