audio PONTIAC VIBE 2004 Owners Manual
[x] Cancel search | Manufacturer: PONTIAC, Model Year: 2004, Model line: VIBE, Model: PONTIAC VIBE 2004Pages: 370, PDF Size: 2.68 MB
Page 1 of 370
Seats and Restraint Systems........................... 1-1
Front Seats
............................................... 1-2
Rear Seats
............................................... 1-7
Safety Belts
.............................................. 1-8
Child Restraints
.......................................1-27
Supplemental Restraint System (SRS)
.........1-47
Restraint System Check
............................1-56
Features and Controls..................................... 2-1
Keys
........................................................ 2-2
Doors and Locks
....................................... 2-7
Windows
.................................................2-11
Theft-Deterrent Systems
............................2-13
Starting and Operating Your Vehicle
...........2-16
Mirrors
....................................................2-35
Storage Areas
.........................................2-37
Sunroof
..................................................2-42
Instrument Panel............................................. 3-1
Instrument Panel Overview
.......................... 3-2
Climate Controls
......................................3-19
Warning Lights, Gages and Indicators
.........3-25
Audio System(s)
.......................................3-41Driving Your Vehicle....................................... 4-1
Your Driving, the Road, and Your Vehicle
..... 4-2
Towing
...................................................4-30
Service and Appearance Care.......................... 5-1
Service
..................................................... 5-3
Fuel
......................................................... 5-4
Checking Things Under the Hood
...............5-10
All-Wheel Drive
........................................5-51
Bulb Replacement
....................................5-52
Windshield Wiper Blade Replacement
.........5-60
Tires
......................................................5-61
Appearance Care
.....................................5-89
Vehicle Identi®cation
.................................5-97
Electrical System
......................................5-97
Capacities and Speci®cations
...................5-101
Normal Maintenance Replacement Parts
....5-103
Maintenance Schedule..................................... 6-1
Maintenance Schedule
................................ 6-2
Customer Assistance Information.................... 7-1
Customer Assistance Information
.................. 7-2
Reporting Safety Defects
...........................7-10
Index.................................................................1
2004 Pontiac Vibe Owner ManualM
Page 4 of 370
Vehicle Damage Warnings
Also, in this book you will ®nd these notices:
Notice:These mean there is something that could
damage your vehicle.
A notice will tell you about something that can damage
your vehicle. Many times, this damage would not be
covered by your warranty, and it could be costly. But the
notice will tell you what to do to help avoid the
damage.
When you read other manuals, you might see CAUTION
and NOTICE warnings in different colors or in different
words.
You'll also see warning labels on your vehicle. They use
the same words, CAUTION or NOTICE.
Vehicle Symbols
Your vehicle has components and labels that use
symbols instead of text. Symbols, used on your vehicle,
are shown along with the text describing the operation
or information relating to a speci®c component, control,
message, gage or indicator.
If you need help ®guring out a speci®c name of a
component, gage or indicator, reference the following
topics:
·Seats and Restraint Systems in Section 1
·Features and Controls in Section 2
·Instrument Panel Overview in Section 3
·Climate Controls in Section 3
·Warning Lights, Gages and Indicators in Section 3
·Audio System(s) in Section 3
·Engine Compartment Overview in Section 5
iv
Page 107 of 370
Instrument Panel Overview...............................3-2
Hazard Warning Flashers................................3-4
Other Warning Devices...................................3-4
Horn.............................................................3-5
Tilt Wheel.....................................................3-5
Turn Signal/Multifunction Lever.........................3-5
Exterior Lamps.............................................3-12
Interior Lamps..............................................3-14
Accessory Power Outlets...............................3-17
Power Outlet 115 Volt Alternating Current........3-18
Ashtrays and Cigarette Lighter........................3-19
Climate Controls............................................3-19
Climate Control System.................................3-19
Outlet Adjustment.........................................3-22
Passenger Compartment Air Filter...................3-23
Warning Lights, Gages and Indicators.............3-25
Instrument Panel Cluster................................3-26
Speedometer and Odometer...........................3-27
Tachometer.................................................3-28
Safety Belt Reminder Light.............................3-28
Air Bag Readiness Light................................3-30
Charging System Light..................................3-31Brake System Warning Light..........................3-31
Anti-Lock Brake System Warning Light.............3-32
Engine Coolant Temperature Gage..................3-33
Malfunction Indicator Lamp.............................3-34
Oil Pressure Light.........................................3-38
Cruise Control Light......................................3-39
Overdrive Off Light........................................3-39
Low Washer Fluid Warning Light.....................3-39
Door Ajar Light.............................................3-39
Fuel Gage...................................................3-40
Audio System(s).............................................3-41
Setting the Time...........................................3-41
Radio with CD..............................................3-42
Radio with Six-Disc CD.................................3-52
Navigation/Radio System...............................3-63
Understanding Radio Reception......................3-63
Care of Your CDs.........................................3-64
Care of Your CD Player................................3-64
Fixed Mast Antenna......................................3-64
XMŸ Satellite Radio Antenna System
(United States Only)..................................3-64
Section 3 Instrument Panel
3-1
Page 109 of 370

The main components of your instrument panel are the
following:
A. Air Outlets. See
Outlet Adjustment on page 3-22.
B. Instrument Panel Cluster. See
Instrument Panel
Cluster on page 3-26.
C. Hazard Warning Flasher Button. See
Hazard
Warning Flashers on page 3-4.
D. Audio System. See
Audio System(s) on page 3-41.
E. Rear Window Defogger Button. See ªRear Window
Defoggerº under
Climate Control System on
page 3-19.
F. Front Passenger Safety Belt Reminder Light. See
Safety Belt Reminder Light on page 3-28.
G. Climate Control System. See
Climate Control
System on page 3-19.
H. Power Remote Control Mirror Button. See
Outside
Remote Control Mirrors on page 2-36.
I. Instrument Panel Brightness Control. See
ªInstrument Panel Brightnessº under
Interior Lamps
on page 3-14.
J. Rear Liftglass Release Button. See
Liftgate/Liftglass
on page 2-9.
K. Coinholder. See
Coinholder(s) on page 2-37.
L. Content Theft-Deterrent Security Light. See
Content
Theft-Deterrent on page 2-13.M. Storage Compartment. See
Instrument Panel
Storage Area on page 2-37.
N. Turn Signal/Multifunction Lever. See
Turn
Signal/Multifunction Lever on page 3-5.
O. Hood Release. See
Hood Release on page 5-10.
P. Tilt Lever. See
Tilt Wheel on page 3-5.
Q. Horn. See
Horn on page 3-5.
R. Cruise Control Lever (Option). See ªCruise Controlº
under
Turn Signal/Multifunction Lever on page 3-5.
S. Ignition Switch. See
Ignition Positions on page 2-16.
T. Windshield Wiper Lever. See ªWindshield Wipersº
under
Turn Signal/Multifunction Lever on page 3-5.
U. Cigarette Lighter. See
Ashtrays and Cigarette Lighter
on page 3-19.
V. Shift Lever. See
Shifting Into Park (P) on page 2-28.
W. Power Outlet. See
Power Outlet 115 Volt Alternating
Current on page 3-18.
X. Parking Brake. See
Parking Brake on page 2-27.
Y. Center Console Storage Area. See
Center Console
Storage Area on page 2-37.
Z. Glove Box. See
Glove Box on page 2-37.
3-3
Page 126 of 370

To change the current mode, select one of the following:
H(Vent):This mode directs air to the upper
instrument panel outlets.
)(Bi-Level):This mode directs the air to the upper
instrument panel outlets, and to the ¯oor outlets.
6(Floor):This mode directs the air to the ¯oor outlets
and to the outboard outlets (for the side windows).
?(Recirculation):This mode keeps outside
air from coming in the vehicle. It can be used to prevent
outside air and odors from entering your vehicle or to
help heat or cool the air inside your vehicle more quickly.
Press this button, located in the center of the instrument
panel to the left of the audio system, to turn the
recirculation mode on or off. When the button is pressed,
an indicator light in the button will come on. Press the
button again to turn off recirculate and to circulate
outside air through the system. The indicator light will
go off. Recirculate is automatically turned off when
the climate control system mode knob is turned to defog
or defrost or is between modes.
Temperature Control:Turn the right knob clockwise or
counterclockwise to increase or decrease the
temperature inside your vehicle.A/C (Air Conditioning):Press this button, located in
the center of the instrument panel to the left of the audio
system, to turn the air-conditioning system on or off.
When A/C is pressed, an indicator light in the button will
come on to let you know that the air conditioning is
activated.
On hot days, open the windows to let hot inside air
escape; then close them. This helps to reduce the time
it takes for your vehicle to cool down. It also helps
the system to operate more efficiently.
For quick cool down on hot days:
1. Select the vent mode.
2. Select the recirculation mode.
3. Select A/C.
4. Select the coolest temperature.
5. Select the highest fan speed.
The air-conditioning system removes moisture from the
air, so you may sometimes notice a small amount of
water dripping underneath your vehicle while idling
or after turning off the engine. This is normal.
3-20
Page 127 of 370
Defogging and Defrosting
Fog on the inside of windows is a result of high humidity
(moisture) condensing on the cool window glass. This
can be minimized if the climate control system is
used properly. There are two modes to clear fog or frost
from your windshield. Use the defog mode to clear
the windows of fog or moisture and warm the
passengers. Use the defrost mode to remove fog or
frost from the windshield more quickly.
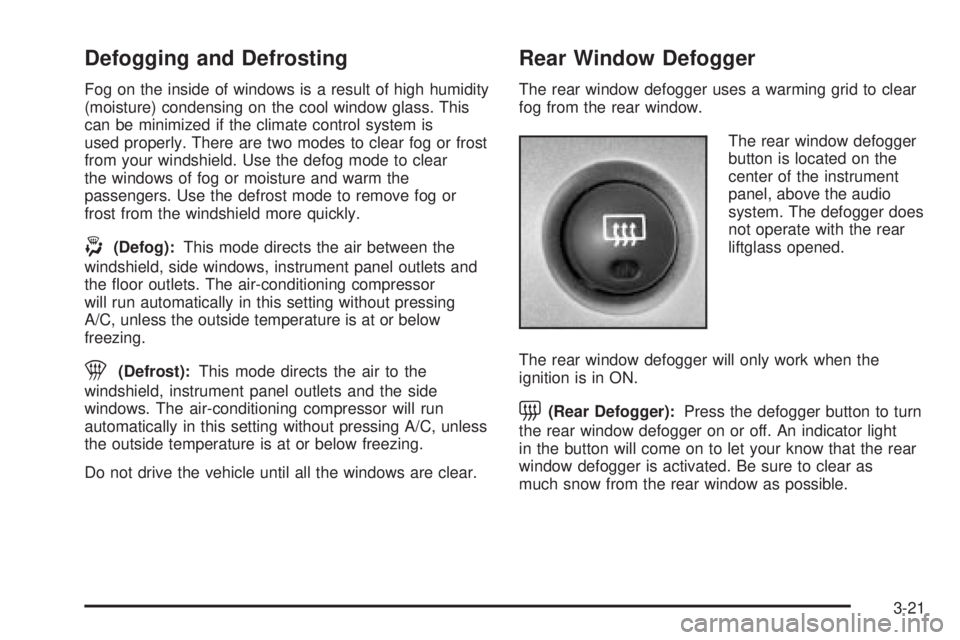
-(Defog):This mode directs the air between the
windshield, side windows, instrument panel outlets and
the ¯oor outlets. The air-conditioning compressor
will run automatically in this setting without pressing
A/C, unless the outside temperature is at or below
freezing.
1(Defrost):This mode directs the air to the
windshield, instrument panel outlets and the side
windows. The air-conditioning compressor will run
automatically in this setting without pressing A/C, unless
the outside temperature is at or below freezing.
Do not drive the vehicle until all the windows are clear.
Rear Window Defogger
The rear window defogger uses a warming grid to clear
fog from the rear window.
The rear window defogger
button is located on the
center of the instrument
panel, above the audio
system. The defogger does
not operate with the rear
liftglass opened.
The rear window defogger will only work when the
ignition is in ON.
=(Rear Defogger):Press the defogger button to turn
the rear window defogger on or off. An indicator light
in the button will come on to let your know that the rear
window defogger is activated. Be sure to clear as
much snow from the rear window as possible.
3-21
Page 135 of 370

Your vehicle also has a safety belt reminder light for the
right front passenger position.
This light is located on the
center of the instrument
panel, above the audio
system.When the key is turned to ON or START, this light will
come on as a reminder for the right front passenger
to fasten the safety belt. The safety belt light will ¯ash
until the right front passenger's safety belt is buckled.
The passenger's safety belt reminder light will not
illuminate if the right front passenger's belt is already
buckled or if a sensor does not detect the weight
of a passenger in that seat.
If something is placed on the right front passenger's
seat, the sensors in the seat may detect that object and
cause the right front passenger's safety belt reminder
light to come on. If this ever happens, move the object to
the rear seat or place it in a rear storage area, if at all
possible.
3-29
Page 147 of 370
Audio System(s)
Notice:Before you add any sound equipment to
your vehicle ± like a tape player, CB radio, mobile
telephone or two-way radio ± be sure you can
add what you want. If you can, it's very important to
do it properly. Added sound equipment may
interfere with the operation of your vehicle's engine,
radio or other systems, and even damage them.
Your vehicle's systems may interfere with the
operation of sound equipment that has been added
improperly.
So, before adding sound equipment, check with
your dealer and be sure to check federal rules
covering mobile radio and telephone units.
Your audio system has been designed to operate easily
and to give years of listening pleasure. You will get
the most enjoyment out of it if you acquaint yourself with
it ®rst. Figure out which radio you have in your vehicle,
®nd out what your audio system can do and how to
operate all of its controls to be sure you're getting the
most out of the advanced engineering that went into it.
Setting the Time
Your radio may have a button marked with an H or HR
to represent hours and an M or MIN to represent
minutes.
Press and hold the hour button until the correct hour
appears on the display. AM will also appear for morning
hours. Press and hold the minute button until the
correct minute appears on the display. The time may be
set with the ignition on or off.
To synchronize the time with an FM station broadcasting
Radio Data System (RDS) information, press and
hold the hour and minute buttons at the same time until
UPDATED appears on the display. If the time is not
available from the station, NO UPDATE will appear on
the display.
3-41
Page 148 of 370
Radio with CD
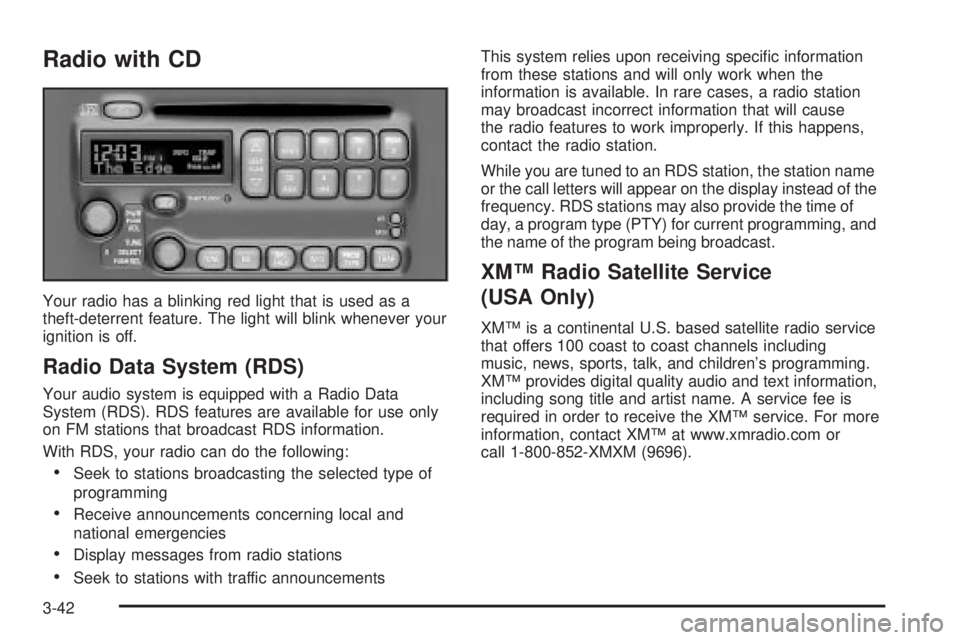
Your radio has a blinking red light that is used as a
theft-deterrent feature. The light will blink whenever your
ignition is off.
Radio Data System (RDS)
Your audio system is equipped with a Radio Data
System (RDS). RDS features are available for use only
on FM stations that broadcast RDS information.
With RDS, your radio can do the following:
·Seek to stations broadcasting the selected type of
programming
·Receive announcements concerning local and
national emergencies
·Display messages from radio stations
·Seek to stations with traffic announcementsThis system relies upon receiving speci®c information
from these stations and will only work when the
information is available. In rare cases, a radio station
may broadcast incorrect information that will cause
the radio features to work improperly. If this happens,
contact the radio station.
While you are tuned to an RDS station, the station name
or the call letters will appear on the display instead of the
frequency. RDS stations may also provide the time of
day, a program type (PTY) for current programming, and
the name of the program being broadcast.
XMŸ Radio Satellite Service
(USA Only)
XMŸ is a continental U.S. based satellite radio service
that offers 100 coast to coast channels including
music, news, sports, talk, and children's programming.
XMŸ provides digital quality audio and text information,
including song title and artist name. A service fee is
required in order to receive the XMŸ service. For more
information, contact XMŸ at www.xmradio.com or
call 1-800-852-XMXM (9696).
3-42
Page 153 of 370
TRAF (Traffic):If TRAF appears on the display, the
tuned station broadcasts traffic announcements.
To receive the traffic announcement from the tuned
station, press this button. Brackets will be displayed
around TRAF and when a traffic announcement comes
on the tuned radio station you will hear it.
If the current tuned station does not broadcast traffic
announcements, press this button and the radio
will seek to a station that does. When the radio ®nds a
station that broadcasts traffic announcements, it will
stop and brackets will be displayed around TRAF. When
a traffic announcement comes on the tuned radio
station you will hear it. If no station is found, NO
TRAFFIC will appear on the display.If the brackets are on the display and TRAF is not, you
can then press the TRAF button to remove the brackets
or use the TUNE knob or the SEEK arrows to go to a
station that supports traffic announcements. If no station
is found, NO TRAFFIC will appear on the display.
Your radio will also interrupt the play of a cassette tape or
a CD if the last tuned station broadcasts traffic
announcements and the brackets are displayed.
This function does not apply to XMŸ Satellite Radio
Service.
Radio Messages
CALIBRATE:Your audio system has been calibrated
for your vehicle from the factory. If CALIBRATE appears
on the display, it means that your radio has not been
con®gured properly for your vehicle and must be
returned to the dealership for service.
3-47