reset PONTIAC VIBE 2006 User Guide
[x] Cancel search | Manufacturer: PONTIAC, Model Year: 2006, Model line: VIBE, Model: PONTIAC VIBE 2006Pages: 388, PDF Size: 2.48 MB
Page 170 of 388
BAND (Alternate Frequency):Alternate frequency
allows the radio to switch to a stronger station with the
same program type. To turn alternate frequency on,
press and hold BAND for two seconds. AF ON will
appear on the display. The radio may switch to stations
with a stronger frequency.
To turn alternate frequency off, press and hold BAND
again for two seconds. AF OFF will appear on the
display. The radio will not switch to other stations.
Setting Preset PTYs (RDS Only)
These pushbuttons have factory PTY presets. Up to
12 PTYs (six FM1 and six FM2), can be programmed on
the six numbered pushbuttons, by performing the
following steps:
1. Press BAND to select FM1 or FM2.
2. Press PROG TYPE to activate program type select
mode. The PTY symbol will appear on the display.
3. Turn the SELECT knob to select a PTY.
4. Press and hold one of the six numbered
pushbuttons until you hear a beep. Whenever that
numbered pushbutton is pressed, the PTY that
was set will return, if program type select mode is
activated.
5. Repeat the steps for each pushbutton.
RDS Messages
ALERT!:Alert warns of local or national emergencies.
When an alert announcement comes on the current
radio station, ALERT! will appear on the display. You will
hear the announcement, even if the volume is low or
a CD is playing. If a CD is playing, play will stop during
the announcement. Alert announcements cannot be
turned off.
ALERT! will not be affected by tests of the emergency
broadcast system. This feature is not supported by
all RDS stations.
INFO (Information):If the current station has a
message, INFO will appear on the display. Press this
button to see the message. The message may display
the artist, song title, call in phone numbers, etc.
If the entire message is not displayed, parts of the
message will appear every three seconds. To scroll
through the message, press and release the INFO
button. A new group of words will appear on the display
after every press of this button. Once the complete
message has been displayed, the information symbol
will disappear from the display until another new
message is received. The last message can be
displayed by pressing the INFO button. You can view
the last message until a new message is received
or a different station is tuned to.
3-58
Page 179 of 388
Playing the Radio
PWR (Power):Push this knob to turn the system on
and off.
VOLUME:Turn this knob to increase or to decrease
the volume.
RCL (Recall):Press this button to display the current
radio station frequency. When the ignition is off,
press this button to display the time.
To change the default on the display, press the RCL
button until you see the display you want, then hold the
button until the display �ashes. The selected display
will now be the default.
Finding a Station
AM/FM:Press this button to switch between FM1, FM2,
or AM. The display will show the selection.
TUNE:Turn this knob to select radio stations.
sSEEKt:Press the right or the left arrow to go to
the next or to the previous station and stay there.
The radio will only seek stations with a strong signal
that are in the selected band.
sSCANt:Press and hold either SCAN arrow for
two seconds until SC appears on the display and
you hear a beep. The radio will go to a station, play for
a few seconds, then go on to the next station. Press
either SCAN arrow again to stop scanning.
To scan preset stations, press and hold either SCAN
arrow for more than four seconds. PRESET SCAN will
appear on the display and you will hear a double
beep. The radio will go to a preset station stored on the
pushbuttons, play for a few seconds, then go on to
the next preset station. Press either SCAN arrow again
to stop scanning presets.
The radio will only scan stations with a strong signal
that are in the selected band.
3-67
Page 180 of 388
Setting Preset Stations
Up to 18 stations (six FM1, six FM2, and six AM), can
be programmed on the six numbered pushbuttons,
by performing the following steps:
1. Turn the radio on.
2. Press AM/FM to select FM1, FM2, or AM.
3. Tune in the desired station.
4. Press and hold one of the six numbered
pushbuttons until you hear a beep. Whenever that
numbered pushbutton is pressed, the station
that was set will return and the equalization that
was selected will be stored for that pushbutton.
5. Repeat the steps for each pushbutton.
Setting the Tone (Bass/Treble)
AUDIO:Push and release the AUDIO knob until BASS,
MID, or TREB appears on the display. Turn the knob
to increase or to decrease. If a station is weak or noisy,
decrease the treble.
To adjust bass, midrange, or treble to the middle
position, select BASS, MID, or TREB and push and hold
the AUDIO knob. The radio will produce one beep
and adjust the display level to the middle position.
To adjust all tone and speaker controls to the middle
position, push and hold the AUDIO knob when no tone
or speaker controls are displayed. CENTERED will
appear on the display and you will hear a beep.AUTO EQ (Automatic Equalization):Press this button
to select customized equalization settings designed
for country, jazz, talk, pop, rock, and classical.
To return to the manual mode, press the AUTO EQ
button until CUSTOM appears on the display. Then
manually adjust the bass, midrange, and treble using the
AUDIO knob.
Adjusting the Speakers (Balance/Fade)
AUDIO:To adjust the balance between the right
and the left speakers, push and release the AUDIO
knob until BAL appears on the display. Turn the knob to
move the sound toward the right or the left speakers.
To adjust the fade between the front and rear speakers,
push and release the AUDIO knob until FAD appears
on the display. Turn the knob to move the sound toward
the front or the rear speakers.
To adjust the balance and the fade to the middle
position, select balance or fade and push and hold the
AUDIO knob. The radio will beep once and adjust
the display level to the middle position.
To adjust all tone and speaker controls to the middle
position, push and hold the AUDIO knob when no tone
or speaker controls are displayed. CENTERED will
appear on the display and you will hear a beep.
3-68
Page 182 of 388
To use the PTY interrupt feature, press and hold the
P-TYPE button until you hear a beep on the PTY
you want to interrupt with. When selected, an asterisk
will appear beside that PTY on the display. Select
multiple interrupts if desired. When listening to a CD,
the last selected RDS station will interrupt play if
that selected program type format is broadcast.
sSCANt:Scan the stations within a PTY by
performing the following:
1. Press the P-TYPE button to activate program type
select mode. P-TYPE and the last selected PTY will
appear on the display.
2. Turn the P-TYPE knob to select a PTY.
3. Once the desired PTY is displayed, press and hold
either SCAN arrow, and the radio will begin
scanning the stations in the PTY.
4. Press either SCAN arrow to stop at a station.
If both PTY and TRAF are on, the radio will scan for
stations with the selected PTY and traffic
announcements.Alternate Frequency:Alternate frequency allows the
radio to switch to a stronger station with the same
program type. To turn alternate frequency on, press and
hold AM/FM for two seconds. AF ON will appear on
the display. The radio may switch to stations with
a stronger frequency.
To turn alternate frequency off, press and hold AM/FM
again for two seconds. AF OFF will appear on the
display. The radio will not switch to other stations.
Setting Preset PTYs
These pushbuttons have factory PTY presets. Up to
12 PTYs (six FM1 and six FM2), can be programmed on
the six numbered pushbuttons, by performing the
following steps:
1. Press AM/FM to select FM1 or FM2.
2. Press the P-TYPE button to activate program type
select mode. P-TYPE and the last selected PTY will
appear on the display.
3. Turn the P-TYPE knob to select a PTY.
4. Press and hold one of the six numbered
pushbuttons until you hear a beep. Whenever that
numbered pushbutton is pressed, the PTY that
was set will return.
5. Repeat the steps for each pushbutton.
3-70
Page 185 of 388
To insert multiple CDs, do the following:
1. Turn the ignition on.
2. Press and hold the LOAD button for two seconds.
You will hear a beep and the indicator light, located
to the right of the slot, will begin to �ash.
3. Once the light stops �ashing and turns green, load
a CD. Insert the CD partway into the slot, label side
up. The player will pull the CD in.
Once the CD is loaded, the light will begin �ashing
again. Once the light stops �ashing and turns green
you can load another CD. The CD player takes up to
six CDs. Do not try to load more than six.
To load more than one CD but less than six, complete
Steps 1 through 3. When �nished loading CDs, the
radio will begin to play the last CD loaded.
If more than one CD has been loaded, a number for
each CD will appear on the display.
Playing a Speci�c Loaded CD
For every CD loaded, a number will appear on the
display. To play a speci�c CD, �rst press the CD AUX
button, then press the numbered pushbutton that
corresponds to the CD. A small bar will appear under
the CD number that is playing and the track number will
appear on the display.If an error appears on the display, see “CD Messages”
later in this section.
LOAD CD
Z(Eject):Press the CD eject side of this
button to eject a CD(s). To eject the CD that is
currently playing, press and release this button. To
eject multiple CDs, press and hold this button for
two seconds. You will hear a beep and the indicator
light will �ash to let you know when a CD is
being ejected.
REMOVE CD will appear on the display. The CD can
be removed. If the CD is not removed, after 25 seconds,
the CD will be automatically pulled back into the
player. If the CD is pushed back into the player, before
the 25 second time period is complete, the player
will sense an error and will try to eject the CD several
times before stopping.
Do not repeatedly press the CD eject button to eject a
CD after trying to push it in manually. The player’s
25-second eject timer will reset at each press of eject,
causing the player to not eject the CD until the
25-second time period has elapsed.
Once the player stops and the CD is ejected, remove
the CD. After removing the CD, push the PWR knob off
and then on again, or wait for the system to reset.
This will clear the CD-sensing feature and enable CDs
to be loaded into the player again.
3-73
Page 296 of 388
Tire Pressure Monitor System
If your vehicle has this feature, it is designed to alert
you when the system detects a large change in
the pressure of one tire. The system cannot alert you
before you drive that a tire is low or �at. You must begin
driving before the system will work properly. The
system works with the brake control system and is
designed to detect differences in the tire rotation speeds
that are caused by changes in tire pressure. The tire
pressure monitoring system does not replace normal tire
maintenance, seeTires on page 5-52,Tire Inspection
and Rotation on page 5-62andWhen It Is Time for New
Tires on page 5-64.
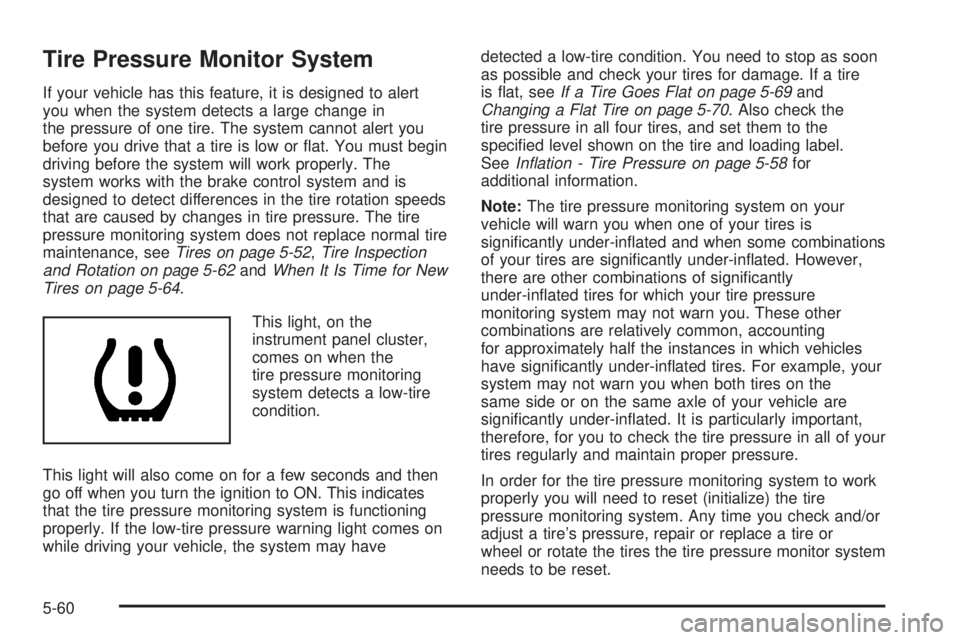
This light, on the
instrument panel cluster,
comes on when the
tire pressure monitoring
system detects a low-tire
condition.
This light will also come on for a few seconds and then
go off when you turn the ignition to ON. This indicates
that the tire pressure monitoring system is functioning
properly. If the low-tire pressure warning light comes on
while driving your vehicle, the system may havedetected a low-tire condition. You need to stop as soon
as possible and check your tires for damage. If a tire
is �at, seeIf a Tire Goes Flat on page 5-69and
Changing a Flat Tire on page 5-70. Also check the
tire pressure in all four tires, and set them to the
speci�ed level shown on the tire and loading label.
SeeIn�ation - Tire Pressure on page 5-58for
additional information.
Note:The tire pressure monitoring system on your
vehicle will warn you when one of your tires is
signi�cantly under-in�ated and when some combinations
of your tires are signi�cantly under-in�ated. However,
there are other combinations of signi�cantly
under-in�ated tires for which your tire pressure
monitoring system may not warn you. These other
combinations are relatively common, accounting
for approximately half the instances in which vehicles
have signi�cantly under-in�ated tires. For example, your
system may not warn you when both tires on the
same side or on the same axle of your vehicle are
signi�cantly under-in�ated. It is particularly important,
therefore, for you to check the tire pressure in all of your
tires regularly and maintain proper pressure.
In order for the tire pressure monitoring system to work
properly you will need to reset (initialize) the tire
pressure monitoring system. Any time you check and/or
adjust a tire’s pressure, repair or replace a tire or
wheel or rotate the tires the tire pressure monitor system
needs to be reset.
5-60
Page 297 of 388
Do not reset (initialize) the system without �rst correcting
the cause of the low-tire condition. If the system is
reset when the tire pressures are incorrect, the system
will not function properly and may not alert you when
a tire is low.
To reset (initialize) the system:
1. Park the vehicle at a safe place and apply the
parking brake. Turn the engine off.
2. Turn the ignition to ON with the engine off.
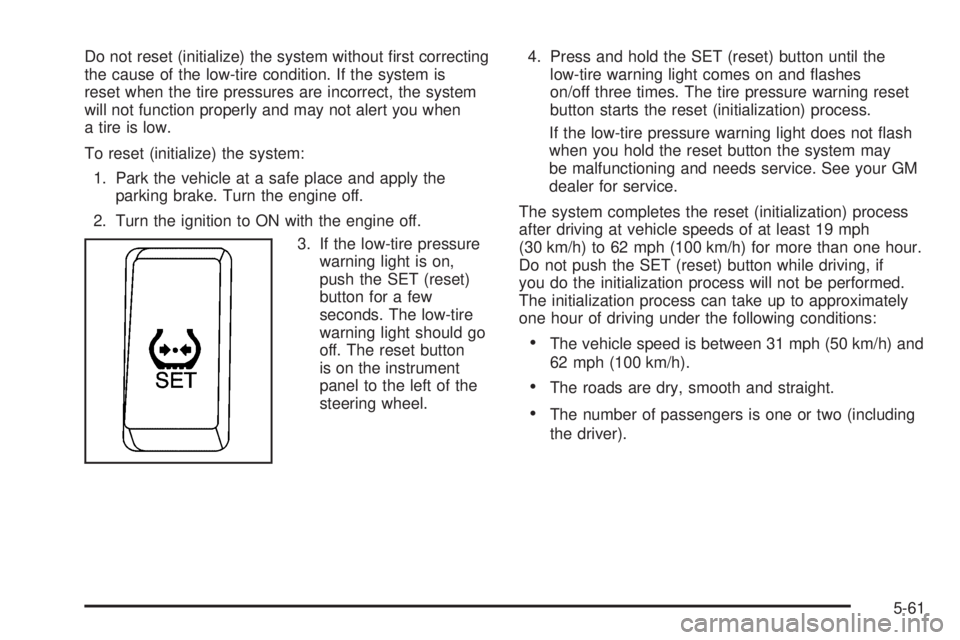
3. If the low-tire pressure
warning light is on,
push the SET (reset)
button for a few
seconds. The low-tire
warning light should go
off. The reset button
is on the instrument
panel to the left of the
steering wheel.4. Press and hold the SET (reset) button until the
low-tire warning light comes on and �ashes
on/off three times. The tire pressure warning reset
button starts the reset (initialization) process.
If the low-tire pressure warning light does not �ash
when you hold the reset button the system may
be malfunctioning and needs service. See your GM
dealer for service.
The system completes the reset (initialization) process
after driving at vehicle speeds of at least 19 mph
(30 km/h) to 62 mph (100 km/h) for more than one hour.
Do not push the SET (reset) button while driving, if
you do the initialization process will not be performed.
The initialization process can take up to approximately
one hour of driving under the following conditions:
The vehicle speed is between 31 mph (50 km/h) and
62 mph (100 km/h).
The roads are dry, smooth and straight.
The number of passengers is one or two (including
the driver).
5-61
Page 298 of 388
The low-tire pressure warning light may not come on
even if the tire in�ation pressure is low, or it may come
on when the tire in�ation pressure is set correctly
under the following circumstances:
A compact spare tire, snow tires, or tire chains are
installed on your vehicle.
The tires are over-in�ated, or the tire in�ation
pressure suddenly drops due to a tire bursting
or other causes.
The vehicle is driven on a slippery road surface
such as rough or frozen roads.
The vehicle speed is less than 19 mph (30 km/h),
and the driving duration is less than �ve minutes.
The tires are made by a different manufacturer or
differ in tread pattern than the original
equipment tires.
Rapid acceleration/deceleration or multiple
consecutive sharp turns.
Towing a trailer.
The vehicle is loaded over the limit or not
balanced properly.
The initialization (reset) procedure was not
performed correctly after replacing or rotating tires
or wheels.
The outside temperature is below 32°F (0°C) or
above 104°F (40°C).
Tire Inspection and Rotation
Tires should be rotated every 5,000 to 8,000 miles
(8 000 to 13 000 km).
Any time you notice unusual wear, rotate your tires as
soon as possible and check wheel alignment. Also
check for damaged tires or wheels. SeeWhen It Is Time
for New Tires on page 5-64andWheel Replacement
on page 5-67for more information.
The purpose of regular rotation is to achieve more
uniform wear for all tires on the vehicle. The �rst rotation
is the most important. SeePart A: Scheduled
Maintenance Services on page 6-4for scheduled
rotation intervals.
5-62
Page 299 of 388
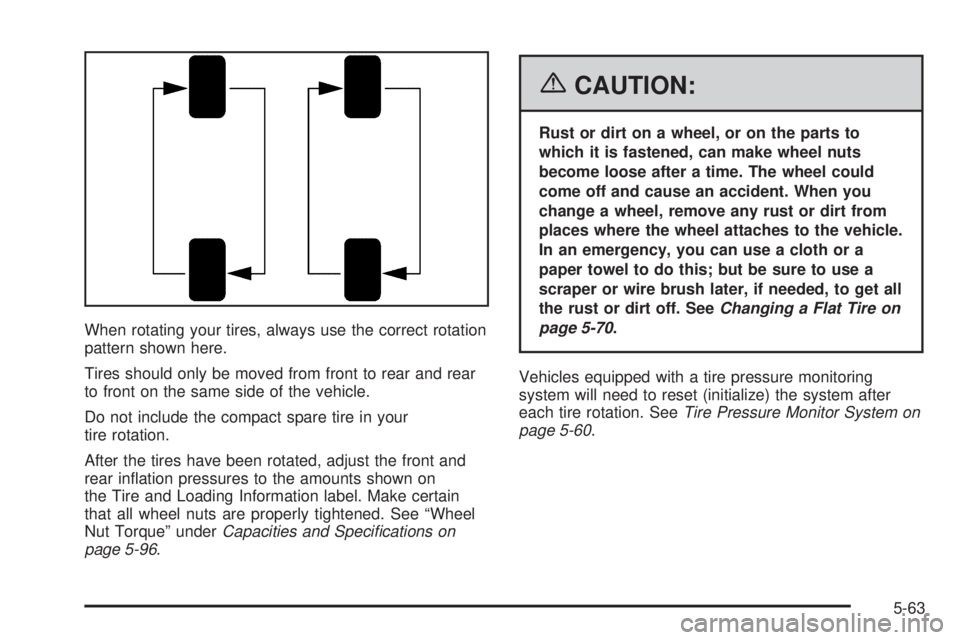
When rotating your tires, always use the correct rotation
pattern shown here.
Tires should only be moved from front to rear and rear
to front on the same side of the vehicle.
Do not include the compact spare tire in your
tire rotation.
After the tires have been rotated, adjust the front and
rear in�ation pressures to the amounts shown on
the Tire and Loading Information label. Make certain
that all wheel nuts are properly tightened. See “Wheel
Nut Torque” underCapacities and Speci�cations on
page 5-96.
{CAUTION:
Rust or dirt on a wheel, or on the parts to
which it is fastened, can make wheel nuts
become loose after a time. The wheel could
come off and cause an accident. When you
change a wheel, remove any rust or dirt from
places where the wheel attaches to the vehicle.
In an emergency, you can use a cloth or a
paper towel to do this; but be sure to use a
scraper or wire brush later, if needed, to get all
the rust or dirt off. SeeChanging a Flat Tire on
page 5-70.
Vehicles equipped with a tire pressure monitoring
system will need to reset (initialize) the system after
each tire rotation. SeeTire Pressure Monitor System on
page 5-60.
5-63